2008 CHEVROLET EQUINOX keyless entry
[x] Cancel search: keyless entryPage 144 of 436
Dome Lamp
If the vehicle has a dome lamp with a switch, the
following are the settings.
9(Off):Move the lever to this position to turn the
lamp off, even when a door is open.
1(Door):Move the lever to this position so that the
lamp comes on when a door is opened.
+(On):Move the lever to this position to turn the
dome lamp on.
Entry Lighting
The dome lamp and the cargo lamp inside the vehicle
comes on when any door is opened, if the dome lamp is
in the door position. In addition, these lamps come on
when the Remote Keyless Entry (RKE) unlock button is
pressed. It stays on for 20 seconds or until a door is
opened. After the door is opened and then closed, the
light remains on for 20 seconds, or until the key is
put in the ignition and turned to the ON/RUN position.
Map Lamps
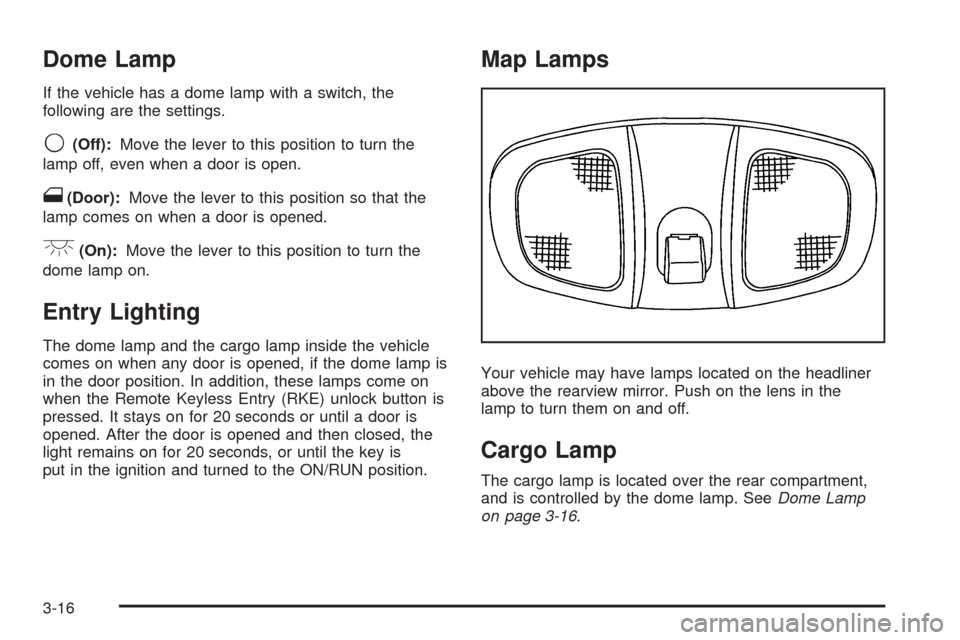
Your vehicle may have lamps located on the headliner
above the rearview mirror. Push on the lens in the
lamp to turn them on and off.
Cargo Lamp
The cargo lamp is located over the rear compartment,
and is controlled by the dome lamp. SeeDome Lamp
on page 3-16.
3-16
Page 147 of 436
Climate Controls
Climate Control System
The heating, cooling, and ventilation for the vehicle can
be controlled with this system. If your vehicle has the
remote start feature, the climate control system functions
as part of the remote start feature. SeeRemote
Keyless Entry (RKE) System Operation on page 2-5.
Operation
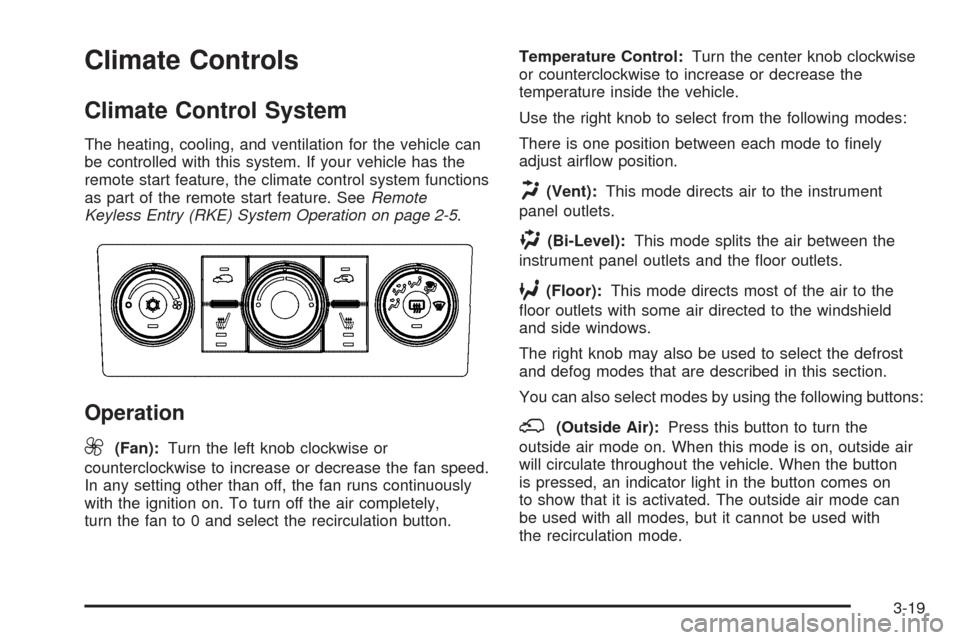
9
(Fan):Turn the left knob clockwise or
counterclockwise to increase or decrease the fan speed.
In any setting other than off, the fan runs continuously
with the ignition on. To turn off the air completely,
turn the fan to 0 and select the recirculation button.Temperature Control:Turn the center knob clockwise
or counterclockwise to increase or decrease the
temperature inside the vehicle.
Use the right knob to select from the following modes:
There is one position between each mode to �nely
adjust air�ow position.
H(Vent):This mode directs air to the instrument
panel outlets.
)(Bi-Level):This mode splits the air between the
instrument panel outlets and the �oor outlets.
6(Floor):This mode directs most of the air to the
�oor outlets with some air directed to the windshield
and side windows.
The right knob may also be used to select the defrost
and defog modes that are described in this section.
You can also select modes by using the following buttons:
;(Outside Air):Press this button to turn the
outside air mode on. When this mode is on, outside air
will circulate throughout the vehicle. When the button
is pressed, an indicator light in the button comes on
to show that it is activated. The outside air mode can
be used with all modes, but it cannot be used with
the recirculation mode.
3-19
Page 150 of 436
If your vehicle has the remote start feature, the rear
defogger automatically turns on if it is cold outside.
When the vehicle transitions out of the remote start
mode, the rear defogger will turn off. SeeRemote
Keyless Entry (RKE) System Operation on page 2-5.
Notice:Do not use anything sharp on the inside
of the rear window. If you do, you could cut or
damage the warming grid, and the repairs would
not be covered by your warranty. Do not attach
a temporary vehicle license, tape, a decal or
anything similar to the defogger grid.
Remote Start Climate Control Operation
If your vehicle has the remote start feature and it
is activated, the climate control system heats and cools
the inside of the vehicle using the modes that were
set before the vehicle was turned off and the rear
defogger automatically turns on. If your vehicle has
heated seats, they may turn on if it is cold outside
and will shut off when the key is turned to ON/RUN.
SeeHeated Seats on page 1-4.
Outlet Adjustment
Use the louvers located on the air outlets to change
the direction of the air�ow.
Operation Tips
Clear away any ice, snow, or leaves from the air
inlets at the base of the vehicle that may block
the �ow of air into your vehicle.
Do not use any non-GM approved hood de�ectors
that could adversely affect the performance of the
system.
Keep the path under the front seats clear of objects
to help circulate the air inside of your vehicle more
effectively.
Passenger Compartment Air Filter
Outside air is routed through a passenger compartment
air �lter before entering the vehicle. This �lter removes
certain particles from the air, including pollen and
dust particles. Reductions in air�ow, which may occur
more quickly in dusty areas, indicate that the �lter needs
to be replaced early.
The �lter should be replaced as part of routine scheduled
maintenance. SeeScheduled Maintenance on page 6-4
for when to replace the �lter.
3-22
Page 174 of 436
If there is a problem with the battery charging system,
the DIC will display SERVICE BATTERY CHARGING
SYSTEM. See “SERVICE BATTERY CHARGING
SYSTEM” underDIC Warnings and Messages on
page 3-49. Also, seeElectric Power Management
on page 3-17for more information.
LEARN REMOTE KEY
This display allows you to match Remote Keyless
Entry (RKE) transmitters to your vehicle. To match
an RKE transmitter to your vehicle:
1. Make sure the vehicle is in PARK (P).
2. Press the vehicle information button until LEARN
REMOTE KEY PRESS
VTO BEGIN displays.
3. Press the set/reset button until REMOTE KEY
LEARNING ACTIVE is displayed.
4. Press and hold the lock and unlock buttons on
the �rst transmitter at the same time for about
15 seconds.
A chime will sound indicating that the transmitter
is matched.
5. To match additional transmitters at this time,
repeat Step 3.
Each vehicle can have a maximum of
four transmitters matched to it.
6. To exit the programming mode, you must
cycle the key to LOCK/OFF.
CALIBRATE COMPAS (Compass)
Your vehicle may have this feature. The compass can
be manually calibrated. To calibrate the compass
through the DIC, seeDIC Compass on page 3-46.
CHANGE COMPASS ZONE
Your vehicle may have this feature. To change the
compass zone through the DIC, seeDIC Compass
on page 3-46.
Blank Display
This display shows no information.
FEATURE SETTNGS (Settings):
PRESS
VTO SELCT (Select)
This display allows you to personalize the feature
settings on your vehicle. SeeDIC Vehicle
Personalization on page 3-58for more information.
DIC Compass
Your vehicle may have a compass in the
Driver Information Center (DIC).
Compass Zone
The zone is set to zone eight upon leaving the factory.
Your dealer/retailer will set the correct zone for your
location.
3-46
Page 181 of 436
OIL PRSSURE (Pressure) LOW
STOP ENGINE
Notice:If you drive your vehicle while the engine
oil pressure is low, severe engine damage may
occur. If a low oil pressure warning appears on the
Driver Information Center (DIC), stop the vehicle
as soon as possible. Do not drive the vehicle until
the cause of the low oil pressure is corrected.
SeeEngine Oil on page 5-15for more information.
This message displays when the vehicle’s engine
oil pressure is low. The oil pressure light also appears
on the instrument panel cluster. SeeOil Pressure
Light on page 3-37.
Stop the vehicle immediately, as engine damage can
result from driving a vehicle with low oil pressure.
Have the vehicle serviced by your dealer/retailer as
soon as possible when this message is displayed.
PASSENGER DOOR
FRONT/REAR OPEN
This message displays when one or more of
the passenger doors are not closed properly.
Close the doors completely.
REMOTE KEY LEARNING ACTIVE
This message displays while you are matching a
Remote Keyless Entry (RKE) transmitter to your vehicle.
See “LEARN REMOTE KEY” underDIC Operation
and Displays on page 3-43for more information.
SERVICE A/C (Air Conditioning)
SYSTEM
This message displays when there is a problem detected
in the air conditioning system. Have the vehicle serviced
by your dealer/retailer.
SERVICE AIR BAG
This message displays when there is a problem with
the airbag system. Have your vehicle serviced by your
dealer/retailer immediately. SeeAirbag Readiness
Light on page 3-27for more information.
3-53
Page 188 of 436
Press the vehicle information button until AUTO
UNLOCK appears on the DIC display. Press the
set/reset button to access the settings for this feature.
Then press the vehicle information button to scroll
through the following settings:
OFF:None of the doors will automatically unlock.
DRIVER KEY OUT:Only the driver’s door will unlock
when the key is taken out of the ignition.
DRIVER IN PARK:Only the driver’s door will unlock
when the vehicle is shifted into PARK (P).
ALL AT KEY OUT:All of the doors will unlock when
the key is taken out of the ignition.
ALL IN PARK (default):All of the doors will unlock
when the vehicle is shifted into PARK (P).
NO CHANGE:No change will be made to this feature.
The current setting will remain.
To select a setting, press the set/reset button while
the desired setting is displayed on the DIC.REMOTE LOCK
This feature allows you to select the type of feedback
you will receive when locking the vehicle with the
Remote Keyless Entry (RKE) transmitter. You will not
receive feedback when locking the vehicle with the RKE
transmitter if any of the doors are open. SeeRemote
Keyless Entry (RKE) System Operation on page 2-5for
more information.
Press the vehicle information button until REMOTE
LOCK appears on the DIC display. Press the set/reset
button to access the settings for this feature. Then
press the vehicle information button to scroll through
the following settings:
HORN/LIGHTS OFF:There will be no feedback when
you press the lock button on the RKE transmitter.
LIGHTS ONLY:The exterior lamps will �ash when
you press the lock button on the RKE transmitter.
HORN CHIRP ONLY:The horn will sound on the
second press of the lock button on the RKE transmitter.
HORN/LIGHTS ON (default):The exterior lamps
will �ash when you press the lock button on the RKE
transmitter, and the horn will sound when the lock button
is pressed again within �ve seconds of the previous
command.
3-60
Page 189 of 436
NO CHANGE:No change will be made to this feature.
The current setting will remain.
To select a setting, press the set/reset button while
the desired setting is displayed on the DIC.
REMOTE UNLOCK
This feature allows you to select the type of feedback
you will receive when unlocking the vehicle with the
RKE transmitter. You will not receive feedback when
unlocking the vehicle with the RKE transmitter if
the doors are open. SeeRemote Keyless Entry (RKE)
System Operation on page 2-5for more information.
Press the vehicle information button until REMOTE
UNLOCK appears on the DIC display. Press the
set/reset button to access the settings for this feature.
Then press the vehicle information button to scroll
through the following settings:
LIGHTS OFF:The exterior lamps will not �ash when
you press the unlock button on the RKE transmitter.
LIGHTS ON (default):The exterior lamps will �ash
when you press the unlock button on the RKE transmitter.
NO CHANGE:No change will be made to this feature.
The current setting will remain.
To select a setting, press the set/reset button while
the desired setting is displayed on the DIC.
DELAY LOCK
This feature allows you to select whether or not the
locking of the vehicle’s doors and liftgate will be delayed.
When locking the doors and liftgate with the power
door lock switch and a door or the liftgate is open, this
feature will delay locking the doors and liftgate until
�ve seconds after the last door is closed. You will
hear three chimes to signal that the delayed locking
feature is in use. The key must be out of the ignition
for this feature to work. You can temporarily override
delayed locking by pressing the power door lock switch
twice or the lock button on the RKE transmitter twice.
SeeDelayed Locking on page 2-11for more information.
Press the vehicle information button until DELAY LOCK
appears on the DIC display. Press the set/reset button
to access the settings for this feature. Then press the
vehicle information button to scroll through the following
settings:
LOCK DELAY OFF:There will be no delayed locking
of the vehicle’s doors.
LOCK DELAY ON (default):The doors will not lock until
�ve seconds after the last door or the liftgate is closed.
NO CHANGE:No change will be made to this feature.
The current setting will remain.
To select a setting, press the set/reset button while
the desired setting is displayed on the DIC.
3-61
Page 190 of 436
EXIT LIGHTNG (Lighting)
This feature allows you to select the amount of time you
want the exterior lamps to remain on when it is dark
enough outside. This happens after the key is turned
from ON/RUN to LOCK/OFF.
Press the vehicle information button until EXIT
LIGHTNG (Lighting) appears on the DIC display.
Press the set/reset button to access the settings for
this feature. Then press the vehicle information button
to scroll through the following settings:
OFF:The exterior lamps will not turn on.
30 SECONDS (default):The exterior lamps will
stay on for 30 seconds.
1 MINUTE:The exterior lamps will stay on for
one minute.
2 MINUTES:The exterior lamps will stay on for
two minutes.
NO CHANGE:No change will be made to this feature.
The current setting will remain.
To select a setting, press the set/reset button while
the desired setting is displayed on the DIC.
APPRCH (Approach) LIGHTNG (Lighting)
This feature allows you to select whether or not to have
the exterior lights turn on brie�y during low light periods
after unlocking the vehicle using the RKE transmitter.
Press the vehicle information button until APPRCH
(Approach) LIGHTNG (Lighting) appears on the DIC
display. Press the set/reset button to access the settings
for this feature. Then press the vehicle information button
to scroll through the following settings:
OFF:The exterior lights will not turn on when you
unlock the vehicle with the RKE transmitter.
ON (default):If it is dark enough outside, the exterior
lights will turn on brie�y when you unlock the vehicle
with the RKE transmitter.
The lights will remain on for 20 seconds or until the lock
button on the RKE transmitter is pressed, or the vehicle is
no longer off. SeeRemote Keyless Entry (RKE) System
Operation on page 2-5for more information.
NO CHANGE:No change will be made to this feature.
The current setting will remain.
To select a setting, press the set/reset button while the
desired setting is displayed on the DIC.
3-62