2008 CHEVROLET EQUINOX instrument cluster
[x] Cancel search: instrument clusterPage 140 of 436
Setting Cruise Control
The cruise control light on the instrument panel cluster
comes on after the cruise control has been set to
the desired speed.
1. Press the on/off button to turn cruise control on.
2. Get up to the desired speed.
3. Press the SET−button and release it.
4. Take your foot off the accelerator pedal.
When the brakes are applied, the cruise control shuts off.
If the vehicle is in cruise control and the Traction
Control System (TCS) begins to limit wheel spin, the
cruise control automatically disengages. SeeTraction
Control System (TCS) on page 4-6. When road
conditions allow, the cruise control can be used again.
Resuming a Set Speed
If the cruise control is at the set speed desired and the
brakes are applied, the cruise control shuts off. The
cruise symbol in the instrument panel cluster also goes
off indicating cruise is no longer engaged. To return
to your previously set speed, you do not need to
go through the set process again.
Once you are driving about 25 mph (40 km/h) or
more, press the +RES button on your steering wheel.
The vehicle goes back to the previous set speed
and stays there.
Increasing Speed While Using
Cruise Control
There are two ways to go to a higher speed.
Press and hold the +RES button on the steering
wheel until the desired speed is reached,
then release it.
To increase vehicle speed in small amounts,
press the +RES button. Each time this is done,
the vehicle goes about 1 mph (1.6 km/h) faster.
Reducing Speed While Using
Cruise Control
To reduce your speed while using cruise control:
Press and hold the SET– button on the steering
wheel until the desired lower speed is reached,
then release it.
To slow down in very small amounts, push
the SET−button on the steering wheel briey.
Each time this is done, the vehicle goes about
1 mph (1.6 km/h) slower.
Passing Another Vehicle While Using
Cruise Control
Use the accelerator pedal to increase the vehicle’s
speed. When you take your foot off the pedal, the
vehicle slows down to the cruise control speed
that was set earlier.
3-12
Page 153 of 436
Instrument Panel Cluster
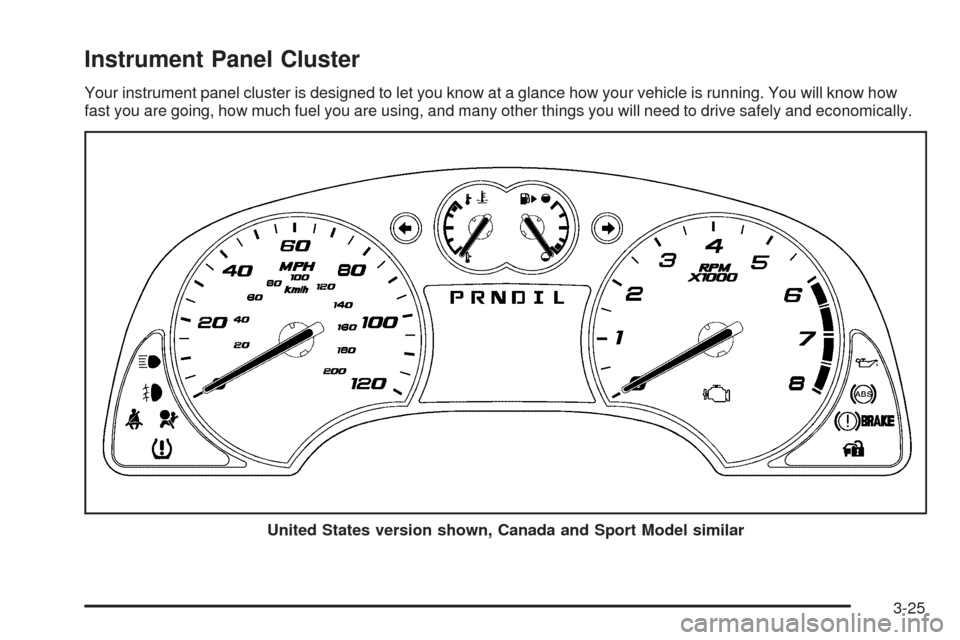
Your instrument panel cluster is designed to let you know at a glance how your vehicle is running. You will know how
fast you are going, how much fuel you are using, and many other things you will need to drive safely and economically.
United States version shown, Canada and Sport Model similar
3-25
Page 155 of 436
Safety Belt Reminders
Safety Belt Reminder Light
When the engine is started, a chime will come on for
several seconds to remind people to fasten their safety
belts, unless the driver’s safety belt is already buckled.
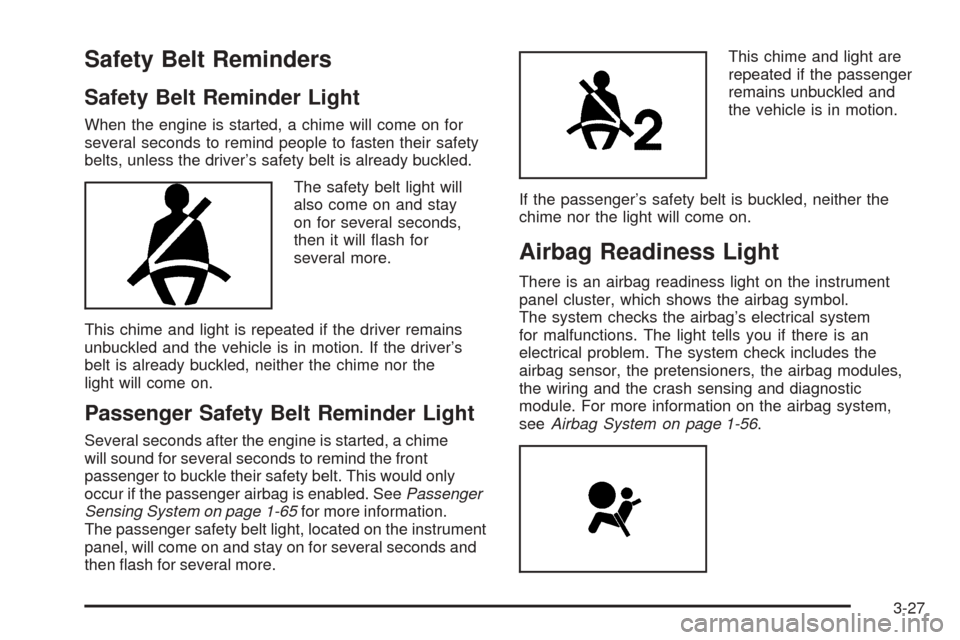
The safety belt light will
also come on and stay
on for several seconds,
then it will ash for
several more.
This chime and light is repeated if the driver remains
unbuckled and the vehicle is in motion. If the driver’s
belt is already buckled, neither the chime nor the
light will come on.
Passenger Safety Belt Reminder Light
Several seconds after the engine is started, a chime
will sound for several seconds to remind the front
passenger to buckle their safety belt. This would only
occur if the passenger airbag is enabled. SeePassenger
Sensing System on page 1-65for more information.
The passenger safety belt light, located on the instrument
panel, will come on and stay on for several seconds and
then ash for several more.This chime and light are
repeated if the passenger
remains unbuckled and
the vehicle is in motion.
If the passenger’s safety belt is buckled, neither the
chime nor the light will come on.
Airbag Readiness Light
There is an airbag readiness light on the instrument
panel cluster, which shows the airbag symbol.
The system checks the airbag’s electrical system
for malfunctions. The light tells you if there is an
electrical problem. The system check includes the
airbag sensor, the pretensioners, the airbag modules,
the wiring and the crash sensing and diagnostic
module. For more information on the airbag system,
seeAirbag System on page 1-56.
3-27
Page 158 of 436
If, after several seconds, both status indicator lights
remain on, or if there are no lights at all, there may
be a problem with the lights or the passenger sensing
system. See your dealer/retailer for service.
{CAUTION:
If the airbag readiness light in the instrument
panel cluster ever comes on and stays on,
it means that something may be wrong with
the airbag system. If this ever happens, have
the vehicle serviced promptly, because an
adult-size person sitting in the right front
passenger’s seat may not have the protection
of the airbag(s). SeeAirbag Readiness Light
on page 3-27for more on this, including
important safety information.
Charging System Light
If this light comes on
while you are driving,
you may have a problem
with the charging system.
A charging system Driver Information Center (DIC)
message may also appear. SeeDIC Warnings
and Messages on page 3-49for more information.
This light could indicate that you have problems with
a generator drive belt, or another electrical problem.
Have it checked right away. If you must drive a
short distance with the light on, be certain to turn off all
your accessories, such as the radio and air conditioner.
3-30
Page 159 of 436
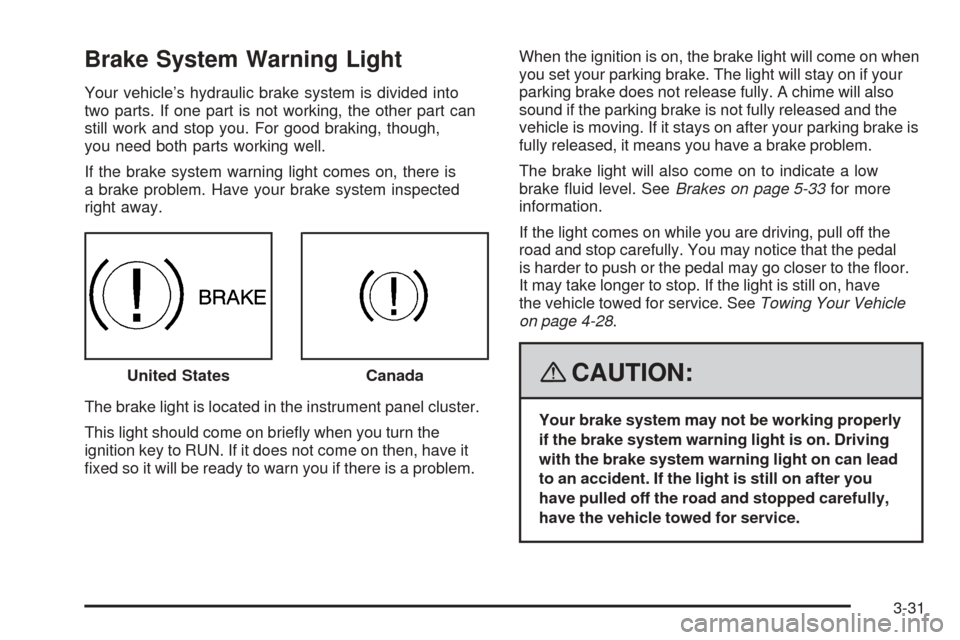
Brake System Warning Light
Your vehicle’s hydraulic brake system is divided into
two parts. If one part is not working, the other part can
still work and stop you. For good braking, though,
you need both parts working well.
If the brake system warning light comes on, there is
a brake problem. Have your brake system inspected
right away.
The brake light is located in the instrument panel cluster.
This light should come on briey when you turn the
ignition key to RUN. If it does not come on then, have it
xed so it will be ready to warn you if there is a problem.When the ignition is on, the brake light will come on when
you set your parking brake. The light will stay on if your
parking brake does not release fully. A chime will also
sound if the parking brake is not fully released and the
vehicle is moving. If it stays on after your parking brake is
fully released, it means you have a brake problem.
The brake light will also come on to indicate a low
brake uid level. SeeBrakes on page 5-33for more
information.
If the light comes on while you are driving, pull off the
road and stop carefully. You may notice that the pedal
is harder to push or the pedal may go closer to the oor.
It may take longer to stop. If the light is still on, have
the vehicle towed for service. SeeTowing Your Vehicle
on page 4-28.
{CAUTION:
Your brake system may not be working properly
if the brake system warning light is on. Driving
with the brake system warning light on can lead
to an accident. If the light is still on after you
have pulled off the road and stopped carefully,
have the vehicle towed for service. United States
Canada
3-31
Page 167 of 436
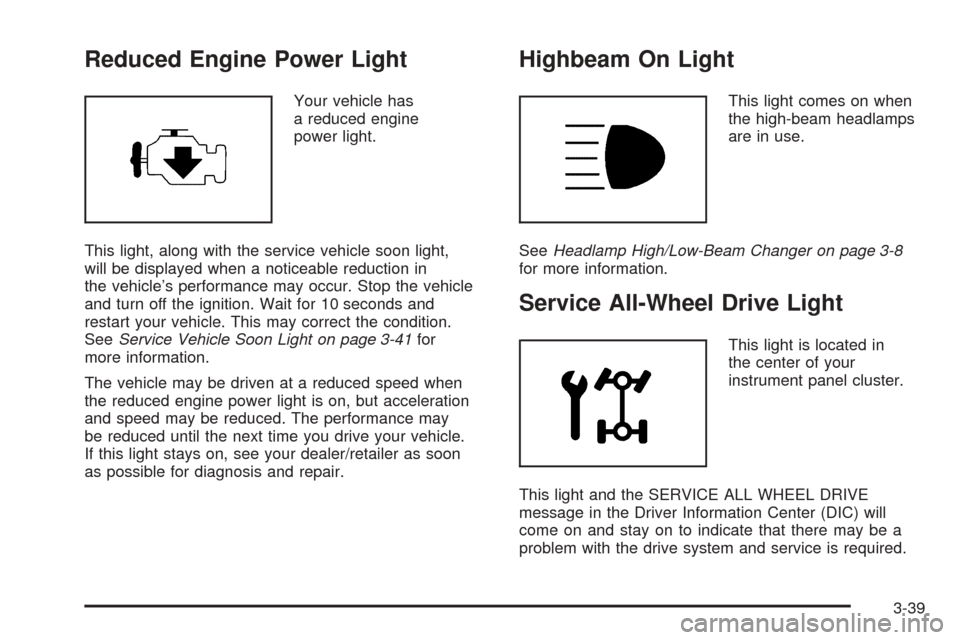
Reduced Engine Power Light
Your vehicle has
a reduced engine
power light.
This light, along with the service vehicle soon light,
will be displayed when a noticeable reduction in
the vehicle’s performance may occur. Stop the vehicle
and turn off the ignition. Wait for 10 seconds and
restart your vehicle. This may correct the condition.
SeeService Vehicle Soon Light on page 3-41for
more information.
The vehicle may be driven at a reduced speed when
the reduced engine power light is on, but acceleration
and speed may be reduced. The performance may
be reduced until the next time you drive your vehicle.
If this light stays on, see your dealer/retailer as soon
as possible for diagnosis and repair.
Highbeam On Light
This light comes on when
the high-beam headlamps
are in use.
SeeHeadlamp High/Low-Beam Changer on page 3-8
for more information.
Service All-Wheel Drive Light
This light is located in
the center of your
instrument panel cluster.
This light and the SERVICE ALL WHEEL DRIVE
message in the Driver Information Center (DIC) will
come on and stay on to indicate that there may be a
problem with the drive system and service is required.
3-39
Page 170 of 436
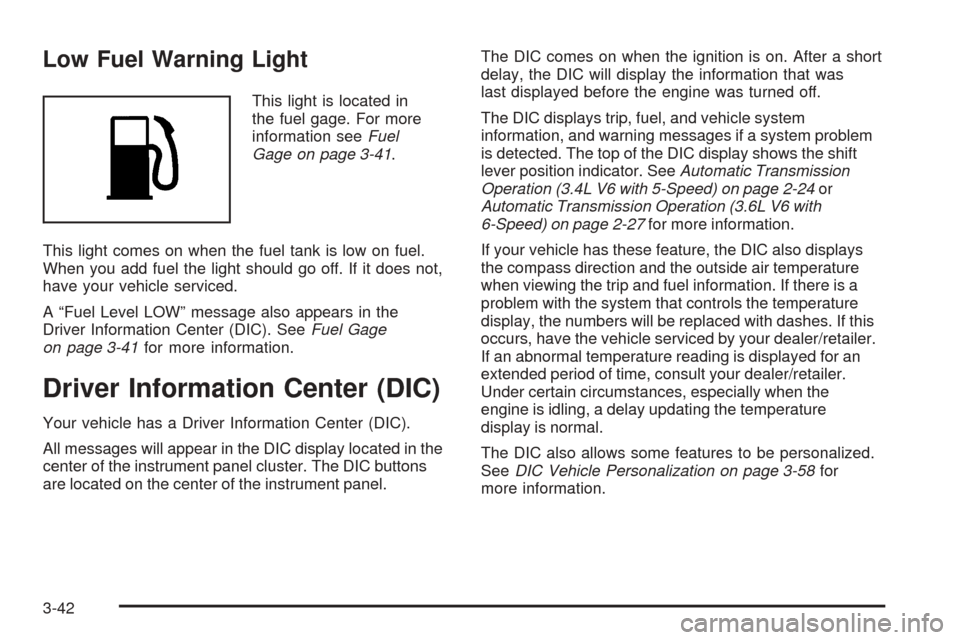
Low Fuel Warning Light
This light is located in
the fuel gage. For more
information seeFuel
Gage on page 3-41.
This light comes on when the fuel tank is low on fuel.
When you add fuel the light should go off. If it does not,
have your vehicle serviced.
A “Fuel Level LOW” message also appears in the
Driver Information Center (DIC). SeeFuel Gage
on page 3-41for more information.
Driver Information Center (DIC)
Your vehicle has a Driver Information Center (DIC).
All messages will appear in the DIC display located in the
center of the instrument panel cluster. The DIC buttons
are located on the center of the instrument panel.The DIC comes on when the ignition is on. After a short
delay, the DIC will display the information that was
last displayed before the engine was turned off.
The DIC displays trip, fuel, and vehicle system
information, and warning messages if a system problem
is detected. The top of the DIC display shows the shift
lever position indicator. SeeAutomatic Transmission
Operation (3.4L V6 with 5-Speed) on page 2-24or
Automatic Transmission Operation (3.6L V6 with
6-Speed) on page 2-27for more information.
If your vehicle has these feature, the DIC also displays
the compass direction and the outside air temperature
when viewing the trip and fuel information. If there is a
problem with the system that controls the temperature
display, the numbers will be replaced with dashes. If this
occurs, have the vehicle serviced by your dealer/retailer.
If an abnormal temperature reading is displayed for an
extended period of time, consult your dealer/retailer.
Under certain circumstances, especially when the
engine is idling, a delay updating the temperature
display is normal.
The DIC also allows some features to be personalized.
SeeDIC Vehicle Personalization on page 3-58for
more information.
3-42
Page 173 of 436
When the remaining oil life is low, the CHANGE
ENGINE OIL SOON message will appear on the
display along with the Change Engine Oil Light on the
instrument panel cluster. See “CHANGE ENGINE
OIL SOON” underDIC Warnings and Messages on
page 3-49andChange Engine Oil Light on page 3-38.
You should change the oil as soon as possible. See
Engine Oil on page 5-15. In addition to the engine oil life
system monitoring the oil life, additional maintenance
is recommended in the Maintenance Schedule in
this manual. SeeScheduled Maintenance on page 6-4
for more information.
Remember, you must reset the OIL LIFE yourself
after each oil change. It will not reset itself. Also, be
careful not to reset the OIL LIFE accidentally at any
time other than when the oil has just been changed.
It cannot be reset accurately until the next oil change.
To reset the engine oil life system, seeEngine Oil
Life System on page 5-18.
UNITS
Press the vehicle information button until UNITS
displays. This display allows you to select between
English or Metric units of measurement. Once in this
display, press the set/reset button to select between
ENGLISH or METRIC units.
FRONT TIRES or REAR TIRES
The pressure for each tire can be viewed in the DIC.
The tire pressure will be shown in either pounds
per square inch (psi) or kilopascals (kPa). Press the
vehicle information button until the DIC displays
FRONT TIRES PSI (kPa) LF ## RF ##. Press the
vehicle information button again until the DIC displays
REAR TIRES PSI (kPa) LR ## RR ##.
If a low or high tire pressure condition is detected by
the system while driving, a message advising you
to check the pressure in a specic tire will appear in
the display. SeeInflation - Tire Pressure on page 5-59
andDIC Warnings and Messages on page 3-49for
more information.
If the tire pressure display shows dashes instead of a
value, there may be a problem with your vehicle. If this
consistently occurs, see your dealer/retailer for service.
BATTERY
Press the vehicle information button until BATTERY
displays. This display shows the current battery voltage.
If the voltage is normal, the display will show NORMAL.
If the voltage is low or high, the display will show
LOW or HIGH. Your vehicle’s charging system regulates
voltage based on the state of the battery. The battery
voltage may uctuate when viewing this information
on the DIC. This is normal. SeeCharging System
Light on page 3-30for more information.
3-45