2008 CHEVROLET EQUINOX display
[x] Cancel search: displayPage 85 of 436
Matching Transmitter(s) to
Your Vehicle
Each RKE transmitter is coded to prevent another
transmitter from unlocking your vehicle. If a transmitter is
lost or stolen, a replacement can be purchased through
your dealer/retailer. All transmitters need to be re-coded
to match the new transmitter. The lost transmitter will
no longer work after the new transmitters are re-coded.
The vehicle can have a maximum of four transmitters
matched to it. Or, see “Learn Remote Key” underDIC
Operation and Displays on page 3-43for instructions
on how to match RKE transmitters to your vehicle.
Battery Replacement
The battery is weak if the transmitter will not work at
the normal range in any location. If you have to get
close to your vehicle before the transmitter works,
change the battery.
Notice:When replacing the battery, use care not
to touch any of the circuitry. Static from your
body transferred to these surfaces may damage
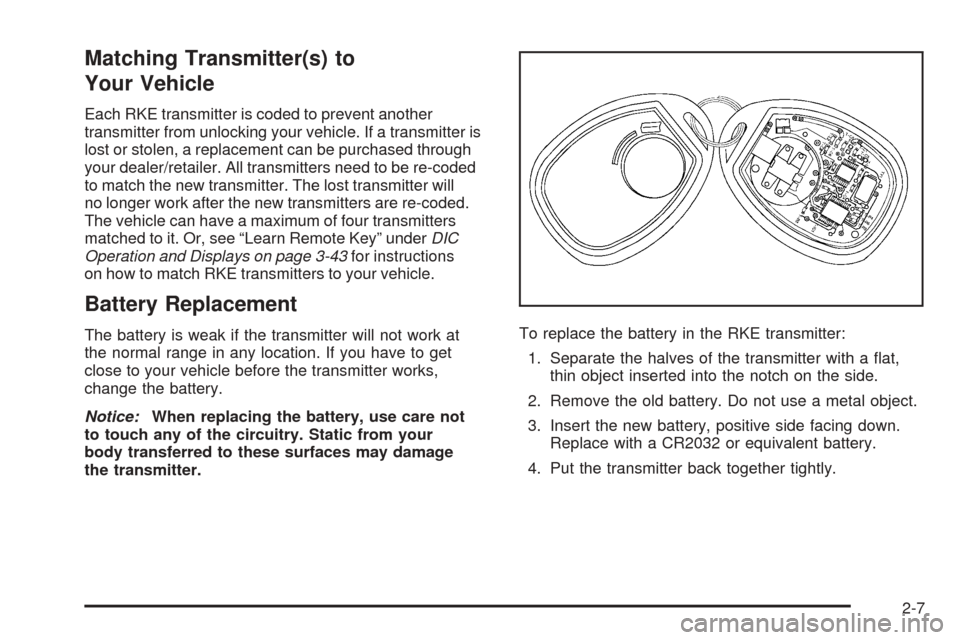
the transmitter.To replace the battery in the RKE transmitter:
1. Separate the halves of the transmitter with a �at,
thin object inserted into the notch on the side.
2. Remove the old battery. Do not use a metal object.
3. Insert the new battery, positive side facing down.
Replace with a CR2032 or equivalent battery.
4. Put the transmitter back together tightly.
2-7
Page 99 of 436
The ignition switch cannot be turned to LOCK/OFF
unless the shift lever is in PARK (P).
ACC (ACC/ACCESSORY):This position operates
some of your electrical accessories.
R(ON/RUN):This is the position the switch returns
to after you start your engine and release the switch.
The switch stays in the ON/RUN position when the
engine is running. But even when the engine is
not running, you can use ON/RUN to operate your
electrical accessories and to display some warning
and indicator lights.
The battery could be drained if you leave the key in
the ACC/ACCESSORY or ON/RUN position with
the engine off. You may not be able to start your
vehicle if the battery is allowed to drain for an
extended period of time.
/(START):This position starts the engine. When
the engine starts, release the key. The ignition switch
will return to ON/RUN for normal driving.
Key In the Ignition
Never leave your vehicle with the keys inside, as it is
an easy target for joy riders or thieves. If you leave
the key in the ignition and park your vehicle, a chime
will sound, when you open the driver’s door. Always
remember to remove your key from the ignition and take
it with you. This will lock your ignition and transmission.
Also, always remember to lock the doors.
The battery could be drained if you leave the key in the
ignition while your vehicle is parked. You may not be
able to start your vehicle after it has been parked for
an extended period of time.
Retained Accessory Power (RAP)
These vehicle accessories can be used for up to
10 minutes after the engine is turned off:
Audio System
Power Windows
Sunroof (if equipped)
Power to these accessories will continue to operate for
up to 10 minutes or until the driver’s door is opened.
All these features will work when the key is in ON/RUN
or ACC/ACCESSORY.
2-21
Page 102 of 436
Automatic Transmission Operation
(3.4L V6 with 5-Speed)
The shift lever is located on the center console.
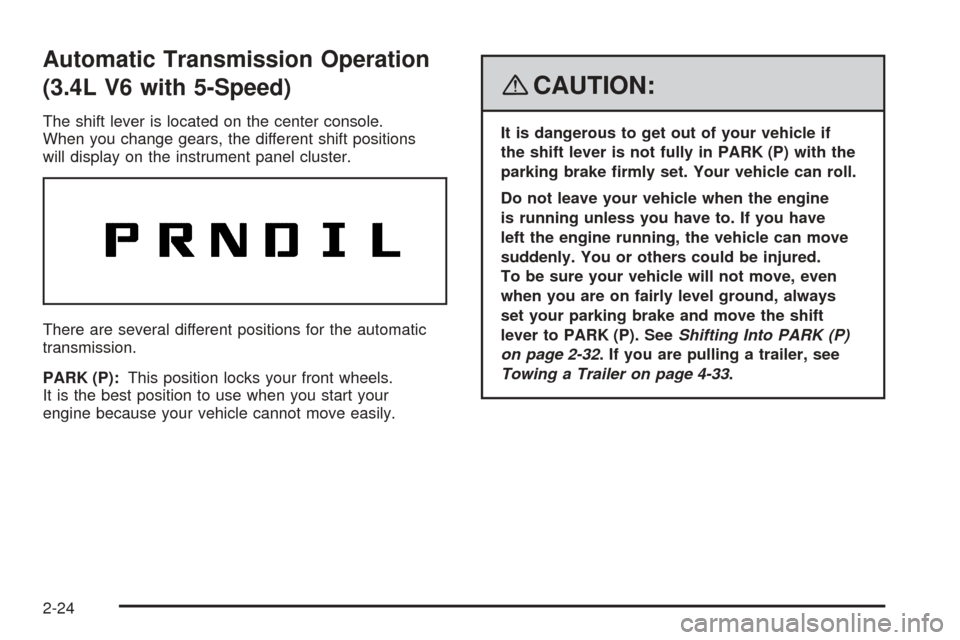
When you change gears, the different shift positions
will display on the instrument panel cluster.
There are several different positions for the automatic
transmission.
PARK (P):This position locks your front wheels.
It is the best position to use when you start your
engine because your vehicle cannot move easily.
{CAUTION:
It is dangerous to get out of your vehicle if
the shift lever is not fully in PARK (P) with the
parking brake �rmly set. Your vehicle can roll.
Do not leave your vehicle when the engine
is running unless you have to. If you have
left the engine running, the vehicle can move
suddenly. You or others could be injured.
To be sure your vehicle will not move, even
when you are on fairly level ground, always
set your parking brake and move the shift
lever to PARK (P). SeeShifting Into PARK (P)
on page 2-32. If you are pulling a trailer, see
Towing a Trailer on page 4-33.
2-24
Page 105 of 436
Automatic Transmission Operation
(3.6L V6 with 6-Speed)
The shift lever for the automatic transmission is located
on the console between the seats.
Maximum engine speed is limited when the vehicle is in
PARK (P) or NEUTRAL (N) to protect driveline
components from improper operation.
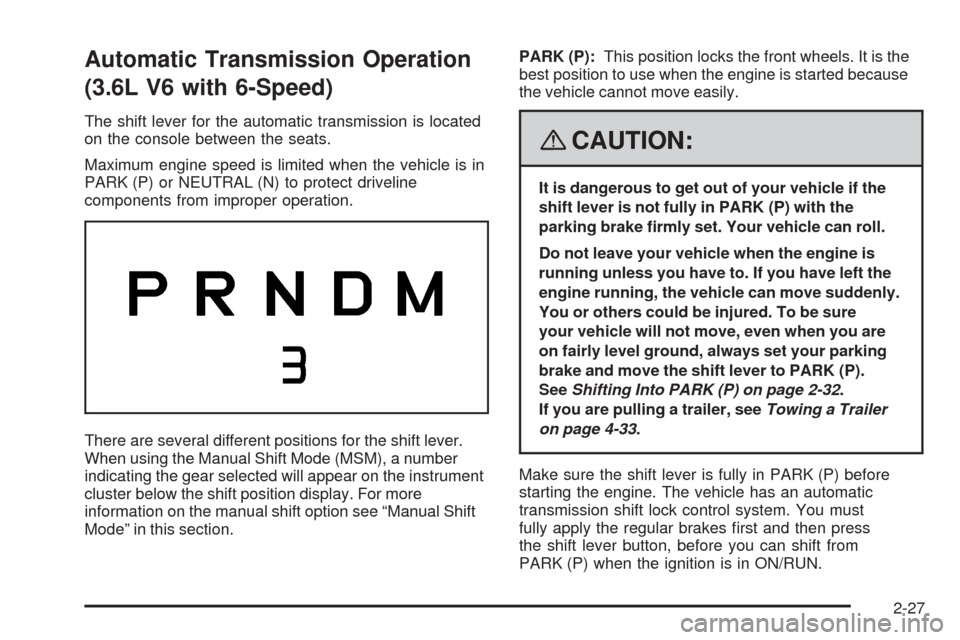
There are several different positions for the shift lever.
When using the Manual Shift Mode (MSM), a number
indicating the gear selected will appear on the instrument
cluster below the shift position display. For more
information on the manual shift option see “Manual Shift
Mode” in this section.PARK (P):This position locks the front wheels. It is the
best position to use when the engine is started because
the vehicle cannot move easily.
{CAUTION:
It is dangerous to get out of your vehicle if the
shift lever is not fully in PARK (P) with the
parking brake �rmly set. Your vehicle can roll.
Do not leave your vehicle when the engine is
running unless you have to. If you have left the
engine running, the vehicle can move suddenly.
You or others could be injured. To be sure
your vehicle will not move, even when you are
on fairly level ground, always set your parking
brake and move the shift lever to PARK (P).
SeeShifting Into PARK (P) on page 2-32.
If you are pulling a trailer, seeTowing a Trailer
on page 4-33.
Make sure the shift lever is fully in PARK (P) before
starting the engine. The vehicle has an automatic
transmission shift lock control system. You must
fully apply the regular brakes �rst and then press
the shift lever button, before you can shift from
PARK (P) when the ignition is in ON/RUN.
2-27
Page 107 of 436
DRIVE (D):This position is for normal driving.
It provides the best fuel economy for your vehicle.
If the vehicle needs more power for passing, and it is:
Going less than 35 mph (55 km/h), push the
accelerator pedal about halfway down.
Going about 35 mph (55 km/h) or more,
push the accelerator pedal all the way down.
The vehicle will shift down to the next gear
and have more power.
Downshifting the transmission in slippery road conditions
could result in skidding, see Skidding underLoss of
Control on page 4-13.
Notice:Spinning the tires or holding the vehicle
in one place on a hill using only the accelerator
pedal may damage the transmission. The repair
will not be covered by your warranty. If you
are stuck, do not spin the tires. When stopping on
a hill, use the brakes to hold the vehicle in place.
MANUAL SHIFT MODE (M):This position, available
on the models with the Manual Shift Mode (MSM),
allows you to change gears similar to a manual
transmission. If your vehicle has this feature, see
“Manual Shift Mode (MSM)”.
Manual Shift Mode (MSM)
(Automatic Transmission)
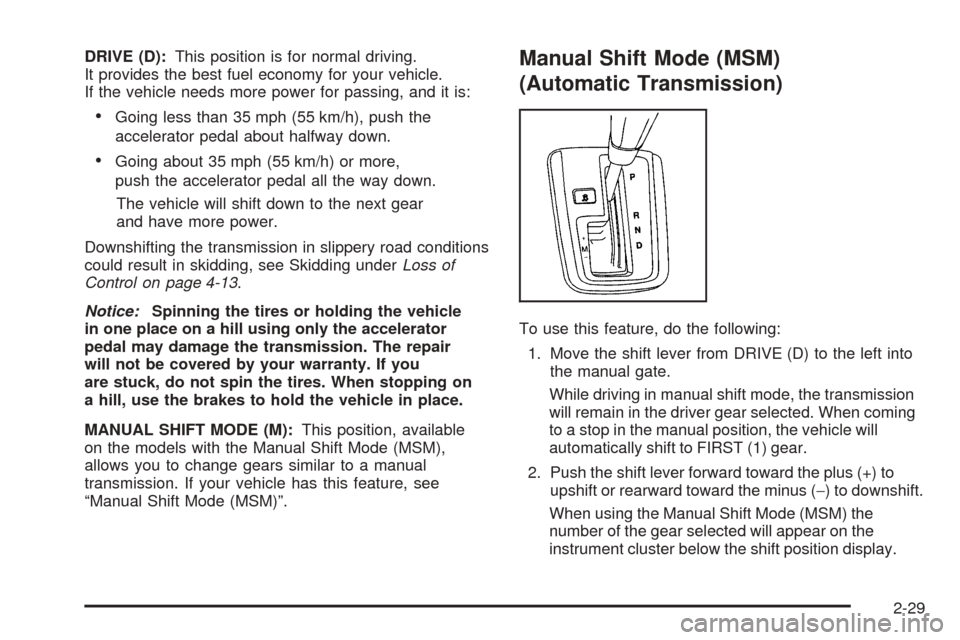
To use this feature, do the following:
1. Move the shift lever from DRIVE (D) to the left into
the manual gate.
While driving in manual shift mode, the transmission
will remain in the driver gear selected. When coming
to a stop in the manual position, the vehicle will
automatically shift to FIRST (1) gear.
2. Push the shift lever forward toward the plus (+) to
upshift or rearward toward the minus (−) to downshift.
When using the Manual Shift Mode (MSM) the
number of the gear selected will appear on the
instrument cluster below the shift position display.
2-29
Page 130 of 436
Reduced Engine Power Light.........................3-39
Highbeam On Light.......................................3-39
Service All-Wheel Drive Light.........................3-39
All-Wheel Drive Disabled Light........................3-40
Gate Ajar Light.............................................3-40
Door Ajar Light.............................................3-40
Service Vehicle Soon Light............................3-41
Fuel Gage...................................................3-41
Low Fuel Warning Light.................................3-42
Driver Information Center (DIC).......................3-42
DIC Operation and Displays...........................3-43
DIC Compass..............................................3-46
DIC Warnings and Messages.........................3-49
DIC Vehicle Personalization............................3-58Audio System(s).............................................3-64
Setting the Time...........................................3-65
Radio(s)......................................................3-68
Using an MP3 (Radio with CD
or Six-Disc CD Player)...............................3-87
Using an MP3 (Radio with CD
and DVD Player).......................................3-92
XM Radio Messages.....................................3-97
Navigation/Radio System...............................3-98
Rear Seat Entertainment (RSE) System...........3-99
Theft-Deterrent Feature................................3-108
Audio Steering Wheel Controls......................3-108
Radio Reception.........................................3-110
Multi-Band Antenna.....................................3-110
Section 3 Instrument Panel
3-2
Page 133 of 436
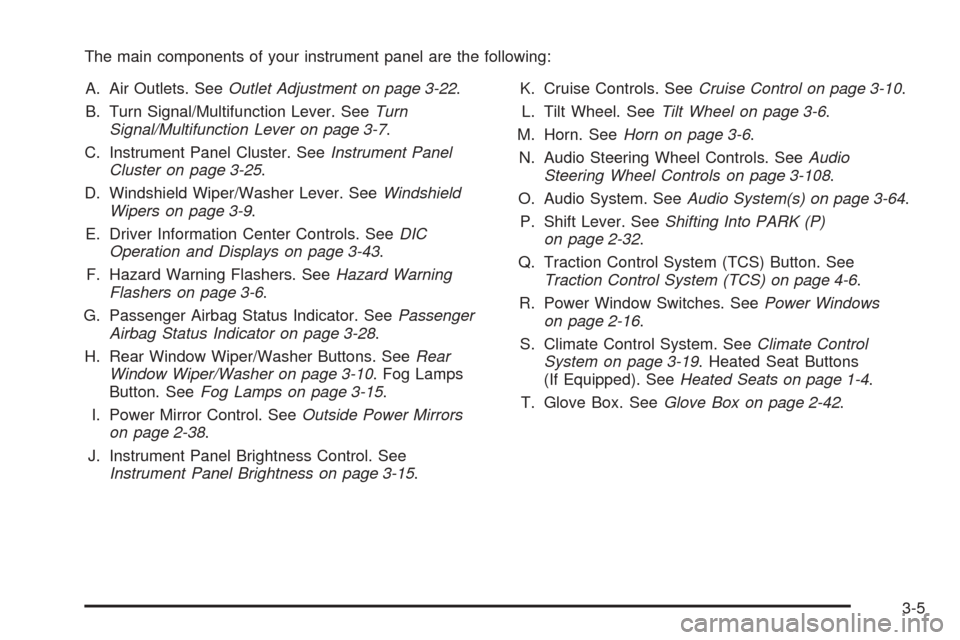
The main components of your instrument panel are the following:
A. Air Outlets. SeeOutlet Adjustment on page 3-22.
B. Turn Signal/Multifunction Lever. SeeTurn
Signal/Multifunction Lever on page 3-7.
C. Instrument Panel Cluster. SeeInstrument Panel
Cluster on page 3-25.
D. Windshield Wiper/Washer Lever. SeeWindshield
Wipers on page 3-9.
E. Driver Information Center Controls. SeeDIC
Operation and Displays on page 3-43.
F. Hazard Warning Flashers. SeeHazard Warning
Flashers on page 3-6.
G. Passenger Airbag Status Indicator. SeePassenger
Airbag Status Indicator on page 3-28.
H. Rear Window Wiper/Washer Buttons. SeeRear
Window Wiper/Washer on page 3-10. Fog Lamps
Button. SeeFog Lamps on page 3-15.
I. Power Mirror Control. SeeOutside Power Mirrors
on page 2-38.
J. Instrument Panel Brightness Control. See
Instrument Panel Brightness on page 3-15.K. Cruise Controls. SeeCruise Control on page 3-10.
L. Tilt Wheel. SeeTilt Wheel on page 3-6.
M. Horn. SeeHorn on page 3-6.
N. Audio Steering Wheel Controls. SeeAudio
Steering Wheel Controls on page 3-108.
O. Audio System. SeeAudio System(s) on page 3-64.
P. Shift Lever. SeeShifting Into PARK (P)
on page 2-32.
Q. Traction Control System (TCS) Button. See
Traction Control System (TCS) on page 4-6.
R. Power Window Switches. SeePower Windows
on page 2-16.
S. Climate Control System. SeeClimate Control
System on page 3-19. Heated Seat Buttons
(If Equipped). SeeHeated Seats on page 1-4.
T. Glove Box. SeeGlove Box on page 2-42.
3-5
Page 145 of 436
Electric Power Management
The vehicle has Electric Power Management (EPM)
that estimates the battery’s temperature and state
of charge. It then adjusts the voltage for best
performance and extended life of the battery.
When the battery’s state of charge is low, the voltage is
raised slightly to quickly put the charge back in. When the
state of charge is high, the voltage is lowered slightly to
prevent overcharging. If the vehicle has a voltmeter gage
or a voltage display on the Driver Information Center
(DIC), you may see the voltage move up or down. This is
normal. If there is a problem, an alert will be displayed.
The battery can be discharged at idle if the electrical
loads are very high. This is true for all vehicles. This is
because the generator (alternator) may not be spinning
fast enough at idle to produce all the power that is
needed for very high electrical loads.
A high electrical load occurs when several of the following
loads are on: headlamps, high beams, fog lamps, rear
window defogger, climate control fan at high speed,
heated seats, engine cooling fans, trailer loads, and
loads plugged into accessory power outlets.
EPM works to prevent excessive discharge of the battery.
It does this by balancing the generator’s output and the
vehicle’s electrical needs. It can increase engine idlespeed to generate more power, whenever needed.
It can temporarily reduce the power demands of some
accessories.
Normally, these actions occur in steps or levels, without
being noticeable. In rare cases at the highest levels of
corrective action, this action may be noticeable to the
driver. If so, a Driver Information Center (DIC) message
might be displayed, such as Battery Saver Active or
Service Battery Charging System. If this message is
displayed, it is recommended that the driver reduce the
electrical loads as much as possible. SeeDIC Warnings
and Messages on page 3-49.
Battery Run-Down Protection
Your vehicle has a battery saver feature designed to
protect the vehicle’s battery.
When any interior lamp is left on and the ignition is
turned off, the battery rundown protection system will
automatically turn the lamp off after 20 minutes. This
will avoid draining the battery. This vehicle also has a
retained accessory power feature. If the radio is on,
it will turn off after 10 minutes or if any door on the
vehicle is opened. SeeRetained Accessory Power (RAP)
on page 2-21.
3-17