2008 CHEVROLET CORVETTE change wheel
[x] Cancel search: change wheelPage 60 of 432

Servicing Your Airbag-Equipped
Vehicle
Airbags affect how your vehicle should be serviced.
There are parts of the airbag system in several places
around your vehicle. Your dealer/retailer and the service
manual have information about servicing your vehicle
and the airbag system. To purchase a service manual,
seeService Publications Ordering Information on
page 7-17.
{CAUTION:
For up to 10 seconds after the ignition is
turned off and the battery is disconnected, an
airbag can still in�ate during improper service.
You can be injured if you are close to an
airbag when it in�ates. Avoid yellow
connectors. They are probably part of the
airbag system. Be sure to follow proper
service procedures, and make sure the person
performing work for you is quali�ed to do so.
Adding Equipment to Your
Airbag-Equipped Vehicle
Q:Is there anything I might add to or change
about the vehicle that could keep the airbags
from working properly?
A:Yes. If you add things that change your vehicle’s
frame, bumper system, height, front end or side
sheet metal, they may keep the airbag system from
working properly. Changing or moving any parts of
the front seats, safety belts, the airbag sensing and
diagnostic module, steering wheel, instrument panel,
the inside review mirror, front sensors, or airbag
wiring can affect the operation of the airbag system.
In addition, your vehicle has a passenger sensing
system for the right front passenger’s position, which
includes sensors that are part of the passenger’s
seat. The passenger sensing system may not
operate properly if the original seat trim is replaced
with non-GM covers, upholstery or trim, or with GM
covers, upholstery or trim designed for a different
vehicle. Any object, such as an aftermarket seat
heater or a comfort enhancing pad or device,
1-56
Page 137 of 432
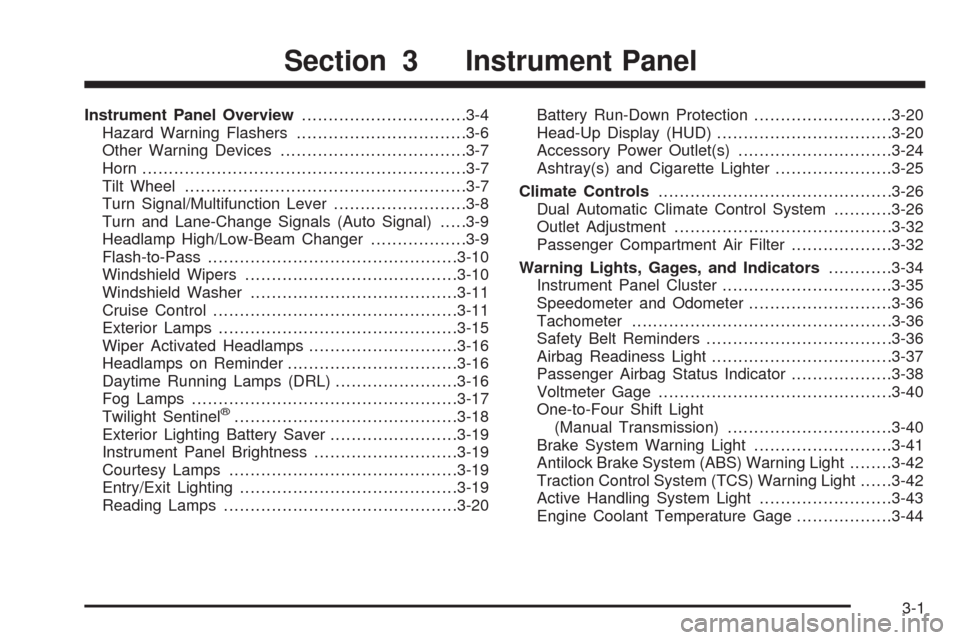
Instrument Panel Overview...............................3-4
Hazard Warning Flashers................................3-6
Other Warning Devices...................................3-7
Horn .............................................................3-7
Tilt Wheel.....................................................3-7
Turn Signal/Multifunction Lever.........................3-8
Turn and Lane-Change Signals (Auto Signal).....3-9
Headlamp High/Low-Beam Changer..................3-9
Flash-to-Pass...............................................3-10
Windshield Wipers........................................3-10
Windshield Washer.......................................3-11
Cruise Control..............................................3-11
Exterior Lamps.............................................3-15
Wiper Activated Headlamps............................3-16
Headlamps on Reminder................................3-16
Daytime Running Lamps (DRL).......................3-16
Fog Lamps ..................................................3-17
Twilight Sentinel
®..........................................3-18
Exterior Lighting Battery Saver........................3-19
Instrument Panel Brightness...........................3-19
Courtesy Lamps...........................................3-19
Entry/Exit Lighting.........................................3-19
Reading Lamps............................................3-20Battery Run-Down Protection..........................3-20
Head-Up Display (HUD).................................3-20
Accessory Power Outlet(s).............................3-24
Ashtray(s) and Cigarette Lighter......................3-25
Climate Controls............................................3-26
Dual Automatic Climate Control System...........3-26
Outlet Adjustment.........................................3-32
Passenger Compartment Air Filter...................3-32
Warning Lights, Gages, and Indicators............3-34
Instrument Panel Cluster................................3-35
Speedometer and Odometer...........................3-36
Tachometer.................................................3-36
Safety Belt Reminders...................................3-36
Airbag Readiness Light..................................3-37
Passenger Airbag Status Indicator...................3-38
Voltmeter Gage............................................3-40
One-to-Four Shift Light
(Manual Transmission)...............................3-40
Brake System Warning Light..........................3-41
Antilock Brake System (ABS) Warning Light........3-42
Traction Control System (TCS) Warning Light......3-42
Active Handling System Light.........................3-43
Engine Coolant Temperature Gage..................3-44
Section 3 Instrument Panel
3-1
Page 144 of 432
Telescopic Steering Column
If your vehicle has this feature, the telescopic steering
column will allow you to adjust the distance the steering
wheel is from the instrument panel.
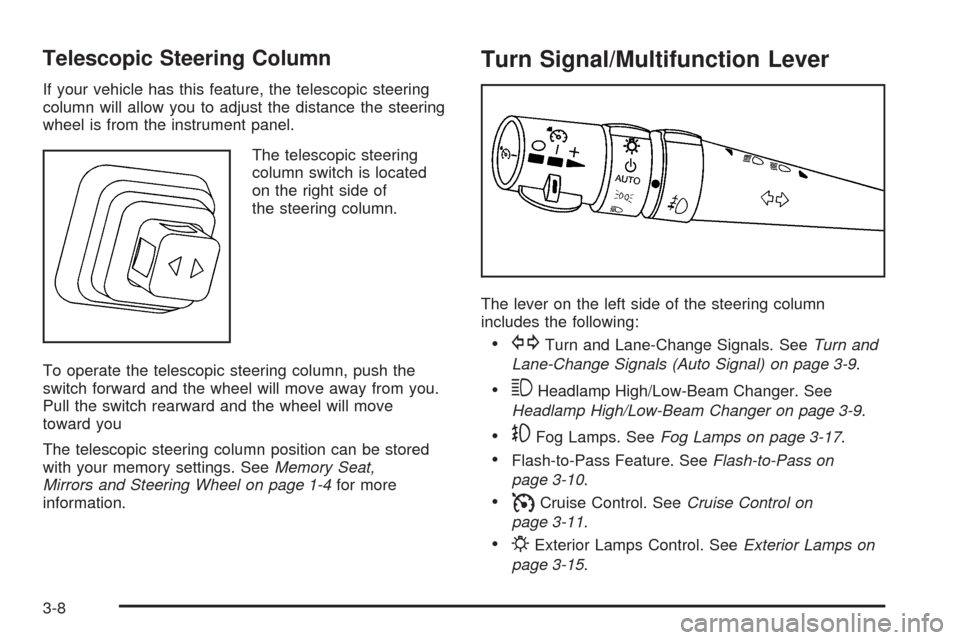
The telescopic steering
column switch is located
on the right side of
the steering column.
To operate the telescopic steering column, push the
switch forward and the wheel will move away from you.
Pull the switch rearward and the wheel will move
toward you
The telescopic steering column position can be stored
with your memory settings. SeeMemory Seat,
Mirrors and Steering Wheel on page 1-4for more
information.
Turn Signal/Multifunction Lever
The lever on the left side of the steering column
includes the following:
GTurn and Lane-Change Signals. SeeTurn and
Lane-Change Signals (Auto Signal) on page 3-9.
3Headlamp High/Low-Beam Changer. See
Headlamp High/Low-Beam Changer on page 3-9.
-Fog Lamps. SeeFog Lamps on page 3-17.
Flash-to-Pass Feature. SeeFlash-to-Pass on
page 3-10.
ICruise Control. SeeCruise Control on
page 3-11.
PExterior Lamps Control. SeeExterior Lamps on
page 3-15.
3-8
Page 148 of 432
With cruise control, you can maintain a speed of about
25 mph (40 km/h) or more without keeping your foot
on the accelerator. This can really help on long
trips. Cruise control does not work at speeds below
about 25 mph (40 km/h).
Cruise control will not work if your parking brake is set,
or if the master cylinder brake �uid level is low.
{CAUTION:
Cruise control can be dangerous where you
cannot drive safely at a steady speed. So, do
not use your cruise control on winding roads
or in heavy traffic.
Cruise control can be dangerous on slippery
roads. On such roads, fast changes in tire
traction can cause excessive wheel slip, and
you could lose control. Do not use cruise
control on slippery roads.
If your vehicle is in cruise control, and has the Traction
Control System (TCS), and it begins to limit wheel
spin, the cruise control automatically disengages.
SeeTraction Control System (TCS) on page 4-6.
When road conditions allow you to safely use it again,
you can turn cruise control back on.
Setting Cruise Control
{CAUTION:
If you leave your cruise control on when you
are not using cruise, you might hit a button
and go into cruise when you do not want to.
You could be startled and even lose control.
Keep the cruise control switch off until you
want to use cruise control.
1. Move the cruise control switch to on.
2. Get up to the speed desired.
3. Press in the set button at the end of the lever and
release it.
4. Take your foot off the accelerator pedal.
When the cruise control is engaged, the CRUISE SET
TO XX MPH message displays on the Driver Information
Center (DIC). SeeOther Messages on page 3-74.
3-12
Page 159 of 432
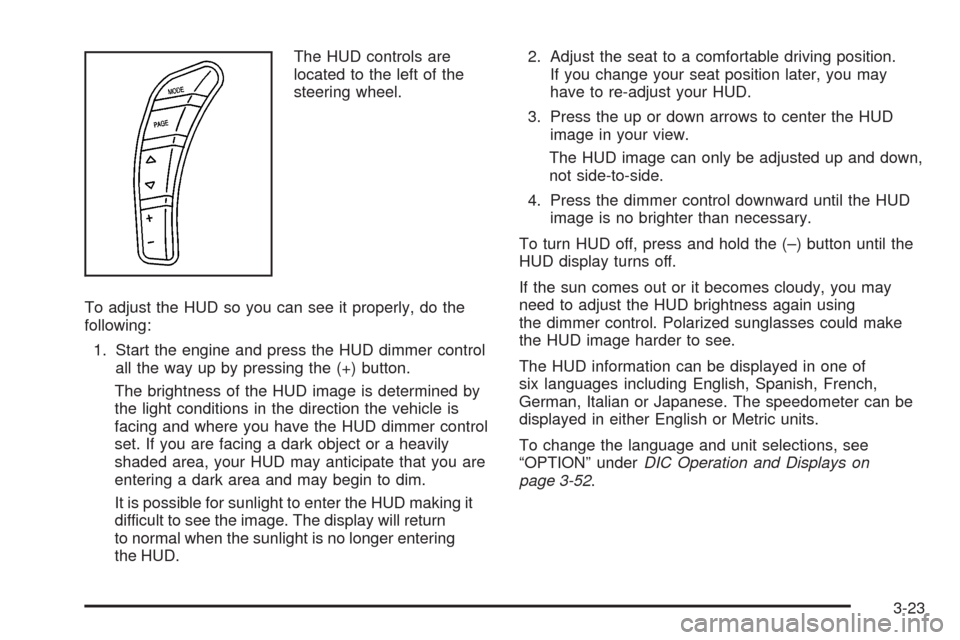
The HUD controls are
located to the left of the
steering wheel.
To adjust the HUD so you can see it properly, do the
following:
1. Start the engine and press the HUD dimmer control
all the way up by pressing the (+) button.
The brightness of the HUD image is determined by
the light conditions in the direction the vehicle is
facing and where you have the HUD dimmer control
set. If you are facing a dark object or a heavily
shaded area, your HUD may anticipate that you are
entering a dark area and may begin to dim.
It is possible for sunlight to enter the HUD making it
difficult to see the image. The display will return
to normal when the sunlight is no longer entering
the HUD.2. Adjust the seat to a comfortable driving position.
If you change your seat position later, you may
have to re-adjust your HUD.
3. Press the up or down arrows to center the HUD
image in your view.
The HUD image can only be adjusted up and down,
not side-to-side.
4. Press the dimmer control downward until the HUD
image is no brighter than necessary.
To turn HUD off, press and hold the (–) button until the
HUD display turns off.
If the sun comes out or it becomes cloudy, you may
need to adjust the HUD brightness again using
the dimmer control. Polarized sunglasses could make
the HUD image harder to see.
The HUD information can be displayed in one of
six languages including English, Spanish, French,
German, Italian or Japanese. The speedometer can be
displayed in either English or Metric units.
To change the language and unit selections, see
“OPTION” underDIC Operation and Displays on
page 3-52.
3-23
Page 247 of 432
Antilock Brake System (ABS)
Your vehicle has the Antilock Brake System (ABS), an
advanced electronic braking system that will help
prevent a braking skid.
When you start the engine and begin to drive away,
ABS will check itself. You might hear a momentary
motor or clicking noise while this test is going on, and
you might even notice that the brake pedal moves
a little. This is normal.
If there is a problem with
ABS, this warning light will
stay on. SeeAntilock Brake
System (ABS) Warning
Light on page 3-42.
Let us say the road is wet and you are driving safely.
Suddenly, an animal jumps out in front of you. You slam
on the brakes and continue braking. Here is what
happens with ABS:
A computer senses that wheels are slowing down. If
one of the wheels is about to stop rolling, the computer
will separately work the brakes at each wheel.ABS can change the brake pressure faster than any
driver could. The computer is programmed to make the
most of available tire and road conditions. This can
help you steer around the obstacle while braking hard.
As you brake, the computer keeps receiving updates
on wheel speed and controls braking pressure
accordingly.
Remember: ABS does not change the time you need to
get your foot up to the brake pedal or always decrease
stopping distance. If you get too close to the vehicle in
front of you, you will not have time to apply the brakes if
that vehicle suddenly slows or stops. Always leave
enough room up ahead to stop, even though you
have ABS.
Using ABS
Do not pump the brakes. Just hold the brake pedal
down �rmly and let antilock work for you. You might hear
a motor or clicking noise and feel the brake pedal
move a little during a stop, but this is normal.
Braking in Emergencies
With ABS, you can steer and brake at the same time.
In many emergencies, steering can help you more than
even the very best braking.
4-5
Page 252 of 432

Selective Ride Control
You may have a ride control system on your vehicle
called Magnetic Selective Ride Control. The system
provides the following performance bene�ts:
Reduced Impact Harshness
Improved Road Isolation
Improved High-Speed Stability
Improved Handling Response
Better Control of Body Ride Motions
This knob is located on the
center console. Turn it to
select the suspension
of your choice.TOUR:Use for normal city and highway driving.
This setting provides a smooth, soft ride.
SPORT:Use where road conditions or personal
preference demand more control. This setting provides
more “feel”, or response to the road conditions.
You can select a setting at any time. Based on road
conditions, steering wheel angle and your vehicle speed,
the system automatically adjusts to provide the best
ride and handling. Select a new setting whenever driving
conditions change.
Three Driver Information Center (DIC) messages
(SERVICE RIDE CONTROL, SHOCKS INOPERATIVE
and MAXIMUM SPEED 80 MPH (129 KM/H) display
when a malfunction occurs with the Selective Ride
Control system. Refer toDIC Warnings and Messages
on page 3-57for more information.
4-10
Page 253 of 432
Steering
Power Steering
If you lose power steering assist because the engine
stops or the system is not functioning, you can steer but
it will take much more effort.
Magnetic Speed Variable Assist
Steering
Your vehicle has a steering system that continuously
adjusts the effort you feel when steering at all vehicle
speeds. It provides ease when parking, yet a �rm, solid
feel at highway speeds.
Steering Tips
It is important to take curves at a reasonable speed.
A lot of the “driver lost control” accidents mentioned on
the news happen on curves. Here is why:
Experienced driver or beginner, each of us is subject to
the same laws of physics when driving on curves.
The traction of the tires against the road surface makes
it possible for the vehicle to change its path when
you turn the front wheels. If there is no traction, inertia
will keep the vehicle going in the same direction. If
you have ever tried to steer a vehicle on wet ice, you
will understand this.Traction in a curve depends on the condition of the tires
and the road surface, the angle at which the curve is
banked, and your speed. While in a curve, speed is the
one factor you can control.
Suppose you are steering through a sharp curve.
Then you suddenly accelerate. Both control
systems — steering and acceleration — have to do their
work where the tires meet the road. Adding the sudden
acceleration can demand too much of those places. You
can lose control. SeeTraction Control System (TCS) on
page 4-6.
What should you do if this ever happens? Ease up on
the accelerator pedal, steer the vehicle the way you
want it to go, and slow down.
Speed limit signs near curves warn that you should
adjust your speed. Of course, the posted speeds
are based on good weather and road conditions. Under
less favorable conditions you will want to go slower.
If you need to reduce speed when approaching a curve,
do it before you enter the curve, while the front wheels
are straight ahead.
Try to adjust the speed so you can drive through the
curve. Maintain a reasonable, steady speed. Wait
to accelerate until you are out of the curve, and then
accelerate gently into the straightaway.
Adding non-dealer/non-retailer accessories can affect
your vehicle’s performance. SeeAccessories and
Modifications on page 5-3.
4-11