2008 CHEVROLET CORVETTE battery
[x] Cancel search: batteryPage 60 of 432

Servicing Your Airbag-Equipped
Vehicle
Airbags affect how your vehicle should be serviced.
There are parts of the airbag system in several places
around your vehicle. Your dealer/retailer and the service
manual have information about servicing your vehicle
and the airbag system. To purchase a service manual,
seeService Publications Ordering Information on
page 7-17.
{CAUTION:
For up to 10 seconds after the ignition is
turned off and the battery is disconnected, an
airbag can still in�ate during improper service.
You can be injured if you are close to an
airbag when it in�ates. Avoid yellow
connectors. They are probably part of the
airbag system. Be sure to follow proper
service procedures, and make sure the person
performing work for you is quali�ed to do so.
Adding Equipment to Your
Airbag-Equipped Vehicle
Q:Is there anything I might add to or change
about the vehicle that could keep the airbags
from working properly?
A:Yes. If you add things that change your vehicle’s
frame, bumper system, height, front end or side
sheet metal, they may keep the airbag system from
working properly. Changing or moving any parts of
the front seats, safety belts, the airbag sensing and
diagnostic module, steering wheel, instrument panel,
the inside review mirror, front sensors, or airbag
wiring can affect the operation of the airbag system.
In addition, your vehicle has a passenger sensing
system for the right front passenger’s position, which
includes sensors that are part of the passenger’s
seat. The passenger sensing system may not
operate properly if the original seat trim is replaced
with non-GM covers, upholstery or trim, or with GM
covers, upholstery or trim designed for a different
vehicle. Any object, such as an aftermarket seat
heater or a comfort enhancing pad or device,
1-56
Page 69 of 432
Keyless Access System
The Keyless Access System operates on a radio
frequency subject to Federal Communications
Commission (FCC) Rules and with Industry Canada.
This device complies with Part 15 of the FCC Rules.
Operation is subject to the following two conditions:
1. This device may not cause harmful interference.
2. This device must accept any interference received,
including interference that may cause undesired
operation.
This device complies with RSS-210 of Industry Canada.
Operation is subject to the following two conditions:
1. This device may not cause interference.
2. This device must accept any interference received,
including interference that may cause undesired
operation of the device.
Changes or modi�cations to this system by other than
an authorized service facility could void authorization to
use this equipment.If there is a decrease in the keyless access transmitter
range, try this:Check the distance. The transmitter may be too far
from the vehicle. It may be necessary to stand
closer during rainy or snowy weather.
Check the location. Other vehicles or objects may
be blocking the signal. Take a few steps to the
left or right, hold the transmitter higher, and
try again.
Check the transmitter’s battery. See “Battery
Replacement” underKeyless Access System
Operation on page 2-6.
Make sure that an electronic device such as a
cellular phone or lap top computer is not causing
interference.
If the transmitter is still not working correctly, see
your dealer/retailer or a quali�ed technician for
service.
2-5
Page 73 of 432
If additional transmitters need programing, take
transmitter 1 out of the transmitter pocket and place
transmitter 2 in the pocket. Up to four transmitters can
be programmed. The DIC then displays MAXIMUM
NUMBER OF FOBS LEARNED and exits the
programming mode.
Press the Acc. button (ignition switch) when all the
transmitters are programmed.
Battery Replacement
If NO FOBS DETECTED displays on the DIC when you
try to start the vehicle, the battery is weak. Place the
transmitter in the glove box transmitter pocket with the
buttons facing towards the passenger side. Then, with
the vehicle in PARK (P) for an automatic transmission,
press the brake pedal and the START button. If the
vehicle has a manual transmission, press the clutch and
the START button. This starts the vehicle, however, it is
recommended that the battery be replaced as soon as
possible. The DIC may display FOB BATTERY LOW.
Notice:When replacing the battery, do not touch
any of the circuitry on the transmitter. Static
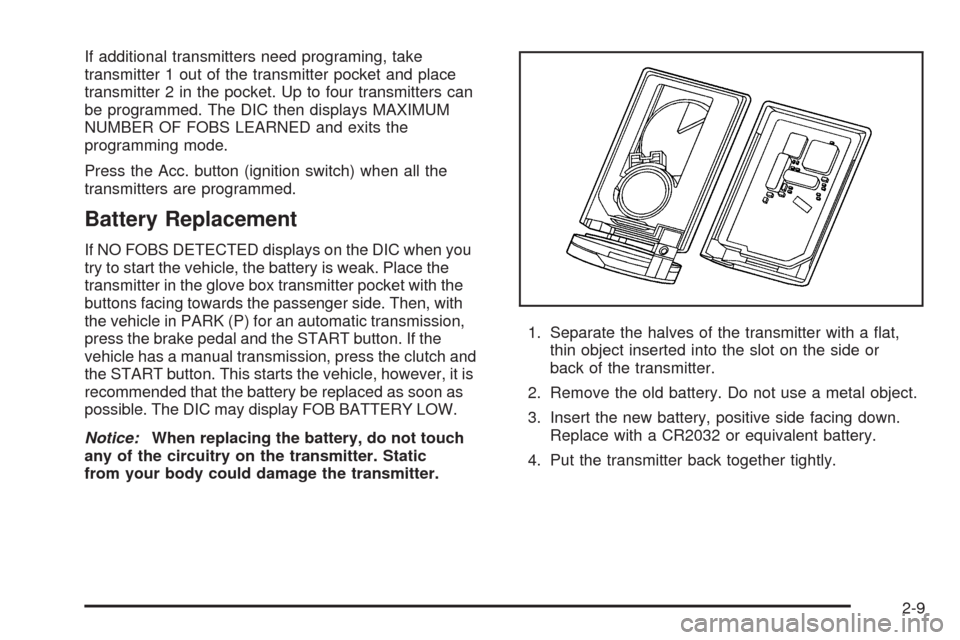
from your body could damage the transmitter.1. Separate the halves of the transmitter with a �at,
thin object inserted into the slot on the side or
back of the transmitter.
2. Remove the old battery. Do not use a metal object.
3. Insert the new battery, positive side facing down.
Replace with a CR2032 or equivalent battery.
4. Put the transmitter back together tightly.
2-9
Page 78 of 432
Hatch/Trunk Lid Release
There are several ways to release the hatch/trunk lid.
If your vehicle has an automatic transmission, the shift
lever must be in PARK (P). For manual transmission
vehicles, the parking brake must be set when the ignition
is started for the hatch/trunk release to operate. The
parking brake does not need to be set when the ignition
is off for the hatch/trunk release to operate. SeeParking
Brake on page 2-32.
Press the hatch/trunk
Vlid release button, located on
the instrument panel to the left of the steering wheel.
The theft-deterrent alarm system must not be armed.
Press the hatch/trunk
}lid release button on
the keyless access transmitter. SeeKeyless Access
System on page 2-5.
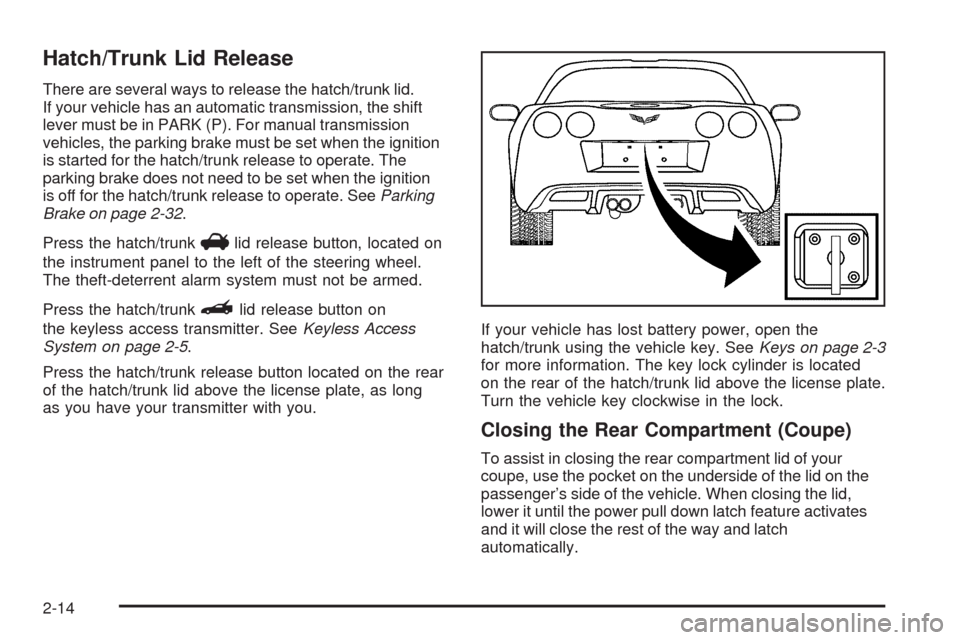
Press the hatch/trunk release button located on the rear
of the hatch/trunk lid above the license plate, as long
as you have your transmitter with you.If your vehicle has lost battery power, open the
hatch/trunk using the vehicle key. SeeKeys on page 2-3
for more information. The key lock cylinder is located
on the rear of the hatch/trunk lid above the license plate.
Turn the vehicle key clockwise in the lock.
Closing the Rear Compartment (Coupe)
To assist in closing the rear compartment lid of your
coupe, use the pocket on the underside of the lid on the
passenger’s side of the vehicle. When closing the lid,
lower it until the power pull down latch feature activates
and it will close the rest of the way and latch
automatically.
2-14
Page 82 of 432
Power Window Initialize
After a power reconnect such as battery replacement,
the window index-up feature will not function until
the system is initialized.
Once power is restored:
1. Close the door.
2. Raise the window and hold the switch up for
three seconds after the window is closed.
3. Release the switch, then hold the switch up again
for three seconds and release.
Sun Visors
Pull the visor toward you, or move it to the side to help
reduce glare.
To use the lighted mirror, lift the cover.
Theft-Deterrent Systems
Vehicle theft is big business, especially in some cities.
This vehicle has theft-deterrent features, however,
they do not make it impossible to steal.
Theft-Deterrent System
This vehicle has a theft-deterrent alarm system.
The security light �ashes if
a door is open and locked
with the power door
lock switch.
If this light stays on while the engine is running, the
vehicle needs service.
2-18
Page 83 of 432

Arming the System
To arm the system:
PressQon the keyless access transmitter.
Open the door and lock the door with the power
door lock switch. The security light should �ash.
Remove the keyless access transmitter from inside
the vehicle and close the door. The security light
stops �ashing and stays on. After 30 seconds,
the light should turn off.
The vehicle can be programmed to automatically
lock the doors and arm the theft-deterrent system
when you exit the vehicle. SeeDIC Vehicle
Personalization on page 3-75.
If a door or the hatch/trunk is opened without using the
keyless access transmitter, the alarm goes off. The
horn sounds for two minutes, then goes off to save
battery power. The vehicle will not start without
a keyless access transmitter present.
The theft-deterrent system does not arm if the driver
door is locked with the power door lock switch after the
doors are closed.
If the keyless access transmitter is removed from the
vehicle while a passenger is in it, have them lock
the doors after they are closed. The alarm will not arm,
so the passenger will not set it off.
Testing the Alarm
To test the system:
1. Make sure the trunk lid/hatch is latched.
2. Lower the window on the driver door.
3. Manually arm the system.
4. Close the doors and wait 30 seconds.
5. Reach through the open window and manually pull
the release lever on the �oor.
6. Press the unlock button on the transmitter to turn
off the alarm.
If the alarm does not sound, check to see if the horn
works. The horn fuse may be blown. SeeFuses
and Circuit Breakers on page 5-100. If the horn works,
but the alarm does not go off, see your dealer/retailer.
Disarming the System
Press the unlock button on the keyless access
transmitter or squeeze the door handle sensor while
the transmitter is near the vehicle to unlock a door.
Unlocking a door any other way sets off the alarm.
If the alarm sounds, press the unlock button on
the keyless access transmitter to disarm it.
Do not leave the key or device that disarms or
deactivates the theft deterrent system in the vehicle.
2-19
Page 87 of 432
When the engine is off, press this button to place the
vehicle in accessory mode. ACCESSORY MODE
ON will display on the Driver Information Center (DIC).
This mode allows you to use things like the radio
and the windshield wipers while the engine is off. Use
accessory mode if you must have your vehicle in motion
while the engine is off, for example, if your vehicle is
being pushed or towed.
After being in accessory mode for about 10 minutes, the
vehicle will automatically enter RAP or OFF, depending
on if the doors are opened or closed.
Retained Accessory Power (RAP)
These vehicle accessories can be used for up to
10 minutes after the engine is turned off:
Audio System
Power Windows
These features continue to work up to 10 minutes after
the engine is turned off or until either door is opened.
If a door is opened, the power windows and audio
system will shut off.
Starting the Engine
Move the shift lever to PARK (P) or NEUTRAL (N) for
an automatic transmission. For a manual transmission
the vehicle can be started in NEUTRAL or any other
gear as long as the clutch is depressed. To restart
a manual transmission when you are already moving,
use the NEUTRAL position only. To restart an automatic
transmission when you are already moving, use
NEUTRAL (N).
Notice:Do not try to shift to P (Park) if your vehicle
is moving. If you do, you could damage the
transmission. Shift to P (Park) only when your
vehicle is stopped.
The keyless access transmitter must be inside the
vehicle for the ignition to work.
Cell phone chargers can interfere with the operation of
the Keyless Access System. Battery chargers should
not be plugged in when starting or turning off the engine.
2-23
Page 88 of 432
To start your vehicle, do the following:
1. For an automatic transmission, with your foot on the
brake pedal, press the START button located on
the instrument panel. For a manual transmission,
while pressing in the clutch, press the START
button.
If there is not a keyless access transmitter in the
vehicle or if there is something causing interference
with it, the DIC will display NO FOBS DETECTED.
SeeDIC Warnings and Messages on page 3-57
for more information.
2. When the engine begins cranking, let go of the
button and the engine cranks automatically until
it starts. If the battery in the keyless access
transmitter is weak, the DIC displays FOB
BATTERY LOW. You can still drive the vehicle.
See “Battery Replacement” underKeyless Access
System Operation on page 2-6for more information.
If the fob battery is dead, you need to insert the
fob into the fob slot to enable engine starting.
See “No Fobs Detected” underDIC Warnings and
Messages on page 3-57.3. Do not race the engine immediately after starting it.
Operate the engine and transmission gently until
the oil warms up and lubricates all moving parts.
4. If the engine does not start and no DIC message is
displayed, wait 15 seconds before trying again to let
the cranking motor cool down.
If the engine does not start after 5-10 seconds,
especially in very cold weather (below 0°F or−18°C),
it could be �ooded with too much gasoline. Try
pushing the accelerator pedal all the way to the �oor
while cranking for up to 15 seconds maximum. Wait
at least 15 seconds between each try, to allow the
cranking motor to cool down. When the engine starts,
let go of the accelerator. If the vehicle starts brie�y
but then stops again, do the same thing. This clears
the extra gasoline from the engine.
Notice:Cranking the engine for long periods of
time, by pressing the START button immediately
after cranking has ended, can overheat and damage
the cranking motor, and drain the battery. Wait at
least 15 seconds between each try, to allow the
cranking motor to cool down.
2-24