2008 CHEVROLET CORVETTE ESP
[x] Cancel search: ESPPage 152 of 432
Wiper Activated Headlamps
This feature activates the headlamps and parking lamps
after the windshield wipers have been in use for
approximately 15 seconds and deactivates and returns
to ambient lighting conditions 15 seconds after the
wipers are turned off.
If the exterior lamp control has been turned off or is in
the parking lamp position while the wiper control is
active in any position, the HEADLAMPS SUGGESTED
message appears on the Driver Information Center
(DIC). SeeDIC Warnings and Messages on page 3-57.
When the ignition is turned off, the wiper-activated
headlamps will immediately turn off.
Headlamps on Reminder
A warning chime will sound if the exterior lamp control
is left on in either the headlamp or parking lamp position
and the driver’s door is opened with the ignition off.
Daytime Running Lamps (DRL)
Daytime Running Lamps (DRL) can make it easier for
others to see the front of your vehicle during the
day. DRL can be helpful in many different driving
conditions, but they can be especially helpful in the short
periods after dawn and before sunset. Fully functional
daytime running lamps are required on all vehicles
�rst sold in Canada.
The DRL system will make the front turn signal lamps
come on when the following conditions are met:
It is still daylight and the ignition is on.
The exterior lamp control is in the AUTO position.
The transmission is not in PARK (P) or the
parking brake is off.
The parking brake is off or the vehicle speed is
greater than 8 mph (13 km/h).
When DRL are on, only the front turn signal lamps will
be on. No other exterior lamps such as the parking
lamps, taillamps, etc. will be on when the DRL are being
used. The instrument panel will not be lit up either.
3-16
Page 158 of 432
When the desired HUD display has been selected,
release the MODE button.
Within each mode, the display, can be further
customized by pressing the PAGE button. Pressing this
button in each mode will turn off and on the following:
Street Mode — No tachometer, circular tachometer,
and linear tachometer.
Track Modes 1 and 2 — No minor gage, coolant
temperature, transmission oil temperature, engine
oil temperature, and engine oil pressure.
While in Track Mode 1 or 2, the maximum G value
achieved during the current ignition cycle can be
displayed by pressing and holding the PAGE button.
The maximum G display will be shown until the
PAGE button is released. The maximum G value
display will be identical to the normal G value
display, except the maximum G gage digits (X.XX G)
and corresponding G gage bar will overwrite the
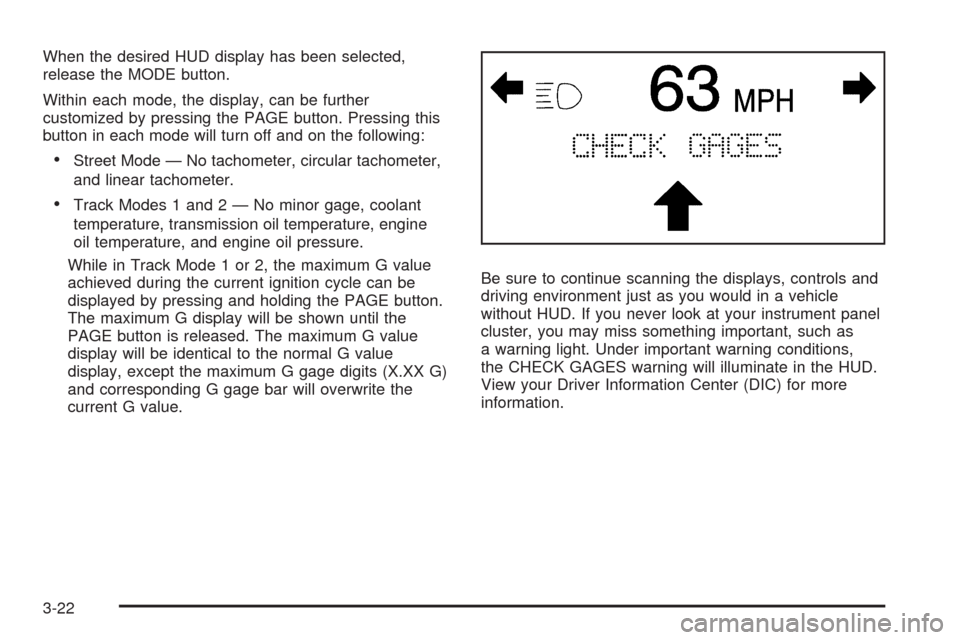
current G value.Be sure to continue scanning the displays, controls and
driving environment just as you would in a vehicle
without HUD. If you never look at your instrument panel
cluster, you may miss something important, such as
a warning light. Under important warning conditions,
the CHECK GAGES warning will illuminate in the HUD.
View your Driver Information Center (DIC) for more
information.
3-22
Page 211 of 432
DIC Vehicle Personalization
Many features on your vehicle can be personalized.
This means that the operation of these features can be
set to operate differently depending on who is driving
the vehicle. See “Personal Options” later in this section
for the features that you can personalize.
The personalization settings for other features are
automatically updated and saved as the driver adjusts
them. These include the following settings and presets:
The radio presets, tone, volume, fade, balance,
equalization (EQ) settings and source (radio or CD)
The last climate control setting
The Head-Up Display (HUD) position and dimming
level, if your vehicle has this feature
The instrument panel cluster dimming level and last
selected DIC display
Separate personalization settings are saved for
two different drivers. One of the keyless access
transmitters is assigned to driver 1. The other is
assigned to driver 2. The back of the keyless access
transmitters are labelled 1 or 2 to correspond to
each driver.The current driver’s preferences are recalled when one
of the following occurs:
The lock or unlock button on the keyless access
transmitter, labelled 1 or 2, is pressed.
The appropriate memory button, 1 or 2, located on
the driver’s door is pressed. SeeMemory Seat,
Mirrors and Steering Wheel on page 1-4for more
information.
A valid keyless access transmitter is detected upon
opening the driver’s door.
If more than one valid keyless access transmitter is
detected upon opening the driver’s door, the driver
preferences for the lowest driver number will be recalled.
If a keyless access transmitter that is not labelled 1 or 2
is used, the personalization system will not recognize
the transmitter. The Driver Information Center (DIC) will
not display a current driver number and the features
that are normally programmed through the DIC will be
set to the default states. Also, if the OPTION button
is pressed, the DIC does not display the menus used to
set personalizations, but instead displays OPTIONS
UNAVAILABLE for a few seconds.
3-75
Page 218 of 432
If you choose BOTH, on automatic transmission
vehicles, both doors will automatically unlock when the
shift lever is moved into PARK (P). On manual
transmission vehicles, both doors will automatically
unlock when the ignition is turned off or is in RAP.
When the mode you want is selected, press the OPTION
button to set your choice and advance to the next
personal option.
Language:This option allows you to select the
language the DIC, the Head-Up Display (HUD), if your
vehicle has this feature, and the radio uses to display
messages. Each language mode will be displayed in its
own language. For example, English will be displayed
as ENGLISH, Spanish as ESPANOL, etc. If your vehicle
has the navigation system, you will not have the
Japanese language mode.
Press the OPTION button until LANGUAGE appears on
the display, then press the RESET button to scroll
through the following modes:
ENGLISH (default)
DEUTSCH (German)
FRANCAIS (French)
ITALIANO (Italian)
ESPANOL (Spanish)If you choose a language that you do not understand,
press the OPTION and RESET buttons for �ve seconds.
The DIC will begin displaying all of the various
languages one by one for as long as the buttons are
pressed. When the desired language is displayed,
release the buttons and the DIC will set to this language.
When the mode you want is selected, press the
OPTION button to set your choice and advance to the
next personal option.
Personalize Name:This option allows you to type in a
name or greeting that will appear on the DIC display
whenever the corresponding keyless access
transmitter (1 or 2) is used or one of the memory
buttons (1 or 2) located on the driver’s door is pressed.
Press the OPTION button until PERSONALIZE
NAME appears on the display, then press the RESET
button to scroll through the following modes:
YES
NO (default)
If you choose YES, you can type in a name that will
appear on the DIC display.
3-82
Page 219 of 432
To program a name, use the following procedure:
1. Enter the PERSONAL OPTIONS menu and select
the driver number (1 or 2) that you would like to
program by following the instructions listed
previously under “Entering the Personal Options
Menu”.
2. Press the OPTION button until the PERSONALIZE
NAME option appears on the display.
3. Select YES under PERSONALIZE NAME by
pressing the RESET button.
4. Press the OPTION button and a cursor will display
where you can insert a letter.
5. Press the OPTION button again until the letter you
want is displayed. To scroll through the letters faster
and without a beeping noise, keep the OPTIONS
button depressed. There are alpha/numeric
characters and a blank space available.
6. Then press the RESET button to select the letter of
your choice and proceed on to the next space to
the right.If you make a mistake and would like to clear or
replace a letter, perform the following steps:
6.1. Press the RESET button to reach the letter
you would like to change.
6.2. Press the OPTION button to scroll through
the letter choices.
6.3. Press the RESET button to select the letter
and proceed on to the next space to the right.
7. Repeat Steps 5 and 6 until the name or greeting
you want is complete. After the name or greeting
is complete, keep pressing the RESET button
until the display turns blank and exits out of this
option. You can program up to 20 characters.
If you choose NO, this option will turn off.
If a customized name or greeting is not programmed,
the DIC display will show Driver 1 or Driver 2 to
correspond with either the number on the back of the
keyless access transmitter (1 or 2) that is being used or
to the memory button (1 or 2) that is pressed.
PERSONALIZE NAME is the last option available to
program in the PERSONAL OPTIONS menu. Pressing
the OPTION button after this setting will exit you from
the PERSONAL OPTIONS menu. The last item you
were in prior to entering PERSONAL OPTIONS will then
display on the DIC.
3-83
Page 229 of 432
Playing a CD(s) (Six-Disc CD Player)
If the ignition or radio is turned off, with a CD in
the player, it stays in the player. When the ignition or
radio is turned on, the CD starts playing where it
stopped, if it was the last selected audio source.
When a CD is inserted, the CD symbol appears on
the CD. As each new track starts to play, the track
number displays.
M(Load):Press to load CDs into the CD player.
This CD player holds up to six CDs.
To insert one CD, do the following:
1. Press and release the
Mbutton.
2. When INSERT CD # displays, load a CD and
insert the CD partway into the slot, label side
up. The player pulls the CD in.
To insert multiple CDs, do the following:
1. Press and hold the
Mbutton for two seconds.
Two beeps sound and LOAD ALL DISCS displays.
2. When INSERT CD # displays, load a CD and
insert the CD partway into the slot, label side
up. The player pulls the CD in.
Once the CD is loaded, wait for INSERT CD # to
display, then load the next CD. The CD player takes
up to six CDs.To load more than one CD but less than six, complete
Steps 1 through 3. When �nished loading CDs,
press the
Mbutton to cancel the loading function.
The radio begins to play the last CD loaded.
If more than one CD has been loaded, a number for
each CD displays.
Playing a Speci�c Loaded CD
For every CD loaded, a number displays. To play a
speci�c CD press the numbered pushbutton that
corresponds to the CD.
If an error displays, see “CD Messages” later in this
section.
X(Eject):Press to eject CD(s).
To eject the CD that is currently playing, press and
release this button.
To eject multiple CDs, do the following:
1. Press and hold for two seconds.
A beep sounds and EJECT ALL displays.
2. When REMOVE DISC displays, the CD ejects and
can be removed.
To stop ejecting the CDs, press the
Mor
the
Xbutton.
3-93
Page 240 of 432
To scan presets, press and hold either the down or up
arrow for four seconds until PRESET SCAN displays and
a beep sounds. The radio goes to a station, plays for a
few seconds, then goes to the next station. Press either
the down or up arrow again to stop scanning.
When a CD is playing, press the down or up arrow to go
to the next or to the previous track.
To scan the current CD, press and hold either the down
or up arrow for more than two seconds. The CD goes to
the next track, plays the �rst 10 seconds, then goes to the
next track. Press either the down or up arrow again to
stop scanning.
To scan all of the CDs loaded, press and hold either the
down or up arrow for more than four seconds. The CD
goes to the next CD, plays the �rst 10 seconds of each
track, then goes to the next CD. Press either the down or
up arrow again to stop scanning.
e+e−(Volume):Press the plus or minus volume
button to increase or to decrease the radio volume.
1–6 (Preset Pushbuttons):Press this button to play
stations that are programmed on the radio preset
pushbuttons. The radio only seeks preset stations with a
strong signal that are in the selected band.
Radio Reception
Frequency interference and static can occur during
normal radio reception if items such as cell phone
chargers, vehicle convenience accessories, and external
electronic devices are plugged into the accessory
power outlet. If there is interference or static, unplug the
item from the accessory power outlet.
AM
The range for most AM stations is greater than for FM,
especially at night. The longer range can cause
station frequencies to interfere with each other.
For better radio reception, most AM radio stations boost
the power levels during the day, and then reduces
these levels during the night. Static can also occur when
things like storms and power lines interfere with radio
reception. When this happens, try reducing the treble on
the radio.
FM Stereo
FM stereo gives the best sound, but FM signals reach
only about 10 to 40 miles (16 to 65 km). Tall buildings or
hills can interfere with FM signals, causing the sound
to fade in and out.
3-104
Page 245 of 432
Alcohol affects four things that anyone needs to drive a
vehicle: judgment, muscular coordination, vision, and
attentiveness.
Police records show that almost 40 percent of all motor
vehicle-related deaths involve alcohol. In most cases,
these deaths are the result of someone who was
drinking and driving. In recent years, more than
17,000 annual motor vehicle-related deaths have been
associated with the use of alcohol, with about
250,000 people injured.
For persons under 21, it is against the law in every
U.S. state to drink alcohol. There are good medical,
psychological, and developmental reasons for
these laws.
The obvious way to eliminate the leading highway
safety problem is for people never to drink alcohol and
then drive.Medical research shows that alcohol in a person’s
system can make crash injuries worse, especially
injuries to the brain, spinal cord, or heart. This means
that when anyone who has been drinking — driver
or passenger — is in a crash, that person’s chance of
being killed or permanently disabled is higher than if the
person had not been drinking.
Control of a Vehicle
The following three systems help to control your vehicle
while driving — brakes, steering, and accelerator.
At times, as when driving on snow or ice, it is easy to
ask more of those control systems than the tires
and road can provide. Meaning, you can lose control of
your vehicle. SeeTraction Control System (TCS) on
page 4-6andActive Handling System on page 4-7.
Adding non-dealer/non-retailer accessories can
affect your vehicle’s performance. SeeAccessories
and Modifications on page 5-3.
4-3