2008 CHEVROLET AVEO buttons
[x] Cancel search: buttonsPage 82 of 384
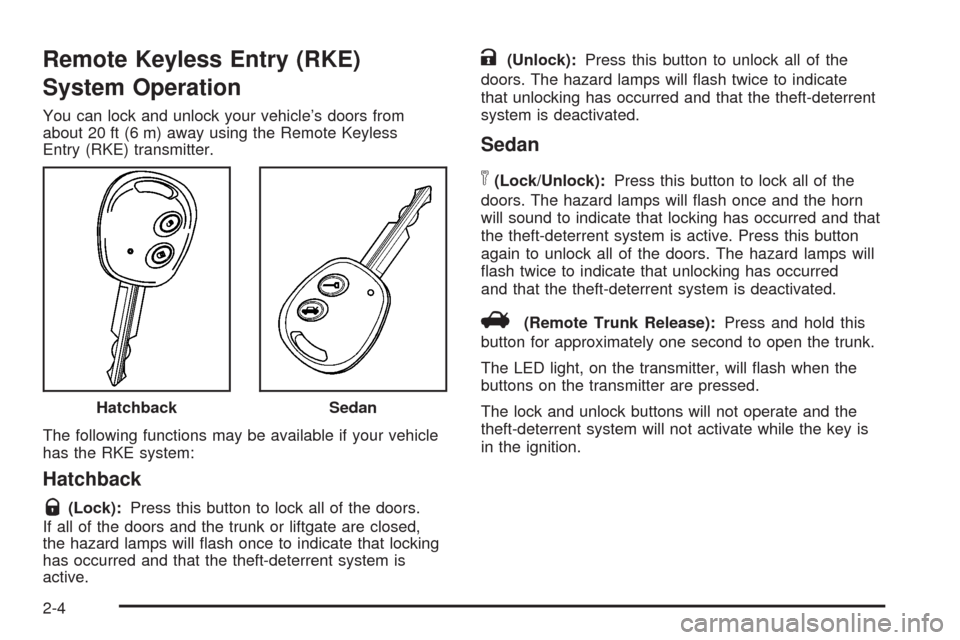
Remote Keyless Entry (RKE)
System Operation
You can lock and unlock your vehicle’s doors from
about 20 ft (6 m) away using the Remote Keyless
Entry (RKE) transmitter.
The following functions may be available if your vehicle
has the RKE system:
Hatchback
Q(Lock):Press this button to lock all of the doors.
If all of the doors and the trunk or liftgate are closed,
the hazard lamps will flash once to indicate that locking
has occurred and that the theft-deterrent system is
active.
K(Unlock):Press this button to unlock all of the
doors. The hazard lamps will flash twice to indicate
that unlocking has occurred and that the theft-deterrent
system is deactivated.
Sedan
n(Lock/Unlock):Press this button to lock all of the
doors. The hazard lamps will flash once and the horn
will sound to indicate that locking has occurred and that
the theft-deterrent system is active. Press this button
again to unlock all of the doors. The hazard lamps will
flash twice to indicate that unlocking has occurred
and that the theft-deterrent system is deactivated.
V(Remote Trunk Release):Press and hold this
button for approximately one second to open the trunk.
The LED light, on the transmitter, will flash when the
buttons on the transmitter are pressed.
The lock and unlock buttons will not operate and the
theft-deterrent system will not activate while the key is
in the ignition. Hatchback
Sedan
2-4
Page 94 of 384
How to Turn Off the System Alarm
If the system alarm is active, it can be deactivated using
one of the following methods:
•Press the lock or unlock buttons on the remote
keyless entry transmitter.
•Unlock the driver’s or passenger’s front door using
the key.
Otherwise, the alarm will automatically stop after
30 seconds. The system will then lock the doors
and rearm the theft-deterrent system.
How to Detect a Tamper Condition
If the hazard warning lamps flash once when you
press the lock or unlock buttons on the remote keyless
entry transmitter, the theft-deterrent system alarm
was activated while you were away.
Immobilizer
This device complies with Part 15 of the FCC Rules.
Operation is subject to the following two conditions:
1. This device may not cause interference.
2. This device must accept any interference received,
including interference that may cause undesired
operation.This device complies with RSS-210 of Industry Canada.
Operation is subject to the following two conditions:
1. This device may not cause interference.
2. This device must accept any interference received,
including interference that may cause undesired
operation of the device.
Changes or modifications to this system by other than
an authorized service facility could void authorization to
use this equipment.
Immobilizer Operation
Your vehicle may have a passive theft-deterrent system.
The immobilizer system prevents your vehicle from
being started by unauthorized persons.
The system is automatically armed when the key is
removed from the ignition.
You do not have to manually arm or disarm the system.
The security light will come on if there is a problem
with arming or disarming the theft-deterrent system.
If your vehicle has an immobilizer system, your vehicle
has a special key that works with the theft-deterrent
system. There is a transponder in the key head that is
electronically coded. The correct key will start the vehicle.
An invalid key immobilizes the engine. The immobilizer
system isolates the power supply to the ignition system,
the fuel pump and the fuel injectors.
2-16
Page 111 of 384
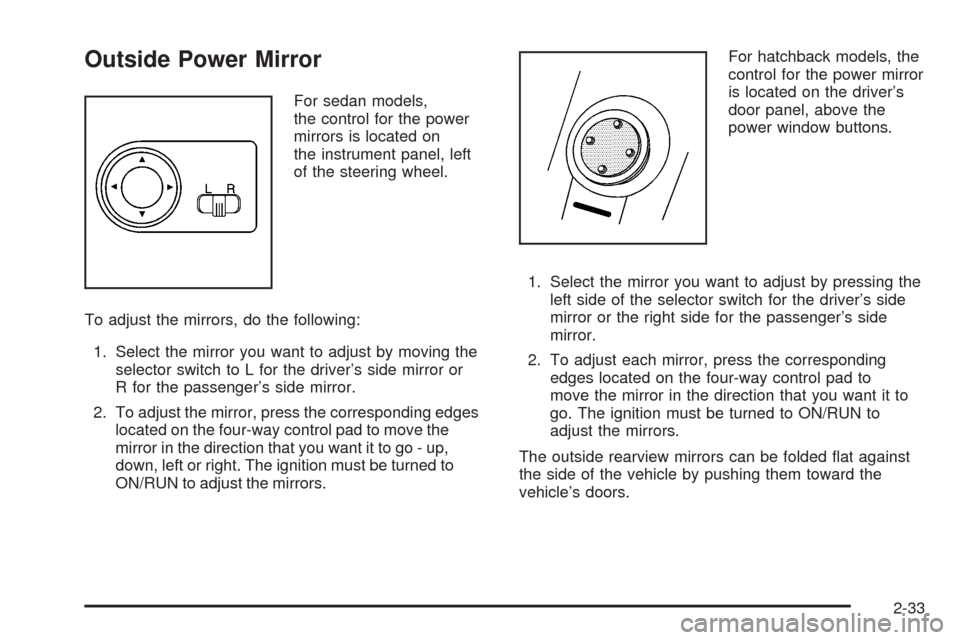
Outside Power Mirror
For sedan models,
the control for the power
mirrors is located on
the instrument panel, left
of the steering wheel.
To adjust the mirrors, do the following:
1. Select the mirror you want to adjust by moving the
selector switch to L for the driver’s side mirror or
R for the passenger’s side mirror.
2. To adjust the mirror, press the corresponding edges
located on the four-way control pad to move the
mirror in the direction that you want it to go - up,
down, left or right. The ignition must be turned to
ON/RUN to adjust the mirrors.For hatchback models, the
control for the power mirror
is located on the driver’s
door panel, above the
power window buttons.
1. Select the mirror you want to adjust by pressing the
left side of the selector switch for the driver’s side
mirror or the right side for the passenger’s side
mirror.
2. To adjust each mirror, press the corresponding
edges located on the four-way control pad to
move the mirror in the direction that you want it to
go. The ignition must be turned to ON/RUN to
adjust the mirrors.
The outside rearview mirrors can be folded flat against
the side of the vehicle by pushing them toward the
vehicle’s doors.
2-33
Page 134 of 384

Clock
If you have a sedan there is a digital clock located in
the center of the instrument panel, above the center air
outlets. When the ignition is turned to ACC/ACCESSORY
or ON/RUN, the time is displayed in the digital clock.
There are three adjusting buttons for the digital clock:
H (Hour):To go forward one hour, press the H button
once. To go forward more than one hour, press and hold
the button until the correct hour is reached.
M (Minute):To go forward one minute, press the
M button once. To go forward more than one minute,
press and hold the button until the correct minute
is reached.
S (Set):To reset the time to the nearest hour, press the
S button.
For example, if the set button is pressed while the time
is between 8:00 and 8:29, the display is set to 8:00.
If this button is pressed while the time is between 8:30
and 8:59, the display is set to 9:00.
After disconnecting the battery or replacing the fuse,
reset the clock.
If you have a hatchback there is a clock located in the
Secondary Information Center (SIC), seeSecondary
Information Center (SIC) (Hatchback Only) on
page 3-43.
Climate Controls
Climate Control System
The heating, cooling, and ventilation for your vehicle
can be controlled with this system.
Uplevel shown, Base similar, Hatchback only
3-20
Page 158 of 384
Clock (Hatchback Only)
Your vehicle has a digital clock. The clock is located
in the secondary instrument cluster on the center of the
instrument panel, above the center air outlets. When
the ignition is turned to ACC/ACCESSORY or ON/RUN,
the time is displayed in the digital clock. There are
two adjusting buttons for the digital clock:
H (Hour):To go forward one hour, press the H button
once. To go forward more than one hour, press and
hold the button until the correct hour is reached.
M (Minute):To go forward one minute, press the
M button once. To go forward more than one minute,
press and hold the button until the correct minute
is reached.
After disconnecting the battery or replacing the fuse,
reset the clock.
Safety Belt Reminders
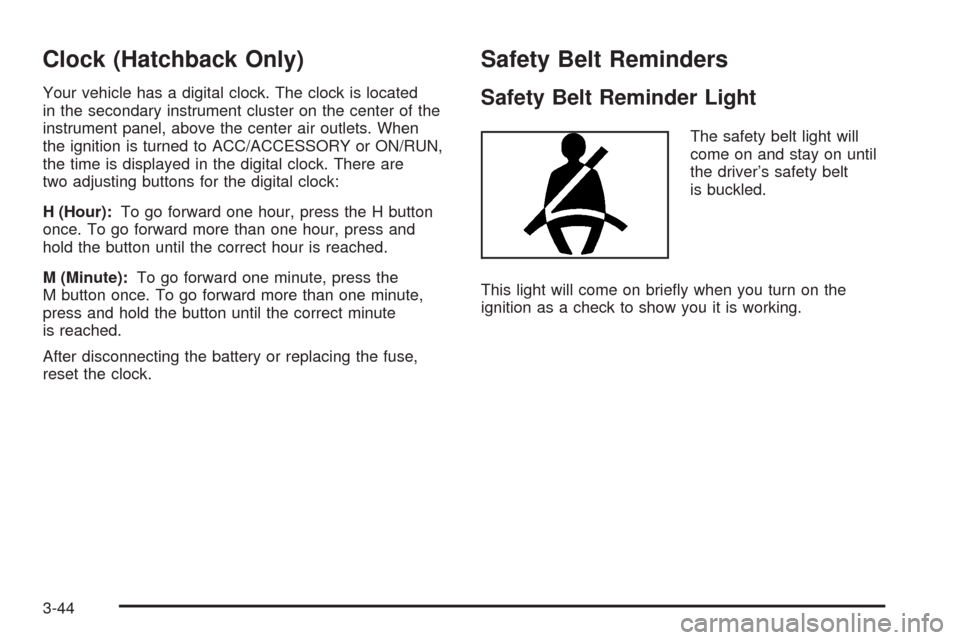
Safety Belt Reminder Light
The safety belt light will
come on and stay on until
the driver’s safety belt
is buckled.
This light will come on briefly when you turn on the
ignition as a check to show you it is working.
3-44
Page 169 of 384
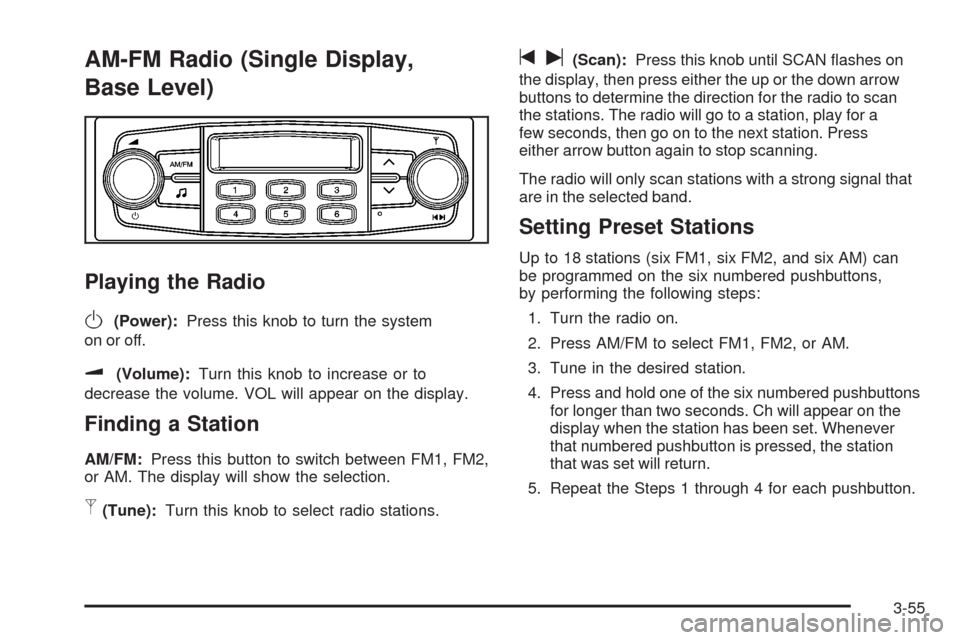
AM-FM Radio (Single Display,
Base Level)
Playing the Radio
O
(Power):Press this knob to turn the system
on or off.
u(Volume):Turn this knob to increase or to
decrease the volume. VOL will appear on the display.
Finding a Station
AM/FM:Press this button to switch between FM1, FM2,
or AM. The display will show the selection.
p(Tune):Turn this knob to select radio stations.
tu(Scan):Press this knob until SCAN flashes on
the display, then press either the up or the down arrow
buttons to determine the direction for the radio to scan
the stations. The radio will go to a station, play for a
few seconds, then go on to the next station. Press
either arrow button again to stop scanning.
The radio will only scan stations with a strong signal that
are in the selected band.
Setting Preset Stations
Up to 18 stations (six FM1, six FM2, and six AM) can
be programmed on the six numbered pushbuttons,
by performing the following steps:
1. Turn the radio on.
2. Press AM/FM to select FM1, FM2, or AM.
3. Tune in the desired station.
4. Press and hold one of the six numbered pushbuttons
for longer than two seconds. Ch will appear on the
display when the station has been set. Whenever
that numbered pushbutton is pressed, the station
that was set will return.
5. Repeat the Steps 1 through 4 for each pushbutton.
3-55
Page 171 of 384

The previous volume setting is maintained whenever
the radio is turned on. The volume can be adjusted by
using the volume knob.
Finding a Station
AM/AUX:Press this button to play an AM station while
a portable audio device is playing. Press this button
again and the system will begin playing audio from the
connected portable audio player. If a portable audio
player is not connected, “no input device found” will be
displayed.
FM:Press this button to switch between FM1 or FM2.
The display will show the selection.
¦¥SEEK:Press the up or down SEEK arrow to go
to the next or to the previous station and stay there.
The radio will only seek stations with a strong signal that
are in the selected band.
¦¥TUNE:Press the up or down TUNE arrow to go
to the next or to the previous radio station.
SCAN:Push and release this button to scan radio
stations. The radio will go to a station, play for a
few seconds, then go on to the next station.
Push this button again to stop scanning.
The radio will only scan stations with a strong signal
that are in the selected band.
Setting Preset Stations
Up to 36 stations (six FM1, six FM2, six FM-A and
six AM1, six AM2, six AM-A), can be programmed on
the six numbered pushbuttons, by performing the
following steps:
1. Turn the radio on.
2. Press AM/AUX to select AM1, AM2, or AM-A.
Press FM to select FM1, FM2 or FM-A.
3. Tune in the desired station.
4. Press and hold one of the six numbered
pushbuttons for longer than two seconds.
The channel number (CH#1 through CH#6) will
flash on the display when the station has been set.
Whenever that numbered preset button is
pressed, the station that was set will return.
5. Repeat the first four steps for each preset button.
AST (Automatic Store):Six FM1 preset stations with
the strongest reception in the region can be automatically
stored. Press the AST button for longer than one second.
The display will show AUTO SCANNING and then
SCANNING will flash on display. Once the stations are
stored, the radio will switch to FM1 and the first preset
station will begin to play. FM-A will appear on the display
when listening to the automatic stored stations. Press the
AM or FM button to cancel automatic store.
3-57
Page 175 of 384
AST (Automatic Store)
Six FM1 preset stations with the strongest reception in
the region can be automatically stored. Press the AST
button for more than two seconds. The display shows
AUTO SCANNING and then SCANNING flashes on the
display. Once the stations are stored, the radio switches
to FM1 and the first preset station begins to play. FM-A
displays while listening to the automatic stored stations.
Press the AM or FM button to cancel automatic store.
Setting Preset Stations
Up to 24 stations (six FM1, six FM2, six AM1, and
six AM2), can be programmed on the six numbered
buttons, by performing the following steps:
1. Turn the radio on.
2. Press the AM or FM button to select FM1, FM2,
AM1 or AM2.
3. Tune in the desired station.
4. Press and hold one of the six numbered buttons for
more than two seconds. The preset button number
one through six flashes on the display when the
station has been set. When that numbered preset
button is pressed, that preset station returns.
5. Repeat the Steps 1 through 4 for each preset
button.
Order of Sound Function
The order for displayed sound function is BASS, TRE,
BAL, FADE, EQ OFF, and VOL (Bass, Treble, Fade,
Balance, Equalization Off, and Volume).
Setting the Tone (Bass/Treble)
SOUND (Bass/Treble):Press this button until
BAS (bass) displays. Turn the
Oknob to increase or
to decrease the bass. The display shows the bass level.
After making the selection, press this button to set the
bass level selection.
Press this button until TRE (treble) displays.
Turn the
Oknob to increase or to decrease the treble.
The display shows the treble level. After making the
selection, press this button to set the treble level
selection. If a station is weak or has static, decrease
the treble.
3-61