2008 CHEVROLET AVEO Clutch
[x] Cancel search: ClutchPage 97 of 384
Starting the Engine
Automatic Transmission
Move the shift lever to PARK (P) or NEUTRAL (N).
The engine will not start in any other position — that
is a safety feature. To restart when you are already
moving, use NEUTRAL (N) only.
Notice:Do not try to shift to PARK (P) if your
vehicle is moving. If you do, you could damage the
transmission. Shift to PARK (P) only when your
vehicle is stopped.
Manual Transmission
The shift lever should be in NEUTRAL and the parking
brake engaged. Hold the clutch pedal to the floor and
start the engine. Your vehicle will not start if the clutch
pedal is not all the way down — that is a safety feature.
Starting Procedure
1. With your foot off the accelerator pedal, turn the
ignition to START. When the engine starts, let go
of the key. The idle speed will go down as your
engine gets warm.
Notice:Holding your key in START for longer than
15 seconds at a time will cause your battery to be
drained much sooner. And the excessive heat can
damage your starter motor. Wait about 15 seconds
between each try to help avoid draining your battery
or damaging your starter.
2. If it does not start, wait about 15 seconds and try
again to start the engine by turning the ignition to
START. Wait about 15 seconds between each try.
When the engine has run about 10 seconds to
warm up, your vehicle is ready to be driven.
Do not run your engine at high speed when
it is cold.
If the weather is below freezing (32°F or 0°C),
let the engine run for a few minutes to warm up.
2-19
Page 103 of 384
Manual Transmission Operation
Five-Speed
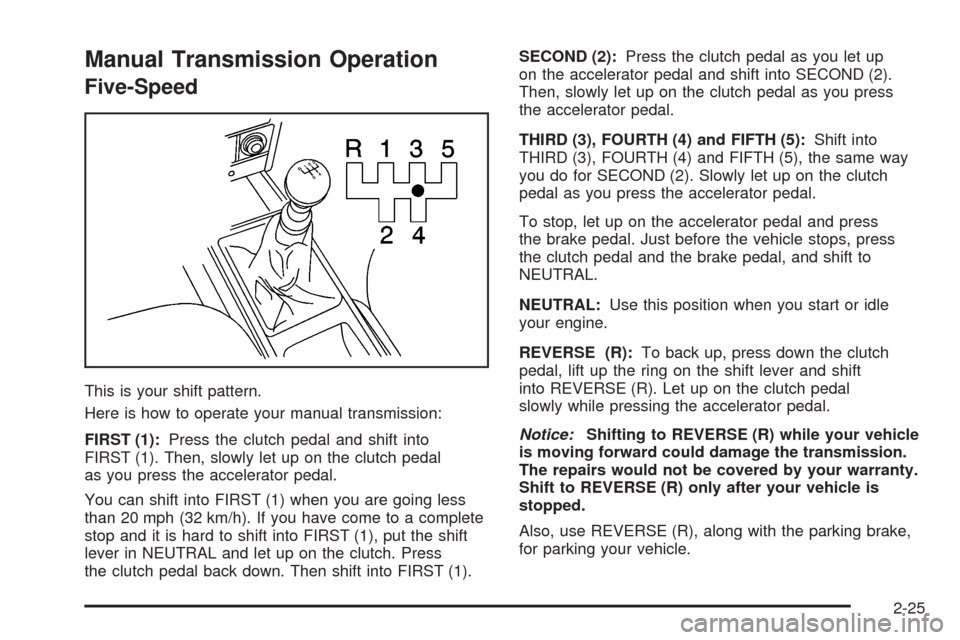
This is your shift pattern.
Here is how to operate your manual transmission:
FIRST (1):Press the clutch pedal and shift into
FIRST (1). Then, slowly let up on the clutch pedal
as you press the accelerator pedal.
You can shift into FIRST (1) when you are going less
than 20 mph (32 km/h). If you have come to a complete
stop and it is hard to shift into FIRST (1), put the shift
lever in NEUTRAL and let up on the clutch. Press
the clutch pedal back down. Then shift into FIRST (1).SECOND (2):Press the clutch pedal as you let up
on the accelerator pedal and shift into SECOND (2).
Then, slowly let up on the clutch pedal as you press
the accelerator pedal.
THIRD (3), FOURTH (4) and FIFTH (5):Shift into
THIRD (3), FOURTH (4) and FIFTH (5), the same way
you do for SECOND (2). Slowly let up on the clutch
pedal as you press the accelerator pedal.
To stop, let up on the accelerator pedal and press
the brake pedal. Just before the vehicle stops, press
the clutch pedal and the brake pedal, and shift to
NEUTRAL.
NEUTRAL:Use this position when you start or idle
your engine.
REVERSE (R):To back up, press down the clutch
pedal, lift up the ring on the shift lever and shift
into REVERSE (R). Let up on the clutch pedal
slowly while pressing the accelerator pedal.
Notice:Shifting to REVERSE (R) while your vehicle
is moving forward could damage the transmission.
The repairs would not be covered by your warranty.
Shift to REVERSE (R) only after your vehicle is
stopped.
Also, use REVERSE (R), along with the parking brake,
for parking your vehicle.
2-25
Page 107 of 384
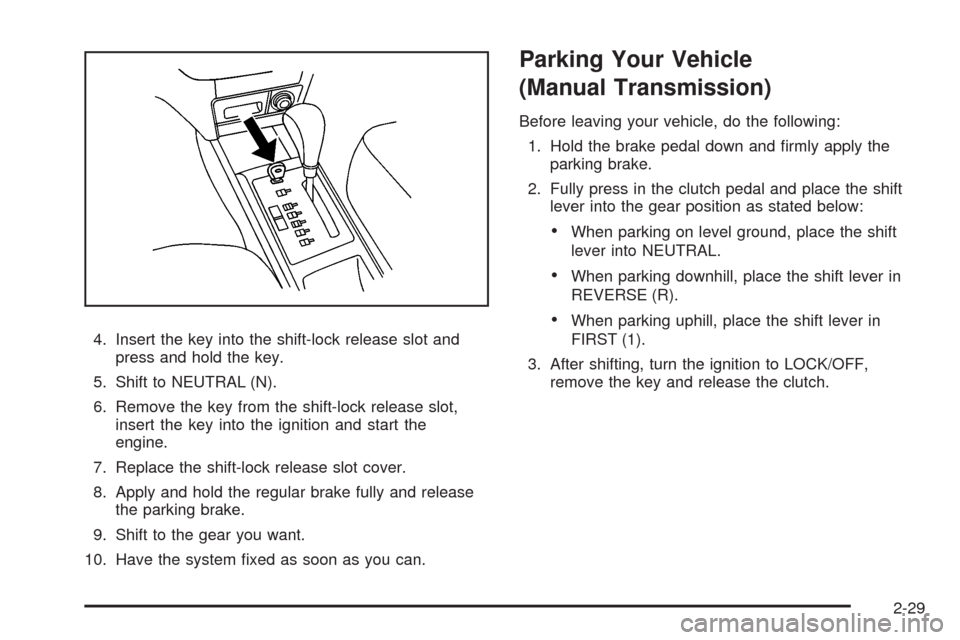
4. Insert the key into the shift-lock release slot and
press and hold the key.
5. Shift to NEUTRAL (N).
6. Remove the key from the shift-lock release slot,
insert the key into the ignition and start the
engine.
7. Replace the shift-lock release slot cover.
8. Apply and hold the regular brake fully and release
the parking brake.
9. Shift to the gear you want.
10. Have the system fixed as soon as you can.
Parking Your Vehicle
(Manual Transmission)
Before leaving your vehicle, do the following:
1. Hold the brake pedal down and firmly apply the
parking brake.
2. Fully press in the clutch pedal and place the shift
lever into the gear position as stated below:
•When parking on level ground, place the shift
lever into NEUTRAL.
•When parking downhill, place the shift lever in
REVERSE (R).
•When parking uphill, place the shift lever in
FIRST (1).
3. After shifting, turn the ignition to LOCK/OFF,
remove the key and release the clutch.
2-29
Page 127 of 384
Cruise Control
If your vehicle has cruise control, a speed of about
24 mph (39 km/h) or more can be maintained without
keeping your foot on the accelerator. This can really help
on long trips. Cruise control does not work at speeds
below 24 mph (39 km/h).
When the brakes are applied, or the clutch pedal if you
have a manual transmission, the cruise control turns off.
{CAUTION:
Cruise control can be dangerous where you
cannot drive safely at a steady speed. So, do
not use your cruise control on winding roads
or in heavy traffic.
Cruise control can be dangerous on slippery
roads. On such roads, fast changes in tire
traction can cause excessive wheel slip, and
you could lose control. Do not use cruise
control on slippery roads.
Setting Cruise Control
{CAUTION:
If you leave your cruise control on when you
are not using cruise, you might hit a button
and go into cruise when you do not want to.
You could be startled and even lose control.
Keep the cruise control switch off until you
want to use cruise control.
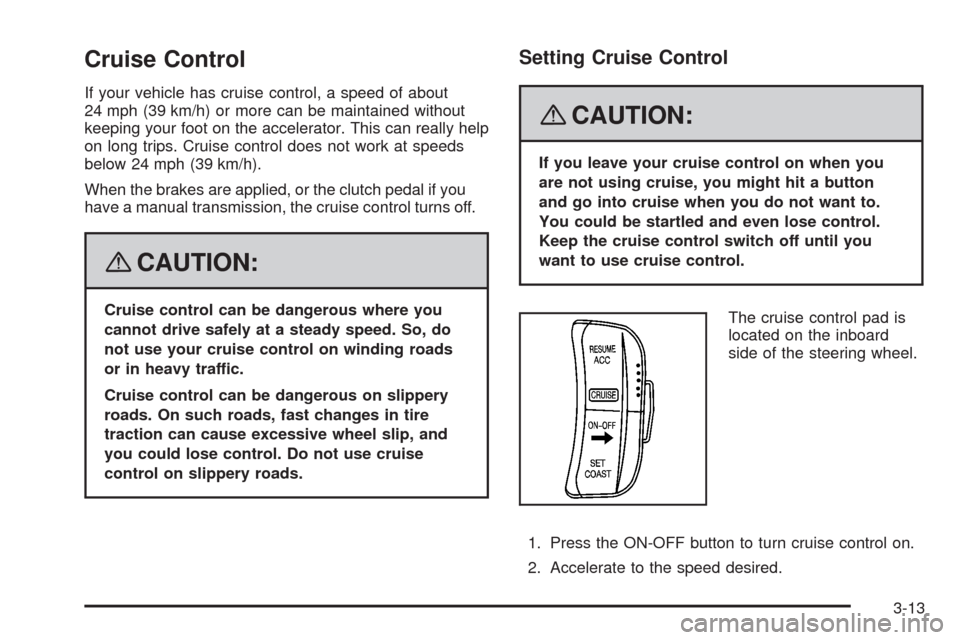
The cruise control pad is
located on the inboard
side of the steering wheel.
1. Press the ON-OFF button to turn cruise control on.
2. Accelerate to the speed desired.
3-13
Page 128 of 384
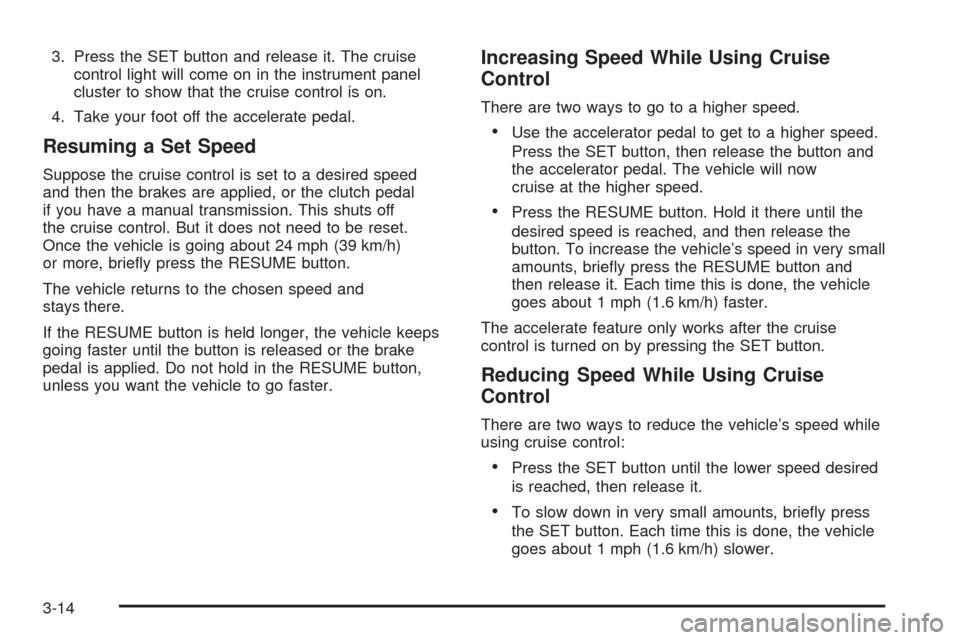
3. Press the SET button and release it. The cruise
control light will come on in the instrument panel
cluster to show that the cruise control is on.
4. Take your foot off the accelerate pedal.
Resuming a Set Speed
Suppose the cruise control is set to a desired speed
and then the brakes are applied, or the clutch pedal
if you have a manual transmission. This shuts off
the cruise control. But it does not need to be reset.
Once the vehicle is going about 24 mph (39 km/h)
or more, briefly press the RESUME button.
The vehicle returns to the chosen speed and
stays there.
If the RESUME button is held longer, the vehicle keeps
going faster until the button is released or the brake
pedal is applied. Do not hold in the RESUME button,
unless you want the vehicle to go faster.
Increasing Speed While Using Cruise
Control
There are two ways to go to a higher speed.
•Use the accelerator pedal to get to a higher speed.
Press the SET button, then release the button and
the accelerator pedal. The vehicle will now
cruise at the higher speed.
•Press the RESUME button. Hold it there until the
desired speed is reached, and then release the
button. To increase the vehicle’s speed in very small
amounts, briefly press the RESUME button and
then release it. Each time this is done, the vehicle
goes about 1 mph (1.6 km/h) faster.
The accelerate feature only works after the cruise
control is turned on by pressing the SET button.
Reducing Speed While Using Cruise
Control
There are two ways to reduce the vehicle’s speed while
using cruise control:
•Press the SET button until the lower speed desired
is reached, then release it.
•To slow down in very small amounts, briefly press
the SET button. Each time this is done, the vehicle
goes about 1 mph (1.6 km/h) slower.
3-14
Page 129 of 384
Passing Another Vehicle While Using
Cruise Control
Use the accelerator pedal to increase the vehicle’s
speed. When you take your foot off the pedal, the
vehicle will slow down to the cruise control speed
set earlier.
Using Cruise Control on Hills
How well the cruise control works on hills depends upon
the vehicle speed, load, and the steepness of the hills.
When going up steep hills, you might have to step on the
accelerator pedal to maintain the vehicle’s speed. When
going downhill, you might have to brake or shift to a lower
gear to keep the vehicle’s speed down. Applying the
brake pedal will turn off the cruise control. Many drivers
find this to be too much trouble and do not use cruise
control on steep hills.
Ending Cruise Control
There are two ways to turn off the cruise control:
•Step lightly on the brake pedal, or press the clutch
pedal, if you have a manual transmission.
•Press the ON OFF button on the cruise control pad.
Erasing Speed Memory
The cruise control set speed memory is erased, when
the cruise control or the ignition is turned off.
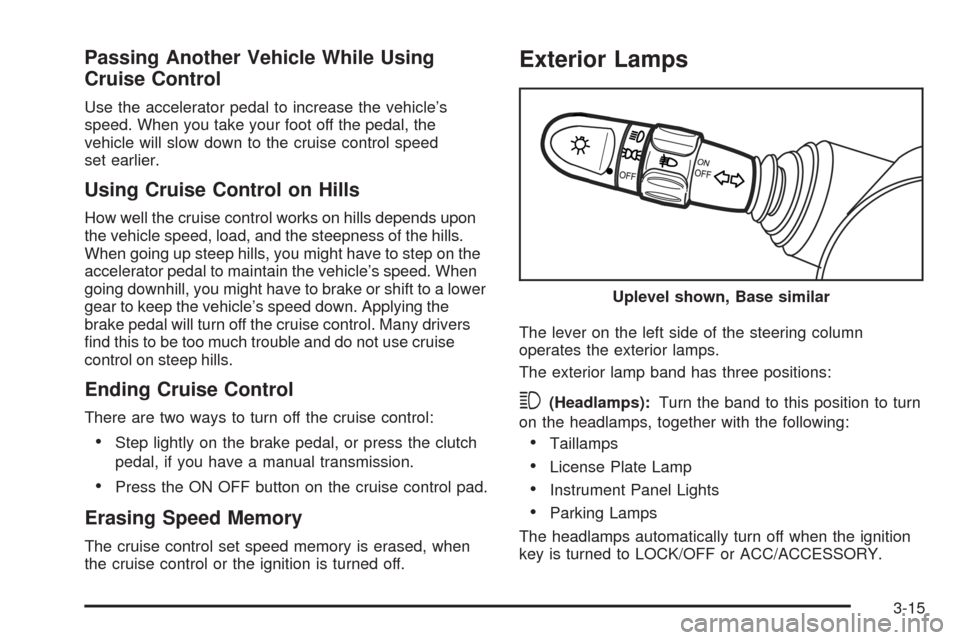
Exterior Lamps
The lever on the left side of the steering column
operates the exterior lamps.
The exterior lamp band has three positions:
3(Headlamps):Turn the band to this position to turn
on the headlamps, together with the following:
•Taillamps
•License Plate Lamp
•Instrument Panel Lights
•Parking Lamps
The headlamps automatically turn off when the ignition
key is turned to LOCK/OFF or ACC/ACCESSORY.Uplevel shown, Base similar
3-15
Page 223 of 384

Service............................................................5-3
Accessories and Modifications..........................5-3
California Proposition 65 Warning.....................5-4
California Perchlorate Materials Requirements.....5-4
Doing Your Own Service Work.........................5-4
Adding Equipment to the Outside
of Your Vehicle...........................................5-5
Fuel................................................................5-5
Gasoline Octane............................................5-5
Gasoline Specifications....................................5-5
California Fuel...............................................5-6
Additives.......................................................5-6
Fuels in Foreign Countries...............................5-7
Filling the Tank..............................................5-7
Filling a Portable Fuel Container.......................5-9
Checking Things Under the Hood....................5-10
Hood Release..............................................5-10
Engine Compartment Overview.......................5-12
Engine Oil...................................................5-13
Engine Air Cleaner/Filter................................5-17
Automatic Transmission Fluid.........................5-19
Manual Transmission Fluid.............................5-21
Hydraulic Clutch...........................................5-21
Engine Coolant.............................................5-22
Coolant Surge Tank Pressure Cap..................5-25
Engine Overheating.......................................5-25
Cooling System............................................5-26Power Steering Fluid.....................................5-30
Windshield Washer Fluid................................5-31
Brakes........................................................5-32
Battery........................................................5-35
Jump Starting...............................................5-36
Headlamp Aiming...........................................5-40
Bulb Replacement..........................................5-41
Halogen Bulbs
..............................................5-41
Headlamps (Hatchback).................................5-41
Headlamps (Sedan)......................................5-42
Front Turn Signal and Parking Lamps
(Hatchback)..............................................5-43
Front Turn Signal and Parking Lamps (Sedan).....5-44
Turn Signal Lamps (Side)..............................5-45
Center High-Mounted Stoplamp (CHMSL)
(Sedan)...................................................5-46
Taillamps, Turn Signal, Stoplamps and
Back-up Lamps.........................................5-47
License Plate Lamp......................................5-48
Replacement Bulbs.......................................5-48
Windshield Wiper Blade Replacement..............5-49
Tires..............................................................5-50
Tire Sidewall Labeling...................................5-51
Tire Terminology and Definitions.....................5-54
Inflation - Tire Pressure.................................5-57
Tire Pressure Monitor System.........................5-58
Tire Pressure Monitor Operation.....................5-60
Section 5 Service and Appearance Care
5-1
Page 235 of 384
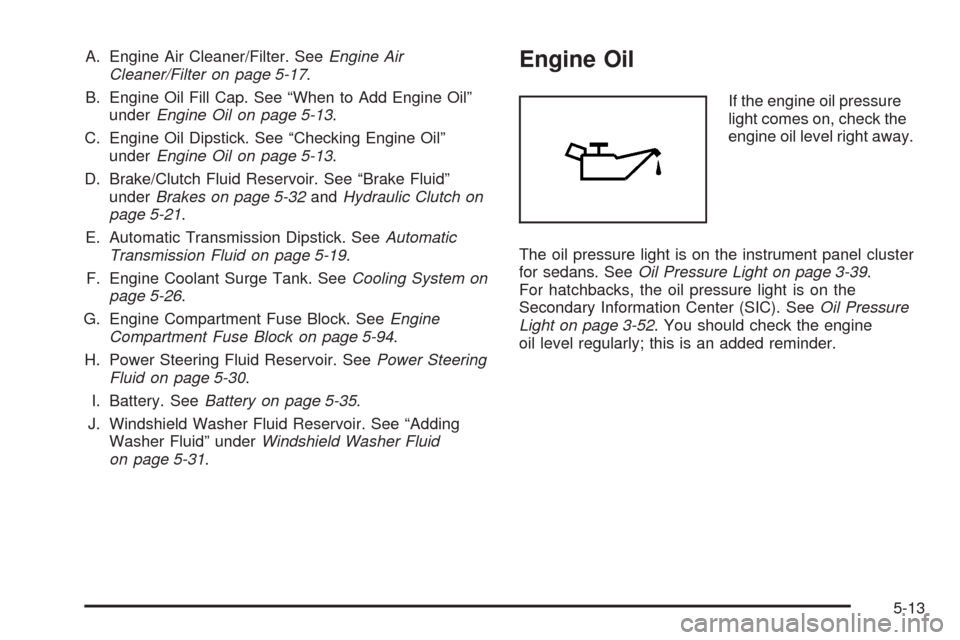
A. Engine Air Cleaner/Filter. SeeEngine Air
Cleaner/Filter on page 5-17.
B. Engine Oil Fill Cap. See “When to Add Engine Oil”
underEngine Oil on page 5-13.
C. Engine Oil Dipstick. See “Checking Engine Oil”
underEngine Oil on page 5-13.
D. Brake/Clutch Fluid Reservoir. See “Brake Fluid”
underBrakes on page 5-32andHydraulic Clutch on
page 5-21.
E. Automatic Transmission Dipstick. SeeAutomatic
Transmission Fluid on page 5-19.
F. Engine Coolant Surge Tank. SeeCooling System on
page 5-26.
G. Engine Compartment Fuse Block. SeeEngine
Compartment Fuse Block on page 5-94.
H. Power Steering Fluid Reservoir. SeePower Steering
Fluid on page 5-30.
I. Battery. SeeBattery on page 5-35.
J. Windshield Washer Fluid Reservoir. See “Adding
Washer Fluid” underWindshield Washer Fluid
on page 5-31.Engine Oil
If the engine oil pressure
light comes on, check the
engine oil level right away.
The oil pressure light is on the instrument panel cluster
for sedans. SeeOil Pressure Light on page 3-39.
For hatchbacks, the oil pressure light is on the
Secondary Information Center (SIC). SeeOil Pressure
Light on page 3-52. You should check the engine
oil level regularly; this is an added reminder.
5-13