Page 87 of 165
ing off the ignition and/or dur-
ing the restart operation, the
on-board socket is switched
off to take the load off the
vehicle electrical system.Cable routingThe cables from the power
socket to the auxiliary device
must be routed in such a way
that they:Do not impede the rider
Do not restrict or obstruct
the steering angle and
handling characteristics
Cannot be trapped
Incorrectly routed cables
can impede the rider.
Route the cables as
described above.
685zAccessories
Page 104 of 165

workshop, preferably an
authorised BMW Motorrad
dealer.WheelsApproved wheels and
tyresFor each size of tyre BMW
Motorrad tests certain makes,
and approves those that it
certifies as roadworthy. If
BMW Motorrad has not ap-
proved the wheels and tyres,
it cannot assess their suitab-
ility or provide any guarantee
of road safety.
Use only wheels and tyres
approved by BMW Motorrad
for your type of motorcycle.
You can obtain detailed in-
formation from your author-
ised BMW Motorrad dealer or
on the Internet at www.bmw-
motorrad.com.
Removing front wheelPlace the motorcycle on an
auxiliary stand; BMW re-
commends the BMW Motor-
rad rear-wheel stand.
Install the rear wheel stand.
with OA Centre stand:
Make sure the ground is
level and firm and place
the motorcycle on its centre
stand.
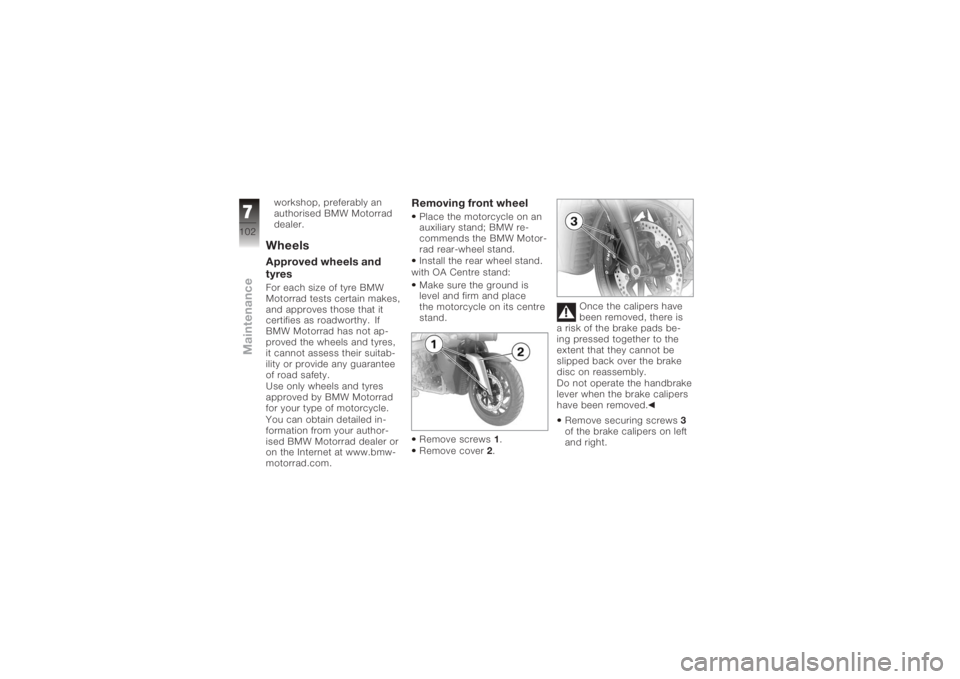
Remove screws 1.
Remove cover 2. Once the calipers have
been removed, there is
a risk of the brake pads be-
ing pressed together to the
extent that they cannot be
slipped back over the brake
disc on reassembly.
Do not operate the handbrake
lever when the brake calipers
have been removed.
Remove securing screws 3
of the brake calipers on left
and right.
7102zMaintenance
Page 109 of 165
is perceptible, and repeat
this operation several times.Removing rear wheelPlace the motorcycle on an
auxiliary stand; BMW re-
commends the BMW Motor-
rad rear-wheel stand.
Install the rear wheel stand.
with OA Centre stand:
Make sure the ground is
level and firm and place
the motorcycle on its centre
stand. Remove screw
1from silen-
cer cover 2.
Pull the cover to the rear to
remove.
Remove clamp 3from the
silencer. Do not remove the sealing
grease from the clamp.
Remove screw
4for the
bracket of the end silencer
from the rear footrest.
Turn the end silencer out.
Engage first gear.
7107zMaintenance
Page 112 of 165

If the gap between the
rear wheel and the end
silencer is too small, the rear
wheel can overheat.
The clearance between the
rear wheel and the end silen-
cer must be at least 15 mm.
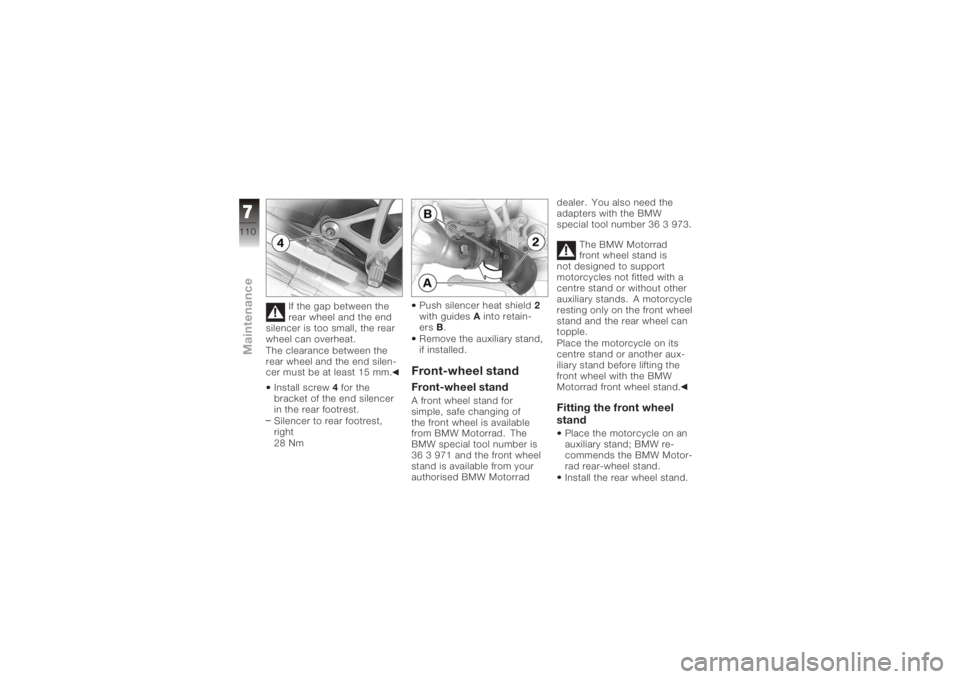
Install screw 4for the
bracket of the end silencer
in the rear footrest.
Silencer to rear footrest,
right
28 Nm Push silencer heat shield
2
with guides Ainto retain-
ers B.
Remove the auxiliary stand,
if installed.
Front-wheel standFront-wheel standA front wheel stand for
simple, safe changing of
the front wheel is available
from BMW Motorrad. The
BMW special tool number is
36 3 971 and the front wheel
stand is available from your
authorised BMW Motorrad dealer. You also need the
adapters with the BMW
special tool number 36 3 973.
The BMW Motorrad
front wheel stand is
not designed to support
motorcycles not fitted with a
centre stand or without other
auxiliary stands. A motorcycle
resting only on the front wheel
stand and the rear wheel can
topple.
Place the motorcycle on its
centre stand or another aux-
iliary stand before lifting the
front wheel with the BMW
Motorrad front wheel stand.
Fitting the front wheel
standPlace the motorcycle on an
auxiliary stand; BMW re-
commends the BMW Motor-
rad rear-wheel stand.
Install the rear wheel stand.
7110zMaintenance
Page 114 of 165
Rear wheel standRear wheel standBMW Motorrad offers an aux-
iliary stand for holding mo-
torcycles (including those
without centre stands) se-
curely upright for mainten-
ance work. The BMW special
tool number is 36 3 980 and
the auxiliary stand is avail-
able from your authorised
BMW Motorrad dealer.
Fitting the rear wheel
standUse screws1to set the
rear-wheel stand to the de-
sired height.
Remove retaining disc 2.To
do so, press release but-
ton 3. Push the rear wheel stand
from the left into the rear
axle.
Apply the retaining disc
from the right; to do so,
press the unlock button.
Place your left hand on the
left grab handle of the mo-
torcycle
4, and your right
hand on the lever of the rear
wheel stand 5.
7112zMaintenance