Page 15 of 165
General view, right
side1Indicator for engine oil
level ( 93)
2 Filler neck, fuel ( 78)
3 Battery compartment
( 121)
4 Brake-fluid reservoir,
front ( 97)
5 Type plate
6 Vehicle identification
number
7 Brake-fluid reservoir, rear
( 99)
213zGeneral views
Page 29 of 165
ist workshop, preferably an
authorised BMW Motorrad
dealer.
Engine electronics General warning light
lights up yellow.
Engine electronics sym-
bol appears on the dis-
play.
The engine is running
in emergency operating
mode. Engine power might
be reduced and this can
cause hazardous situations,
particularly if you attempt to
overtake other road users.
Engine power level might be
lower than normal: adapt your
style of riding accordingly.
The engine electronics control
unit has diagnosed a fault. In
exceptional cases, the engine
stops and refuses to start. Otherwise, the engine runs in
emergency operating mode.
You can continue to ride,
but bear in mind that the
usual engine power might
not be available.
Have the fault rectified as
soon as possible by a spe-
cialist workshop, preferably
an authorised BMW Motor-
rad dealer.
Insufficient engine oil pres-
sure General warning light
lights up red.
Engine oil pressure sym-
bol appears on the dis-
play.
The oil pressure in the lube-
oil system is too low.
The insufficient oil
pressure warning does
not fulfil the function of an
oil gauge. The only way of checking whether the oil level
is correct is to check the oil
sight glass.
A low oil level is one reason
why a warning indicating in-
sufficient oil pressure is is-
sued.
Checking the engine oil
level ( 93)
Topping up the engine oil
( 94)
If the warning indicating in-
sufficient engine oil level is
issued and a check indicates
that the engine oil level is cor-
rect: Other engine problems
besides a low oil level
can cause the insufficient en-
gine oil pressure warning to
be issued. Continuing to ride
in these cases can cause en-
gine damage.
If this warning is issued even
though the engine oil level is
327zStatus indicators
Page 46 of 165
Average consumption
Oil level
Ambient temperatureResidual rangeYou can also view residual
range1before the fuel level
drops to reserve. The de-
scription of how to read the
residual range in the section
on the Tripmaster ( 42) also
applies to the on-board com-
puter.
Calculating average
speedAverage speed 1is calculated
on basis of the time elapsed
since the last RESET. Times
during which the engine was
stopped are excluded from
the calculation.
Resetting average speedRepeatedly press BC
button 1until the average
speed appears in the
display.
Hold the BC button down
for at least 2 seconds (RE-
SET).
The display shows "---.--
km"
444zOperation
Page 66 of 165
components are not designed
to withstand. Damage caused
in this way is not covered by
the warranty.
Do not tamper with the
control unit of the electronic
engine-management
system.ChecklistUse the following checklist
to check important functions,
settings and wear limits be-
fore you ride off.Brakes
Brake-fluid levels, front and
rear
Clutch
Clutch fluid level
Shock absorber setting and
spring preload
Tyre-tread depth and tyre
pressures Cases correctly installed
and luggage secured
At regular intervals: Engine oil level (every refuel-
ling stop)
Brake-pad wear (every third
refuelling stop)
StartingSide standYou cannot start the motor-
cycle with the side stand ex-
tended and a gear engaged.
The engine will switch itself
off if you start it with the gear-
box in neutral and then en-
gage a gear before retracting
the side stand.GearboxYou can start the engine
when the gearbox is in neutral
or if you pull the clutch with a
gear engaged. Switch on the
ignition before you pull the clutch. When the gearbox is
in neutral, the green neutral
telltale light is on and the gear
indicator in the multifunction
display shows 0.
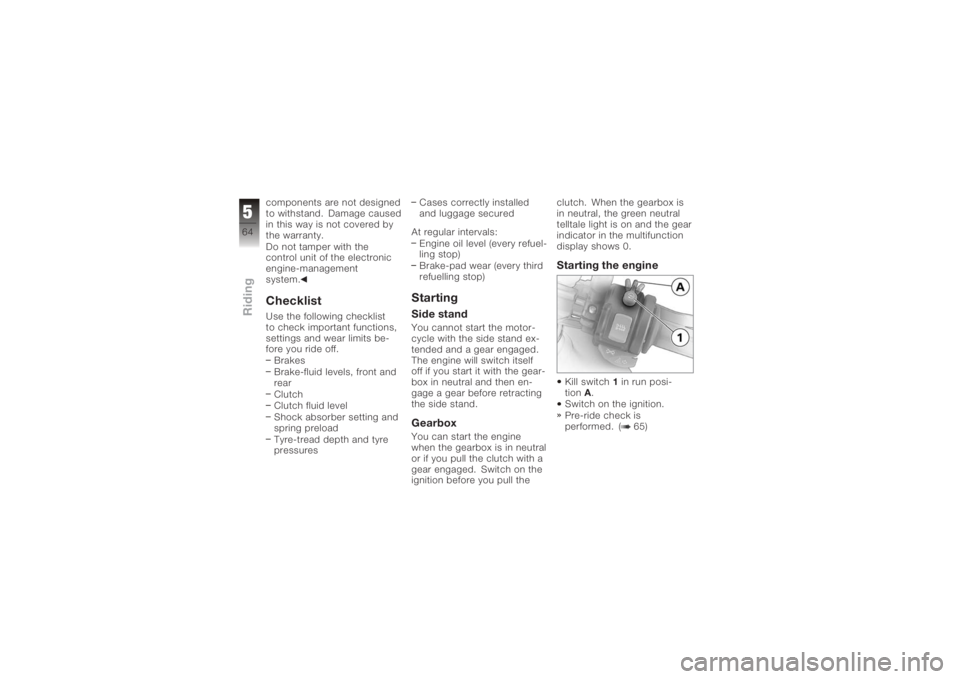
Starting the engineKill switch
1in run posi-
tion A.
Switch on the ignition.
Pre-ride check is
performed. ( 65)
564zRiding
Page 95 of 165
4Open-ended spanner,
w/f 17
5 TORX wrenches, T40,
T45, T50Engine oilChecking the engine oil
level
The engine can seize if
the oil level is low, and
this can lead to accidents.
Always make sure that the oil
level is correct.
Oil can collect in the
sump if the motorcycle
is out of use for an extended
period of time; this oil has to
be pumped into the oil tank
before the level is read. The
engine oil must be at oper-
ating temperature to do this.
Checking the oil level with the
engine cold or after no more
than a short ride will lead to
misinterpretation; this in turn, means that the engine will be
operated with the incorrect
quantity of oil.
In order to ensure that the en-
gine oil level is read correctly,
check the oil level only after a
lengthy trip.
The oil level varies with
the temperature of the
oil. The higher the temperat-
ure the higher the oil level in
the oil tank. Check the engine
oil level immediately after a
lengthy journey.
Make sure the engine is at
operating temperature and
hold the motorcycle upright.
with OA Centre stand:
Check that the engine is
at operating temperature,
make sure the ground is
level and firm and place
the motorcycle on its centre
stand. Allow the engine to idle for
one minute.
Switch off the ignition.
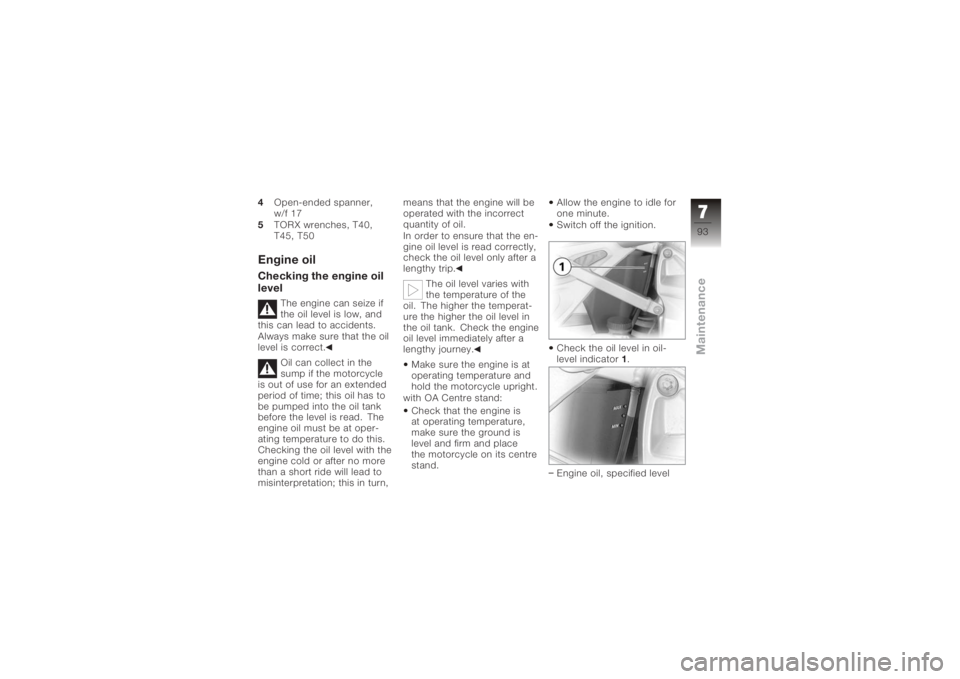
Check the oil level in oil-
level indicator
1.
Engine oil, specified level
793zMaintenance
Page 96 of 165
Between MIN and MAX
marks
If the oil level is below the
MIN mark: Top up the engine oil.
If the oil level is above the
MAX mark: Drain off the engine oil.Topping up the engine oilMake sure the ground is
level and firm and place the
motorcycle on its stand.
Removing the seat ( 51) Damage to the engine
can result if it is oper-
ated without enough oil, but
the same also applies if the oil
level is too high.
Always make sure that the oil
level is correct.
Wipe the area around the
filler neck clean.
Unscrew cap of engine oil
filler neck 1.
Top up the engine oil to the
specified level.
Draining engine oilRemoving the seat ( 51)
Squeeze the retainer of
transparent tube 2together
on left and right and pull the
tube up and out of the oil
tank.
Pull the transparent tube
down out of the frame and
drain the engine oil into a
suitable container until the
level is to specification.
Insert the transparent tube
into the oil tank and engage
the retainer.
794zMaintenance
Page 116 of 165
Do not touch the glass
of new bulbs with your
fingers. Use a clean, dry cloth
to hold the bulbs when hand-
ling them. Dirt deposits, in
particular oil and grease, in-
terfere with heat radiation
from the bulb. This leads to
overheating and shortens the
bulb's operating life.
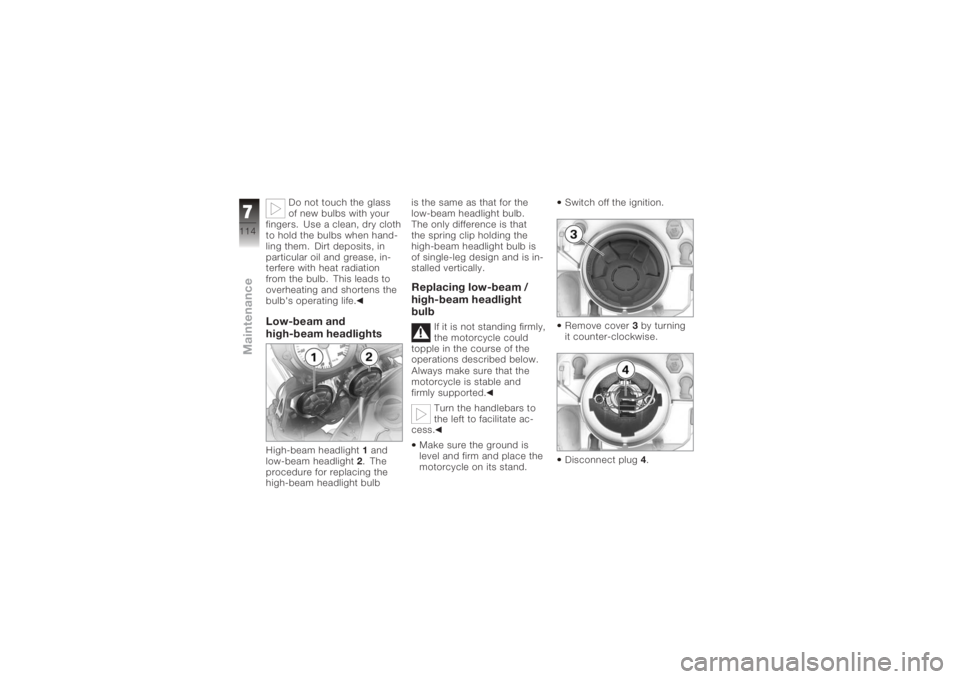
Low-beam and
high-beam headlightsHigh-beam headlight 1and
low-beam headlight 2. The
procedure for replacing the
high-beam headlight bulb is the same as that for the
low-beam headlight bulb.
The only difference is that
the spring clip holding the
high-beam headlight bulb is
of single-leg design and is in-
stalled vertically.
Replacing low-beam /
high-beam headlight
bulb
If it is not standing firmly,
the motorcycle could
topple in the course of the
operations described below.
Always make sure that the
motorcycle is stable and
firmly supported.
Turn the handlebars to
the left to facilitate ac-
cess.
Make sure the ground is
level and firm and place the
motorcycle on its stand. Switch off the ignition.
Remove cover
3by turning
it counter-clockwise.
Disconnect plug 4.
7114zMaintenance
Page 157 of 165
CoolantTemperature gauge, 22, 23
Warning, coolant temperat-
ure, 26
D
Dimensions Technical data, 141
E
Electrics Technical data, 139
Emergency off switch (kill switch), 17, 47
Engine Starting, 64
Technical data, 134
Warning, engine electron-
ics, 27
Engine oil Checking level, 93
Draining , 94
Filler neck, 15
Indicator for engine oil
level, 13
Technical data, 135 Topping up, 94
Warning, engine oil pres-
sure, 27
ESA, 57 Adjusting spring preload, 58
Adjusting suspension
damping, 57
Calling up settings, 57
EWS Warning, 26
F
Final drive Technical data, 137
Frame Technical data, 141
Front-wheel stand Installing, 110
Fuel Filler neck, 13
Quantity reading, 22
Refuelling, 78
Technical data, 135
Warning, fuel down to
reserve, 26
Fuses, 139 G
Gear indicator, 22
Grip heating, 17, 47
H
Handlebar fittings
General view, left side , 16
General view, right side, 17
Hazard warning flashers, 16, 17
Switching off, 41
Switching on, 40
Headlight High-beam headlight, 19
Low-beam headlight, 19
Side lights, 19
Headlight flasher, 16
Helmet holder, 15, 53
High-beam headlight, 16
Horn, 16
I
Ignition Switching off, 38
Switching on, 38
11155zIndex