Page 68 of 165
Phase 2General warning light
lights up red.CHECK!
indicator appears
on the display.
If the 'General' warning light is
not displayed:
Some malfunctions can-
not be indicated if the
'General' warning light cannot
be displayed.
Check that the 'General'
warning light comes on, and
that it lights up yellow and
then red.
Have the fault rectified as
soon as possible by a spe-
cialist workshop, preferably
an authorised BMW Motor-
rad dealer.
ABS warning lights
OE
There are two country-
dependent versions of the
ABS warning light:
Country-dependent ver-
sion 1.
Country-dependent ver-
sion 2.
The description below is
based on country-dependent
version 1.ABS self-diagnosis
OE
BMW Integral ABS performs
self-diagnosis and a
pull-away test to ensure its
operability. Self-diagnosis
is performed automatically
when you switch on the
ignition. Self-diagnosis is
not performed unless both
brake levers are in their fully
released positions. Phase 1
Self-diagnosis is in progress.
General warning light
lights up red.
ABS warning light
flashes four times per
second.
Phase 2
Self-diagnosis is complete.
ABS warning light
flashes once per
second.
If self-diagnosis did not com-
plete:
Release the brake levers as
soon as possible.
If an error message appears
when self-diagnosis com-
pletes: See the section entitled
"Status indicators" for in-
formation on how to inter-
pret these messages.
566zRiding
Page 69 of 165
The ABS warning light
does not go out until the
pull-away test completes.
Pulling away with
BMW Integral ABS
OE
Starting on gradientsSelect a gear.
Release the clutch lever and
both brake levers.
Switch on the ignition.
Wait for ABS self-diagnosis
to complete.
Apply the brakes and disen-
gage the clutch.
Start the engine.ABS warning lightsThere are two country-
dependent versions of the
ABS warning light:
Country-dependent ver-
sion 1. Country-dependent ver-
sion 2.
The description below is
based on country-dependent
version 1.
ABS pull-away testWhen you pull away, the
BMW Integral ABS checks the
ABS sensors. ABS warning light
flashes once per
second.
The ABS warning light goes
out when the pull-away test
completes.
If an error message appears
when the pull-away test com-
pletes: See the section entitled
"Status indicators" for in-
formation on how to inter-
pret these messages.
Running inThe first 1000 kmWhile running in the mo-
torcycle, vary the throttle
opening and engine-speed
range frequently.
Try to do most of your rid-
ing during this initial period
on twisting, fairly hilly roads,
avoiding high-speed main
roads and highways if pos-
sible.
Exceeding the specified
engine speeds while run-
ning in will lead to increased
engine wear.
Keep to the specified engine
speeds for running in.
Do not exceed the rpm lim-
its recommended for run-
ning in.
Running-in speeds
7000 min
-1
No full-load acceleration.
567zRiding
Page 115 of 165
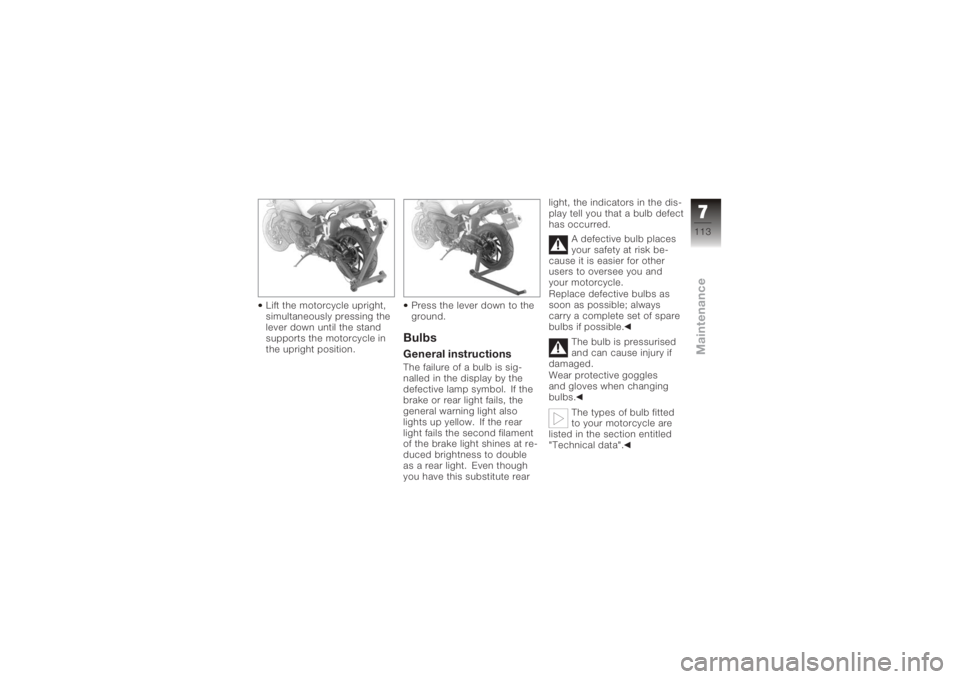
Lift the motorcycle upright,
simultaneously pressing the
lever down until the stand
supports the motorcycle in
the upright position.Press the lever down to the
ground.
BulbsGeneral instructionsThe failure of a bulb is sig-
nalled in the display by the
defective lamp symbol. If the
brake or rear light fails, the
general warning light also
lights up yellow. If the rear
light fails the second filament
of the brake light shines at re-
duced brightness to double
as a rear light. Even though
you have this substitute rearlight, the indicators in the dis-
play tell you that a bulb defect
has occurred.
A defective bulb places
your safety at risk be-
cause it is easier for other
users to oversee you and
your motorcycle.
Replace defective bulbs as
soon as possible; always
carry a complete set of spare
bulbs if possible.
The bulb is pressurised
and can cause injury if
damaged.
Wear protective goggles
and gloves when changing
bulbs.
The types of bulb fitted
to your motorcycle are
listed in the section entitled
"Technical data".
7113zMaintenance
Page 116 of 165
Do not touch the glass
of new bulbs with your
fingers. Use a clean, dry cloth
to hold the bulbs when hand-
ling them. Dirt deposits, in
particular oil and grease, in-
terfere with heat radiation
from the bulb. This leads to
overheating and shortens the
bulb's operating life.
Low-beam and
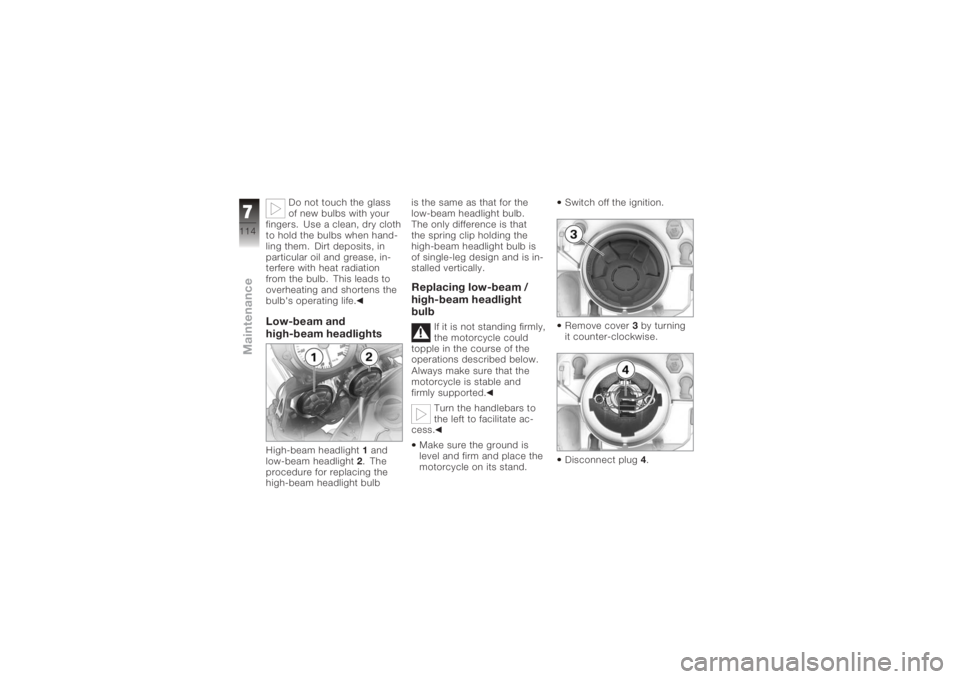
high-beam headlightsHigh-beam headlight 1and
low-beam headlight 2. The
procedure for replacing the
high-beam headlight bulb is the same as that for the
low-beam headlight bulb.
The only difference is that
the spring clip holding the
high-beam headlight bulb is
of single-leg design and is in-
stalled vertically.
Replacing low-beam /
high-beam headlight
bulb
If it is not standing firmly,
the motorcycle could
topple in the course of the
operations described below.
Always make sure that the
motorcycle is stable and
firmly supported.
Turn the handlebars to
the left to facilitate ac-
cess.
Make sure the ground is
level and firm and place the
motorcycle on its stand. Switch off the ignition.
Remove cover
3by turning
it counter-clockwise.
Disconnect plug 4.
7114zMaintenance
Page 123 of 165
applicable, 71 60 7 688 865
(110 V). If you are in doubt,
disconnect the battery from
the on-board systems and
connect the charger directly
to the battery.If you switch on the ig-
nition and the multifunc-
tion display and telltale lights
fail to light up, the battery is
completely flat. Attempting to
charge a completely flat bat-
tery via the on-board socket
can cause damage to the mo-
torcycle's electronics.
If a battery has discharged to
the extent that it is completely
flat, it has to be disconnec-
ted from the on-board circuits
and charged with the char-
ger connected directly to the
battery posts.
Charge via the power sock-
et, with the battery connec- ted to the motorcycle's on-
board electrical system.
The motorcycle's
on-board electronics
know when the battery is
fully charged. The on-board
socket is switched off when
this happens.
Comply with the operating
instructions of the charger. If you are unable to
charge the battery
through the power socket,
you may be using a charger
that is not compatible with
your motorcycle's electronics.
If this happens, disconnect
the battery from the on-board
systems and connect the
charger directly to the
battery.
Charging the battery
when disconnectedCharge the battery using a
suitable charger.
Comply with the operating
instructions of the charger.
Once the battery is fully
charged, disconnect the
charger's terminal clips from
the battery terminals.
The battery has to be re-
charged at regular inter-
vals in the course of a lengthy
period of disuse. See the in-
structions for caring for your
battery. Always fully recharge
the battery before restoring it
to useRemoving the battery
If it is not standing firmly,
the motorcycle could
topple in the course of the
operations described below.
Always make sure that the
7121zMaintenance
Page 157 of 165
CoolantTemperature gauge, 22, 23
Warning, coolant temperat-
ure, 26
D
Dimensions Technical data, 141
E
Electrics Technical data, 139
Emergency off switch (kill switch), 17, 47
Engine Starting, 64
Technical data, 134
Warning, engine electron-
ics, 27
Engine oil Checking level, 93
Draining , 94
Filler neck, 15
Indicator for engine oil
level, 13
Technical data, 135 Topping up, 94
Warning, engine oil pres-
sure, 27
ESA, 57 Adjusting spring preload, 58
Adjusting suspension
damping, 57
Calling up settings, 57
EWS Warning, 26
F
Final drive Technical data, 137
Frame Technical data, 141
Front-wheel stand Installing, 110
Fuel Filler neck, 13
Quantity reading, 22
Refuelling, 78
Technical data, 135
Warning, fuel down to
reserve, 26
Fuses, 139 G
Gear indicator, 22
Grip heating, 17, 47
H
Handlebar fittings
General view, left side , 16
General view, right side, 17
Hazard warning flashers, 16, 17
Switching off, 41
Switching on, 40
Headlight High-beam headlight, 19
Low-beam headlight, 19
Side lights, 19
Headlight flasher, 16
Helmet holder, 15, 53
High-beam headlight, 16
Horn, 16
I
Ignition Switching off, 38
Switching on, 38
11155zIndex
Page 158 of 165
ImmobiliserWarning, 26
Instrument cluster Overview, 18
Sensor for lighting, 18
J
Jump starting, 118
L
Laying up, 128
Lights Switching off the parking
lights, 50
Switching on the high-beam
headlight, 49
Switching on the low-beam
headlight, 49
Switching on the parking
lights, 50
Switching on the side
lights, 49 M
Mirrors
Adjusting, 54
Multifunction display, 18, 22
O
On-board computer Ambient temperature, 45
Average consumption, 45
Average speed, 44
Pushbutton, 16
Resetting average con-
sumption, 45
Resetting average
speed, 44
Residual range, 44
Selecting readings, 43
Tripmaster function, 43
P
Power socket, 11
Pre-ride check, 65 R
Rear wheel stand
Installing, 112
Refuelling, 78
Reserve Warning, 26
Residual range, 42, 44
Restoring to use, 129
Rev. counter, 18
Running gear Technical data, 137
S
Seat Installation, 52
Lock, 11
Removal, 51
Service, 144
Side stand Placing motorcycle on side
stand, 71
Removing motorcycle from
side stand, 73
Starting the engine, 64
Speedometer, 18
11156zIndex
Page 159 of 165
Spring preload, rearAdjusting, 11, 55
Starter, 17
Steering lock, 39
Suspension damping, rear Adjusting, 11, 56
T
Technical data Brakes, 138
Bulbs, 140
Clutch, 136
Dimensions, 141
Electrics, 139
Engine, 134
Engine oil, 135
Final drive, 137
Frame, 141
Fuel, 135
Running gear, 137
Transmission, 136
Weights, 142
Wheels and tyres, 138
Telltale lights, 18 Toolkit
Anti-theft alarm, 15
Overview, basic kit, 92
Overview, supplementary
kit, 92
Torques, 133
Transmission Starting the engine, 64
Technical data, 136
Tripmaster, 22 Operation, 41
Resetting the tripmeter, 42
Residual range, 42
Selecting readings, 41
Troubleshooting chart, 132
Turn indicators Left, 16, 50
Right, 17, 51
Switching off, 17, 51
Tyres Checking tread depth, 101
Checking tyre pressures, 58
Technical data, 138 V
Vehicle
General view, left side, 11
General view, right side, 13
Laying up, 128
restoring to use, 129
Vehicle identification num- ber, 13
W
Warning lights, 18
Warnings, 22 Mode of presentation, 23
Warnings, overview, 24, 31
Weights Technical data, 142
Wheels Installing front wheel, 105
Installing rear wheel, 108
Removing front wheel, 102
Removing rear wheel, 107
Technical data, 138
11157zIndex