Page 83 of 165
Rear wheel liftEven under severe braking,
a high level of tyre grip can
mean that the front wheel
does not lock up until very
late, if at all. Consequently,
ABS does not intervene until
very late, if at all. Under these
circumstances the rear wheel
can lift off the ground, and the
outcome can be a highsiding
situation in which the motor-
cycle can flip over.Severe braking can
cause the rear wheel to
lift off the ground.
Bear in mind that ABS can-
not be relied on in all circum-
stances to prevent the rear
wheel from lifting clear of the
ground.
Residual braking func-
tionWhen the ignition is switched
off, during self-diagnosis,
or if the BMW Integral ABS
malfunctions, only a residual
braking function remains
available in the brake circuits
in question. The residual
braking function is the braking
power without the hydraulic
servo assistance of the BMW
Integral ABS. Under these
circumstances, therefore,
you must apply considerably
higher pressure to the brake
levers in question in order to
apply the brakes, and lever
travel is longer. When the
residual braking function
is active, the ABS function
is unavailable in the brake
system in question. When the
residual braking function is
active, the integral braking function is partially or entirely
unavailable.
Without the assistance
of the ABS function, the
wheels could lock when the
brakes are applied hard. You
have to apply considerably
more force to the brake
levers to brake without
servo-assisted brakes. The
changed braking response
can cause accidents.
Avoid hard braking if possible.
Apply brakes in good time as
increased effort is required.
Have the fault rectified as
soon as possible by a spe-
cialist workshop, preferably
an authorised BMW Motorrad
dealer.
The brake-lever travel
needed to build up brak-
ing pressure can be consider-
ably longer when the system
is in residual braking function
mode, so BMW Motorrad re-
581zRiding
Page 86 of 165
General instructionsBMW Motorrad recommends
the use of parts and ac-
cessories for your motorcycle
that are approved by BMW for
this purpose.
Genuine BMW parts and ac-
cessories and other products
which BMW has approved
can be obtained from your
authorised BMW Motorrad
dealer, together with expert
advice on their installation
and use.
These parts and products
have been tested by BMW for
safety, function and suitability.
BMW accepts product liability
for them.
Conversely, BMW is unable
to accept any liability whatso-
ever for parts and accessor-
ies which it has not approved.BMW cannot examine
or test each product of
outside origin to ensure that it
can be used on or in connec-
tion with BMW motorcycles
without constituting a safety
hazard. Country-specific of-
ficial authorisation does not
suffice as assurance. Tests
conducted by these instances
cannot make provision for all
operating conditions experi-
enced by BMW motorcycles
and, consequently, they are
not sufficient in some circum-
stances.
Use only parts and accessor-
ies approved by BMW for
your motorcycle.
Whenever you are planning
modifications, comply with all
the legal requirements. Make
sure that the motorcycle does
not infringe national road-
vehicle construction and use
regulations.
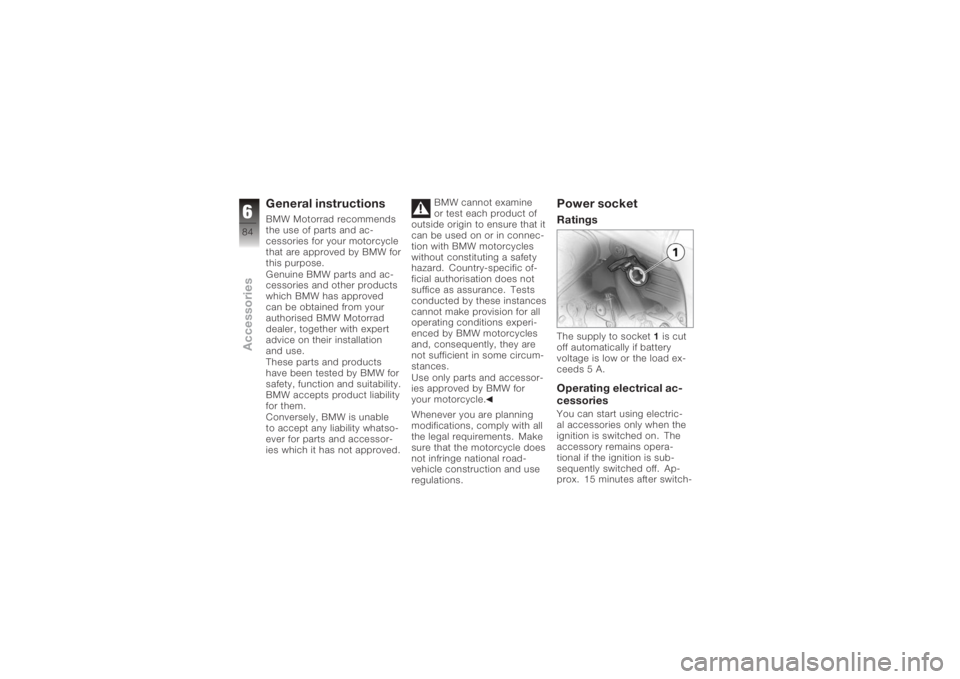
Power socketRatingsThe supply to socket 1is cut
off automatically if battery
voltage is low or the load ex-
ceeds 5 A.Operating electrical ac-
cessoriesYou can start using electric-
al accessories only when the
ignition is switched on. The
accessory remains opera-
tional if the ignition is sub-
sequently switched off. Ap-
prox. 15 minutes after switch-
684zAccessories
Page 87 of 165
ing off the ignition and/or dur-
ing the restart operation, the
on-board socket is switched
off to take the load off the
vehicle electrical system.Cable routingThe cables from the power
socket to the auxiliary device
must be routed in such a way
that they:Do not impede the rider
Do not restrict or obstruct
the steering angle and
handling characteristics
Cannot be trapped
Incorrectly routed cables
can impede the rider.
Route the cables as
described above.
685zAccessories
Page 95 of 165
4Open-ended spanner,
w/f 17
5 TORX wrenches, T40,
T45, T50Engine oilChecking the engine oil
level
The engine can seize if
the oil level is low, and
this can lead to accidents.
Always make sure that the oil
level is correct.
Oil can collect in the
sump if the motorcycle
is out of use for an extended
period of time; this oil has to
be pumped into the oil tank
before the level is read. The
engine oil must be at oper-
ating temperature to do this.
Checking the oil level with the
engine cold or after no more
than a short ride will lead to
misinterpretation; this in turn, means that the engine will be
operated with the incorrect
quantity of oil.
In order to ensure that the en-
gine oil level is read correctly,
check the oil level only after a
lengthy trip.
The oil level varies with
the temperature of the
oil. The higher the temperat-
ure the higher the oil level in
the oil tank. Check the engine
oil level immediately after a
lengthy journey.
Make sure the engine is at
operating temperature and
hold the motorcycle upright.
with OA Centre stand:
Check that the engine is
at operating temperature,
make sure the ground is
level and firm and place
the motorcycle on its centre
stand. Allow the engine to idle for
one minute.
Switch off the ignition.
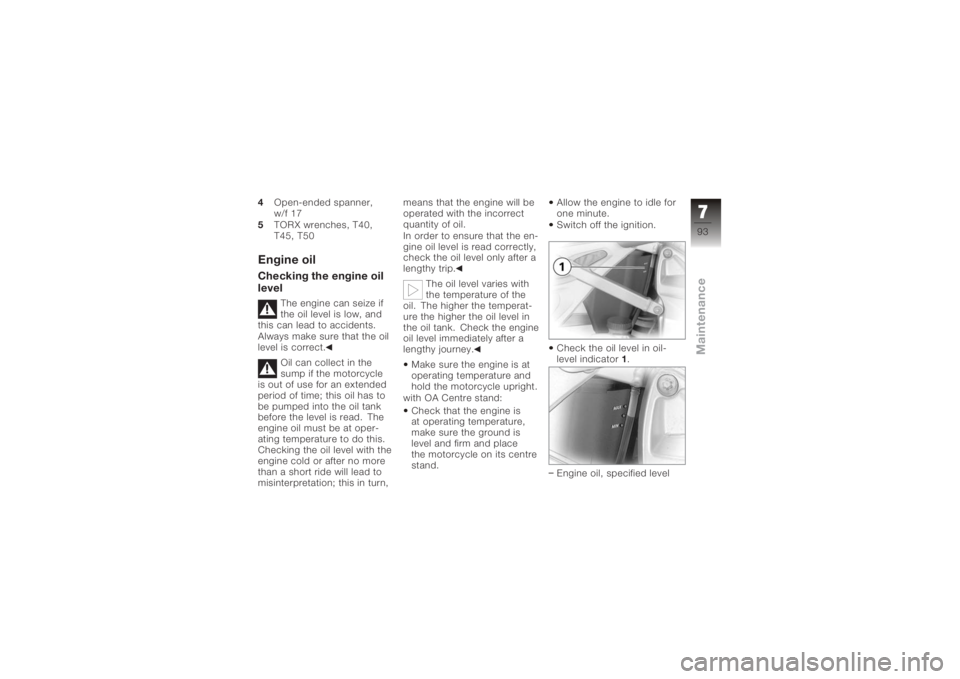
Check the oil level in oil-
level indicator
1.
Engine oil, specified level
793zMaintenance
Page 97 of 165
Store or dispose of the ex-
cess engine oil in an envir-
onmentally compatible man-
ner.Brake system, generalReliabilityA fully functional brake sys-
tem is a basic requirement for
the road safety of your motor-
cycle.
Do not ride the motorcycle if
you have any doubts about
the dependability of the brake
system.
Under these circumstances
have the brake system
checked by a specialist
workshop, preferably an
authorised BMW Motorrad
dealer.Incorrect working prac-
tices endanger the reli-
ability of the brakes.
Have all work on the brake
system carried out by a spe-
cialist workshop, preferably
an authorised BMW Motorrad
dealer.
Checking operation of
the brakesPull the handbrake lever.
The pressure point must be
clearly perceptible.
Press the footbrake lever.
The pressure point must be
clearly perceptible.
If pressure points are not
clearly perceptible: Have the brakes checked
by a specialist workshop,
preferably an authorised
BMW Motorrad dealer. with OE BMW Motorrad Integ-
ral ABS:
Switch on the ignition.
Wait for ABS self-diagnosis
to complete.
Pull the handbrake lever.
The pressure point must be
clearly perceptible.
The noise of the hydraulic
pump running must be aud-
ible.
Press the footbrake lever.
The pressure point must be
clearly perceptible.
The noise of the hydraulic
pump running must be aud-
ible.
If the hydraulic pump does
not run or if the pressure
points are not clearly
perceptible: Have the brakes checked
by a specialist workshop,
preferably an authorised
BMW Motorrad dealer.
795zMaintenance
Page 108 of 165
Lift the front wheel and in-
stall quick-release axle7.
Quick-release axle in
threaded bush
50 Nm
Install right-hand axle
clamping screw 6.
Clamping screw for quick-
release axle in wheel carrier
19 Nm
Remove the front wheel
stand.
Ease the brake calipers on
to the brake discs. with OE BMW Motorrad Integ-
ral ABS:
The cable of the ABS
sensor could chafe
through if it comes into
contact with the brake disc.
Make sure that the ABS
sensor cable is routed
correctly.
Carefully route the ABS
cable.
Install securing screws 3.
Front brake caliper, wheel
carrier installed ( 133) Remove the adhesive tape
from the wheel rim.
Hold cover
2in position.
Install screws 1.
Firmly pull the handbrake
lever until the pressure point
is perceptible, and repeat
this operation several times.
with OE BMW Motorrad Integ-
ral ABS: Switch on the ignition.
Wait for self-diagnosis to
complete.
Firmly pull the handbrake
lever until the pressure point
7106zMaintenance
Page 116 of 165
Do not touch the glass
of new bulbs with your
fingers. Use a clean, dry cloth
to hold the bulbs when hand-
ling them. Dirt deposits, in
particular oil and grease, in-
terfere with heat radiation
from the bulb. This leads to
overheating and shortens the
bulb's operating life.
Low-beam and
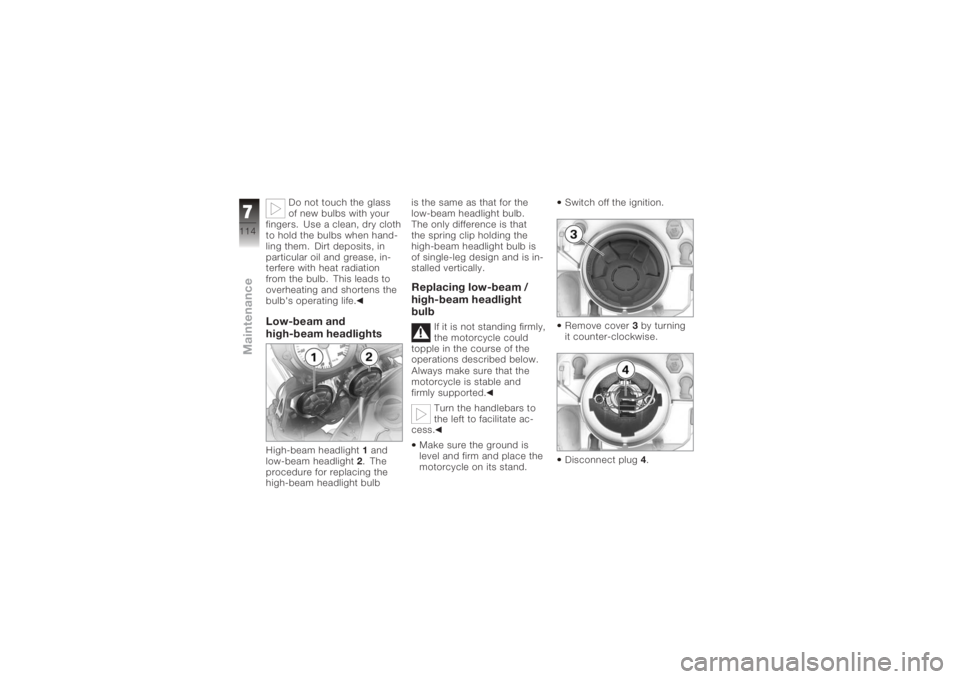
high-beam headlightsHigh-beam headlight 1and
low-beam headlight 2. The
procedure for replacing the
high-beam headlight bulb is the same as that for the
low-beam headlight bulb.
The only difference is that
the spring clip holding the
high-beam headlight bulb is
of single-leg design and is in-
stalled vertically.
Replacing low-beam /
high-beam headlight
bulb
If it is not standing firmly,
the motorcycle could
topple in the course of the
operations described below.
Always make sure that the
motorcycle is stable and
firmly supported.
Turn the handlebars to
the left to facilitate ac-
cess.
Make sure the ground is
level and firm and place the
motorcycle on its stand. Switch off the ignition.
Remove cover
3by turning
it counter-clockwise.
Disconnect plug 4.
7114zMaintenance
Page 117 of 165
Release spring clip5at left
and right and swing it up.
Remove bulb 6.
Installation of the bulb is the
reverse of the removal pro-
cedure. Use a clean, dry cloth to
hold the new bulb.
When installing, make sure
that tab
7 is pointing up.
Replacing parking-light
bulb
If it is not standing firmly,
the motorcycle could
topple in the course of the
operations described below.
Always make sure that the
motorcycle is stable and
firmly supported. Make sure the ground is
level and firm and place the
motorcycle on its stand.
Switch off the ignition.
Remove securing screws
1
from both sides of the bulb
housing.
7115zMaintenance