2008 BMW 4.8I wheel
[x] Cancel search: wheelPage 56 of 292
Adjusting
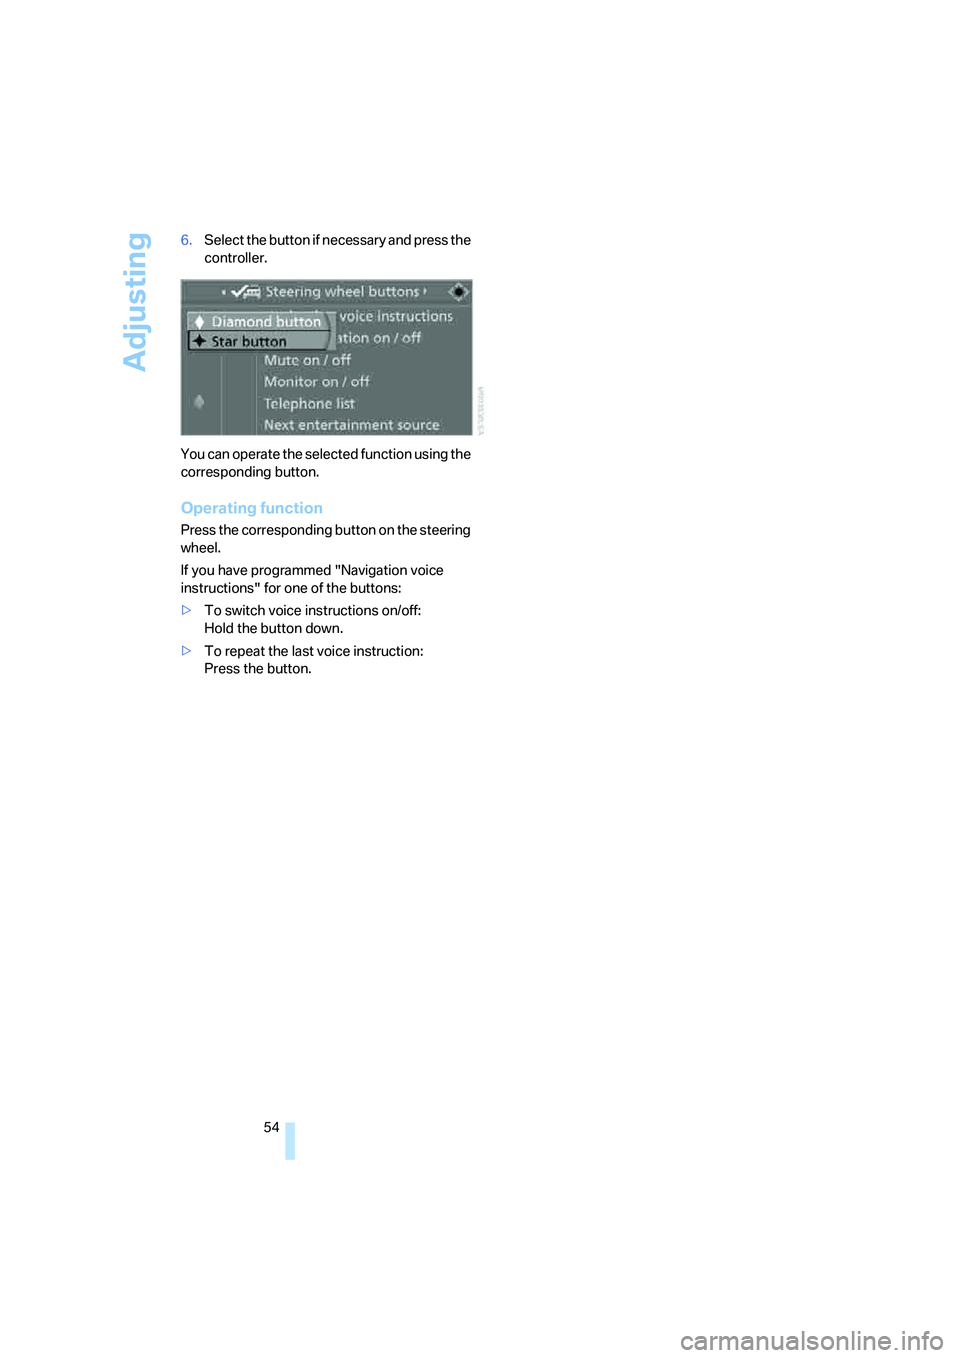
54 6.Select the button if necessary and press the
controller.
You can operate the selected function using the
corresponding button.
Operating function
Press the corresponding button on the steering
wheel.
If you have programmed "Navigation voice
instructions" for one of the buttons:
>To switch voice instructions on/off:
Hold the button down.
>To repeat the last voice instruction:
Press the button.
Page 63 of 292
Controls
61Reference
At a glance
Driving tips
Communications
Navigation
Entertainment
Mobility
With the engine stopped, the parking brake acts
on the rear wheels via an electromechanical
system. When the engine is running, the park-
ing brake acts on the disk brakes of the front
and rear wheels via the brake hydraulics.
Setting manually
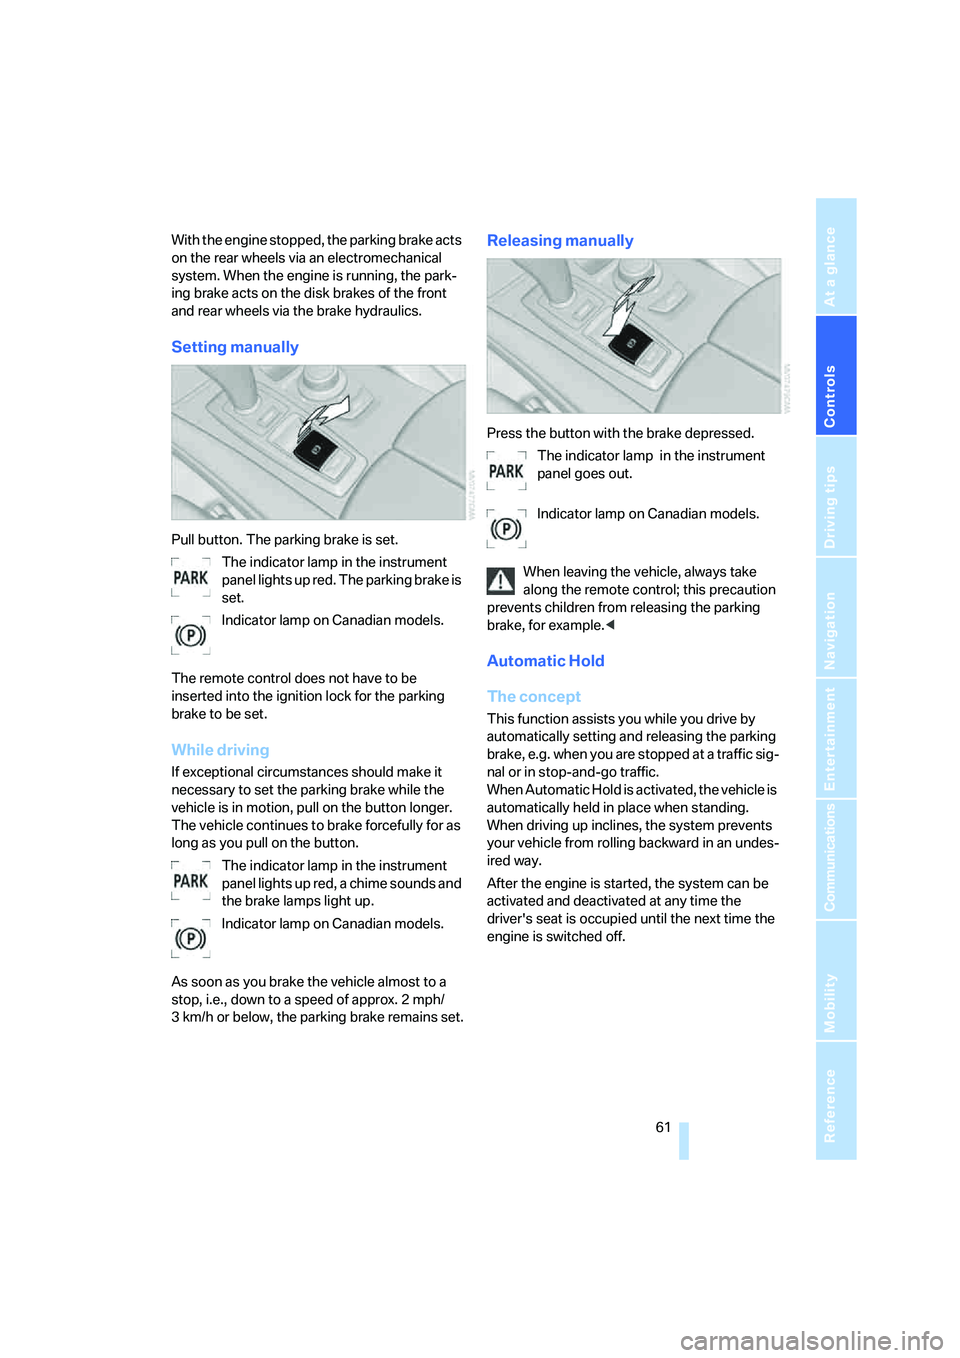
Pull button. The parking brake is set.
The indicator lamp in the instrument
panel lights up red. The parking brake is
set.
Indicator lamp on Canadian models.
The remote control does not have to be
inserted into the ignition lock for the parking
brake to be set.
While driving
If exceptional circumstances should make it
necessary to set the parking brake while the
vehicle is in motion, pull on the button longer.
The vehicle continues to brake forcefully for as
long as you pull on the button.
The indicator lamp in the instrument
panel lights up red, a chime sounds and
the brake lamps light up.
Indicator lamp on Canadian models.
As soon as you brake the vehicle almost to a
stop, i.e., down to a speed of approx. 2 mph/
3 km/h or below, the parking brake remains set.
Releasing manually
Press the button with the brake depressed.
The indicator lamp in the instrument
panel goes out.
Indicator lamp on Canadian models.
When leaving the vehicle, always take
along the remote control; this precaution
prevents children from releasing the parking
brake, for example.<
Automatic Hold
The concept
This function assists you while you drive by
automatically setting and releasing the parking
brake, e.g. when you are stopped at a traffic sig-
nal or in stop-and-go traffic.
When Automatic Hold is activated, the vehicle is
automatically held in place when standing.
When driving up inclines, the system prevents
your vehicle from rolling backward in an undes-
ired way.
After the engine is started, the system can be
activated and deactivated at any time the
driver's seat is occupied until the next time the
engine is switched off.
Page 65 of 292
Controls
63Reference
At a glance
Driving tips
Communications
Navigation
Entertainment
Mobility
Before you start to drive, either release the
parking brake manually, refer to page61, or
reactivate Automatic Hold, refer to page62.
Before leaving the vehicle with the engine
running, shift the selector lever into posi-
tion P of the automatic transmission and make
sure that the parking brake is set. Otherwise,
the vehicle may begin to roll.<
Malfunction
If the parking brake fails or malfunctions, secure
the vehicle against rolling, e.g. with a wheel
chock, if you leave the vehicle.
Releasing parking brake manually
In the event of an electrical power loss or elec-
trical malfunction, you can release the parking
brake manually.
Before manually releasing the parking
brake and each time you park the vehicle
without setting the parking brake, make sure
that the automatic transmission is in position P,
refer to page65. Be sure to pay attention to the
information in the instrument panel.
In addition, secure the vehicle against rolling,
e.g. with a wheel chock. Otherwise there is a
danger that the vehicle could roll if parked on a
steep slope.<
If it becomes necessary to also release the
transmission lock of the automatic transmission
manually, follow this sequence:
1.If necessary, start by releasing the parking
brake manually.
2.Then release the automatic transmission's
transmission lock manually, refer to
page65.
Jump starting and towing, refer to information
starting on page256.
Releasing
1.Open the left-hand side panel in the cargo
bay.
2.Remove the first-aid kit
* and the warning
triangle
* if necessary. Close the bracket of
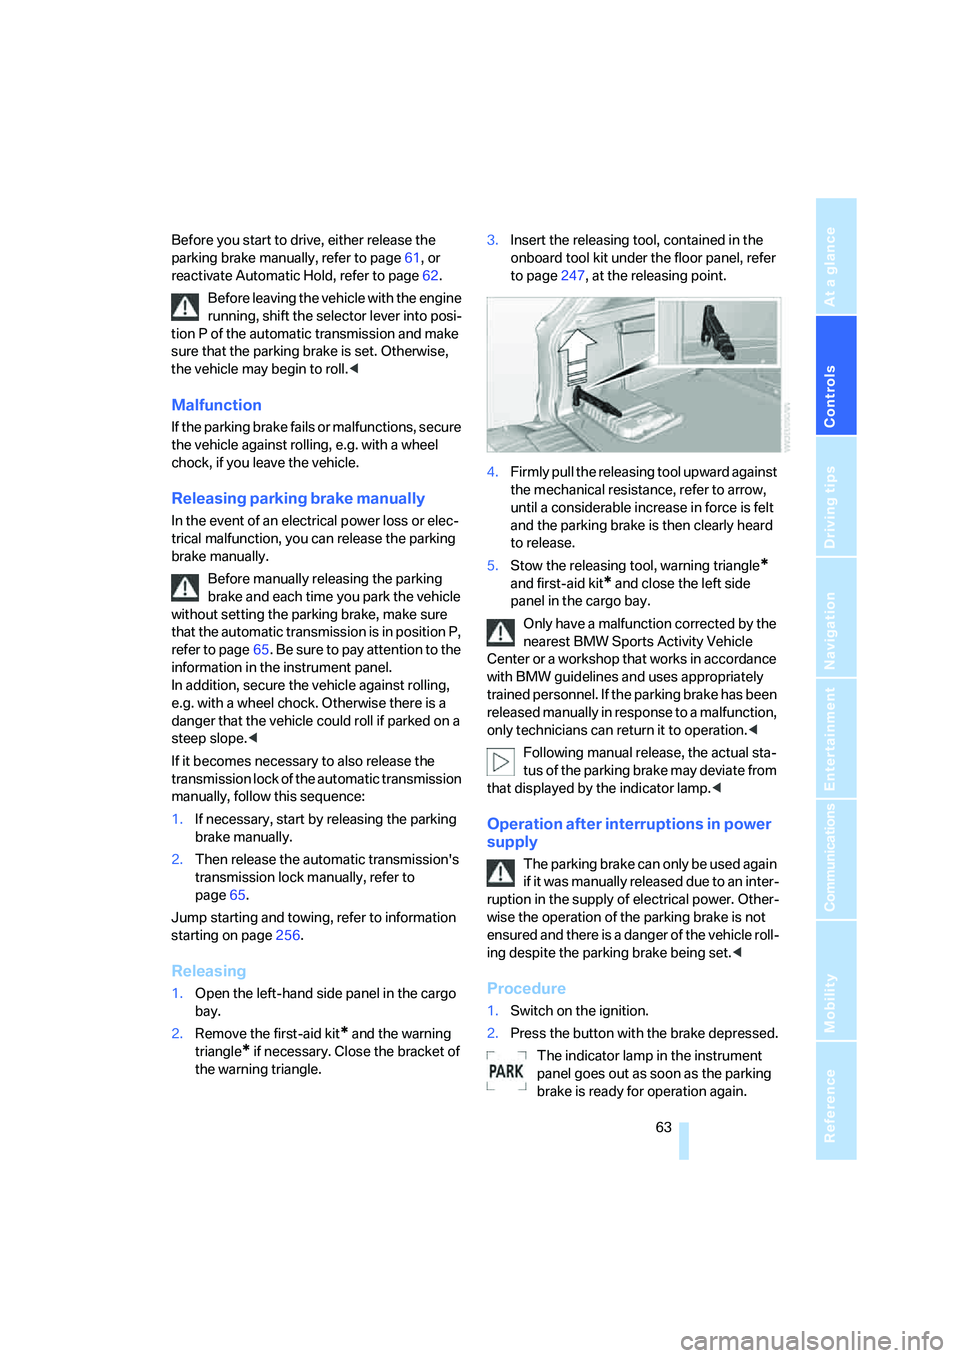
the warning triangle.3.Insert the releasing tool, contained in the
onboard tool kit under the floor panel, refer
to page247, at the releasing point.
4.Firmly pull the releasing tool upward against
the mechanical resistance, refer to arrow,
until a considerable increase in force is felt
and the parking brake is then clearly heard
to release.
5.Stow the releasing tool, warning triangle
*
and first-aid kit* and close the left side
panel in the cargo bay.
Only have a malfunction corrected by the
nearest BMW Sports Activity Vehicle
Center or a workshop that works in accordance
with BMW guidelines and uses appropriately
trained personnel. If the parking brake has been
released manually in response to a malfunction,
only technicians can return it to operation.<
Following manual release, the actual sta-
tus of the parking brake may deviate from
that displayed by the indicator lamp.<
Operation after interruptions in power
supply
The parking brake can only be used again
if it was manually released due to an inter-
ruption in the supply of electrical power. Other-
wise the operation of the parking brake is not
ensured and there is a danger of the vehicle roll-
ing despite the parking brake being set.<
Procedure
1.Switch on the ignition.
2.Press the button with the brake depressed.
The indicator lamp in the instrument
panel goes out as soon as the parking
brake is ready for operation again.
Page 67 of 292
Controls
65Reference
At a glance
Driving tips
Communications
Navigation
Entertainment
Mobility
P Park
Select only when the vehicle is stationary.
The rear wheels are locked.
P is engaged automatically as soon as
you switch off the engine unless N is
engaged and on vehicles with comfort access
the remote control is inserted in the ignition
lock, refer to page59.<
N Neutral
Can, for example, be engaged in automatic car
washes. The vehicle can roll.
N remains engaged even after the engine
is switched off whenever you leave the
remote control in the ignition lock. This function
is used, for example, in a car wash, refer to
page60. After approx. 30 minutes P is auto-
matically engaged.<
D Drive, automatic position
Position for normal vehicle operation. All for-
ward gears are available.
Under normal operating conditions, the fuel
consumption is lowest when driving in posi-
tion D.
Kick-down
The kick-down mode provides maximum accel-
eration.
Press the accelerator pedal beyond the
increased resistance at full throttle.
Sport program and manual mode M/S
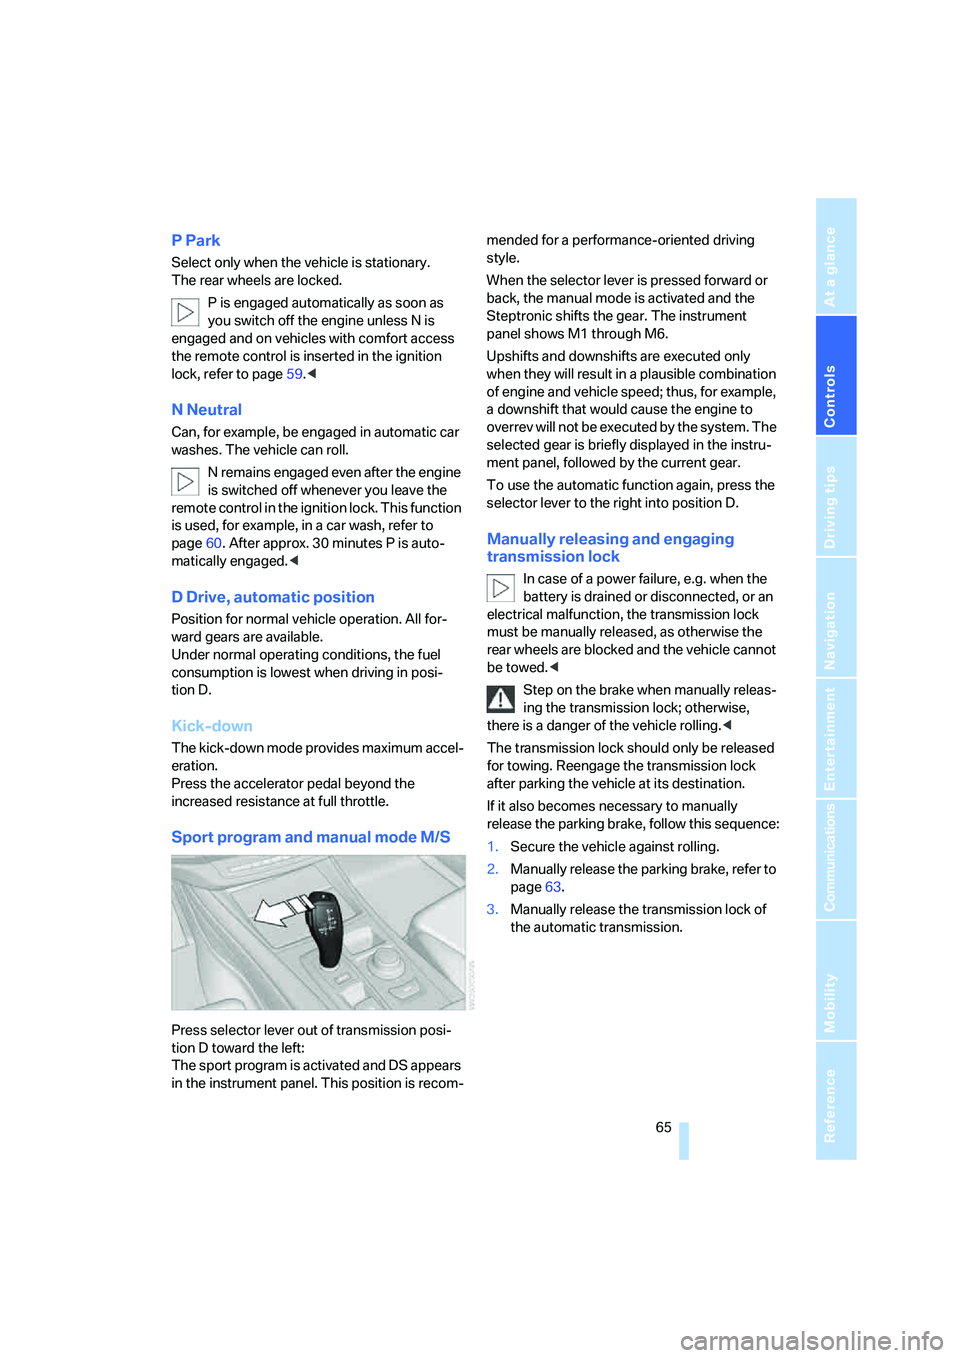
Press selector lever out of transmission posi-
tion D toward the left:
The sport program is activated and DS appears
in the instrument panel. This position is recom-mended for a performance-oriented driving
style.
When the selector lever is pressed forward or
back, the manual mode is activated and the
Steptronic shifts the gear. The instrument
panel shows M1 through M6.
Upshifts and downshifts are executed only
when they will result in a plausible combination
of engine and vehicle speed; thus, for example,
a downshift that would cause the engine to
overrev will not be executed by the system. The
selected gear is briefly displayed in the instru-
ment panel, followed by the current gear.
To use the automatic function again, press the
selector lever to the right into position D.
Manually releasing and engaging
transmission lock
In case of a power failure, e.g. when the
battery is drained or disconnected, or an
electrical malfunction, the transmission lock
must be manually released, as otherwise the
rear wheels are blocked and the vehicle cannot
be towed.<
Step on the brake when manually releas-
ing the transmission lock; otherwise,
there is a danger of the vehicle rolling.<
The transmission lock should only be released
for towing. Reengage the transmission lock
after parking the vehicle at its destination.
If it also becomes necessary to manually
release the parking brake, follow this sequence:
1.Secure the vehicle against rolling.
2.Manually release the parking brake, refer to
page63.
3.Manually release the transmission lock of
the automatic transmission.
Page 70 of 292

Driving
68
Activating intermittent operation or
rain sensor
Press the button, arrow3. The LED in the but-
ton lights up.
Setting interval for intermittent wipe, or
sensitivity of the rain sensor
Turn the knurled wheel5.
Deactivating intermittent operation or
rain sensor
Press the button again, arrow3. The LED goes
out.
Deactivate the rain sensor when passing
through an automatic car wash. Failure to
do so could result in damage caused by undes-
ired wiper activation.<
Cleaning windshield and headlamps*
Pull the lever, arrow4.
The system sprays washer fluid against the
windshield and activates the wipers for a brief
period.
When the vehicle lighting system is switched
on, the headlamps are also cleaned at regular
and appropriate intervals.
Do not use the washers if there is any
danger that the fluid will freeze on the
windshield. If you do so, your vision could be
obscured. To avoid freezing, use a washer fluid
antifreeze, refer to Washer fluid. Do not use
washing mechanisms when the washer fluid
reservoir is empty, otherwise you will damage
the washer pump.<
Windshield washer nozzles
Both windshield washer nozzles are automati-
cally heated with the engine running or the igni-
tion switched on.
Rear window wiper
1Intermittent mode. When reverse gear is
engaged, continuous operation is switched
on automatically
2Cleaning the rear window
Do not use washing mechanisms when
the washer fluid reservoir is empty, other-
wise you will damage the washer pump.<
Washer fluid
Washer fluid antifreeze is flammable.
For this reason, keep it away from ignition
sources and store only in the closed original
container out of reach of children. Otherwise,
there is the danger of bodily injury. Always
observe the instructions for use provided on the
containers.<
Filler neck for washer fluid
Only add washer fluid with the engine
cooled down to exclude contact with hot
engine components. Otherwise there is a dan-
ger of fire and to personal safety if the fluid is
spilled.<
Page 88 of 292
Technology for comfort, convenience and safety
86
Rear view camera*
The concept
The rear view camera in the liftgate displays the
area behind your vehicle on the Control Display.
Also check the traffic situation around the
vehicle during parking and maneuvering
with direct vision, as otherwise danger of an
accident could result, for example, from road
users or objects located outside the picture
area of the rear view camera.<
Switching on
Automatically
With the engine running, shift into reverse.
If the image of the Park Distance Control
PDC appears in the Control Display, you
can switch the image to the rear view camera,
refer to Displays on page88.<
Manually
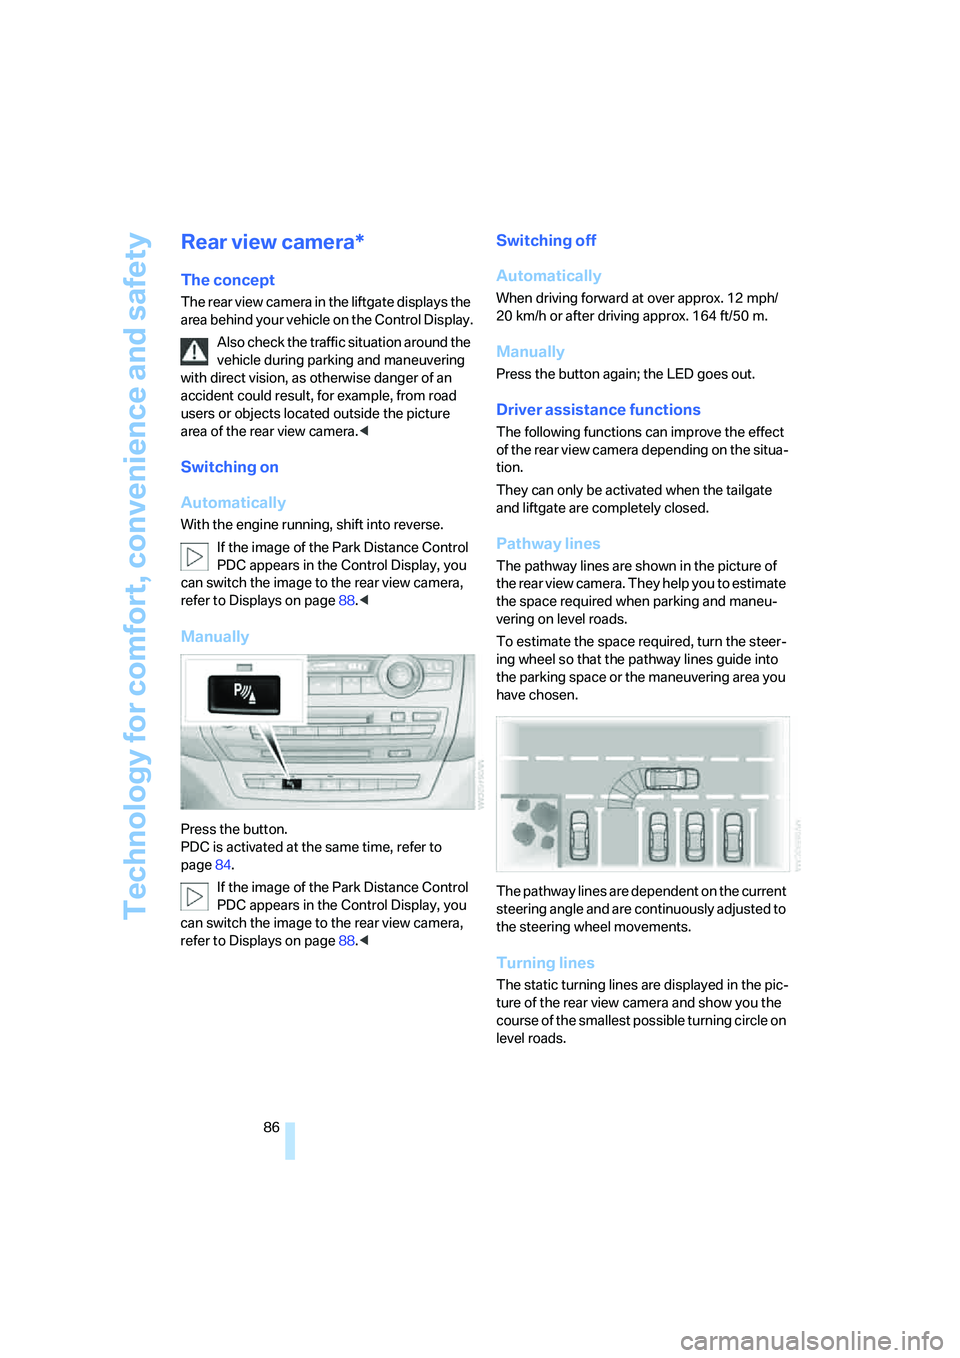
Press the button.
PDC is activated at the same time, refer to
page84.
If the image of the Park Distance Control
PDC appears in the Control Display, you
can switch the image to the rear view camera,
refer to Displays on page88.<
Switching off
Automatically
When driving forward at over approx. 12 mph/
20 km/h or after driving approx. 164 ft/50 m.
Manually
Press the button again; the LED goes out.
Driver assistance functions
The following functions can improve the effect
of the rear view camera depending on the situa-
tion.
They can only be activated when the tailgate
and liftgate are completely closed.
Pathway lines
The pathway lines are shown in the picture of
the rear view camera. They help you to estimate
the space required when parking and maneu-
vering on level roads.
To estimate the space required, turn the steer-
ing wheel so that the pathway lines guide into
the parking space or the maneuvering area you
have chosen.
The pathway lines are dependent on the current
steering angle and are continuously adjusted to
the steering wheel movements.
Turning lines
The static turning lines are displayed in the pic-
ture of the rear view camera and show you the
course of the smallest possible turning circle on
level roads.
Page 89 of 292
Controls
87Reference
At a glance
Driving tips
Communications
Navigation
Entertainment
Mobility
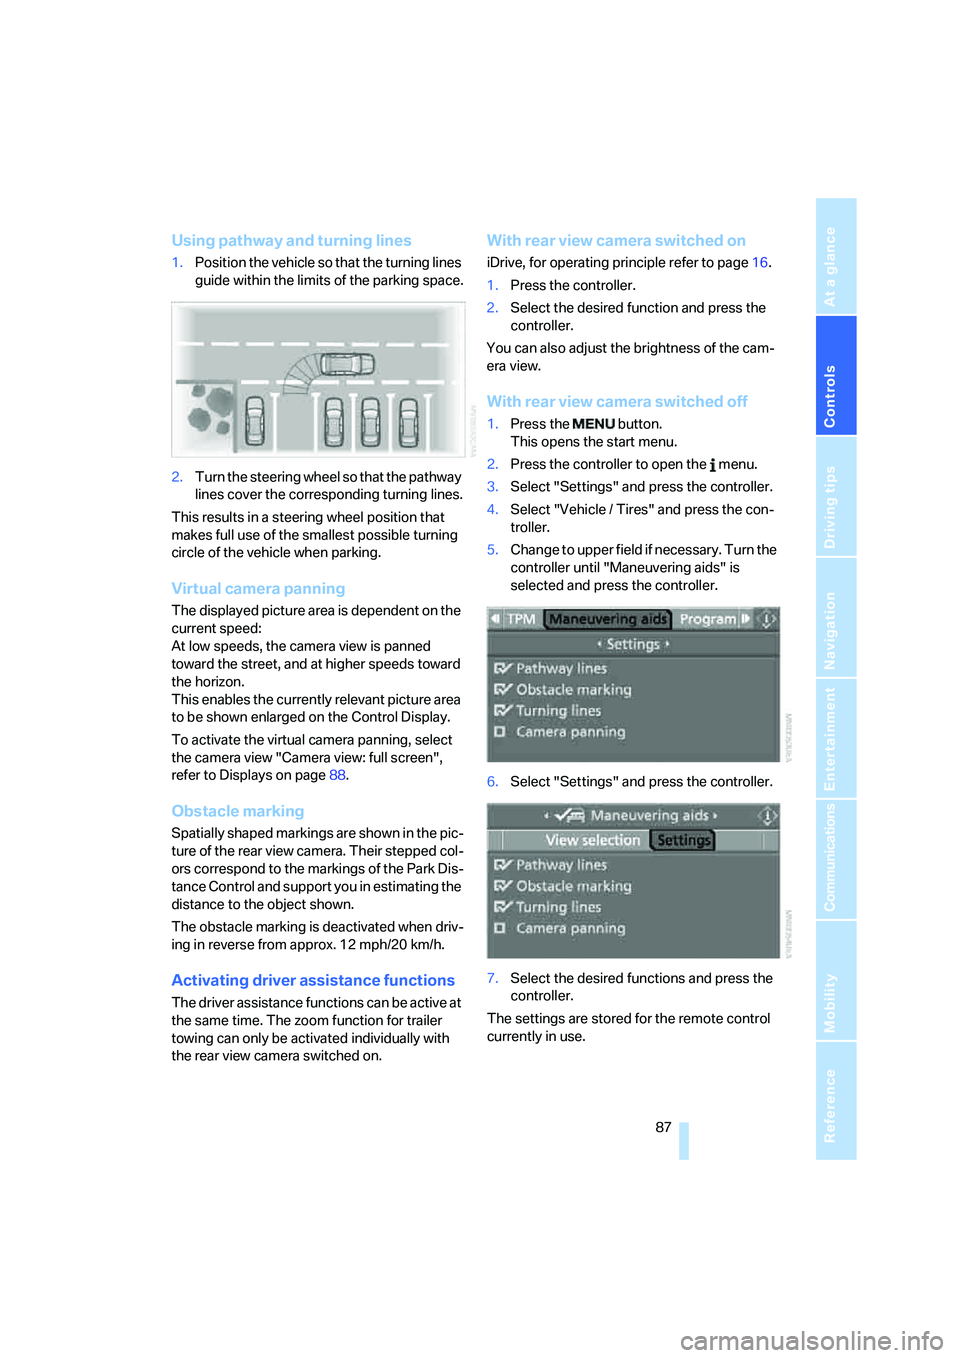
Using pathway and turning lines
1.Position the vehicle so that the turning lines
guide within the limits of the parking space.
2.Turn the steering wheel so that the pathway
lines cover the corresponding turning lines.
This results in a steering wheel position that
makes full use of the smallest possible turning
circle of the vehicle when parking.
Virtual camera panning
The displayed picture area is dependent on the
current speed:
At low speeds, the camera view is panned
toward the street, and at higher speeds toward
the horizon.
This enables the currently relevant picture area
to be shown enlarged on the Control Display.
To activate the virtual camera panning, select
the camera view "Camera view: full screen",
refer to Displays on page88.
Obstacle marking
Spatially shaped markings are shown in the pic-
ture of the rear view camera. Their stepped col-
ors correspond to the markings of the Park Dis-
tance Control and support you in estimating the
distance to the object shown.
The obstacle marking is deactivated when driv-
ing in reverse from approx. 12 mph/20 km/h.
Activating driver assistance functions
The driver assistance functions can be active at
the same time. The zoom function for trailer
towing can only be activated individually with
the rear view camera switched on.
With rear view camera switched on
iDrive, for operating principle refer to page16.
1.Press the controller.
2.Select the desired function and press the
controller.
You can also adjust the brightness of the cam-
era view.
With rear view camera switched off
1.Press the button.
This opens the start menu.
2.Press the controller to open the menu.
3.Select "Settings" and press the controller.
4.Select "Vehicle / Tires" and press the con-
troller.
5.Change to upper field if necessary. Turn the
controller until "Maneuvering aids" is
selected and press the controller.
6.Select "Settings" and press the controller.
7.Select the desired functions and press the
controller.
The settings are stored for the remote control
currently in use.
Page 90 of 292
Technology for comfort, convenience and safety
88
Displays
You can have the picture from the rear view
camera displayed in several formats and in
combination with the PDC Park Distance Con-
trol, refer to page85.
In addition, you also have the option of display-
ing only the PDC Park Distance Control.
>"Camera picture and PDC"
The rear view camera picture is shown in
the main window of the Control Display.
>"Camera view: full screen"
The picture of the rear view camera is
shown on the entire Control Display.
>"Camera view: main window"
The picture of the rear view camera is
shown in the main window of the Control
Display.
>"PDC in main window only"
PDC is shown in the main window of the
Control Display.
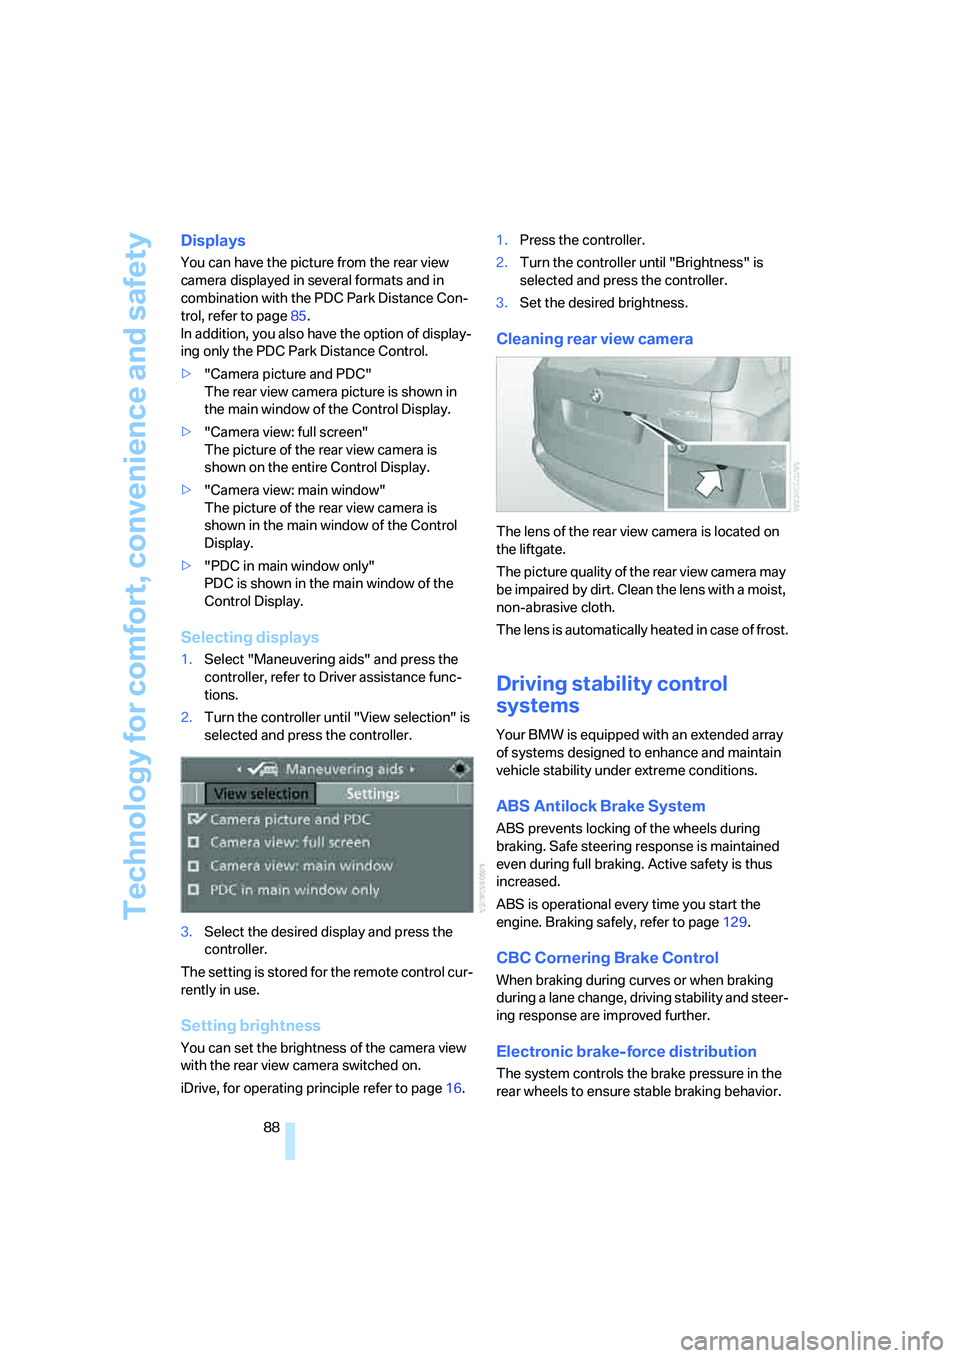
Selecting displays
1.Select "Maneuvering aids" and press the
controller, refer to Driver assistance func-
tions.
2.Turn the controller until "View selection" is
selected and press the controller.
3.Select the desired display and press the
controller.
The setting is stored for the remote control cur-
rently in use.
Setting brightness
You can set the brightness of the camera view
with the rear view camera switched on.
iDrive, for operating principle refer to page16.1.Press the controller.
2.Turn the controller until "Brightness" is
selected and press the controller.
3.Set the desired brightness.
Cleaning rear view camera
The lens of the rear view camera is located on
the liftgate.
The picture quality of the rear view camera may
be impaired by dirt. Clean the lens with a moist,
non-abrasive cloth.
The lens is automatically heated in case of frost.
Driving stability control
systems
Your BMW is equipped with an extended array
of systems designed to enhance and maintain
vehicle stability under extreme conditions.
ABS Antilock Brake System
ABS prevents locking of the wheels during
braking. Safe steering response is maintained
even during full braking. Active safety is thus
increased.
ABS is operational every time you start the
engine. Braking safely, refer to page129.
CBC Cornering Brake Control
When braking during curves or when braking
during a lane change, driving stability and steer-
ing response are improved further.
Electronic brake-force distribution
The system controls the brake pressure in the
rear wheels to ensure stable braking behavior.