2008 AUDI S5 lights
[x] Cancel search: lightsPage 198 of 294
Downloaded from www.Manualslib.com manuals search engine Your vehicle and the environment 196How to improve economy and minimise pollutionFuel economy, environmental impact and wear on the engine,
brakes and tyres depend largely on the way you drive the vehicle. By
adopting an economical driving style and anticipating the traffic
situation ahead, you can reduce fuel consumption by 10-15%. The
following section gives you some tips on lessening the impact on
the environment and reducing your operating costs at the same
time.
Anticipate well in advance
A car uses most fuel when accelerating. If you anticipate hazards
and speed changes well in advance, you will need to brake less and
thus accelerate less. Wherever possible, let the car slow down grad-
ually with a gear engaged, for instance when you can see that the
next traffic lights are red. This takes advantage of the engine
braking effect, reducing wear on the brakes and tyres. Emissions
and fuel consumption will drop to zero due to the overrun fuel cut-
off.
Change gear early to save fuel
An effective way of saving fuel is to change up quickly through the
gears. Running the engine at high rpm in the lower gears uses an
unnecessary amount of fuel.
Manual gearbox: Shift up to second gear as soon as possible. If
possible, we recommend shifting up to the next gear at approx.
2,000 rpm.
Automatic gearbox: Press the accelerator slowly and avoid using
the “kick-down” feature.
Avoid driving at high speed
Avoid travelling at top speed. Fuel consumption, exhaust emissions
and noise levels all increase very rapidly at higher speeds. Driving at
moderate speeds will help to save fuel.Do not let the engine idle for longer than necessary
It is worthwhile switching off the engine when waiting in a traffic
jam, at level crossings or at traffic lights with a long red phase. The
fuel saved after only 30 - 40 seconds is greater than the amount of
fuel needed to restart the engine.
The engine takes a very long time to warm up when it is running at
idling speed. Mechanical wear and pollutant emissions are also
especially high during this initial warm-up phase. It is therefore best
to drive off immediately after starting the engine. Avoid running the
engine at high speed.
Regular servicing
Regular servicing can establish a basis for good fuel economy
before you start driving. A well-serviced engine gives you the
benefit of improved fuel efficiency as well as maximum reliability
and an enhanced resale value. A badly tuned engine can consume
up to ten percent more fuel than necessary.
Avoid short trips
The engine and emission control system need to reach their proper
working temperature in order to minimise fuel consumption and
emissions.
A cold engine uses disproportionately more fuel. The engine only
reaches its working temperature after about four kilometres, when
fuel consumption will return to a normal level. This is the reason
why we recommend avoiding short trips wherever possible.
Maintain the correct tyre pressures
Always make sure the tyres are inflated to the correct pressures
⇒page 232 to save fuel. If the tyre pressures are just 0.5 bar too low,
this can increase the fuel consumption by as much as 5 %. Due to
the greater rolling resistance, under-inflation also increases tyre
wear and impairs handling.
Do not use winter tyres all through the year; they will increase fuel
consumption by up to 10 %.
document_0900452a81793dcc.book Seite 196 Mittwoch, 21. März 2007 5:42 17
Page 201 of 294
Downloaded from www.Manualslib.com manuals search engine Towing a trailer199
Controls
Safety
Driving tips
General maintenance
Self-help
Technical data additional mirrors fitted. Both exterior mirrors should be mounted
on hinged extension brackets. Adjust the mirrors to give sufficient
vision to the rear.
Power supply
When you remove the ignition key the power supply to the trailer is
interrupted.
Removable ball joint coupling
Vehicles with a factory-fitted towing bracket are equipped with a
removable ball joint coupling. It is carried under the floor panel on
the left-hand side of the luggage compartment.
Note
We recommend having the car serviced between the normal inspec-
tion intervals if it used frequently for towing a trailer.Applies to vehicles: with towing bracketTrailer stabilisation system
Trailer stabilisation helps to reduce the risk of the vehicle
skidding when towing a trailer.When is the trailer stabilisation system activated?
Trailer stabilisation is active when the following requirements are
met:•
The ESP must NOT be switched off ⇒page 186,
•
The trailer connector must be properly secured in the vehicle
socket.
•
Vehicle speed must be higher than approx. 60 km/h.
How trailer stabilisation works:
In many cases, the driver can stabilise a swaying trailer by manually
braking the vehicle.However, if the ESP detects that the trailer is swaying and this is
affecting the towing vehicle, it will automatically brake the vehicle
to stabilise the trailer by slowing it down. The warning lamp
will
light up in the instrument cluster. If possible, do not turn the
steering wheel at this stage.
In order to warn traffic behind you, the brake lights will come on
during this automatic braking operation.
A trailer weighing less than 70% of the kerb weight of the towing
vehicle may sway quite considerably without the trailer stabilisation
system intervening. This can happen when the swaying movements
of the light-weight trailer are not or hardly passed on to the towing
vehicle and are therefore not detected by the ESP.
If the system for activating the trailer brake lights is defective, this
will be indicated in the instrument cluster display ⇒page 36, “Bulb
monitor ”.
Requirements for correct functioning of the trailer
stabilisation system
If these conditions are not met in full, the trailer stabilisation system
will only intervene to a limited extent or not at all ⇒.
•
The electrical connection between the towing vehicle and the
trailer must be functioning correctly, without any defects.
•
The load on the trailer must be properly secured.
•
The tyre pressures on both the vehicle and the trailer must be
adapted to the load that is being carried.
•
Where possible, operate the trailer with the maximum permitted
draw bar weight.
•
The trailer overrun brake must be set correctly. This is important
to ensure that the trailer can be braked correctly, to avoid the vehicle
and trailer “jack-knifing” and to prevent excess braking of the trailer.
•
In low outside temperatures, both the towing vehicle and the
trailer should be fitted with winter tyres.
document_0900452a81793dcc.book Seite 199 Mittwoch, 21. März 2007 5:42 17
Page 213 of 294
Downloaded from www.Manualslib.com manuals search engine Care of vehicle and cleaning211
Controls
Safety
Driving tips
General maintenance
Self-help
Technical data
WARNING
•
Do not wash the vehicle with the ignition switched on – risk of
accident.
•
Do not clean the underside of the car or inside the wheel arches
without protecting your hands and arms. You may cut yourself on
sharp metal parts.
•
Take care when washing the car during the winter: moisture
and ice on the brakes may affect braking efficiency – this could
cause an accident.Caution
•
Do not wash the vehicle in direct sunlight – otherwise the paint
can be damaged.
•
Do not use insect sponges, or abrasive household sponges, etc.
– they can damage the surfaces.
•
The headlights should only be washed with water – do not wipe
them with a dry cloth or sponge. It is best to use soapy water.
•
Never wash tyres with a jet that sprays the water out in a direct
stream. This could damage the tyres – even if the spray is kept at a
distance and only used for a very short time.For the sake of the environment
The car should only be washed in special wash bays. This prevents
oily water from getting into the public drains. In some districts,
washing vehicles anywhere else may be prohibited.Waxing and polishingWaxing
Waxing protects the paintwork. It is time to apply a good coat of wax
when water no longer forms droplets and rolls off the clean paint-
work.Even if a wax solution is used regularly in the car wash, it is advis-
able to protect the paint with a coat of wax at least twice a year.
In the summer, you will find it is much easier to remove dead insects
(which accumulate on the bumper and the front of the bonnet) if the
car has been waxed recently.
Polishing
Polishing is only necessary if the paint has lost its shine, and the
gloss cannot be brought back by putting on wax.
The car must be waxed after polishing if the polish used does not
contain wax compounds to seal the paint.
Caution
Matt painted and plastic parts must not be treated with wax or
polish.Ornamental trim and mouldingsThe metal brightwork on the body is made of aluminium rather than
chrome (for environmental reasons).
Dirt or marks on the trim mouldings should be removed with an
acid-free cleaning agent (do not use a chrome cleaner). Body polish
is also unsuitable for use on trim mouldings. The intensive cleaning
fluids often used before the car goes into a car wash may contain
alkaline substances, which can cause dull or milky patches when
they dry out.
Audi dealers carry stocks of cleaning products which have been
tested for use on your vehicle and are not harmful to the
environment.
document_0900452a81793dcc.book Seite 211 Mittwoch, 21. März 2007 5:42 17
Page 231 of 294
Downloaded from www.Manualslib.com manuals search engine Checking and topping up fluids229
Controls
Safety
Driving tips
General maintenance
Self-help
Technical data
Important safety warnings for handling a car battery
All work on batteries requires specialist knowledge.The vehicle battery is located under the floor panel in the luggage
compartment.
WARNING
Always be aware of the danger of injury and chemical burns as
well as the risk of accident or fire when working on the battery and
the electrical system.•
Wear safety glasses. Do not allow acid or lead particles to come
into contact with eyes, skin or clothing.
•
Battery acid is extremely corrosive. Wear protective gloves and
safety glasses. Do not tilt the battery - acid can leak out of the
vapour vent. If electrolyte should splash into the eyes rinse at once
for several minutes using clear water. Then seek medical care
immediately. Neutralize any acid splashes on the skin or clothing
with soap solution, and rinse off with plenty of water. If acid is
swallowed by mistake, consult a doctor immediately.
•
Keep open flames, sparks, uncovered lights and lit cigarettes
away from battery. Avoid sparks (including those from static charges) when handling cables and electrical equipment. Never
cross the battery poles. The resulting high-energy sparks can
cause injury.
•
A highly explosive mixture of gases is given off when the
battery is under charge. Only charge battery in a well ventilated
area.
•
Keep children away from the battery and battery acid.
•
Switch off all electrical equipment before starting any work on
the vehicle electrical system. Remove the ignition key. The minus
cable of the battery must be disconnected. When changing a light
bulb, it is sufficient to only turn off the light.
•
Before disconnecting the battery, turn off the anti-theft
system! Otherwise, the alarm will sound.
•
When disconnecting the battery from the vehicle's electrical
system, first disconnect the minus cable and then the plus cable.
•
Before reconnecting the battery, turn off all electrical equip-
ment. First connect the plus cable, then the minus cable. The
battery cables must not be connected to the wrong battery poles
- serious risk of cable fire.
•
Never charge a frozen or thawed out battery - risk of explosion
and chemical burns! A battery must be replaced once it has been
frozen. When it is discharged the battery can freeze at tempera-
tures around 0°C.
•
Make sure that the vapour hose is always attached to the
battery.
•
Never use a damaged battery - risk of explosion! Replace a
damaged battery immediately.Caution
•
Never disconnect the car's battery with the engine running or
with the ignition turned on, otherwise the electrical system or elec-
trical components will be damaged.
Wear safety glasses!
Battery acid is extremely corrosive. Wear protec-
tive gloves and safety glasses.
Keep open flames, sparks, uncovered lights and
lit cigarettes away from battery!
A highly explosive mixture of gases is given off
when the battery is under charge!
Keep children away from the battery and battery
acid.
WARNING (continued)
document_0900452a81793dcc.book Seite 229 Mittwoch, 21. März 2007 5:42 17
Page 251 of 294
Downloaded from www.Manualslib.com manuals search engine Self-help249
Controls
Safety
Driving tips
General maintenance
Self-help
Technical data
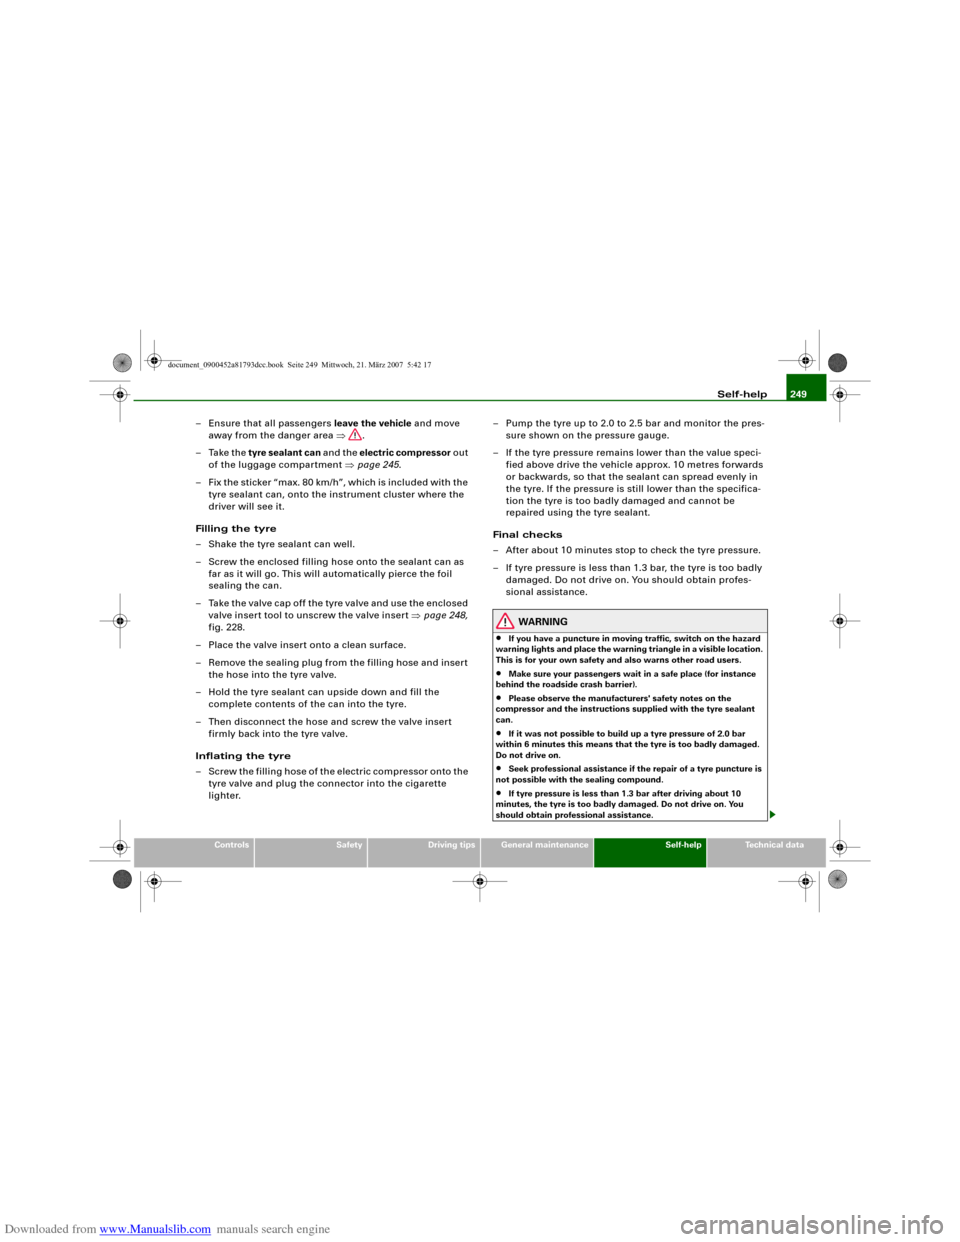
– Ensure that all passengers leave the vehicle and move
away from the danger area ⇒.
– Take the tyre sealant can and the electric compressor out
of the luggage compartment ⇒page 245.
– Fix the sticker “max. 80 km/h”, which is included with the
tyre sealant can, onto the instrument cluster where the
driver will see it.
Filling the tyre
– Shake the tyre sealant can well.
– Screw the enclosed filling hose onto the sealant can as
far as it will go. This will automatically pierce the foil
sealing the can.
– Take the valve cap off the tyre valve and use the enclosed
valve insert tool to unscrew the valve insert ⇒page 248,
fig. 228.
– Place the valve insert onto a clean surface.
– Remove the sealing plug from the filling hose and insert
the hose into the tyre valve.
– Hold the tyre sealant can upside down and fill the
complete contents of the can into the tyre.
– Then disconnect the hose and screw the valve insert
firmly back into the tyre valve.
Inflating the tyre
– Screw the filling hose of the electric compressor onto the
tyre valve and plug the connector into the cigarette
lighter.– Pump the tyre up to 2.0 to 2.5 bar and monitor the pres-
sure shown on the pressure gauge.
– If the tyre pressure remains lower than the value speci-
fied above drive the vehicle approx. 10 metres forwards
or backwards, so that the sealant can spread evenly in
the tyre. If the pressure is still lower than the specifica-
tion the tyre is too badly damaged and cannot be
repaired using the tyre sealant.
Final checks
– After about 10 minutes stop to check the tyre pressure.
– If tyre pressure is less than 1.3 bar, the tyre is too badly
damaged. Do not drive on. You should obtain profes-
sional assistance.
WARNING
•
If you have a puncture in moving traffic, switch on the hazard
warning lights and place the warning triangle in a visible location.
This is for your own safety and also warns other road users.
•
Make sure your passengers wait in a safe place (for instance
behind the roadside crash barrier).
•
Please observe the manufacturers' safety notes on the
compressor and the instructions supplied with the tyre sealant
can.
•
If it was not possible to build up a tyre pressure of 2.0 bar
within 6 minutes this means that the tyre is too badly damaged.
Do not drive on.
•
Seek professional assistance if the repair of a tyre puncture is
not possible with the sealing compound.
•
If tyre pressure is less than 1.3 bar after driving about 10
minutes, the tyre is too badly damaged. Do not drive on. You
should obtain professional assistance.
document_0900452a81793dcc.book Seite 249 Mittwoch, 21. März 2007 5:42 17
Page 252 of 294
Downloaded from www.Manualslib.com manuals search engine Self-help 250
CautionTake special care if you have to repair a tyre on a gradient.
Note
•
Do not use the compressor for longer than 6 minutes at a time,
as it could overheat. When the compressor has cooled down, you
can use it again.
•
If tyre sealant should leak out, leave it to dry and then pull it off
like foil.
•
After carrying out a tyre repair remember to buy a new tyre
sealant can at a qualified workshop. This will ensure that the Tyre
Mobility System is operative again.
•
Please observe the relevant regulations.
Changing a wheelPreparations
Some preparations are necessary before changing a
wheel.– If you have a flat tyre, stop the car well away from moving
traffic. Choose a location that is as level as possible.
– All passengers should leave the car. They should wait in
a safe place (for instance behind the roadside crash
barrier).
– Apply the parking brake to stop the vehicle moving acci-
dentally.
–Engage first gear (manual gearbox) or move selector
lever to position P (automatic gearbox).– When towing a trailer: unhitch the trailer from your
vehicle.
– Take the tools ⇒page 245 and the spare wheel*
⇒page 246 out of the luggage compartment.
WARNING
If you have a puncture in moving traffic, switch on the hazard
warning lights and place the warning triangle in a visible location.
This is for your own safety and also warns other road users.
Caution
If you have to change the tyre on a gradient, block the wheel oppo-
site the wheel being changed by placing a stone or similar object
under it to prevent the vehicle from rolling away.
Note
Please observe the relevant regulations.How to change a wheel
Change the wheel as described below.–Pull off the hub cap. Also refer to ⇒page 251, “Hub
caps”.
–Loosen the wheel bolts ⇒page 251.
–Raise the car with the jack* ⇒page 252.
–Ta k e o f f the wheel with the flat tyre and then put on the
spare wheel* ⇒page 253.
–Lower the vehicle to the ground.
document_0900452a81793dcc.book Seite 250 Mittwoch, 21. März 2007 5:42 17
Page 260 of 294
Downloaded from www.Manualslib.com manuals search engine Self-help 258Do not pull too hard with the towing vehicle and take care to avoid
jerking the towrope. When towing on a loose surface there is always
a risk of overloading and damaging the anchorage points.
Caution
If there is no oil in the gearbox or no lubricant in the automatic
transmission the car may only be towed with the driven wheels
lifted clear of the road, or transported on a special car transporter
or trailer.
Note
•
Note the regulations concerning towing.
•
The hazard warning lights of both vehicles must normally be
switched on. However, observe any regulations to the contrary.
•
Make sure that the towrope is not twisted, as otherwise the front
towline anchorage on your vehicle could work itself loose.
Front towline anchorage
The front towline anchorage is only mounted if the vehicle
has to be towed.
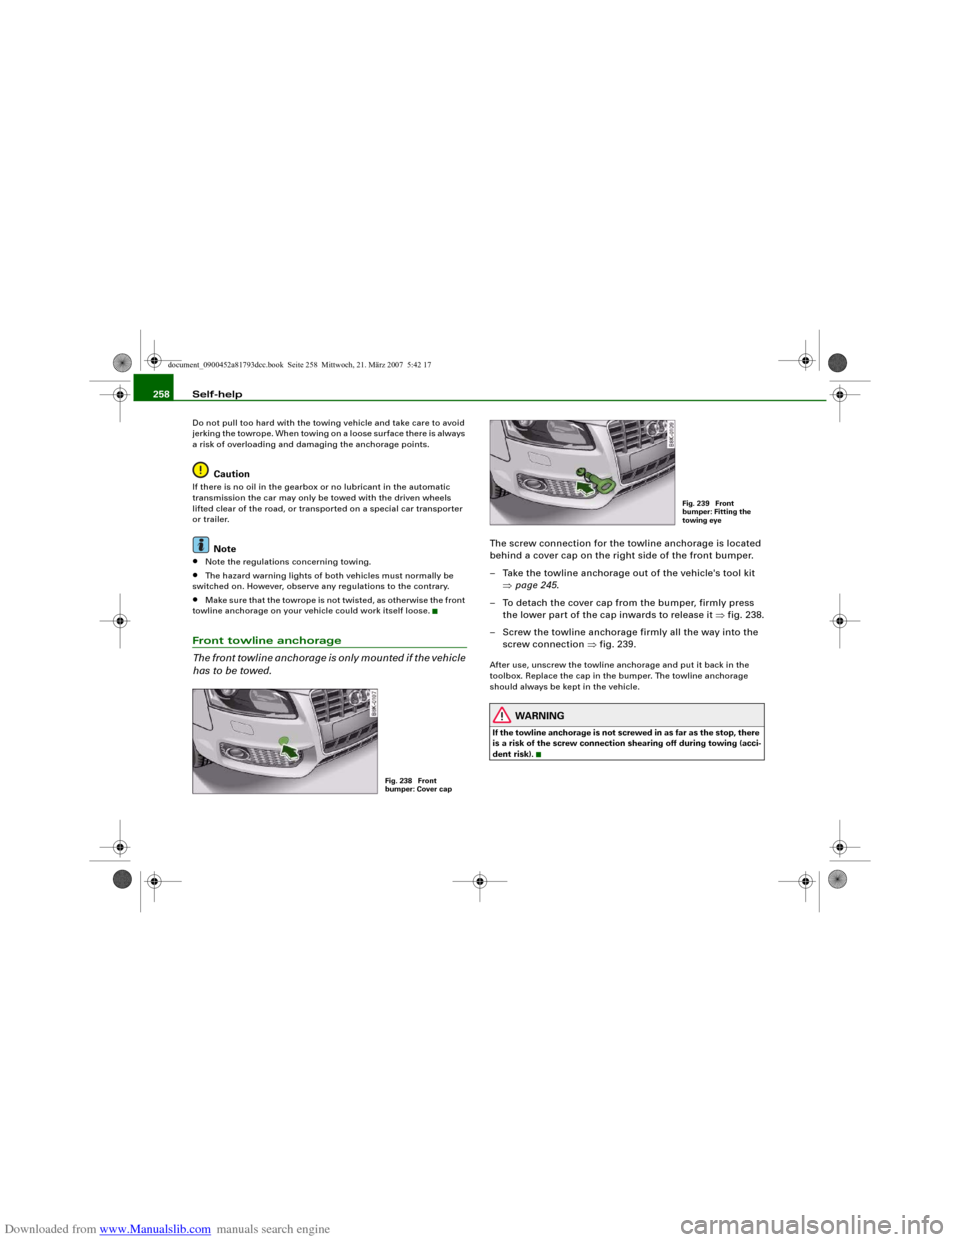
The screw connection for the towline anchorage is located
behind a cover cap on the right side of the front bumper.
– Take the towline anchorage out of the vehicle's tool kit
⇒page 245.
– To detach the cover cap from the bumper, firmly press
the lower part of the cap inwards to release it ⇒fig. 238.
– Screw the towline anchorage firmly all the way into the
screw connection ⇒fig. 239.After use, unscrew the towline anchorage and put it back in the
toolbox. Replace the cap in the bumper. The towline anchorage
should always be kept in the vehicle.
WARNING
If the towline anchorage is not screwed in as far as the stop, there
is a risk of the screw connection shearing off during towing (acci-
dent risk).
Fig. 238 Front
bumper: Cover cap
Fig. 239 Front
bumper: Fitting the
towing eye
document_0900452a81793dcc.book Seite 258 Mittwoch, 21. März 2007 5:42 17
Page 267 of 294
Downloaded from www.Manualslib.com manuals search engine Fuses and bulbs265
Controls
Safety
Driving tips
General maintenance
Self-help
Technical data
BulbsChanging bulbs
Changing bulbs requires a certain degree of practical
skill.You can change the following bulbs for exterior lights yourself:•
Bulb for turn signals
•
Bulb for fog light
•
Bulbs for rear lights in boot lid
•
Bulbs for rear lights in side panel
•
Bulbs for number plate light
The following bulbs should only be changed by a qualified work-
shop:
•
Xenon headlights: Light source for daytime running
lights/parking lights
•
Bulb for headlights: Bi-xenon lights ⇒
•
Light source for turn signal in exterior mirror housing
•
Light source for high-level brake light
As a rule, you require a certain degree of practical skill to change
defective bulbs. This applies in particular to those bulbs which are
only accessible from the engine compartment.
If in doubt, we recommend that you have defective bulbs changed
by a qualified workshop or qualified mechanic.
If you do decide to change bulbs in the engine compartment your-
self, be aware of the safety risks involved ⇒page 221 ⇒.
Types of bulbs
You must only replace a bulb with a bulb of the same type. Informa-
tion regarding e.g. the wattage can be found on the base of the
bulb.
WARNING
•
Take particular care when working on components in the
engine compartment if the engine is warm - risk of burns!
•
Bulbs are sensitive to pressure. The glass can break when you
touch the bulb, causing injury.
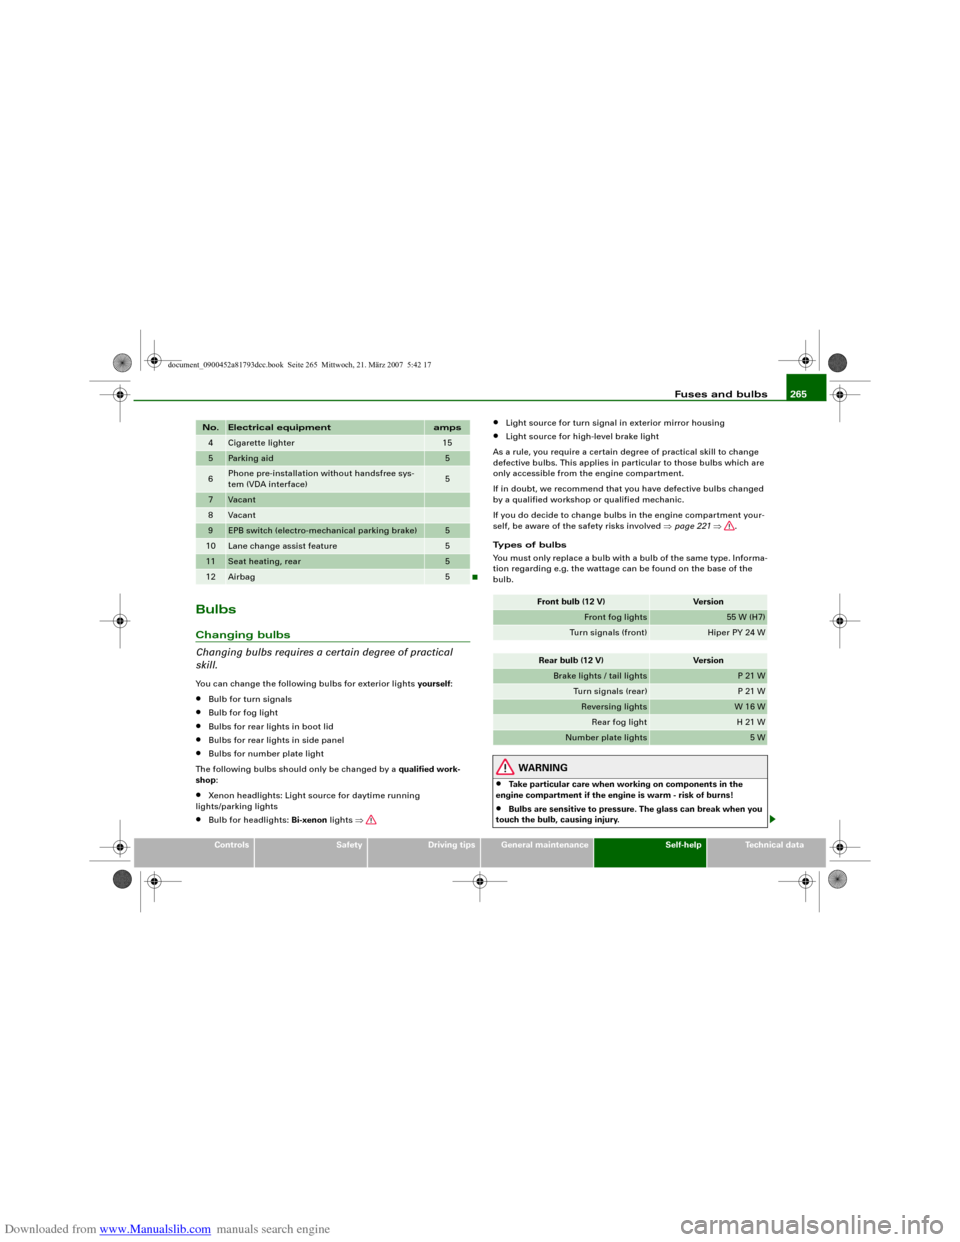
4
Cigarette lighter
15
5
Parking aid
5
6
Phone pre-installation without handsfree sys-
tem (VDA interface)
5
7
Vacant
8
Vacant
9
EPB switch (electro-mechanical parking brake)
5
10
Lane change assist feature
5
11
Seat heating, rear
5
12
Airbag
5
No.
Electrical equipment
amps
Front bulb (12 V)
Version
Front fog lights
55 W (H7)
Turn signals (front)
Hiper PY 24 W
Rear bulb (12 V)
Version
Brake lights / tail lights
P 21 W
Turn signals (rear)
P 21 W
Reversing lights
W 16 W
Rear fog light
H 21 W
Number plate lights
5 W
document_0900452a81793dcc.book Seite 265 Mittwoch, 21. März 2007 5:42 17