2008 AUDI S5 lights
[x] Cancel search: lightsPage 67 of 294
Downloaded from www.Manualslib.com manuals search engine Lights and vision65
Controls
Safety
Driving tips
General maintenance
Self-help
Technical data
– Lift the wiper arm away from the glass.
– Press the release button on the wiper blade
⇒page 64, fig. 66. Hold the wiper blade firmly and press
it forwards slightly .
– Slide the wiper blade upwards .
Fitting the wiper blade
– Fit the new wiper blade into the mounting on the wiper
arm . You should hear it engage in the wiper arm.
– Fold the wiper arm back down onto the glass.
WARNING
•
To prevent smearing on the glass, the wiper blades should be
cleaned regularly using a window cleaner solution. If the wiper
blades are very dirty (insects etc.), they should be cleaned using a
sponge or cloth – bad visibility can cause accidents.
•
For safety, the wiper blades should be changed once or twice a
year.Caution
The windscreen wipers must be in the service position ⇒page 64
when replacing the blades! Otherwise the wiper motor or the paint-
work on the bonnet may be damaged.Rear-view mirrorsManual anti-dazzle adjustmentNormal setting
– Push the lever at the bottom of the mirror away from you.Anti-dazzle setting
– Pull the lever at the bottom of the mirror towards you.
Applies to vehicles: with automatic anti-dazzle adjustment for interior mirrorAutomatic anti-dazzle adjustment
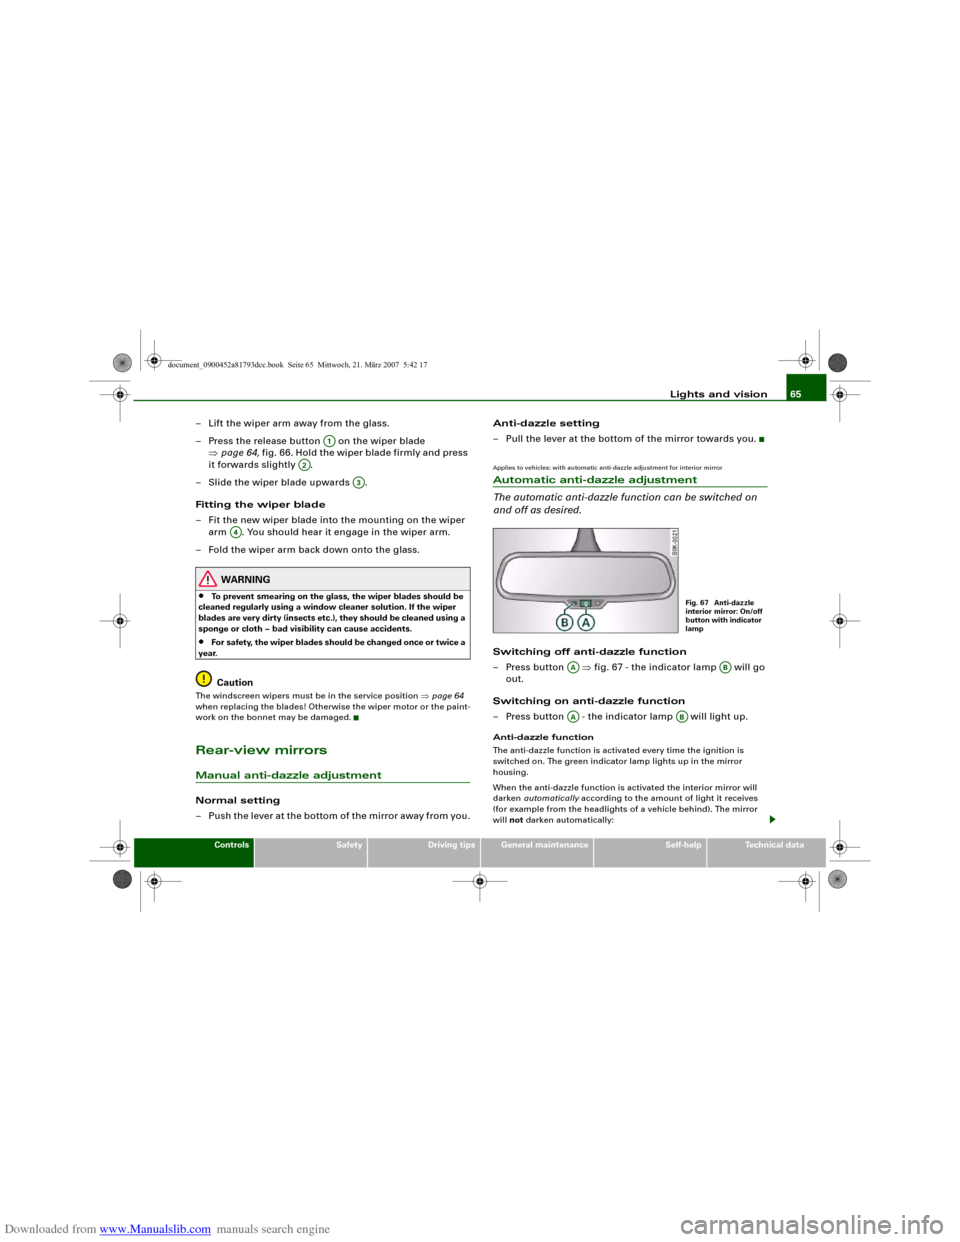
The automatic anti-dazzle function can be switched on
and off as desired.Switching off anti-dazzle function
– Press button ⇒fig. 67 - the indicator lamp will go
out.
Switching on anti-dazzle function
– Press button - the indicator lamp will light up.Anti-dazzle function
The anti-dazzle function is activated every time the ignition is
switched on. The green indicator lamp lights up in the mirror
housing.
When the anti-dazzle function is activated the interior mirror will
darken automatically according to the amount of light it receives
(for example from the headlights of a vehicle behind). The mirror
will not darken automatically:
A1
A2
A3
A4
Fig. 67 Anti-dazzle
interior mirror: On/off
button with indicator
lamp
AA
AB
AA
AB
document_0900452a81793dcc.book Seite 65 Mittwoch, 21. März 2007 5:42 17
Page 68 of 294
Downloaded from www.Manualslib.com manuals search engine Lights and vision 66•
when the interior lighting is switched on
•
when reverse gear is engaged
WARNING
Electrolyte fluid can leak from a broken mirror. This fluid can cause
irritation to the skin, eyes, and respiratory organs. Wash thor-
oughly with clean water should you come into contact with this
fluid. Seek medical assistance if needed.
Caution
Electrolyte fluid leaking from a broken mirror can cause damage to
plastic surfaces. Use a sponge or similar to remove the fluid as soon
as possible.
Note
•
If you switch off the anti-dazzle function for the interior mirror,
this will also deactivate the anti-dazzle function for the exterior
mirrors.
•
The automatic anti-dazzle function will only work properly if the
sun blind* for the rear window is not in use and there are no other
objects preventing light from reaching the interior mirror.
•
Do not attach any stickers to the windscreen in front of the
sensors, as these could lead to malfunctioning of the mirror.
Exterior mirrors
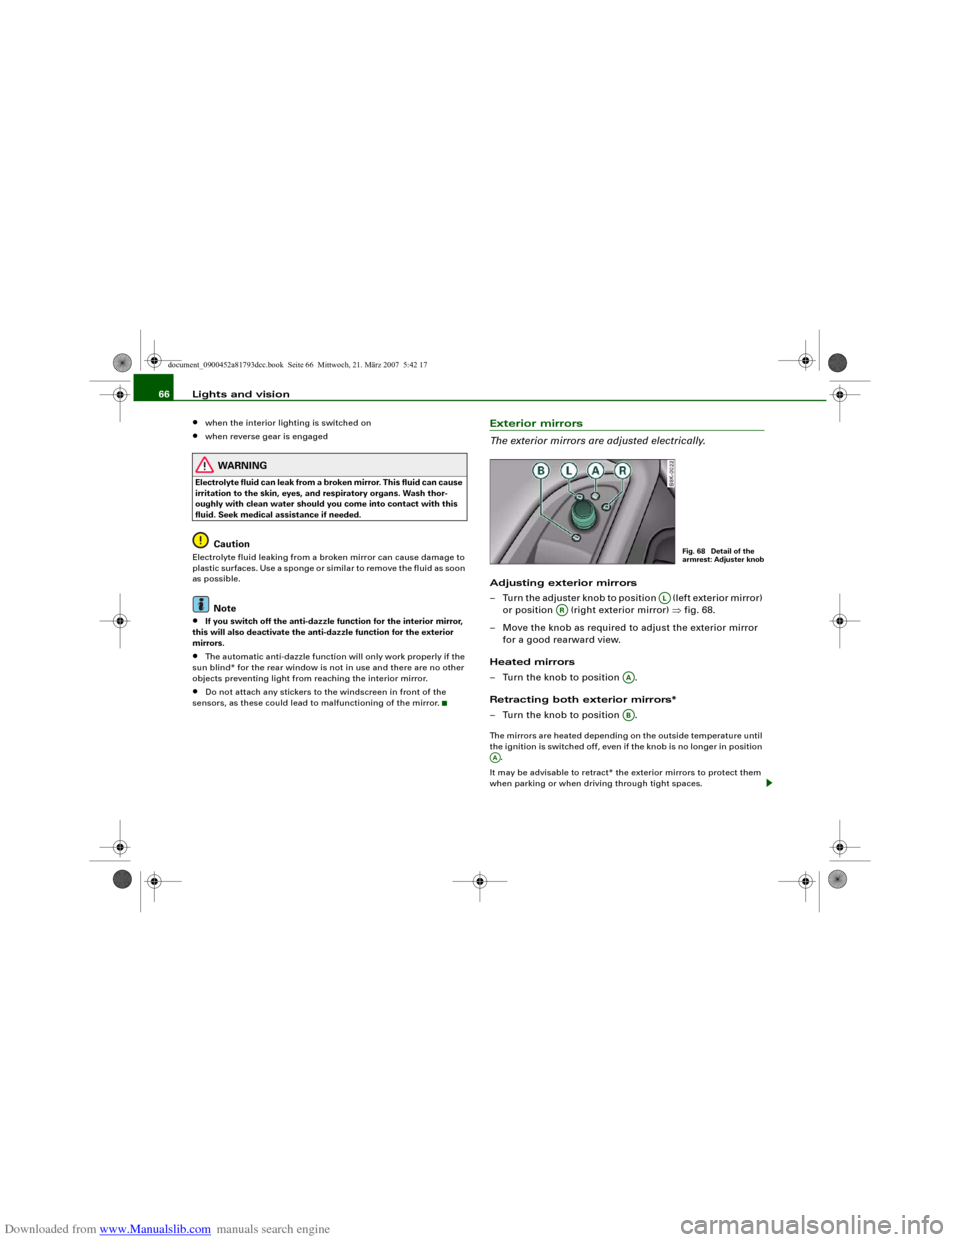
The exterior mirrors are adjusted electrically.Adjusting exterior mirrors
– Turn the adjuster knob to position (left exterior mirror)
or position (right exterior mirror) ⇒fig. 68.
– Move the knob as required to adjust the exterior mirror
for a good rearward view.
Heated mirrors
– Turn the knob to position .
Retracting both exterior mirrors*
– Turn the knob to position .The mirrors are heated depending on the outside temperature until
the ignition is switched off, even if the knob is no longer in position
.
It may be advisable to retract* the exterior mirrors to protect them
when parking or when driving through tight spaces.
Fig. 68 Detail of the
armrest: Adjuster knob
AL
AR
AAAB
AA
document_0900452a81793dcc.book Seite 66 Mittwoch, 21. März 2007 5:42 17
Page 69 of 294
Downloaded from www.Manualslib.com manuals search engine Lights and vision67
Controls
Safety
Driving tips
General maintenance
Self-help
Technical data Memory for exterior mirrors*
On vehicles with memory function for the driver's seat, the setting
of the exterior mirrors is automatically stored together with the seat
position ⇒page 72.
Tilting function for exterior mirror on passenger side*
(only if equipped with memory for exterior mirrors)
When reverse gear is engaged, the mirror surface tilts slightly
downwards, provided the mirror control is switched to the exterior
mirror on the passenger's side (knob in position ⇒page 66,
fig. 68). This provides a better view of the kerb when parking.
The mirror returns to its original position when reverse gear is
disengaged and the vehicle is driven forwards at a speed above
about 15 km/h. The mirror will also return to its original position
when the adjuster knob is turned to the position for the driver's
exterior mirror or when the ignition is switched off.
If the position of the mirror surface is changed while the mirror is
tilted, this new position is automatically stored and assigned to the
remote control key when you disengage reverse gear.
Caution
•
Convex or wide-angle* exterior mirrors give a larger field of
vision. However, they also make objects appear further away than
they actually are. For this reason, you should not rely on these
mirrors for judging the distance of vehicles behind.
•
If one of the mirror housings is knocked out of position (e.g.
when parking), the mirrors must first be fully retracted with the elec-
tric control. Do not readjust the mirror housing by hand, as this will
interfere with the mirror adjuster function.Note
If the electrical adjustment should ever fail to operate, the mirrors
can be adjusted by hand by lightly pressing the edge of the mirror
glass.
Applies to vehicles: with automatic anti-dazzle adjustment for exterior mirrorsAutomatic anti-dazzle adjustment for exterior mirrorsThe exterior mirrors darken together with the automatically
adjusting interior mirror. When the ignition is on, the mirrors will
darken automatically according to the amount of light received (for
example from the headlights of a vehicle behind).
When the interior lights are switched on, or when reverse gear is
engaged, the mirrors revert to their original (i.e. not darkened)
condition.
WARNING
Electrolyte fluid can leak from a broken mirror. This fluid can cause
irritation to the skin, eyes, and respiratory organs. Wash thor-
oughly with clean water should you come into contact with this
fluid. Seek medical assistance if needed.
Caution
Electrolyte fluid leaking from a broken mirror can cause damage to
the paintwork or plastic surfaces. Use a sponge or similar to remove
the fluid as soon as possible.
Note
•
If you switch off the anti-dazzle function for the interior mirror,
this will also deactivate the anti-dazzle function for the exterior
mirrors.
•
The automatic anti-dazzle function will only work properly if the
sun blind* for the rear window is not in use and there are no other
objects preventing light from reaching the interior mirror.
AR
AL
document_0900452a81793dcc.book Seite 67 Mittwoch, 21. März 2007 5:42 17
Page 70 of 294
Downloaded from www.Manualslib.com manuals search engine Lights and vision 68Digital compassApplies to vehicles: with digital compassActivating and deactivating the compass
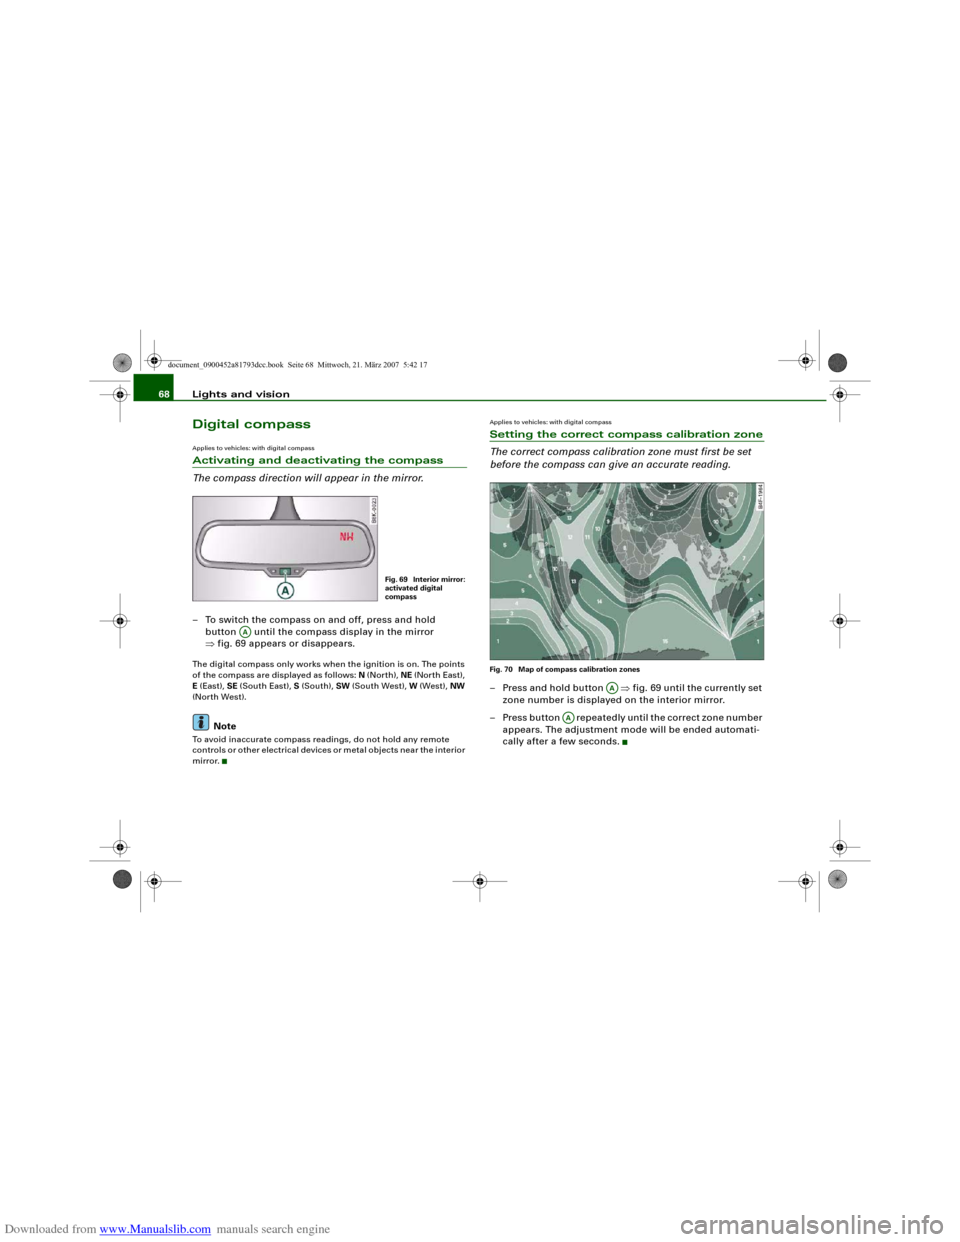
The compass direction will appear in the mirror.– To switch the compass on and off, press and hold
button until the compass display in the mirror
⇒fig. 69 appears or disappears.The digital compass only works when the ignition is on. The points
of the compass are displayed as follows: N (North), NE (North East),
E (East), SE (South East), S (South), SW (South West), W (West), NW
(North West).
Note
To avoid inaccurate compass readings, do not hold any remote
controls or other electrical devices or metal objects near the interior
mirror.
Applies to vehicles: with digital compassSetting the correct compass calibration zone
The correct compass calibration zone must first be set
before the compass can give an accurate reading.Fig. 70 Map of compass calibration zones– Press and hold button ⇒fig. 69 until the currently set
zone number is displayed on the interior mirror.
– Press button repeatedly until the correct zone number
appears. The adjustment mode will be ended automati-
cally after a few seconds.
Fig. 69 Interior mirror:
activated digital
compass
AA
AA
AA
document_0900452a81793dcc.book Seite 68 Mittwoch, 21. März 2007 5:42 17
Page 71 of 294
Downloaded from www.Manualslib.com manuals search engine Lights and vision69
Controls
Safety
Driving tips
General maintenance
Self-help
Technical data
Applies to vehicles: with digital compassCalibrating compass
The compass must be re-calibrated if the display is incor-
rect or inaccurate.– Press and hold button until the letter C appears in the
interior mirror.
– Drive in a circle at a speed of about 10 km/h until a point
of the compass is displayed in the interior mirror.
WARNING
Calibrate your compass at a location where there is no traffic so
that you do not endanger yourself or other road users (accident
risk).
AA
document_0900452a81793dcc.book Seite 69 Mittwoch, 21. März 2007 5:42 17
Page 98 of 294
Downloaded from www.Manualslib.com manuals search engine Heating and cooling 96
– Turn the rotary control to the desired setting.You can use the air distribution setting to select the air outlets you
wish to activate. In setting
all the air is directed to the windows,
in setting
the air is directed to the driver (or passenger), and in
setting
to the footwells. In addition to this there are several other
possible combinations, allowing you to adjust the air distribution to
suit individual requirements.
Switch to for automatic control of the air distribution.
The air distribution setting will be shown on the MMI display
⇒page 95, fig. 109 for a few seconds if the MMI is switched on.
Applies to vehicles: with deluxe automatic air conditionerDefrosting
The windscreen and side windows are defrosted or
demisted as quickly as possible.– To switch on, press the button.
– To switch off, press the button again, or press the
button.The temperature is regulated automatically. The air output is
increased to maximum and most of the air comes out of the outlets
below the windscreen.
The air recirculation mode is switched off when the button is
pressed.Applies to vehicles: with deluxe automatic air conditionerHeated rear window
The rear window heating helps to demist the rear window.– Press the
b u t t o n t o s w i t c h t h e r e a r w i n d o w h e a t i n g o n
and off.
The rear window heating only works when the engine is running. An
indicator lamp in the button lights up when the rear window heater
is switched on.
Depending on the outside temperature, the rear window heating
switches off automatically after about 10 to 20 minutes.
The rear window heating can be switched on permanently by
pressing the
button for longer than two seconds. It will then
remain on until the ignition is switched off. When the rear window
heating is switched on, this setting will remain activated for 15
minutes after switching off the ignition.
If the engine is started again during this period of 15 minutes, the
rear window heating will be switched on for about 10 to 20 minutes,
depending on the exterior temperature. This means you do not have
to manually switch on the rear window heating again if the vehicle
has only been parked for a short time.
For the sake of the environment
Switch off the heated rear window manually as soon as the rear
window is clear. By saving electrical power you can also save fuel.Applies to vehicles: with deluxe automatic air conditionerAC mode Deactivating the AC mode
– Press the button.
Activating the AC mode
– Press the button again.In the AC mode, the air cooling system is switched on and the
heating and ventilation are regulated automatically.
AUTO
AUTO
ACACAC
document_0900452a81793dcc.book Seite 96 Mittwoch, 21. März 2007 5:42 17
Page 106 of 294
Downloaded from www.Manualslib.com manuals search engine Heating and cooling 104Applies to vehicles: with deluxe automatic air conditioner plusAir distribution
The automatically programmed air distribution can be
altered manually if required.– Press the button for Distribution .
– Turn the rotary control to the desired setting.You can use the air distribution setting to select the air outlets you
wish to activate. In setting
all the air is directed to the windows,
in setting
the air is directed to the driver (or passenger), and in
setting
to the footwells. In addition to this there are several other
possible combinations, allowing you to adjust the air distribution to
suit individual requirements.Switch to for automatic control of the air distribution.
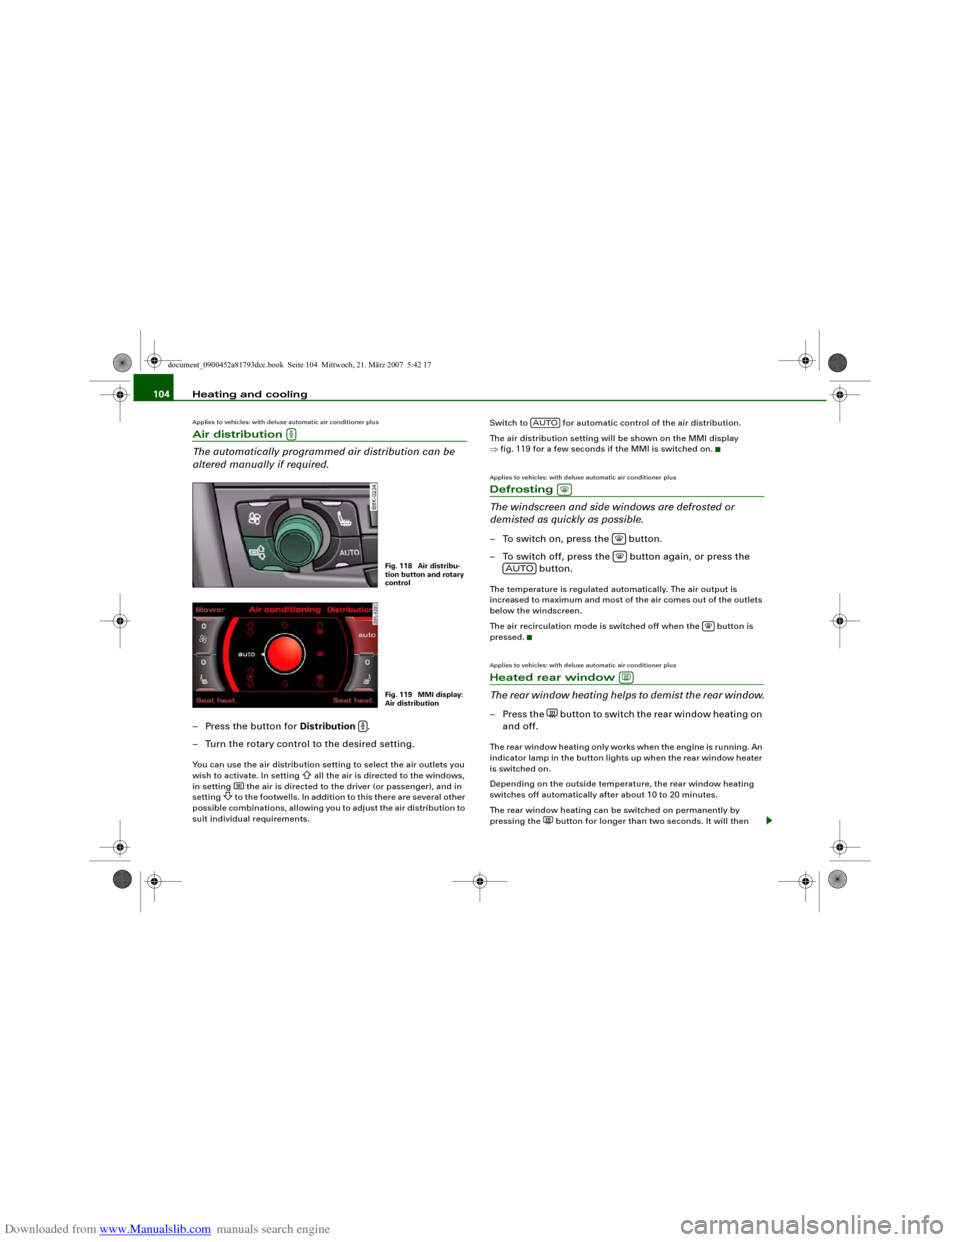
The air distribution setting will be shown on the MMI display
⇒fig. 119 for a few seconds if the MMI is switched on.
Applies to vehicles: with deluxe automatic air conditioner plusDefrosting
The windscreen and side windows are defrosted or
demisted as quickly as possible.– To switch on, press the button.
– To switch off, press the button again, or press the
button.The temperature is regulated automatically. The air output is
increased to maximum and most of the air comes out of the outlets
below the windscreen.
The air recirculation mode is switched off when the button is
pressed.Applies to vehicles: with deluxe automatic air conditioner plusHeated rear window
The rear window heating helps to demist the rear window.– Press the
b u t t o n t o s w i t c h t h e r e a r w i n d o w h e a t i n g o n
and off.
The rear window heating only works when the engine is running. An
indicator lamp in the button lights up when the rear window heater
is switched on.
Depending on the outside temperature, the rear window heating
switches off automatically after about 10 to 20 minutes.
The rear window heating can be switched on permanently by
pressing the
button for longer than two seconds. It will then
Fig. 118 Air distribu-
tion button and rotary
controlFig. 119 MMI display:
Air distribution
AUTO
AUTO
document_0900452a81793dcc.book Seite 104 Mittwoch, 21. März 2007 5:42 17
Page 122 of 294
Downloaded from www.Manualslib.com manuals search engine Driving 120
Note•
The parking brake can be applied at any time - even when the
ignition is switched off. However, the ignition must be switched on
before the parking brake can be released.
•
Any slight noise which may be heard when the parking brake is
applied or released is quite normal and no cause for concern.
•
The parking brake runs an automatic test cycle at regular inter-
vals when the vehicle is parked. This may also cause a slight noise,
which is normal.
Parking
Please note the following points to ensure there is no risk
of the car rolling away accidentally after it is parked.Parking t he c ar
– Use the foot brake to stop the vehicle.
– Pull the switch to apply the parking brake.
– Automatic gearbox: Move the selector lever to P.
– Switch off the engine ⇒.
– Manual gearbox: Engage the first gear.
When parking on slopes
– Turn the steering wheel so that the vehicle would roll into
the kerb if it did start to move accidentally.
WARNING
•
Always take the key with you when leaving the vehicle – even
if you only intend to be gone for a short time. This is especially
important if children are left in the car. They might otherwise be
able to start the engine, release the parking brake or use power-operated equipment such as the electric windows - this could lead
to injuries.
•
Do not leave anyone (especially children) in the vehicle when it
is locked. Locked doors could delay assistance in an emergency,
potentially putting lives at risk.
Driving away from a standstill
The parking brake auto release function releases the
parking brake automatically when you wish to start
moving.Applying the parking brake when stopping
– Pull the switch to apply the parking brake.
Releasing the parking brake when driving away
– Drive off in the normal way: the parking brake will be
released automatically and the vehicle will start moving.On vehicles with automatic gearbox, you can apply the parking
brake when stopping at traffic lights, etc. Then you do not have to
hold the car with the footbrake, as the parking brake will stop it
creeping forward while a gear is engaged in the automatic transmis-
sion. When you drive off in the normal way, the parking brake will be
released automatically and the vehicle will start moving.
Driving away on a slope
When driving away on a gradient, the parking brake auto release
function prevents the vehicle from rolling back unintentionally. The
braking force of the parking brake is only released when there is
enough power at the wheels to make the vehicle move in the desired
direction.
WARNING (continued)
document_0900452a81793dcc.book Seite 120 Mittwoch, 21. März 2007 5:42 17