2008 AUDI S5 technical data
[x] Cancel search: technical dataPage 219 of 294
Downloaded from www.Manualslib.com manuals search engine Fuel and filling the tank217
Controls
Safety
Driving tips
General maintenance
Self-help
Technical data
Fuel and filling the tankPetrolPetrol grade
The correct grade of petrol is listed inside the fuel tank
flap.The vehicle is equipped with a catalytic converter and must only be
run on unleaded petrol. Unleaded petrol must comply with the
European EN 228 standard. The petrol grades have different octane
ratings (RON). If, in exceptional circumstances, the correct octane
rating is not available, please note the following:
Your engine normally requires Super Plus unleaded petrol (98 RON)
according to ⇒page 281, “Performance, weights and dimensions”.
Premium unleaded fuel with 95 RON can also be used. This can,
however, result in a slight loss of power under certain driving condi-
tions. If premium unleaded petrol is not available, the engine can be
run on regular unleaded petrol with 91 RON as an emergency
measure. In this case only use moderate engine speeds and a light
throttle. Avoid using full throttle. Fill up with premium or Super Plus
petrol as soon as possible.
Caution
•
Petrol complying with the EN 228 standard can contain small
quantities of ethanol. However, “bioethanol fuels”, which are
retailed under various different names such as E50 and E85, and
which contain a large proportion of ethanol, must not be put into
the vehicle, as this would damage the fuel system.
•
Even one tankful of leaded fuel would permanently impair the
efficiency of the catalytic converter.
•
High engine speed and full throttle can damage the engine when
using petrol with an octane rating lower than the correct grade for
the engine.
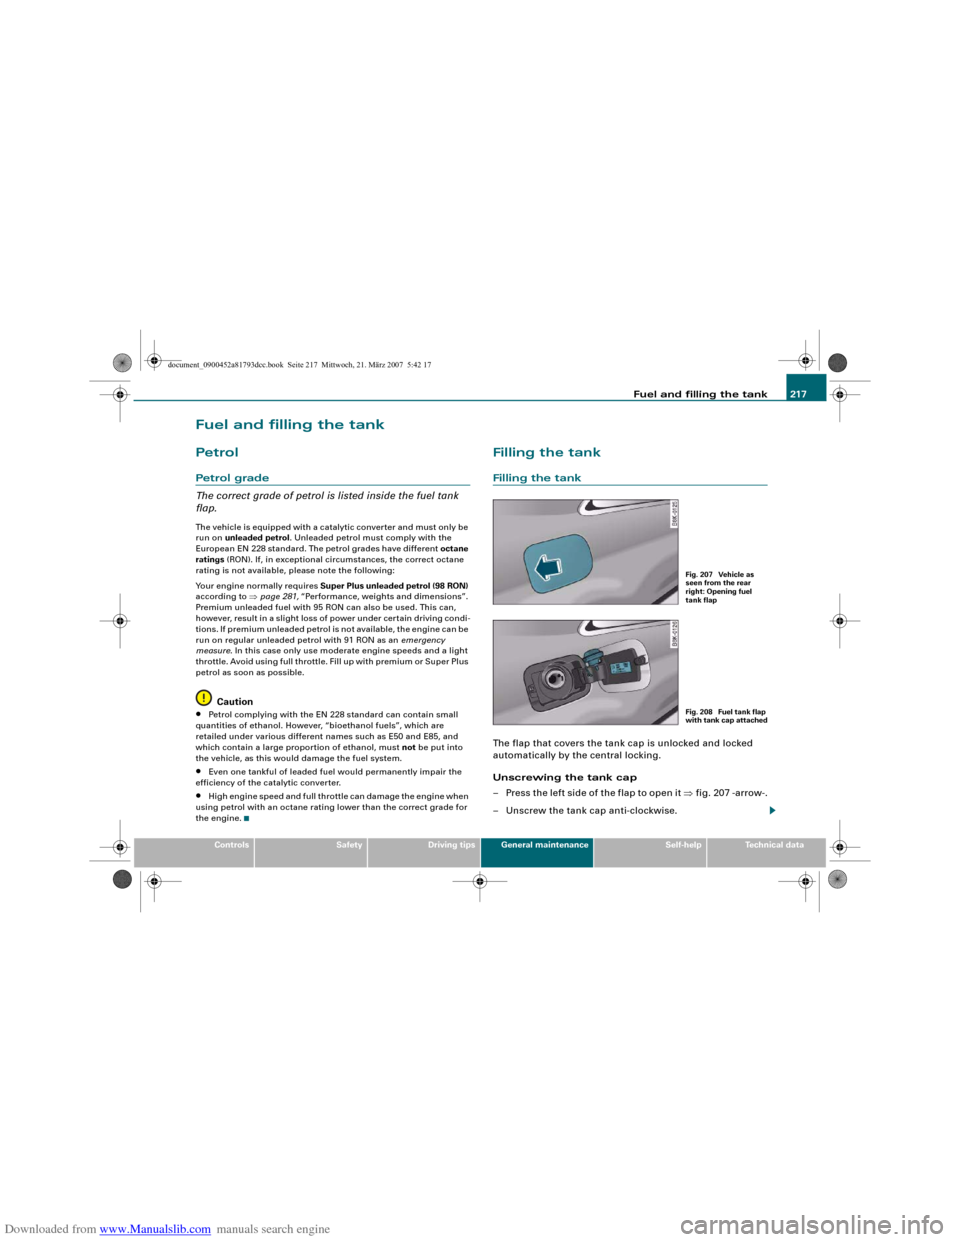
Filling the tankFilling the tankThe flap that covers the tank cap is unlocked and locked
automatically by the central locking.
Unscrewing the tank cap
– Press the left side of the flap to open it ⇒fig. 207 -arrow-.
– Unscrew the tank cap anti-clockwise.
Fig. 207 Vehicle as
seen from the rear
right: Opening fuel
tank flapFig. 208 Fuel tank flap
with tank cap attached
document_0900452a81793dcc.book Seite 217 Mittwoch, 21. März 2007 5:42 17
Page 221 of 294
Downloaded from www.Manualslib.com manuals search engine Fuel and filling the tank219
Controls
Safety
Driving tips
General maintenance
Self-help
Technical data
Releasing the tank flap manually
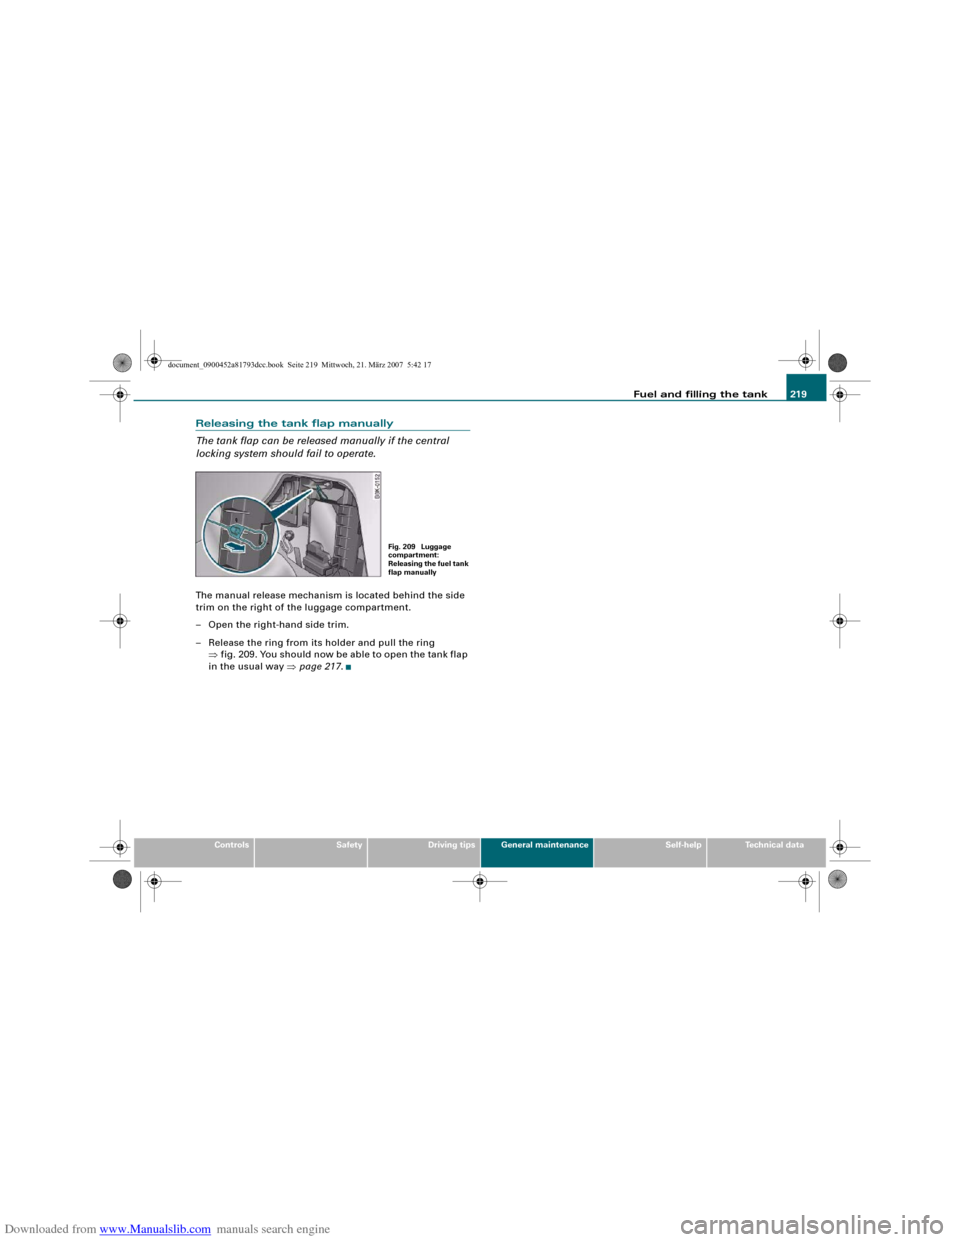
The tank flap can be released manually if the central
locking system should fail to operate.The manual release mechanism is located behind the side
trim on the right of the luggage compartment.
– Open the right-hand side trim.
– Release the ring from its holder and pull the ring
⇒fig. 209. You should now be able to open the tank flap
in the usual way ⇒page 217.
Fig. 209 Luggage
compartment:
Releasing the fuel tank
flap manually
document_0900452a81793dcc.book Seite 219 Mittwoch, 21. März 2007 5:42 17
Page 223 of 294
Downloaded from www.Manualslib.com manuals search engine Checking and topping up fluids221
Controls
Safety
Driving tips
General maintenance
Self-help
Technical data
Working on components in the engine compartment
Extra caution is necessary when working on components
in the engine compartment.Always be aware of the danger of injury and scalding as well as the
risk of accident or fire when working in the engine compartment
(e.g. when checking and refilling fluids). Always observe the warn-
ings listed below and follow all normal safety precautions. The
engine compartment of any motor vehicle is a potentially
hazardous area. ⇒.
WARNING
•
Switch off the engine.
•
Remove the ignition key.
•
Apply the parking brake.
•
Move the gear lever into neutral.
•
Wait for the engine to cool down.
•
Keep children away from engine compartment.
•
Never spill fluids on hot engine components. These fluids can
cause a fire (e.g. radiator anti-freeze).
•
Take care not to cause short circuits in the electrical system,
especially when working on the battery.
•
Do not touch the radiator fan when the engine is hot. The fan
may start running suddenly.
•
Do not unscrew the cap on the expansion tank when the engine
is hot. The cooling system is under pressure.
•
Protect face, hands and arms by covering the cap with a large,
thick rag to protect against escaping coolant and steam.
•
If any tests have to be performed with the engine running,
there is an extra safety risk from the rotating parts, such as the
drive belts, alternator and radiator fan, etc., and from the high-
voltage ignition system.
•
Observe the following additional warnings if work on the fuel
system or the electrical system is necessary:
−Always disconnect the battery.
−Do not smoke.
−Never work near naked flames.
−Always keep an approved fire extinguisher immediately
available.Caution
When topping up fluids make sure the correct fluid is put into the
correct filler opening. This can otherwise cause serious malfunc-
tions or engine damage.
For the sake of the environment
Inspect the ground underneath your vehicle regularly so that any
leaks are detected at an early stage. If you find oil spots or other
fluids, have your vehicle inspected by a qualified workshop.
Note
On right-hand drive vehicles* some of the containers/ reservoirs
mentioned below are located on the other side of the engine
compartment.Closing the bonnet– To close the bonnet, pull it down to overcome the spring
pressure.
– Then let it drop into the catches; do not press down ⇒.
WARNING (continued)
document_0900452a81793dcc.book Seite 221 Mittwoch, 21. März 2007 5:42 17
Page 225 of 294
Downloaded from www.Manualslib.com manuals search engine Checking and topping up fluids223
Controls
Safety
Driving tips
General maintenance
Self-help
Technical data
•
Do not mix the LongLife oil with oil intended for fixed service
intervals, as the requirements for the extended service intervals are
then no longer guaranteed.
•
In exceptional circumstances, if the engine oil level is too low
⇒page 223 and you cannot obtain the specified LongLife oil, you
can put in a small quantity of oil for fixed service intervals -
⇒page 281, “Performance, weights and dimensions”. This should
not be done more than once and no more than 0.5 litres should be
used.
Fixed service intervals (Inspection Service)*
If you do not take advantage of the Audi LongLife service for your
car, you can use the oils for fixed service intervals - ⇒page 281,
“Performance, weights and dimensions”. In this case, your car must
be serviced after a fixed interval of 1 year / 15,000 km (10,000 miles)
– see Service Schedule.
•
In exceptional circumstances, if the engine oil level is too low
⇒page 223 and you cannot obtain the oil specified for your vehicle,
you can put in a small quantity of oil conforming to the specification
ACEA A2 or ACEA A3. This should not be done more than once and
no more than 0.5 litres should be used.
Checking the oil level
Checking oil level
– Park your vehicle on a level surface.
– Allow the warm engine to run briefly at idling speed and
then switch off the ignition.
– Wait approx. 2 minutes.
– Pull out the dipstick. Wipe the dipstick with a clean cloth
and insert it again, pushing it in as far as it will go.
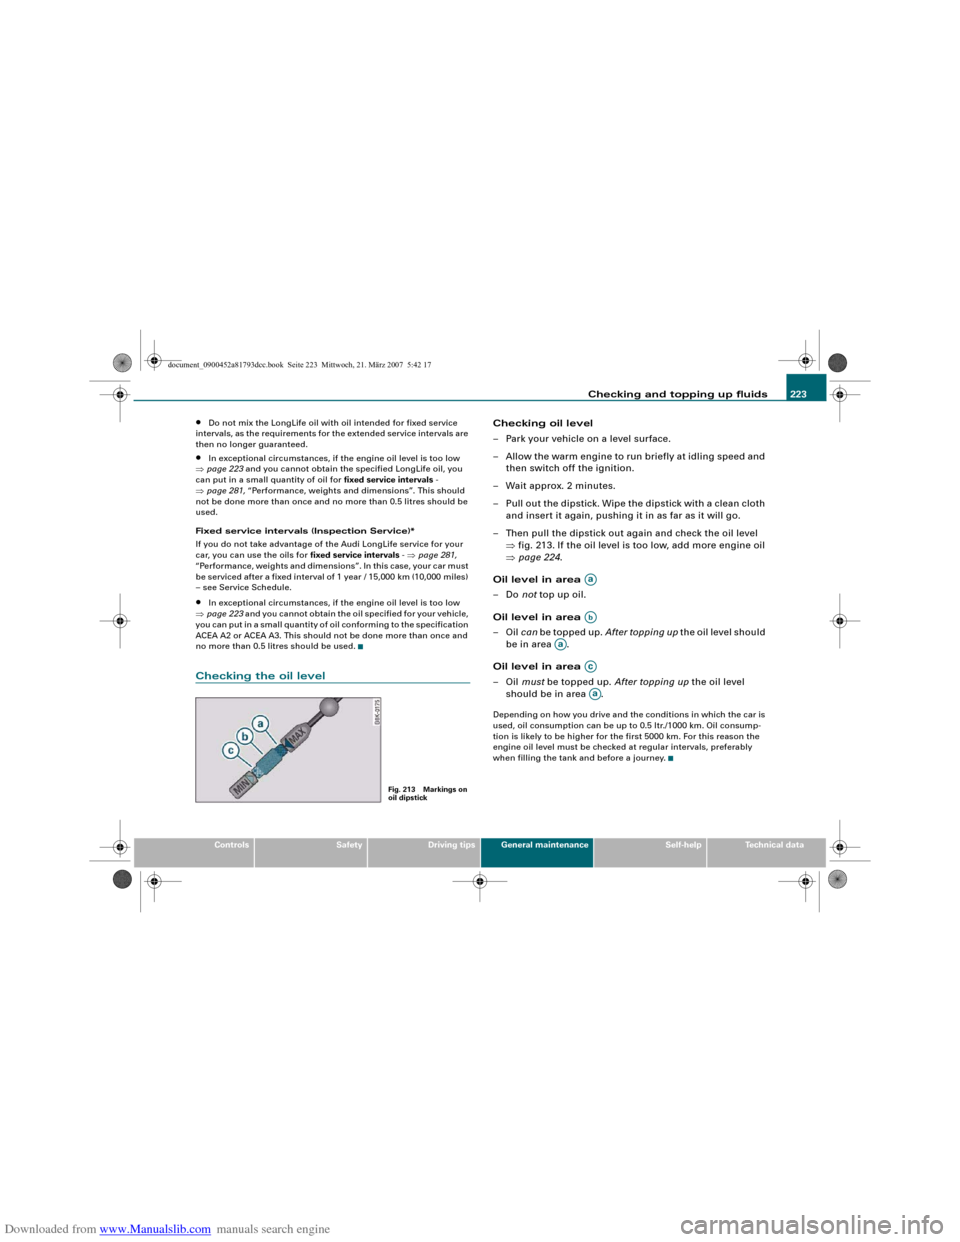
– Then pull the dipstick out again and check the oil level
⇒fig. 213. If the oil level is too low, add more engine oil
⇒page 224.
Oil level in area
–Do not top up oil.
Oil level in area
–Oil can be topped up. After topping up the oil level should
be in area .
Oil level in area
–Oil must be topped up. After topping up the oil level
should be in area .Depending on how you drive and the conditions in which the car is
used, oil consumption can be up to 0.5 ltr./1000 km. Oil consump-
tion is likely to be higher for the first 5000 km. For this reason the
engine oil level must be checked at regular intervals, preferably
when filling the tank and before a journey.
Fig. 213 Markings on
oil dipstick
AaAb
Aa
AcAa
document_0900452a81793dcc.book Seite 223 Mittwoch, 21. März 2007 5:42 17
Page 227 of 294
Downloaded from www.Manualslib.com manuals search engine Checking and topping up fluids225
Controls
Safety
Driving tips
General maintenance
Self-help
Technical data Countries with warm climate
The coolant concentration must not be reduced by adding plain
water, even in the summer or in warm climates. The concentration
of the anti-freeze additive must always be at least 40%.
Countries with cold climate
If greater anti-freeze protection is required in very cold climates, the
proportion of the anti-freeze additive G12+ can be increased. A
concentration of 60% offers protection down to about -40 °C. The
concentration of the antifreeze additive must not be more than 60%,
otherwise this would reduce the antifreeze protection. In addition,
the cooling effect will be adversely affected.
Vehicles for export to countries with a cold climate (such as Sweden,
Norway and Finland) are supplied with antifreeze protection down
to about -35 °C. The concentration of the antifreeze additive for
these countries should always be at least 50%.
Caution
•
It is advisable to have the cooling system checked before the
winter season to make sure that the antifreeze concentration is
adequate for the conditions to be expected. This applies particularly
if you intend to take the car into a colder climate zone. If necessary,
have the anti-freeze concentration increased to 50 - 60% as required.
•
Use only anti-freeze additive G12+, an additive meeting the spec-
ification “TL-VW 774 F ”. Other additives may give considerably infe-
rior corrosion protection. The resulting corrosion in the cooling
system can lead to a loss of coolant, causing serious damage to the
engine.
•
The coolant additive G12+ can be mixed only with additives G11
and G12.
Checking coolant level
The coolant level can be checked at a glance.– Switch off the ignition.
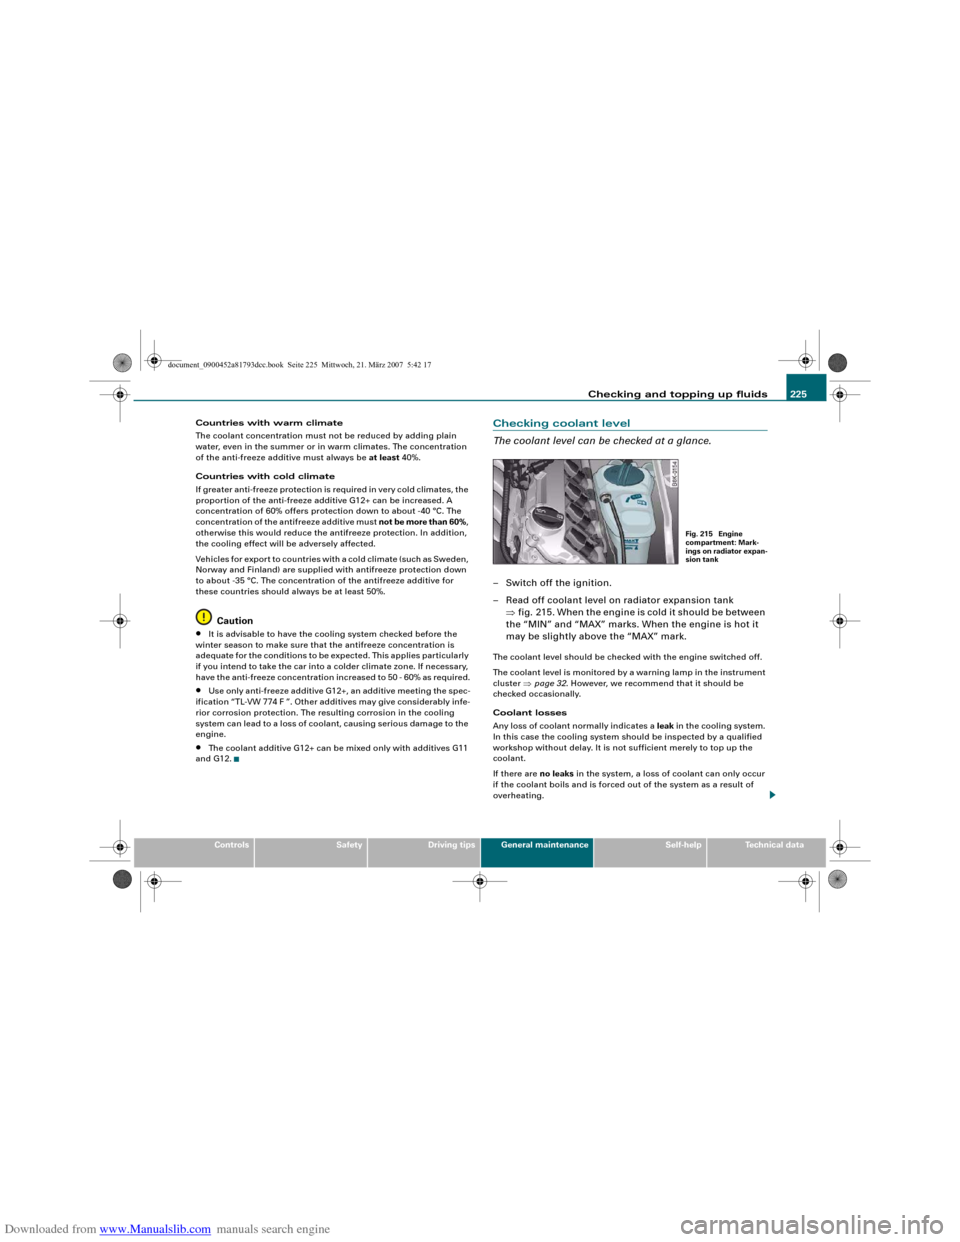
– Read off coolant level on radiator expansion tank
⇒fig. 215. When the engine is cold it should be between
the “MIN” and “MAX” marks. When the engine is hot it
may be slightly above the “MAX” mark.The coolant level should be checked with the engine switched off.
The coolant level is monitored by a warning lamp in the instrument
cluster ⇒page 32. However, we recommend that it should be
checked occasionally.
Coolant losses
Any loss of coolant normally indicates a leak in the cooling system.
In this case the cooling system should be inspected by a qualified
workshop without delay. It is not sufficient merely to top up the
coolant.
If there are no leaks in the system, a loss of coolant can only occur
if the coolant boils and is forced out of the system as a result of
overheating.
Fig. 215 Engine
compartment: Mark-
ings on radiator expan-
sion tank
document_0900452a81793dcc.book Seite 225 Mittwoch, 21. März 2007 5:42 17
Page 229 of 294
Downloaded from www.Manualslib.com manuals search engine Checking and topping up fluids227
Controls
Safety
Driving tips
General maintenance
Self-help
Technical data
Brake fluidChecking brake fluid level
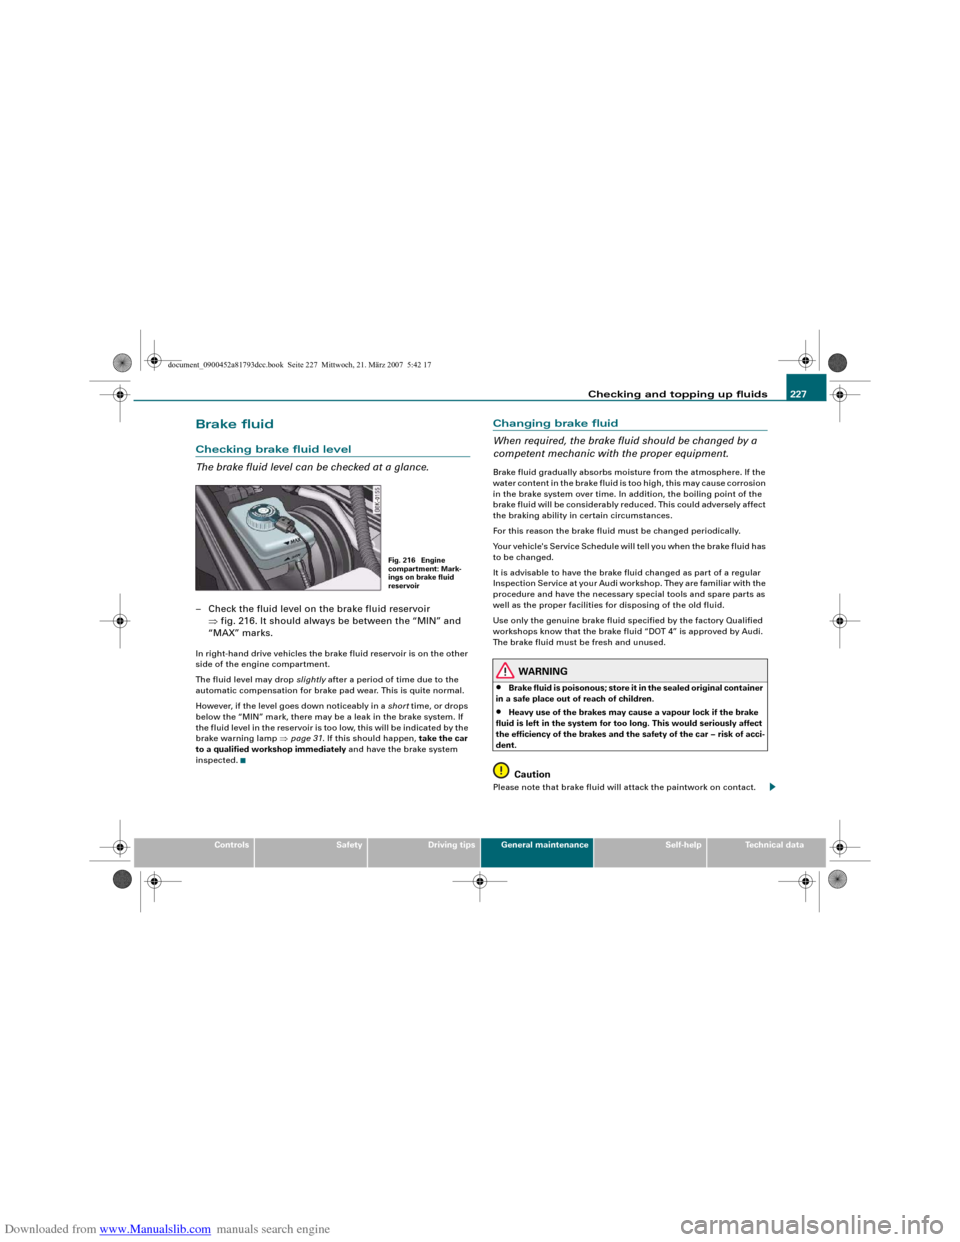
The brake fluid level can be checked at a glance.– Check the fluid level on the brake fluid reservoir
⇒fig. 216. It should always be between the “MIN” and
“MAX” marks.In right-hand drive vehicles the brake fluid reservoir is on the other
side of the engine compartment.
The fluid level may drop slightly after a period of time due to the
automatic compensation for brake pad wear. This is quite normal.
However, if the level goes down noticeably in a short time, or drops
below the “MIN” mark, there may be a leak in the brake system. If
the fluid level in the reservoir is too low, this will be indicated by the
brake warning lamp ⇒page 31. If this should happen, take the car
to a qualified workshop immediately and have the brake system
inspected.
Changing brake fluid
When required, the brake fluid should be changed by a
competent mechanic with the proper equipment.Brake fluid gradually absorbs moisture from the atmosphere. If the
water content in the brake fluid is too high, this may cause corrosion
in the brake system over time. In addition, the boiling point of the
brake fluid will be considerably reduced. This could adversely affect
the braking ability in certain circumstances.
For this reason the brake fluid must be changed periodically.
Your vehicle's Service Schedule will tell you when the brake fluid has
to be changed.
It is advisable to have the brake fluid changed as part of a regular
Inspection Service at your Audi workshop. They are familiar with the
procedure and have the necessary special tools and spare parts as
well as the proper facilities for disposing of the old fluid.
Use only the genuine brake fluid specified by the factory Qualified
workshops know that the brake fluid “DOT 4” is approved by Audi.
The brake fluid must be fresh and unused.
WARNING
•
Brake fluid is poisonous; store it in the sealed original container
in a safe place out of reach of children.
•
Heavy use of the brakes may cause a vapour lock if the brake
fluid is left in the system for too long. This would seriously affect
the efficiency of the brakes and the safety of the car – risk of acci-
dent.Caution
Please note that brake fluid will attack the paintwork on contact.
Fig. 216 Engine
compartment: Mark-
ings on brake fluid
reservoir
document_0900452a81793dcc.book Seite 227 Mittwoch, 21. März 2007 5:42 17
Page 231 of 294
Downloaded from www.Manualslib.com manuals search engine Checking and topping up fluids229
Controls
Safety
Driving tips
General maintenance
Self-help
Technical data
Important safety warnings for handling a car battery
All work on batteries requires specialist knowledge.The vehicle battery is located under the floor panel in the luggage
compartment.
WARNING
Always be aware of the danger of injury and chemical burns as
well as the risk of accident or fire when working on the battery and
the electrical system.•
Wear safety glasses. Do not allow acid or lead particles to come
into contact with eyes, skin or clothing.
•
Battery acid is extremely corrosive. Wear protective gloves and
safety glasses. Do not tilt the battery - acid can leak out of the
vapour vent. If electrolyte should splash into the eyes rinse at once
for several minutes using clear water. Then seek medical care
immediately. Neutralize any acid splashes on the skin or clothing
with soap solution, and rinse off with plenty of water. If acid is
swallowed by mistake, consult a doctor immediately.
•
Keep open flames, sparks, uncovered lights and lit cigarettes
away from battery. Avoid sparks (including those from static charges) when handling cables and electrical equipment. Never
cross the battery poles. The resulting high-energy sparks can
cause injury.
•
A highly explosive mixture of gases is given off when the
battery is under charge. Only charge battery in a well ventilated
area.
•
Keep children away from the battery and battery acid.
•
Switch off all electrical equipment before starting any work on
the vehicle electrical system. Remove the ignition key. The minus
cable of the battery must be disconnected. When changing a light
bulb, it is sufficient to only turn off the light.
•
Before disconnecting the battery, turn off the anti-theft
system! Otherwise, the alarm will sound.
•
When disconnecting the battery from the vehicle's electrical
system, first disconnect the minus cable and then the plus cable.
•
Before reconnecting the battery, turn off all electrical equip-
ment. First connect the plus cable, then the minus cable. The
battery cables must not be connected to the wrong battery poles
- serious risk of cable fire.
•
Never charge a frozen or thawed out battery - risk of explosion
and chemical burns! A battery must be replaced once it has been
frozen. When it is discharged the battery can freeze at tempera-
tures around 0°C.
•
Make sure that the vapour hose is always attached to the
battery.
•
Never use a damaged battery - risk of explosion! Replace a
damaged battery immediately.Caution
•
Never disconnect the car's battery with the engine running or
with the ignition turned on, otherwise the electrical system or elec-
trical components will be damaged.
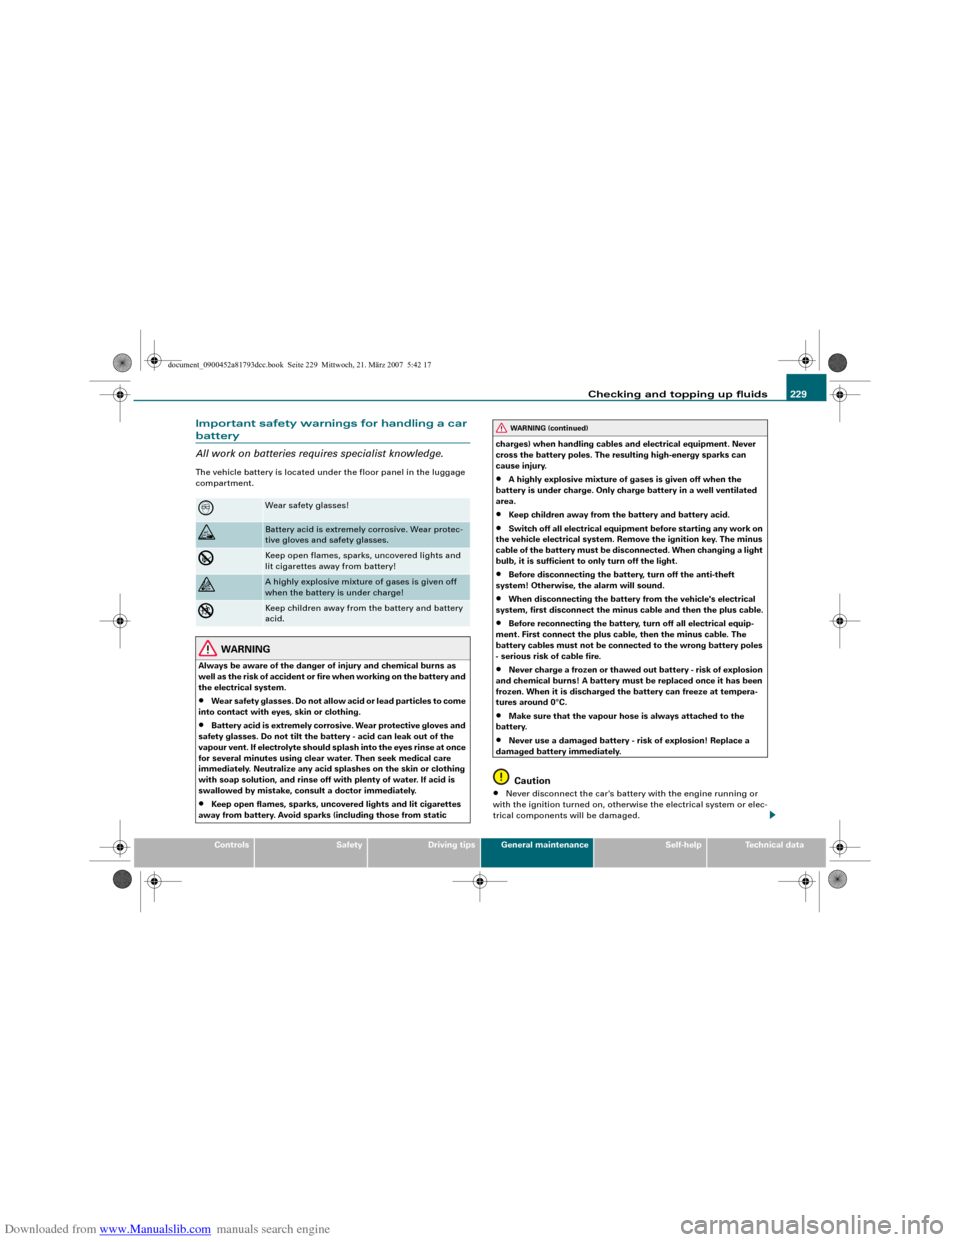
Wear safety glasses!
Battery acid is extremely corrosive. Wear protec-
tive gloves and safety glasses.
Keep open flames, sparks, uncovered lights and
lit cigarettes away from battery!
A highly explosive mixture of gases is given off
when the battery is under charge!
Keep children away from the battery and battery
acid.
WARNING (continued)
document_0900452a81793dcc.book Seite 229 Mittwoch, 21. März 2007 5:42 17
Page 233 of 294
Downloaded from www.Manualslib.com manuals search engine Checking and topping up fluids231
Controls
Safety
Driving tips
General maintenance
Self-help
Technical data
Replacing the battery
A replacement battery must have the same specifications
as the original equipment battery.Your vehicle is equipped with an intelligent power management
system to control the distribution of electrical energy ⇒page 192.
The power management function ensures that the battery is
charged much more efficiently than on vehicles without a power
management system. For this additional power to be available after
replacing the battery, we recommend that the replacement battery
used is of the same make and type as the original-equipment
battery. The battery must be encoded in the control unit for power
management. This has to be done by a qualified workshop.
A replacement battery must have the same capacity, voltage (12 V)
and current rating. It must also have the same dimensions as the
original, factory-fitted battery and have sealed caps. The battery
must comply with the standards TL 825 06 (dated December 1997 or
later) and VW 7 50 73 (August 2001 or later).
Caution
•
Make sure that the vent hose is always attached to the opening
on the side of the battery. Gases or battery acid can otherwise
escape and possibly cause damage.
•
The battery holder and clamps must always be correctly secured.
•
Before starting any work on the battery, always observe the
warnings listed under ⇒page 229, “Important safety warnings for
handling a car battery”.For the sake of the environment
Batteries contain toxic substances including sulphuric acid and
lead. They must be disposed of appropriately and must not be put
together with ordinary household waste. Make sure the battery
removed from the vehicle cannot tip over. Otherwise, sulphuric acid
could escape.
Windscreen washerPlain water on its own is not sufficient for the windscreen
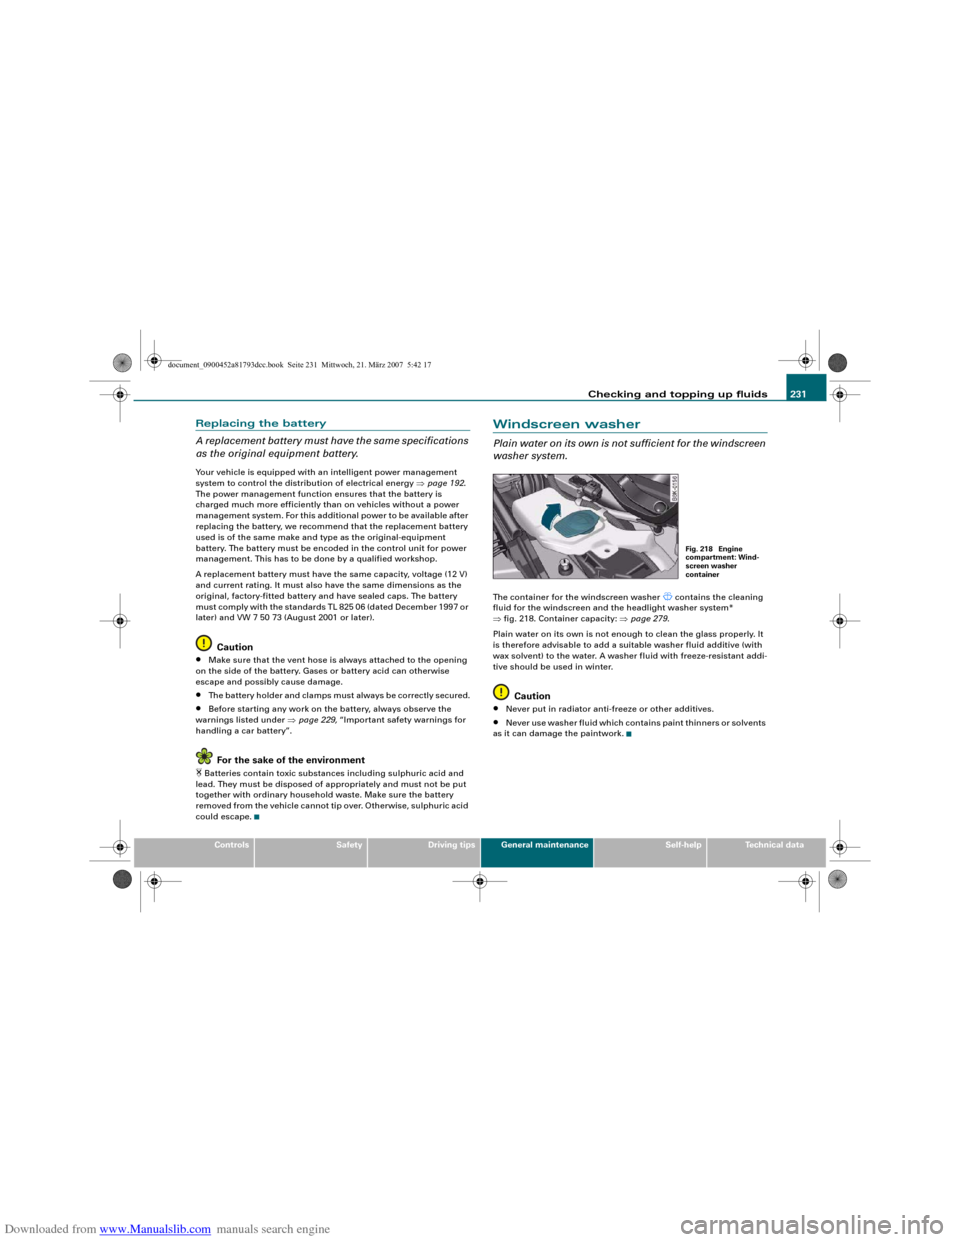
washer system.The container for the windscreen washer
contains the cleaning
fluid for the windscreen and the headlight washer system*
⇒fig. 218. Container capacity: ⇒page 279.
Plain water on its own is not enough to clean the glass properly. It
is therefore advisable to add a suitable washer fluid additive (with
wax solvent) to the water. A washer fluid with freeze-resistant addi-
tive should be used in winter.
Caution
•
Never put in radiator anti-freeze or other additives.
•
Never use washer fluid which contains paint thinners or solvents
as it can damage the paintwork.
Fig. 218 Engine
compartment: Wind-
screen washer
container
document_0900452a81793dcc.book Seite 231 Mittwoch, 21. März 2007 5:42 17