2008 AUDI A4 lights
[x] Cancel search: lightsPage 74 of 342
Lights and vision 72Applies to vehicles: with digital compassSetting the correct compass calibration zone
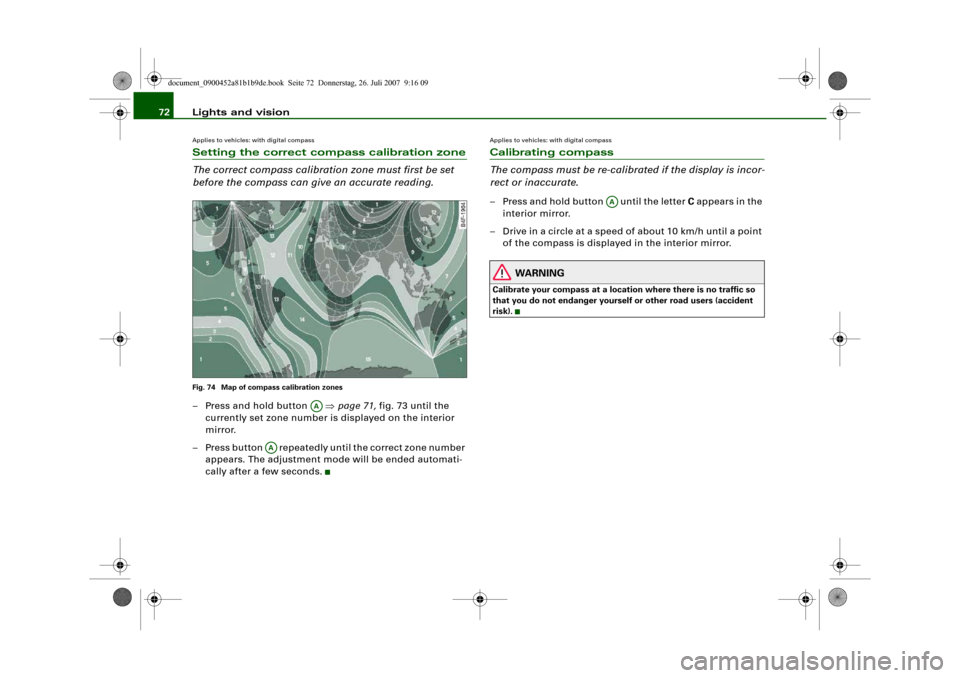
The correct compass calibration zone must first be set
before the compass can give an accurate reading.Fig. 74 Map of compass calibration zones– Press and hold button ⇒page 71, fig. 73 until the
currently set zone number is displayed on the interior
mirror.
– Press button repeatedly until the correct zone number
appears. The adjustment mode will be ended automati-
cally after a few seconds.
Applies to vehicles: with digital compassCalibrating compass
The compass must be re-calibrated if the display is incor-
rect or inaccurate.– Press and hold button until the letter C appears in the
interior mirror.
– Drive in a circle at a speed of about 10 km/h until a point
of the compass is displayed in the interior mirror.
WARNING
Calibrate your compass at a location where there is no traffic so
that you do not endanger yourself or other road users (accident
risk).
AA
AA
AA
document_0900452a81b1b9de.book Seite 72 Donnerstag, 26. Juli 2007 9:16 09
Page 100 of 342
Heating and cooling 98You can use the air distribution setting to select the air outlets you
wish to activate. In setting
all the air is directed to the windows,
in setting
the air is directed to the driver (or passenger), and in
setting
to the footwells. In addition to this there are several other
possible combinations, allowing you to adjust the air distribution to
suit individual requirements.
Switch to for automatic control of the air distribution.
The air distribution setting will be shown on the screen ⇒page 97,
fig. 109 for a few seconds if the sound system or MMI* is switched
on.
Applies to vehicles: with deluxe automatic air conditioner Defrosting
The windscreen and side windows are defrosted or
demisted as quickly as possible.– To switch on, press the button.
– To switch off, press the button again, or press the
button.The temperature is regulated automatically. The air output is
increased to maximum and most of the air comes out of the outlets
below the windscreen.
The air recirculation mode is switched off when the button is
pressed.Applies to vehicles: with deluxe automatic air conditioner Heated rear window
The rear window heating helps to demist the rear window.– Press the
b u t t o n t o s w i t c h t h e r e a r w i n d o w h e a t i n g o n
and off.
The rear window heating only works when the engine is running. An
indicator lamp in the button lights up when the rear window heater
is switched on.
Depending on the outside temperature, the rear window heating
switches off automatically after about 10 to 20 minutes.
The rear window heating can be switched on permanently by
pressing the
button for longer than two seconds. It will then
remain on until the ignition is switched off. When the rear window
heating is switched on, this setting will remain activated for 15
minutes after switching off the ignition.
If the engine is started again during this period of 15 minutes, the
rear window heating will be switched on for about 10 to 20 minutes,
depending on the exterior temperature. This means you do not have
to manually switch on the rear window heating again if the vehicle
has only been parked for a short time.
For the sake of the environment
Switch off the heated rear window manually as soon as the rear
window is clear. By saving electrical power you can also save fuel.Applies to vehicles: with deluxe automatic air conditionerAC mode Deactivating the AC mode
– Press the button.
Activating the AC mode
– Press the button again.In the AC mode, the air cooling system is switched on and the
heating and ventilation are regulated automatically.
AUTO
AUTO
ACACAC
document_0900452a81b1b9de.book Seite 98 Donnerstag, 26. Juli 2007 9:16 09
Page 108 of 342
Heating and cooling 106Applies to vehicles: with deluxe automatic air conditioner plusAir distribution
The automatically programmed air distribution can be
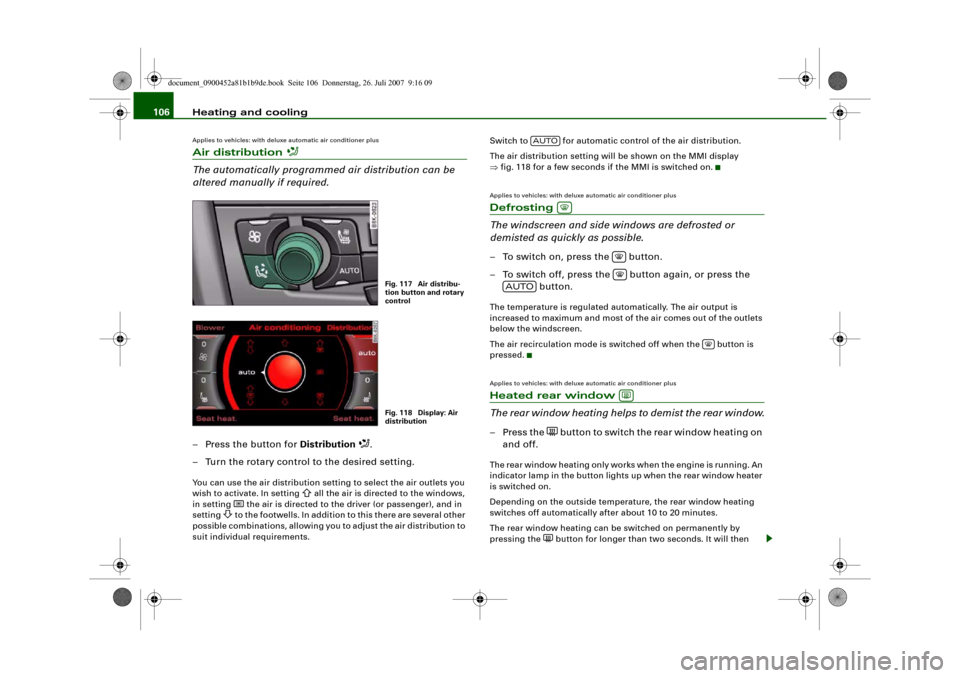
altered manually if required.– Press the button for Distribution
.
– Turn the rotary control to the desired setting.
You can use the air distribution setting to select the air outlets you
wish to activate. In setting
all the air is directed to the windows,
in setting
the air is directed to the driver (or passenger), and in
setting
to the footwells. In addition to this there are several other
possible combinations, allowing you to adjust the air distribution to
suit individual requirements.Switch to for automatic control of the air distribution.
The air distribution setting will be shown on the MMI display
⇒fig. 118 for a few seconds if the MMI is switched on.
Applies to vehicles: with deluxe automatic air conditioner plusDefrosting
The windscreen and side windows are defrosted or
demisted as quickly as possible.– To switch on, press the button.
– To switch off, press the button again, or press the
button.The temperature is regulated automatically. The air output is
increased to maximum and most of the air comes out of the outlets
below the windscreen.
The air recirculation mode is switched off when the button is
pressed.Applies to vehicles: with deluxe automatic air conditioner plusHeated rear window
The rear window heating helps to demist the rear window.– Press the
b u t t o n t o s w i t c h t h e r e a r w i n d o w h e a t i n g o n
and off.
The rear window heating only works when the engine is running. An
indicator lamp in the button lights up when the rear window heater
is switched on.
Depending on the outside temperature, the rear window heating
switches off automatically after about 10 to 20 minutes.
The rear window heating can be switched on permanently by
pressing the
button for longer than two seconds. It will then
Fig. 117 Air distribu-
tion button and rotary
controlFig. 118 Display: Air
distribution
AUTO
AUTO
document_0900452a81b1b9de.book Seite 106 Donnerstag, 26. Juli 2007 9:16 09
Page 118 of 342
Driving 116DrivingSteeringApplies to vehicles: with manually adjustable steering columnAdjusting the steering wheel position
The height and reach of the steering wheel can be
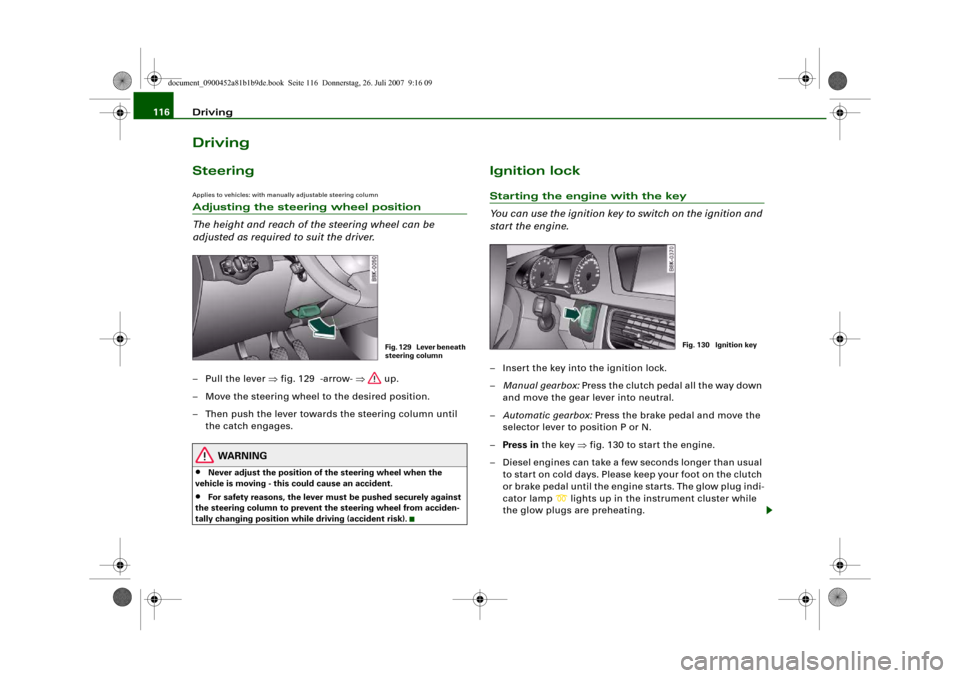
adjusted as required to suit the driver.– Pull the lever ⇒fig. 129 -arrow- ⇒ up.
– Move the steering wheel to the desired position.
– Then push the lever towards the steering column until
the catch engages.
WARNING
•
Never adjust the position of the steering wheel when the
vehicle is moving - this could cause an accident.
•
For safety reasons, the lever must be pushed securely against
the steering column to prevent the steering wheel from acciden-
tally changing position while driving (accident risk).
Ignition lockStarting the engine with the key
You can use the ignition key to switch on the ignition and
start the engine.– Insert the key into the ignition lock.
–Manual gearbox: Press the clutch pedal all the way down
and move the gear lever into neutral.
–Automatic gearbox: Press the brake pedal and move the
selector lever to position P or N.
–Press in the key ⇒fig. 130 to start the engine.
– Diesel engines can take a few seconds longer than usual
to star t on cold days. Please keep your foot on the clutch
or brake pedal until the engine starts. The glow plug indi-
cator lamp
lights up in the instrument cluster while
the glow plugs are preheating.
Fig. 129 Lever beneath
steering column
Fig. 130 Ignition key
document_0900452a81b1b9de.book Seite 116 Donnerstag, 26. Juli 2007 9:16 09
Page 121 of 342
Driving119
Controls
Safety
Driving tips
General maintenance
Self-help
Technical data
–Automatic gearbox: Press the brake pedal and move the
selector lever to position P or N ⇒.
–Press the Start/Stop button ⇒page 118, fig. 131 to start
the engine.
– Diesel engines can take a few seconds longer than usual
to star t on cold days. Please keep your foot on the clutch
or brake pedal until the engine starts. The glow plug indi-
cator lamp
lights up in the instrument cluster while
the glow plugs are preheating.
If you press the Start/Stop button without pressing the clutch or
brake pedal, the ignition will be switched on (and will be switched
off if you press the button again). Diesel engines are preheated
when the ignition is switched on.
If the engine fails to start straight-away, switch off the starter after
about 10 seconds and try again after about half a minute.
When starting from cold the engine may be a little noisy for the first
few seconds until oil pressure has built up in the hydraulic tappets.
This is quite normal and no cause for concern.
Driver message in the instrument cluster display
No key identified
This message appears when you press the Start/Stop button if there
is no remote control key inside the vehicle or if the system cannot
detect or identify the key. This can happen, for example, if the radio
signal from the key is obstructed by a metal briefcase or similar.
Electronic equipment, such as mobile phones, can also interfere
with the radio signal from the key.
Press brake pedal to start engine
This message appears on automatic vehicles if you press the
Start/Stop button to start the engine without first pressing the
brake pedal. The engine will only start if you press the brake pedal.Press clutch pedal to start engine
This message appears on manual vehicles if you press the
Start/Stop button to start the engine without first pressing the
clutch pedal. The engine will only star t if you press the clutch pedal.
Engage N or P to start engine
This message will appear if you try to start the engine when the
selector lever of the automatic gearbox is not in P or N. The engine
can only be started if the selector lever is in one of these positions.
Key not in vehicle
This message will appear together with the symbol
if the remote
control key is removed from the vehicle while the engine is running.
This is to remind you not to continue driving without the key (for
example if you change drivers).
If the remote control key is not in the vehicle you will not be able to
switch on the ignition or restart the engine after it has been
switched off. Without the key, you will also not be able to lock the
vehicle from the outside.
Shift to P, otherwise vehicle can roll away. Doors do not lock if lever
is not in P. or Please move selector lever to position P. Vehicle
cannot be locked.
For safety reasons, this message will appear and a warning buzzer
will sound if the selector lever of the automatic gearbox is not in
position P when you switch off the ignition with the Start/Stop
button. Put the selector lever in position P; otherwise the vehicle
can roll away. If the lever is not in position P you will not be able to
lock the vehicle using the exterior locking switch on the door handle
or the remote control key.
Advanced key defective! Use ignition lock
This message appears if the vehicle has to be started with the igni-
tion key instead of the Start/Stop button.
document_0900452a81b1b9de.book Seite 119 Donnerstag, 26. Juli 2007 9:16 09
Page 124 of 342
Driving 122a fault in the parking brake. Have the fault repaired by a qualified
workshop without delay ⇒page 32.
Note
•
The parking brake can be applied at any time - even when the
ignition is switched off. However, the ignition must be switched on
before the parking brake can be released.
•
Any slight noise which may be heard when the parking brake is
applied or released is quite normal and no cause for concern.
•
The parking brake runs an automatic test cycle at regular inter-
vals when the vehicle is parked. This may also cause a slight noise,
which is normal.
Parking
Please note the following points to ensure there is no risk
of the car rolling away accidentally after it is parked.Parking t he c ar
– Use the foot brake to stop the vehicle.
– Pull the switch to apply the parking brake.
– Automatic gearbox: Move the selector lever to P.
– Switch off the engine ⇒.
– Manual gearbox: Engage the first gear.
When parking on slopes
– Turn the steering wheel so that the vehicle would roll into
the kerb if it did start to move accidentally.
WARNING
•
Always take the key with you when leaving the vehicle – even
if you only intend to be gone for a short time. This is especially
important if children are left in the car. They might otherwise be
able to start the engine, release the parking brake or use power-
operated equipment such as the electric windows - this could lead
to injuries.
•
Do not leave anyone (especially children) in the vehicle when it
is locked. Locked doors could delay assistance in an emergency,
potentially putting lives at risk.
Driving away from a standstill
The parking brake auto release function releases the
parking brake automatically when you wish to start
moving.Applying the parking brake when stopping
– Pull the switch to apply the parking brake.
Releasing the parking brake when driving away
– Drive off in the normal way: the parking brake will be
released automatically and the vehicle will start moving.On vehicles with automatic gearbox, you can apply the parking
brake when stopping at traffic lights, etc. Then you do not have to
hold the car with the footbrake, as the parking brake will stop it
creeping forward while a gear is engaged in the automatic transmis-
sion. When you drive off in the normal way, the parking brake will be
released automatically and the vehicle will start moving.
Driving away on a slope
When driving away on a gradient, the parking brake auto release
function prevents the vehicle from rolling back unintentionally. The
document_0900452a81b1b9de.book Seite 122 Donnerstag, 26. Juli 2007 9:16 09
Page 127 of 342
Driving125
Controls
Safety
Driving tips
General maintenance
Self-help
Technical data lights or in stop-and-go traffic. When the Audi hold assist function
is on, you don't have to keep your foot on the brake to prevent the
vehicle from accidentally rolling away. Once it detects that the
vehicle is stopped, Audi hold assist keeps the vehicle stationary. The
green symbol
in the instrument cluster indicates that the func-
tion is activated. You can now take your foot off the brake pedal.
As soon as you drive off in the normal way, the parking brake will
automatically be released and the vehicle will start moving.
If the conditions for Audi hold assist change and the function is
switched off as a result, the parking brake will be applied automati-
cally to ensure that the vehicle is parked safely. The diode in the
button will go out when the Audi hold assist function is switched
off.
WARNING
The intelligent technology in Audi hold assist cannot defy the laws
of physics. Do not let the extra convenience provided by Audi hold
assist tempt you into taking a safety risk.•
Audi hold assist cannot keep the vehicle stationary in all condi-
tions on a gradient (e.g. if the road is slippery or icy).
•
Audi hold assist must be switched on again each time the
engine is started – Risk of accident!
•
Never get out of the vehicle when the engine is running and
Audi hold assist is switched on – Risk of accident!
•
Always ensure that the vehicle is stopped properly and safely
to avoid injury to yourself and others.Caution
Switch off the Audi hold assist function before driving the vehicle
into a car wash.
Note
•
Audi hold assist can be switched on only when the driver's door
is closed, the driver's seat belt is buckled and the engine is running.
•
Audi hold assist prevents automatic vehicles from creeping
forwards when the brake pedal is released with the car in gear.
•
When the vehicle has been stationary for an extended period,
Audi hold assist will automatically apply the parking brake. In this
case, the green symbol
in the instrument cluster display will
change to red
.
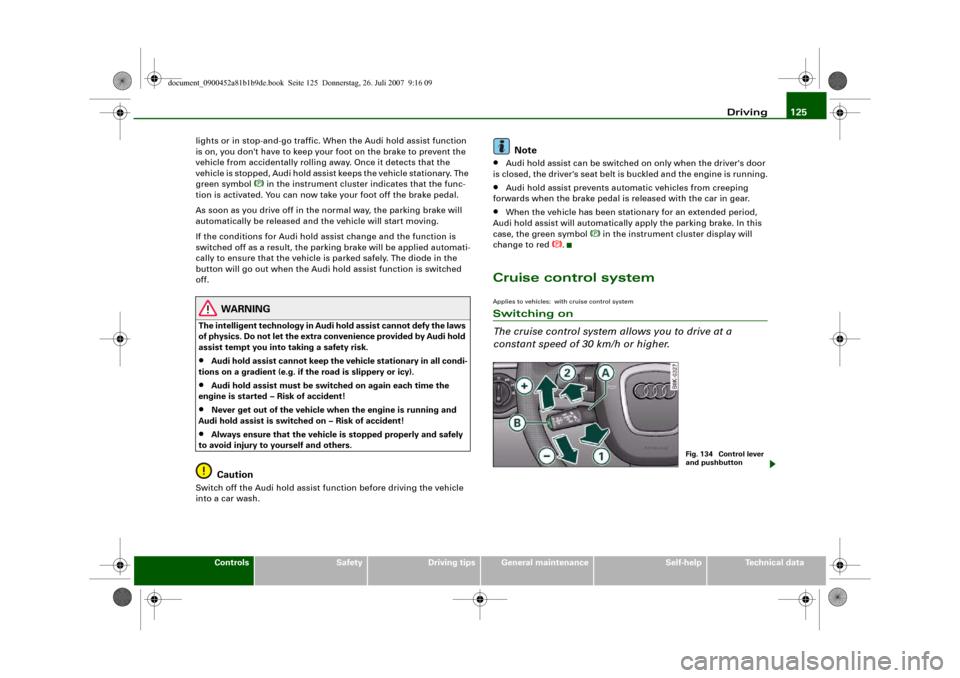
Cruise control systemApplies to vehicles: with cruise control systemSwitching on
The cruise control system allows you to drive at a
constant speed of 30 km/h or higher.
Fig. 134 Control lever
and pushbutton
document_0900452a81b1b9de.book Seite 125 Donnerstag, 26. Juli 2007 9:16 09
Page 128 of 342
Driving 126
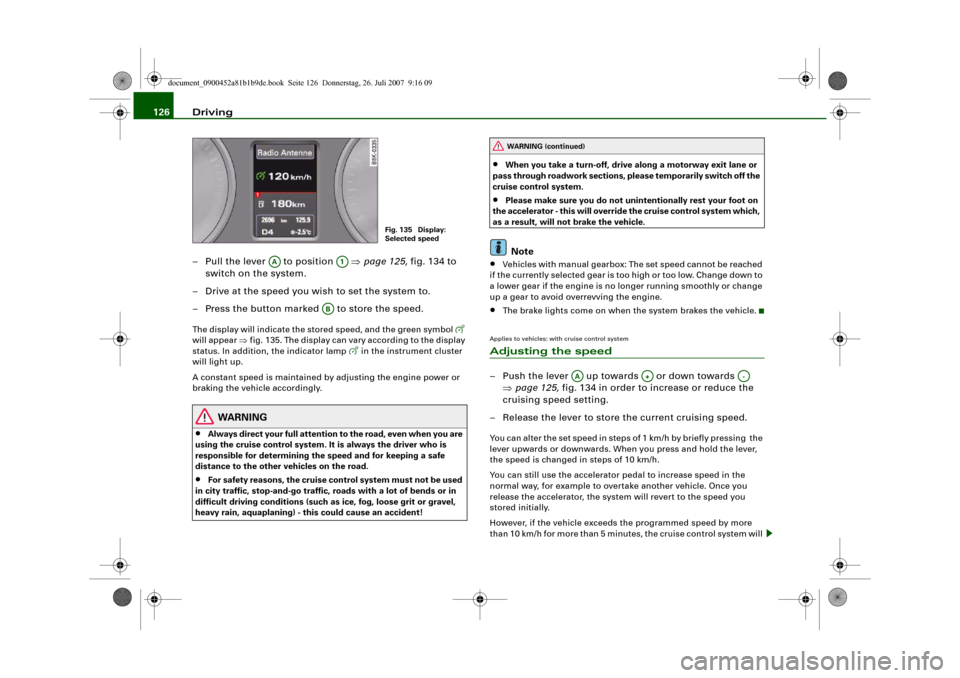
– Pull the lever to position ⇒page 125, fig. 134 to
switch on the system.
– Drive at the speed you wish to set the system to.
– Press the button marked to store the speed.The display will indicate the stored speed, and the green symbol
will appear ⇒fig. 135. The display can vary according to the display
status. In addition, the indicator lamp
in the instrument cluster
will light up.
A constant speed is maintained by adjusting the engine power or
braking the vehicle accordingly.
WARNING
•
Always direct your full attention to the road, even when you are
using the cruise control system. It is always the driver who is
responsible for determining the speed and for keeping a safe
distance to the other vehicles on the road.
•
For safety reasons, the cruise control system must not be used
in city traffic, stop-and-go traffic, roads with a lot of bends or in
difficult driving conditions (such as ice, fog, loose grit or gravel,
heavy rain, aquaplaning) - this could cause an accident!
•
When you take a turn-off, drive along a motorway exit lane or
pass through roadwork sections, please temporarily switch off the
cruise control system.
•
Please make sure you do not unintentionally rest your foot on
the accelerator - this will override the cruise control system which,
as a result, will not brake the vehicle.Note
•
Vehicles with manual gearbox: The set speed cannot be reached
if the currently selected gear is too high or too low. Change down to
a lower gear if the engine is no longer running smoothly or change
up a gear to avoid overrevving the engine.
•
The brake lights come on when the system brakes the vehicle.
Applies to vehicles: with cruise control systemAdjusting the speed– Push the lever up towards or down towards
⇒page 125, fig. 134 in order to increase or reduce the
cruising speed setting.
– Release the lever to store the current cruising speed.You can alter the set speed in steps of 1 km/h by briefly pressing the
lever upwards or downwards. When you press and hold the lever,
the speed is changed in steps of 10 km/h.
You can still use the accelerator pedal to increase speed in the
normal way, for example to overtake another vehicle. Once you
release the accelerator, the system will revert to the speed you
stored initially.
However, if the vehicle exceeds the programmed speed by more
than 10 km/h for more than 5 minutes, the cruise control system will
Fig. 135 Display:
Selected speed
AA
A1
AB
WARNING (continued)
AA
A+
A-
document_0900452a81b1b9de.book Seite 126 Donnerstag, 26. Juli 2007 9:16 09