2008 AUDI A4 ESP
[x] Cancel search: ESPPage 71 of 342
Lights and vision69
Controls
Safety
Driving tips
General maintenance
Self-help
Technical data
Anti-dazzle setting
– Pull the lever at the bottom of the mirror towards you.Applies to vehicles: with automatic anti-dazzle adjustment for interior mirrorAutomatic anti-dazzle adjustment
The automatic anti-dazzle function can be switched on
and off as desired.Switching off anti-dazzle function
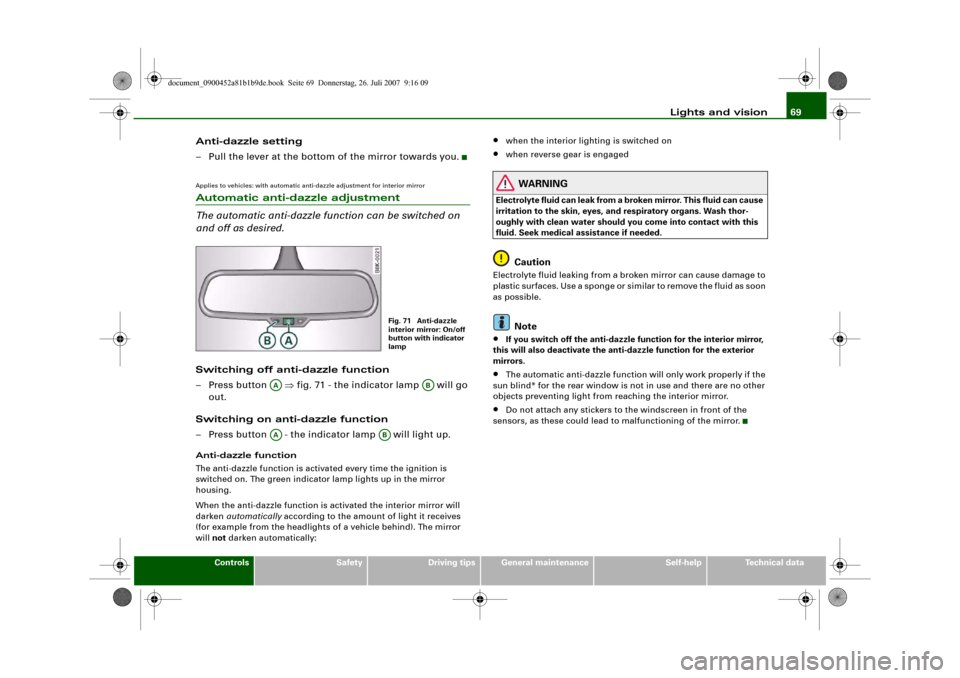
– Press button ⇒fig. 71 - the indicator lamp will go
out.
Switching on anti-dazzle function
– Press button - the indicator lamp will light up.Anti-dazzle function
The anti-dazzle function is activated every time the ignition is
switched on. The green indicator lamp lights up in the mirror
housing.
When the anti-dazzle function is activated the interior mirror will
darken automatically according to the amount of light it receives
(for example from the headlights of a vehicle behind). The mirror
will not darken automatically:
•
when the interior lighting is switched on
•
when reverse gear is engaged
WARNING
Electrolyte fluid can leak from a broken mirror. This fluid can cause
irritation to the skin, eyes, and respiratory organs. Wash thor-
oughly with clean water should you come into contact with this
fluid. Seek medical assistance if needed.
Caution
Electrolyte fluid leaking from a broken mirror can cause damage to
plastic surfaces. Use a sponge or similar to remove the fluid as soon
as possible.
Note
•
If you switch off the anti-dazzle function for the interior mirror,
this will also deactivate the anti-dazzle function for the exterior
mirrors.
•
The automatic anti-dazzle function will only work properly if the
sun blind* for the rear window is not in use and there are no other
objects preventing light from reaching the interior mirror.
•
Do not attach any stickers to the windscreen in front of the
sensors, as these could lead to malfunctioning of the mirror.
Fig. 71 Anti-dazzle
interior mirror: On/off
button with indicator
lamp
AA
AB
AA
AB
document_0900452a81b1b9de.book Seite 69 Donnerstag, 26. Juli 2007 9:16 09
Page 73 of 342
Lights and vision71
Controls
Safety
Driving tips
General maintenance
Self-help
Technical data
Applies to vehicles: with automatic anti-dazzle adjustment for exterior mirrorsAutomatic anti-dazzle adjustment for exterior mirrorsThe exterior mirrors darken together with the automatically
adjusting interior mirror. When the ignition is on, the mirrors will
darken automatically according to the amount of light received (for
example from the headlights of a vehicle behind).
When the interior lights are switched on, or when reverse gear is
engaged, the mirrors revert to their original (i.e. not darkened)
condition.
WARNING
Electrolyte fluid can leak from a broken mirror. This fluid can cause
irritation to the skin, eyes, and respiratory organs. Wash thor-
oughly with clean water should you come into contact with this
fluid. Seek medical assistance if needed.
Caution
Electrolyte fluid leaking from a broken mirror can cause damage to
the paintwork or plastic surfaces. Use a sponge or similar to remove
the fluid as soon as possible.
Note
•
If you switch off the anti-dazzle function for the interior mirror,
this will also deactivate the anti-dazzle function for the exterior
mirrors.
•
The automatic anti-dazzle function will only work properly if the
sun blind* for the rear window is not in use and there are no other
objects preventing light from reaching the interior mirror.
Digital compassApplies to vehicles: with digital compassActivating and deactivating the compass
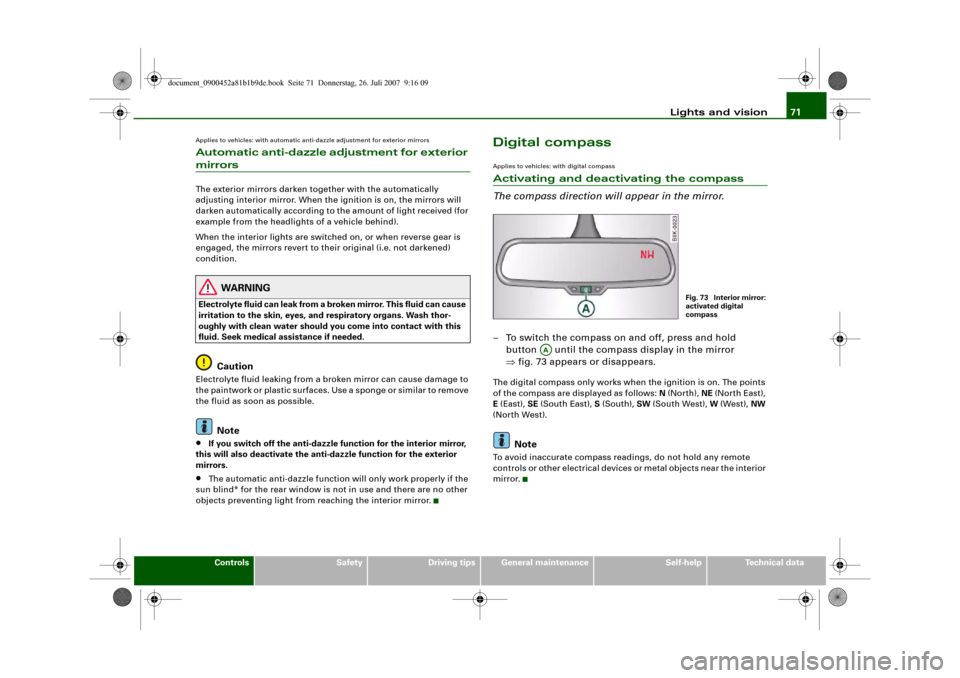
The compass direction will appear in the mirror.– To switch the compass on and off, press and hold
button until the compass display in the mirror
⇒fig. 73 appears or disappears.The digital compass only works when the ignition is on. The points
of the compass are displayed as follows: N (North), NE (North East),
E (East), SE (South East), S (South), SW (South West), W (West), NW
(North West).
Note
To avoid inaccurate compass readings, do not hold any remote
controls or other electrical devices or metal objects near the interior
mirror.
Fig. 73 Interior mirror:
activated digital
compass
AA
document_0900452a81b1b9de.book Seite 71 Donnerstag, 26. Juli 2007 9:16 09
Page 76 of 342
Seats and storage 74
Adjusting height of lumbar support*
– Press the top or bottom part of the adjuster switch to
move the lumbar support upwards or downwards as
required.
Raising or lowering the seat
– Pull the lever ⇒page 73, fig. 75 up or down repeat-
edly (i.e. pump the lever).
Adjusting backrest angle
– Lean forwards to take your weight off the backrest.
– Turn the adjuster wheel ⇒page 73, fig. 75 to set the
angle of the backrest as required.
WARNING
•
Never adjust the driver's seat when the vehicle is moving - this
could lead to an accident.
•
Be careful when adjusting the seat height. Careless or uncon-
trolled use of the seat adjustment can cause injuries.
•
Do not drive with the backrests of the front seats reclined too
far as otherwise the seat belt and airbag could fail to restrain the
wearer properly in an accident, possibly leading to injury.
Electric adjustment of front seatsSeat adjuster controls
The arrangement of the switches corresponds with the
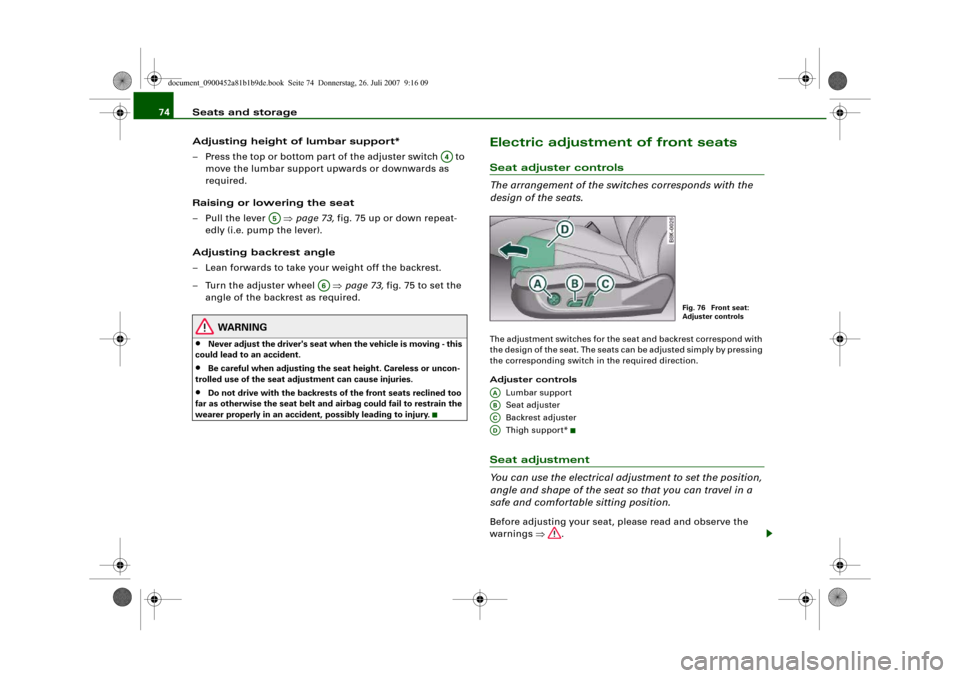
design of the seats.The adjustment switches for the seat and backrest correspond with
the design of the seat. The seats can be adjusted simply by pressing
the corresponding switch in the required direction.
Adjuster controls
Lumbar support
Seat adjuster
Backrest adjuster
Thigh suppor t*Seat adjustment
You can use the electrical adjustment to set the position,
angle and shape of the seat so that you can travel in a
safe and comfortable sitting position.Before adjusting your seat, please read and observe the
warnings ⇒.
A4
A5
A6
Fig. 76 Front seat:
Adjuster controls
AAABACAD
document_0900452a81b1b9de.book Seite 74 Donnerstag, 26. Juli 2007 9:16 09
Page 78 of 342
Seats and storage 76Storing and recalling settings
You can store and recall the settings for two different drivers using
the recall buttons 1 and 2 ⇒page 75, fig. 77 ⇒page 76.
In addition, the current settings are automatically stored when you
lock the vehicle and assigned to the remote control key that is being
used. When you unlock the vehicle, the system automatically recalls
the settings stored on that remote control key.
Switching seat memory on and off
The seat memory will be out of action if the switch has been
pressed and the diode in the switch is lit. In this case, the setting
cannot be stored.
The stored settings will all remain in the memory. However, the seat
can now only be adjusted using the conventional electrical
adjustment.Applies to vehicles: with seat memoryStoring and recalling settingsStoring settings
– Adjust the driver's seat as required.
– Adjust both exterior mirrors.
– Press the button. The diode in the switch will light
up to indicate that it is ready to store the settings. Now
press the desired recall button for at least a second.
– Release the button. The setting is now stored on the
selected recall button.
Recalling settings
– If the driver's door is open, press the desired recall
button briefly.– If the driver's door is closed, press and hold down the
desired recall button until the programmed settings are
reached.
A tone will sound and the diode in the button ⇒page 75,
fig. 77 will light up to confirm that the settings have been stored.
When you lock the vehicle the current settings are automatically
stored and assigned to the remote control key. However, the
settings assigned to the remote control key will not overwrite the
settings stored on recall buttons 1 and 2. The settings stored on the
recall buttons can be called up at any time. When you unlock the
vehicle, the settings assigned to the remote control key are recalled
automatically.
If your vehicle is also driven by other persons using your remote
control key, it is advisable to store your personal settings on one of
the recall buttons. You can then recall your own settings at any time
simply by pressing the corresponding recall button. When you lock
the vehicle these settings are then stored automatically and
assigned once again to the remote control key.
WARNING
•
For safety reasons, never recall seat settings when the vehicle
is moving - this could lead to an accident.
•
In an emergency the recall function can be stopped at any time
by pressing the switch, or by briefly pressing any of the
recall buttons.
OFF
SET
SET
ON/OFF
document_0900452a81b1b9de.book Seite 76 Donnerstag, 26. Juli 2007 9:16 09
Page 81 of 342
Seats and storage79
Controls
Safety
Driving tips
General maintenance
Self-help
Technical data
Luggage compar tmentLoading the luggage compartment
Loads in the luggage compartment should be safely
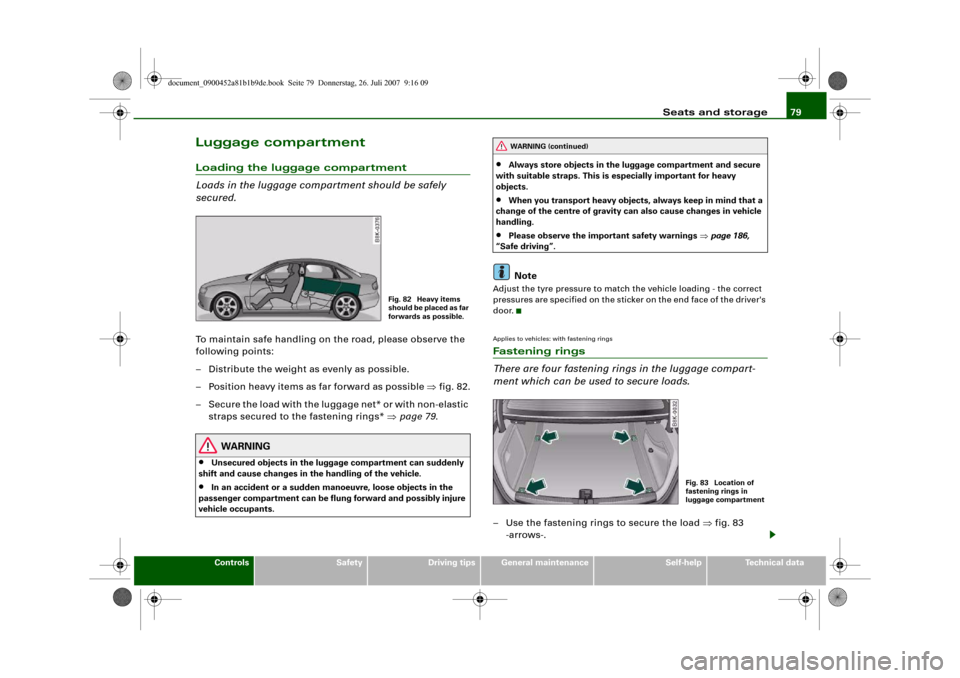
secured.To maintain safe handling on the road, please observe the
following points:
– Distribute the weight as evenly as possible.
– Position heavy items as far forward as possible ⇒fig. 82.
– Secure the load with the luggage net* or with non-elastic
straps secured to the fastening rings* ⇒page 79.
WARNING
•
Unsecured objects in the luggage compartment can suddenly
shift and cause changes in the handling of the vehicle.
•
In an accident or a sudden manoeuvre, loose objects in the
passenger compartment can be flung forward and possibly injure
vehicle occupants.
•
Always store objects in the luggage compartment and secure
with suitable straps. This is especially important for heavy
objects.
•
When you transport heavy objects, always keep in mind that a
change of the centre of gravity can also cause changes in vehicle
handling.
•
Please observe the important safety warnings ⇒page 186,
“Safe driving”.Note
Adjust the tyre pressure to match the vehicle loading - the correct
pressures are specified on the sticker on the end face of the driver's
door.Applies to vehicles: with fastening ringsFastening rings
There are four fastening rings in the luggage compart-
ment which can be used to secure loads.– Use the fastening rings to secure the load ⇒fig. 83
-arrows-.
Fig. 82 Heavy items
s h o u l d b e p l a c e d a s fa r
forwards as possible.
WARNING (continued)
Fig. 83 Location of
fastening rings in
luggage compartment
document_0900452a81b1b9de.book Seite 79 Donnerstag, 26. Juli 2007 9:16 09
Page 124 of 342
Driving 122a fault in the parking brake. Have the fault repaired by a qualified
workshop without delay ⇒page 32.
Note
•
The parking brake can be applied at any time - even when the
ignition is switched off. However, the ignition must be switched on
before the parking brake can be released.
•
Any slight noise which may be heard when the parking brake is
applied or released is quite normal and no cause for concern.
•
The parking brake runs an automatic test cycle at regular inter-
vals when the vehicle is parked. This may also cause a slight noise,
which is normal.
Parking
Please note the following points to ensure there is no risk
of the car rolling away accidentally after it is parked.Parking t he c ar
– Use the foot brake to stop the vehicle.
– Pull the switch to apply the parking brake.
– Automatic gearbox: Move the selector lever to P.
– Switch off the engine ⇒.
– Manual gearbox: Engage the first gear.
When parking on slopes
– Turn the steering wheel so that the vehicle would roll into
the kerb if it did start to move accidentally.
WARNING
•
Always take the key with you when leaving the vehicle – even
if you only intend to be gone for a short time. This is especially
important if children are left in the car. They might otherwise be
able to start the engine, release the parking brake or use power-
operated equipment such as the electric windows - this could lead
to injuries.
•
Do not leave anyone (especially children) in the vehicle when it
is locked. Locked doors could delay assistance in an emergency,
potentially putting lives at risk.
Driving away from a standstill
The parking brake auto release function releases the
parking brake automatically when you wish to start
moving.Applying the parking brake when stopping
– Pull the switch to apply the parking brake.
Releasing the parking brake when driving away
– Drive off in the normal way: the parking brake will be
released automatically and the vehicle will start moving.On vehicles with automatic gearbox, you can apply the parking
brake when stopping at traffic lights, etc. Then you do not have to
hold the car with the footbrake, as the parking brake will stop it
creeping forward while a gear is engaged in the automatic transmis-
sion. When you drive off in the normal way, the parking brake will be
released automatically and the vehicle will start moving.
Driving away on a slope
When driving away on a gradient, the parking brake auto release
function prevents the vehicle from rolling back unintentionally. The
document_0900452a81b1b9de.book Seite 122 Donnerstag, 26. Juli 2007 9:16 09
Page 125 of 342
Driving123
Controls
Safety
Driving tips
General maintenance
Self-help
Technical data braking force of the parking brake is only released when there is
enough power at the wheels to make the vehicle move in the desired
direction.
Note
For safety reasons the parking brake will only release automatically
if the driver's seat belt is engaged in its buckle.Driving away when towing a trailer
Please note the following points to prevent the vehicle
from rolling back unintentionally on a gradient.– Pull and hold the parking brake switch and press the
accelerator. The parking brake will remain engaged and
prevent any tendency to roll back down the slope.
– You can release the parking brake switch as soon as the
engine is delivering enough power to the wheels.Depending on the weight of the vehicle and trailer and the steep-
ness of the slope, there may be a tendency to roll back downhill
when driving away from a standstill. You can prevent this by pulling
out the parking brake switch as you press the accelerator (in the
same way as with a conventional handbrake).Emergency braking function
This feature enables you to stop the vehicle if the main
brake system should fail or if the pedal is obstructed.– Pull out and hold the parking brake switch to stop the
vehicle with the parking brake in an emergency.
– The brakes will be released immediately if you release the
switch or press down the accelerator.
If you pull out and hold the parking brake switch at a road speed
above about 8 km/h, this will initiate an emergency brake applica-
tion. The brakes are then applied hydraulically at all four wheels.
The effect is the same as an emergency stop (full brake application)
⇒
To prevent the emergency braking function from being used acci-
dentally, a warning buzzer sounds when the switch is operated. The
brakes are released immediately when you release the switch or
press down the accelerator.
WARNING
You should only use the emergency braking function in a real
emergency, for example if the brake system should fail or if the
brake pedal is obstructed. If you use the emergency braking func-
tion by activating the parking brake switch, the effect is similar to
a full brake application (emergency stop). Please remember that
the ESP (with its combined ABS, EDL and traction control func-
tions) is still subject to certain physical limits. In a corner or in bad
road or weather conditions an emergency stop can cause the
vehicle to skid or lose steering control.Driver messages in the instrument cluster displayCaution: Vehicle parked too steep
This message can appear when you apply the parking brake if the
car is parked on a gradient steeper than about 30%.
In this case the parking brake may not be strong enough to prevent
the vehicle from rolling back accidentally.
Please release parking brake
However, please remember that, for safety reasons, the parking
brake will only release automatically if the driver's seat belt is
buckled.
document_0900452a81b1b9de.book Seite 123 Donnerstag, 26. Juli 2007 9:16 09
Page 128 of 342
Driving 126
– Pull the lever to position ⇒page 125, fig. 134 to
switch on the system.
– Drive at the speed you wish to set the system to.
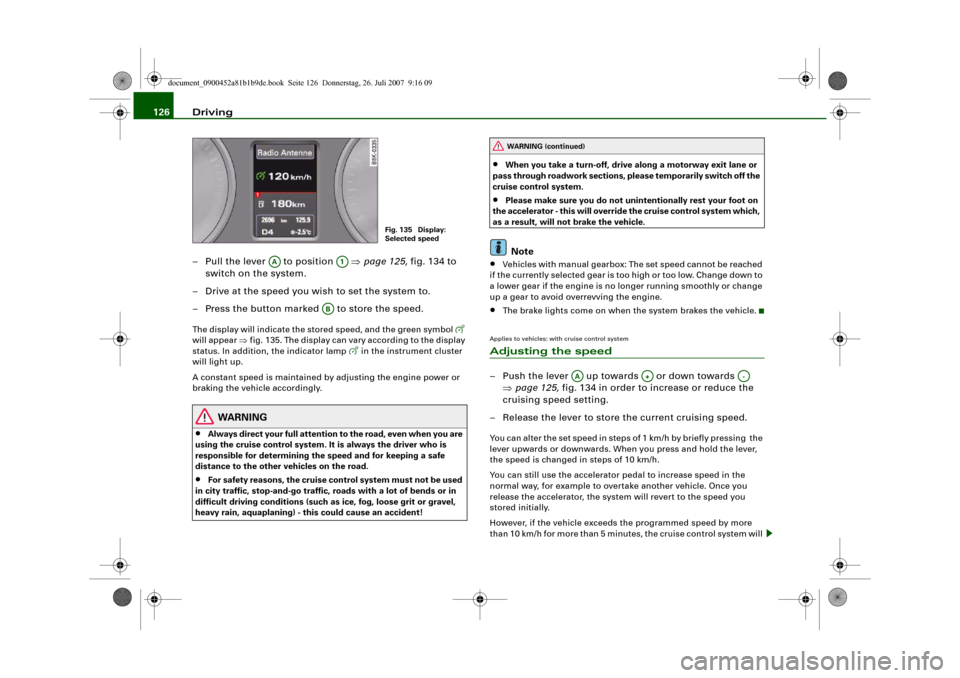
– Press the button marked to store the speed.The display will indicate the stored speed, and the green symbol
will appear ⇒fig. 135. The display can vary according to the display
status. In addition, the indicator lamp
in the instrument cluster
will light up.
A constant speed is maintained by adjusting the engine power or
braking the vehicle accordingly.
WARNING
•
Always direct your full attention to the road, even when you are
using the cruise control system. It is always the driver who is
responsible for determining the speed and for keeping a safe
distance to the other vehicles on the road.
•
For safety reasons, the cruise control system must not be used
in city traffic, stop-and-go traffic, roads with a lot of bends or in
difficult driving conditions (such as ice, fog, loose grit or gravel,
heavy rain, aquaplaning) - this could cause an accident!
•
When you take a turn-off, drive along a motorway exit lane or
pass through roadwork sections, please temporarily switch off the
cruise control system.
•
Please make sure you do not unintentionally rest your foot on
the accelerator - this will override the cruise control system which,
as a result, will not brake the vehicle.Note
•
Vehicles with manual gearbox: The set speed cannot be reached
if the currently selected gear is too high or too low. Change down to
a lower gear if the engine is no longer running smoothly or change
up a gear to avoid overrevving the engine.
•
The brake lights come on when the system brakes the vehicle.
Applies to vehicles: with cruise control systemAdjusting the speed– Push the lever up towards or down towards
⇒page 125, fig. 134 in order to increase or reduce the
cruising speed setting.
– Release the lever to store the current cruising speed.You can alter the set speed in steps of 1 km/h by briefly pressing the
lever upwards or downwards. When you press and hold the lever,
the speed is changed in steps of 10 km/h.
You can still use the accelerator pedal to increase speed in the
normal way, for example to overtake another vehicle. Once you
release the accelerator, the system will revert to the speed you
stored initially.
However, if the vehicle exceeds the programmed speed by more
than 10 km/h for more than 5 minutes, the cruise control system will
Fig. 135 Display:
Selected speed
AA
A1
AB
WARNING (continued)
AA
A+
A-
document_0900452a81b1b9de.book Seite 126 Donnerstag, 26. Juli 2007 9:16 09