2008 AUDI A4 ESP
[x] Cancel search: ESPPage 277 of 342
Wheels and tyres275
Controls
Safety
Driving tips
General maintenance
Self-help
Technical data Furthermore, this could cause damage to your vehicle and
possibly also result in an accident.
Note
•
If you cannot continue driving even with run flat tyres please
obtain professional assistance.
•
You should obtain professional assistance if you are in any doubt
regarding the rims and tyres for your vehicle.
Applies to vehicles: with run flat tyresDriving with run flat tyres
Please remember that the vehicle's handling will be
impaired.Driving a vehicle with a deflated tyre, or with insufficient
tyre pressure, is an abnormal situation. However, since the
handling of a vehicle equipped with run flat tyres is only
slightly impaired, it is important to remember that you are
driving with a deflated tyre. If you have to make use of the
run flat system please remember the following points:
– The Electronic Stabilisation Program (ESP) must be
switched on.
–Do not exceed 80km/h ⇒.
– Anticipate the traffic situation well in advance.
– Be careful when accelerating.
– Avoid unnecessary braking and steering manoeuvres.
– Reduce speed in good time before corners and potential
hazards.
Please refer to ⇒page 274, “ When is it no longer possible to
continue driving with the help of the run flat tyres?”
Effects on handling when driving with defective tyres
If one of the front tyres is defective, your vehicle will tend to pull
slightly towards that side and braking performance will be
impaired.
A defective rear tyre will also make the vehicle pull slightly to one
side, and the braking response will again be slightly impaired.
These effects will be most noticeable when driving in a corner.
WARNING
•
When using the run flat system the changes in vehicle handling
will be noticeable when braking, in corners and during fast accel-
eration.
•
The maximum permitted speed of 80 km/h is subject to road
and weather conditions. Always observe the relevant rules and
regulations. Run flat tyres allow you to continue your journey in
the event of a loss of tyre pressure. However, the driver remains
responsible for the safety of the vehicle and for restoring the
correct tyre pressure and having defective parts replaced
⇒page 276. For these reasons you should always adjust your
driving to suit the circumstances.Caution
We recommend that you drive with great care when making use of
the run flat system. Avoid abrupt manoeuvres.
WARNING (continued)
document_0900452a81b1b9de.book Seite 275 Donnerstag, 26. Juli 2007 9:16 09
Page 279 of 342
Accessories and modifications to the vehicle277
Controls
Safety
Driving tips
General maintenance
Self-help
Technical data
Accessories and modifications to the vehicleAccessories and replacement partsAlways ask your dealer or specialist retailer for advice
before purchasing accessories and replacement parts.Your car is designed to offer a high standard of active and passive
safety. For this reason, we recommend that you ask an Audi dealer
for advice before fitting accessories or replacement parts. Audi
dealers have the latest information from the manufacturer and can
recommend accessories and replacement parts which are suitable
for your requirements. They can also answer any questions you
might have regarding official regulations.
We recommend you to use only Audi accessories and Audi Genuine
parts
®. Audi has tested these parts and accessories for suitability,
reliability and safety. Audi dealers have the necessary experience
and facilities to ensure that the parts are installed properly.
Although the market is constantly scrutinised, Audi cannot judge or
assume responsibility for the reliability, safety and suitability of
non-genuine products - even though in some instances, these parts
may have been approved by an officially recognised technical
testing authority or accompanied by an official approval certificate.
Any retro-fitted equipment which has a direct effect on the vehicle
and/or the way it is driven (e.g. cruise control system or electroni-
cally-controlled suspension) must be approved for use in your
vehicle and bear the e mark (the European Union's approval
symbol).
If any additional electrical components are fitted which do not serve
to control the vehicle itself (for instance a refrigerator box, laptop or
ventilator fan, etc.), these must bear the CE mark (manufacturer
conformity declaration in the European Union).
WARNING
Never attach accessories (such as cup holders or telephone
brackets) to the surfaces covering the airbag units or the areas
around the airbags: this could cause injury if the airbag is
triggered.ModificationsModifications must always be carried out according to
our specifications.Unauthorised modifications to the electronic components or soft-
ware in the vehicle may cause malfunctioning. Due to the way the
electronic components are linked together in networks, other
systems may be affected by the faults. This can seriously impair
safety, lead to excessive wear of components, and also invalidate
the type approval for your vehicle.
You will appreciate that your Audi dealer cannot be held liable for
any damage caused by modifications and/or work performed incor-
rectly.
We recommend that all work should be performed by an Audi work-
shop using Audi Genuine parts
®.
WARNING
Incorrectly performed modifications or other work on your vehicle
can lead to malfunctions and cause accidents.
document_0900452a81b1b9de.book Seite 277 Donnerstag, 26. Juli 2007 9:16 09
Page 296 of 342
Self-help 294Starting the engine
The two jump leads must be connected in the correct
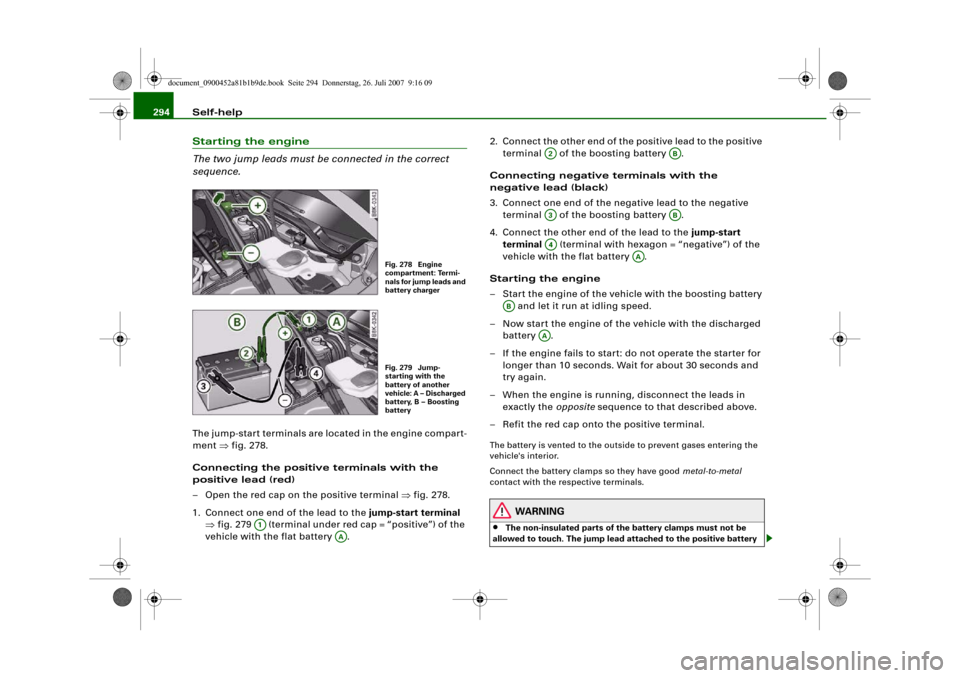
sequence.The jump-start terminals are located in the engine compart-
ment ⇒fig. 278.
Connecting the positive terminals with the
positive lead (red)
– Open the red cap on the positive terminal ⇒fig. 278.
1. Connect one end of the lead to the jump-start terminal
⇒fig. 279 (terminal under red cap = “positive”) of the
vehicle with the flat battery .2. Connect the other end of the positive lead to the positive
terminal of the boosting battery .
Connecting negative terminals with the
negative lead (black)
3. Connect one end of the negative lead to the negative
terminal of the boosting battery .
4. Connect the other end of the lead to the jump-start
terminal (terminal with hexagon = “negative”) of the
vehicle with the flat battery .
Starting the engine
– Start the engine of the vehicle with the boosting battery
and let it run at idling speed.
– Now start the engine of the vehicle with the discharged
battery .
– If the engine fails to start: do not operate the starter for
longer than 10 seconds. Wait for about 30 seconds and
try again.
– When the engine is running, disconnect the leads in
exactly the opposite sequence to that described above.
– Refit the red cap onto the positive terminal.
The battery is vented to the outside to prevent gases entering the
vehicle's interior.
Connect the battery clamps so they have good metal-to-metal
contact with the respective terminals.
WARNING
•
The non-insulated parts of the battery clamps must not be
allowed to touch. The jump lead attached to the positive battery
Fig. 278 Engine
compartment: Termi-
nals for jump leads and
battery chargerFig. 279 Jump-
starting with the
battery of another
vehicle: A – Discharged
battery, B – Boosting
battery
A1
AA
A2
AB
A3
AB
A4
AA
AB
AA
document_0900452a81b1b9de.book Seite 294 Donnerstag, 26. Juli 2007 9:16 09
Page 297 of 342
Self-help295
Controls
Safety
Driving tips
General maintenance
Self-help
Technical data terminal must not touch metal parts of the vehicle: this can cause
short circuiting.
•
Do not bend over the batteries – risk of acid burns.
•
The screw plugs on the battery cells must be screwed in firmly.
•
Keep sparks, flame and lighted cigarettes away from batteries:
the gases given off can cause an explosion.
•
If jump-starting another vehicle, position the jump leads in
such a way that they cannot come into contact with any moving
parts in the engine compartment of the other vehicle.Caution
Please note that the above method of connecting the leads is meant
for jump-starting your vehicle. If jump-starting another vehicle, you
should not connect the negative lead (–) to the negative terminal of
the discharged battery, but directly to the engine block or a solid
metal part bolted to the engine block. If the battery of the other
vehicle does not have a gas vent, there is a risk that a mixture of
oxygen and hydrogen gas can accumulate and cause an
explosion.Tow-starting and towing awayGeneral notes
Points to observe when tow-starting or towing awayIf you use a towrope:
Notes for the driver of the towing vehicle
– The towrope must be taut before driving off.– Engage the clutch very gently when starting to move; on
vehicles with automatic gearbox press the accelerator
slowly.
Notes for the driver of the towed vehicle
– The ignition should be switched on so that the turn
signals, horn, windscreen wipers and washers can be
used. Please ensure that the steering wheel is unlocked
when you switch on the ignition, and that it moves freely.
–Put gear lever in neutral (manual gearbox) or move
selector lever to position N (automatic gearbox).
– The brake servo and power steering only work when the
engine is running. Considerably more effort is required
on the brake pedal and steering wheel when the engine
is switched off.
– Ensure that the towrope remains taut at all times when
towing.
Towrope or towbar
It is easier and safer to tow a vehicle with a towbar. You should only
use a towrope if you do not have a towbar.
A towrope should be slightly elastic to reduce the loading on both
vehicles. It is advisable to use a towrope made of synthetic fibre or
similar material.
Attach the tow-rope or tow-bar only to the towing anchorages
intended for this purpose ⇒page 296 or ⇒page 297.
Driving technique
Towing requires some experience – especially when using a
towrope. Both drivers should be familiar with the technique required
for towing. Inexperienced drivers should not attempt to tow-start or
tow away another vehicle.
WARNING (continued)
document_0900452a81b1b9de.book Seite 295 Donnerstag, 26. Juli 2007 9:16 09
Page 307 of 342
Fuses and bulbs305
Controls
Safety
Driving tips
General maintenance
Self-help
Technical data
WARNING
•
Take particular care when working on components in the
engine compartment if the engine is warm - risk of burns!
•
Bulbs are sensitive to pressure. The glass can break when you
touch the bulb, causing injury.
•
Incorrect handling of the high-voltage element of xenon gas-
discharge bulbs* can have potentially fatal consequences.
•
When changing bulbs, please take care not to injure yourself on
sharp edges, in particular on the headlight housing.Caution
•
Always remove the ignition key before carrying out any work on
the electrical system - danger of short circuiting!
•
Switch off the lights or parking lights before you change a bulb.
•
Take good care to avoid damaging any components.
•
Removing the lights in particular can lead to the paintwork
becoming damaged. This is another reason why we recommend
having the bulbs changed by a qualified workshop.For the sake of the environment
Please ask your specialist retailer how to dispose of used bulbs in
the proper manner.
Note
Place the parts you have removed on a soft cloth so that they do not
become scratched.•
Please check at regular intervals that all lighting (especially the
exterior lighting) on your vehicle is functioning properly. This is not
only in the interest of your own safety, but also in that of all other
road users.
•
Before changing a bulb, make sure you have the correct new
bulb.
•
Do not touch the glass part of the bulb with your bare hands, use
a cloth or paper towel instead. Otherwise, the fingerprints left on
the glass will vaporise as a result of the heat generated by the bulb,
be deposited on the reflector and impair its surface.
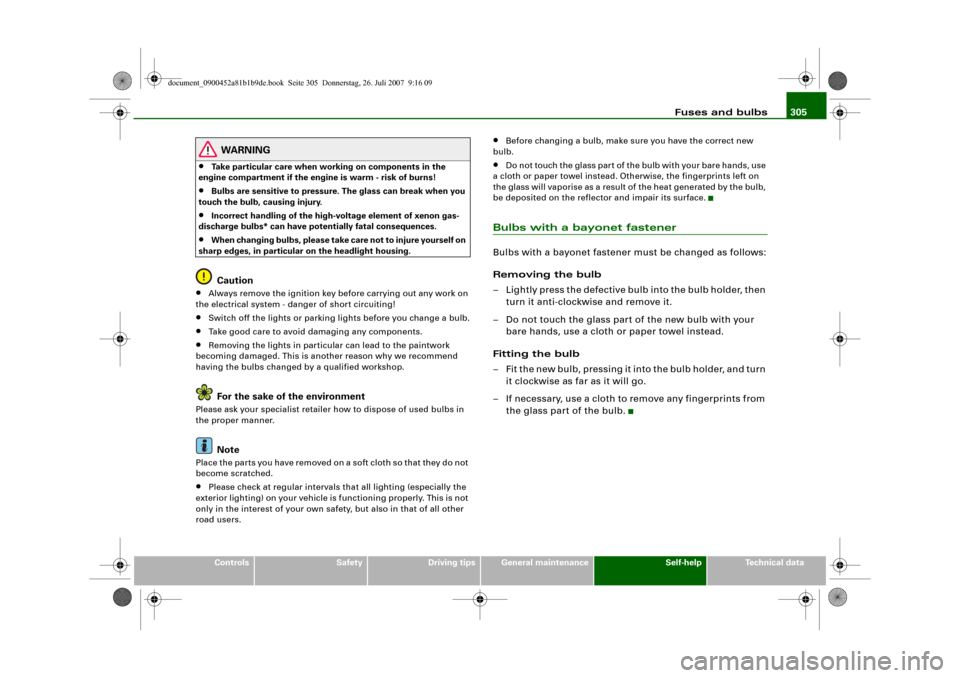
Bulbs with a bayonet fastenerBulbs with a bayonet fastener must be changed as follows:
Removing the bulb
– Lightly press the defective bulb into the bulb holder, then
turn it anti-clockwise and remove it.
– Do not touch the glass part of the new bulb with your
bare hands, use a cloth or paper towel instead.
Fitting the bulb
– Fit the new bulb, pressing it into the bulb holder, and turn
it clockwise as far as it will go.
– If necessary, use a cloth to remove any fingerprints from
the glass part of the bulb.
document_0900452a81b1b9de.book Seite 305 Donnerstag, 26. Juli 2007 9:16 09
Page 322 of 342
General notes 320General notesExplanation of technical dataWhere not otherwise indicated or separately listed, all technical
data apply to vehicles with standard equipment for the German
market. Other figures may apply for special versions and export
models.
Please note that the details listed in the vehicle's registration docu-
ments can be taken as correct.
Engine data
The figures for engine power output are determined according to
EU standards.
Performance figures
The performance figures were measured without equipment which
may influence performance, such as mudflaps or extremely wide-
section tyres.
Kerb weight (unladen weight)
These figures (kerb weight according to the currently applicable
version of EU Directive 92/21/EEC) apply to the vehicle with the tank
90% full, with no special equipment. The figures include an addi-
tional 75 kg to allow for the weight of the driver.
When towing a trailer, the gross vehicle weight may be exceeded by
up to 30 kg and the maximum rear axle weight may be exceeded by
up to 80 kg.
Maximum trailer weights
The maximum trailer weights are calculated in accordance with the
currently applicable version of EU Directive 92/21/EEC.
The figures for a trailer with brakes, on gradients up to 8% are appli-
cable only up to a maximum speed of 80 km/h (even though higher
speeds may be permitted when towing a trailer in some countries).The figures for a trailer with brakes on gradients up to 12% and for
the weight of car and trailer on gradients up to 12% are applicable
up to a maximum speed of 100 km/h. This maximum speed must not
be exceeded even in countries where higher speeds are permitted.
Maximum draw bar loading
The vertical load exerted by the trailer drawbar on the ball joint of
the towing bracket must not exceed 80 kg.
In the interest of safety, we recommend applying the maximum
permitted draw bar weight. The stability of the trailer could be
adversely affected if too little weight is applied.
If the maximum permitted drawbar weight cannot be obtained, e.g.
when using small or light trailers, statutory regulations require that
the drawbar weight be at least 4% of the actual trailer weight (for
single-axle trailers or twin-axle trailers with an axle spacing less
than 1.0 m).
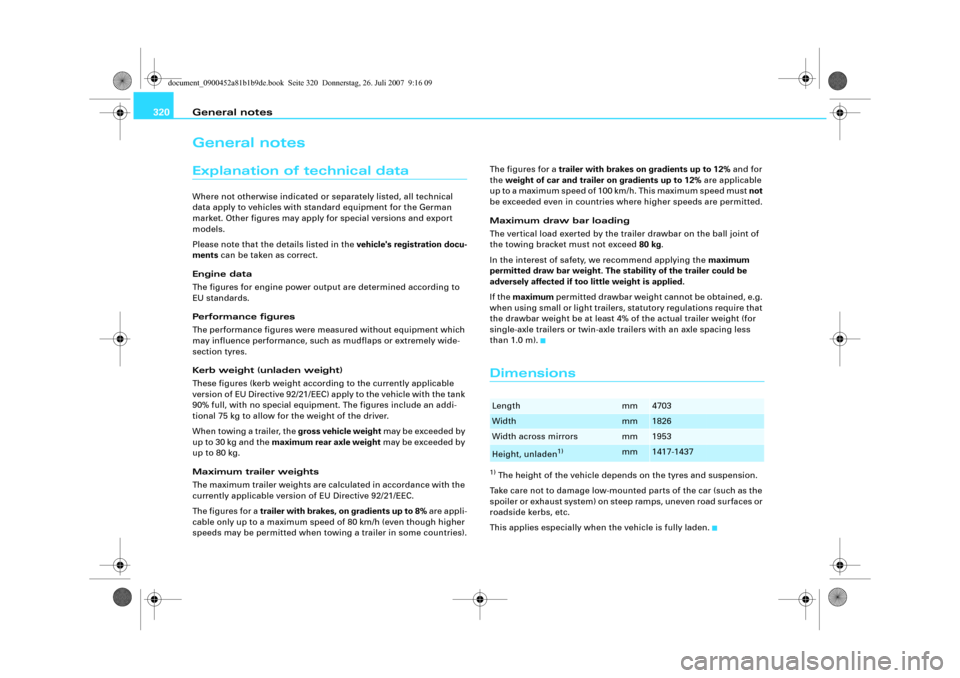
Dimensions1) The height of the vehicle depends on the tyres and suspension.
Take care not to damage low-mounted parts of the car (such as the
spoiler or exhaust system) on steep ramps, uneven road surfaces or
roadside kerbs, etc.
This applies especially when the vehicle is fully laden.Length
mm
4703
Width
mm
1826
Width across mirrors
mm
1953
Height, unladen
1)
mm
1417-1437
document_0900452a81b1b9de.book Seite 320 Donnerstag, 26. Juli 2007 9:16 09
Page 334 of 342
Index 332CCapacities . . . . . . . . . . . . . . . . . . . . . . . . . 321
Car keys . . . . . . . . . . . . . . . . . . . . . . . . . . . . 43
Care of vehicle . . . . . . . . . . . . . . . . . . . . . 244
Catalytic converter . . . . . . . . . . . . . . . . . . 229
Central locking system . . . . . . . . . . . . . . . 42
Boot lid . . . . . . . . . . . . . . . . . . . . . . . . . . 51
Deadlock mechanism . . . . . . . . . . . . . . 48
Fuel tank flap . . . . . . . . . . . . . . . . . . . . 252
Locking . . . . . . . . . . . . . . . . . . . . . . . . . . 48
Locking and unlocking the vehicle from
inside . . . . . . . . . . . . . . . . . . . . . . . . . . 49
Manual locking . . . . . . . . . . . . . . . . . . . 51
Opening and closing windows . . . . . . 54
Sun roof . . . . . . . . . . . . . . . . . . . . . . . . . 54
Switches on driver's door . . . . . . . . . . 49
Unlocking . . . . . . . . . . . . . . . . . . . . . . . . 48
Cetane number . . . . . . . . . . . . . . . . . . . . . 251
Changing a wheel . . . . . . . . . . . . . . . . . . . 288
Changing bulbs
SeeBulbs . . . . . . . . . . . . . . . . . . . . . . . 304
Chassis number . . . . . . . . . . . . . . . . . . . . 321
Child safety . . . . . . . . . . . . . . . . . . . . . . . . 210
Side airbags . . . . . . . . . . . . . . . . . . . . . 212
Child safety seat . . . . . . . . . . . . . . . . . . . . 213
Child seat categories . . . . . . . . . . . . . 213
Fitting . . . . . . . . . . . . . . . . . . . . . . . . . . 216
ISOFIX system . . . . . . . . . . . . . . . . . . . 218
On front passenger's seat . . . . . . . . . 211
Safety notes . . . . . . . . . . . . . . . . . . . . . 210
Child-proof catches
Rear doors . . . . . . . . . . . . . . . . . . . . . . . 53Cigarette lighter . . . . . . . . . . . . . . . . . . . . . 87
Cleaning . . . . . . . . . . . . . . . . . . . . . . . . . . . 244
Cleaning Alcantara . . . . . . . . . . . . . . . . . . 250
Cleaning seat covers
Alcantara . . . . . . . . . . . . . . . . . . . . . . . 250
Natural leather . . . . . . . . . . . . . . . . . . 249
Textile covers . . . . . . . . . . . . . . . . . . . . 247
Cleaning textile covers and trim parts . . 247
Clock, setting . . . . . . . . . . . . . . . . . . . . . . . 13
Closing
Bonnet . . . . . . . . . . . . . . . . . . . . . . . . . 256
Sun roof . . . . . . . . . . . . . . . . . . . . . . . . . 55
Coat hooks . . . . . . . . . . . . . . . . . . . . . . . . . . 91
Colour code . . . . . . . . . . . . . . . . . . . . . . . . 321
coming home . . . . . . . . . . . . . . . . . . . . . . . 59
Compact temporary spare wheel
SeeSpare wheel . . . . . . . . . . . . . . . . . 284
Compartment for (sun)glasses . . . . . . . . . 91
Compass in mirror . . . . . . . . . . . . . . . . . . . 71
Controls and displays
Overview . . . . . . . . . . . . . . . . . . . . . . . . . . 9
Convenience open/close function . . . . . . 54
Cooling system
Anti-freeze additive . . . . . . . . . . . . . . . 260
Checking coolant level . . . . . . . . . . . . 261
Coolant . . . . . . . . . . . . . . . . . . . . . . . . . 260
Coolant temperature gauge . . . . . . . . . 11
Malfunction . . . . . . . . . . . . . . . . . . . . . . 33
Radiator fan . . . . . . . . . . . . . . . . . . . . . 262
Topping up coolant . . . . . . . . . . . . . . . 261Cruise control system
Adjusting stored speed . . . . . . . . . . . 126
Indicator lamp . . . . . . . . . . . . . . . . . . . . 19
Pre-selecting a speed . . . . . . . . . . . . . 127
Switching off . . . . . . . . . . . . . . . . . . . . 127
Switching on . . . . . . . . . . . . . . . . . . . . 125
See alsoadaptive cruise control . . . . 128
Cup holders . . . . . . . . . . . . . . . . . . . . . . . . . 85
Current fuel consumption . . . . . . . . . . . . . 25
DDate display . . . . . . . . . . . . . . . . . . . . . . . . . 13
Daytime running lights . . . . . . . . . . . . . . . 59
DCP
SeeDynamic gear control program . 166
Deactivating front passenger's airbag . . 208
Deadlock mechanism . . . . . . . . . . . . . . 42, 48
Defrosting windows . . . . . . . . . . . . . . 98, 106
Deluxe automatic air conditioner . . . . . . . 93
Air distribution . . . . . . . . . . . . . . . . . . . 97
Air outlets . . . . . . . . . . . . . . . . . . . . . . . . 99
Air outlets for rear passengers . . . . . . 99
Air recirculation mode . . . . . . . . . . . . . 97
Automatic mode . . . . . . . . . . . . . . . . . . 95
Basic settings . . . . . . . . . . . . . . . . . . . . 100
Blower . . . . . . . . . . . . . . . . . . . . . . . . . . . 96
Controls . . . . . . . . . . . . . . . . . . . . . . . . . 94
Defrosting . . . . . . . . . . . . . . . . . . . . . . . 98
Description . . . . . . . . . . . . . . . . . . . . . . . 93
Economical operation . . . . . . . . . . . . . 100
Heated rear window . . . . . . . . . . . . . . . 98
Seat heating, front . . . . . . . . . . . . . . . 114
document_0900452a81b1b9de.book Seite 332 Donnerstag, 26. Juli 2007 9:16 09
Page 336 of 342
Index 334
Operation . . . . . . . . . . . . . . . . . . . . . . . 121
Parking . . . . . . . . . . . . . . . . . . . . . . . . . 122
Releasing and applying . . . . . . . . . . . 121
Warning lamp . . . . . . . . . . . . . . . . . 19, 20
Electronic differential lock
How the system works . . . . . . . . . . . . 222
Warning lamp . . . . . . . . . . . . . . . . . . . . 19
Electronic immobiliser . . . . . . . . . . . . . 14, 43
Electronic stabilisation program
How the system works . . . . . . . . . . . . 222
Warning lamp . . . . . . . . . . . . . . . . . . . . 17
Emergency braking function . . . . . . . . . . 123
Emergency key . . . . . . . . . . . . . . . . . . . . . . 45
Emergency release
Ignition key . . . . . . . . . . . . . . . . . . . . . . 46
Emission control systems
Catalytic converter . . . . . . . . . . . . . . . 229
Diesel particulate filter . . . . . . . . . . . . 229
Emissions . . . . . . . . . . . . . . . . . . . . . . . . . 321
Engine compartment
Safety notes . . . . . . . . . . . . . . . . . . . . . 255
Engine compartment layout . . . . . . . . . . 256
Engine data
SeePerformance, weights and
dimensions . . . . . . . . . . . . . . . . . . . . 323
Engine hood
SeeBonnet . . . . . . . . . . . . . . . . . . . . . . 254
Engine management
(EPC) warning lamp . . . . . . . . . . . . . . . 16
Engine oil . . . . . . . . . . . . . . . . . . . . . . 34, 257
Checking oil level . . . . . . . . . . . . 258, 259
Consumption . . . . . . . . . . . . . . . . 258, 259
LongLife Service . . . . . . . . . . . . . . . . . 257Topping up . . . . . . . . . . . . . . . . . . . . . . 259
See alsoPerformance, weights and
dimensions . . . . . . . . . . . . . . . . . . . . 323
Engine oil capacity
SeePerformance, weights and
dimensions . . . . . . . . . . . . . . . . . . . . 323
Engine oil pressure
Warning lamp . . . . . . . . . . . . . . . . . . . . 33
Engine oil sensor
Malfunction . . . . . . . . . . . . . . . . . . . . . . 38
Environmental compatibility . . . . . . . . . . 231
Environmental tips
Filling the tank . . . . . . . . . . . . . . . . . . . 252
Heated rear window . . . . . . . . . . . 98, 106
Leaks . . . . . . . . . . . . . . . . . . . . . . . . . . . 255
Roof carrier . . . . . . . . . . . . . . . . . . . . . . 84
EPC
SeeEngine management . . . . . . . . . . . 16
ESP
SeeElectronic stabilisation program . 17
Ethanol fuel . . . . . . . . . . . . . . . . . . . . . . . . 251
Exterior mirrors . . . . . . . . . . . . . . . . . . . . . . 70
FFastening rings . . . . . . . . . . . . . . . . . . 79, 193
Filling the tank . . . . . . . . . . . . . . . . . . . . . 252
Releasing the tank flap manually . . . 253
Fire extinguisher . . . . . . . . . . . . . . . . . . . . 283
First-aid kit . . . . . . . . . . . . . . . . . . . . . . . . . 282
Floor mats . . . . . . . . . . . . . . . . . . . . . 191, 192
Fog lights . . . . . . . . . . . . . . . . . . . . . . . . . . . 58
Four-wheel drive . . . . . . . . . . . . . . . . . . . . 226Front passenger
SeeSitting position . . . . . . . . . . . . . . . 189
Fuel
Biodiesel . . . . . . . . . . . . . . . . . . . . . . . . 251
Capacity . . . . . . . . . . . . . . . . . . . . . . . . 321
Consumption . . . . . . . . . . . . . . . . . . . . 321
Current fuel consumption . . . . . . . . . . 25
Diesel . . . . . . . . . . . . . . . . . . . . . . . . . . 251
Ethanol . . . . . . . . . . . . . . . . . . . . . . . . . 251
Fuel level low . . . . . . . . . . . . . . . . . . . . . 37
Petrol . . . . . . . . . . . . . . . . . . . . . . . . . . 251
Saving fuel . . . . . . . . . . . . . . . . . . . . . . 229
Fuel consumption . . . . . . . . . . . . . . . . . . . 321
Fuel range . . . . . . . . . . . . . . . . . . . . . . . . . . 25
Fuel tank flap . . . . . . . . . . . . . . . . . . . . . . . 252
Fuse, changing . . . . . . . . . . . . . . . . . . . . . 300
GGarage door opener . . . . . . . . . . . . . . . . . 179
Gear-change indicator . . . . . . . . . . . . . . . . 22
Generator
SeeAlternator . . . . . . . . . . . . . . . . . . . . 32
Glove box . . . . . . . . . . . . . . . . . . . . . . . . . . . 90
Glow plug system
Indicator lamp . . . . . . . . . . . . . . . . . . . . 16HHandbrake
SeeElectro-mechanical parking brake . . .
121
document_0900452a81b1b9de.book Seite 334 Donnerstag, 26. Juli 2007 9:16 09