2008 AUDI A4 steering wheel
[x] Cancel search: steering wheelPage 64 of 342
Lights and vision 62•
When reaching the tail end of a traffic jam
•
If your vehicle breaks down or there is an emergency
•
If your vehicle is being towed away, or if you are towing another
vehicle.
Turn signal and main beam lever
The turn signal and main beam lever also operates the
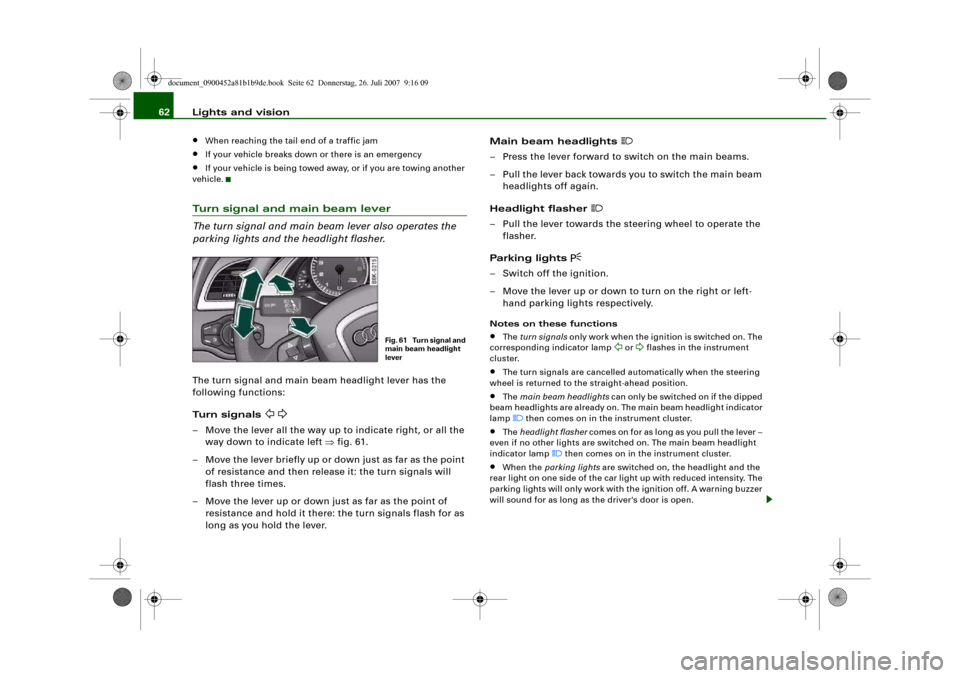
parking lights and the headlight flasher.The turn signal and main beam headlight lever has the
following functions:
Turn signals
– Move the lever all the way up to indicate right, or all the
way down to indicate left ⇒fig. 61.
– Move the lever briefly up or down just as far as the point
of resistance and then release it: the turn signals will
flash three times.
– Move the lever up or down just as far as the point of
resistance and hold it there: the turn signals flash for as
long as you hold the lever.Main beam headlights
– Press the lever forward to switch on the main beams.
– Pull the lever back towards you to switch the main beam
headlights off again.
Headlight flasher
– Pull the lever towards the steering wheel to operate the
flasher.
Parking lights
– Switch off the ignition.
– Move the lever up or down to turn on the right or left-
hand parking lights respectively.Notes on these functions•
The turn signals only work when the ignition is switched on. The
corresponding indicator lamp
or
flashes in the instrument
cluster.
•
The turn signals are cancelled automatically when the steering
wheel is returned to the straight-ahead position.
•
The main beam headlights can only be switched on if the dipped
beam headlights are already on. The main beam headlight indicator
lamp then comes on in the instrument cluster.
•
The headlight flasher comes on for as long as you pull the lever –
even if no other lights are switched on. The main beam headlight
indicator lamp
then comes on in the instrument cluster.
•
When the parking lights are switched on, the headlight and the
rear light on one side of the car light up with reduced intensity. The
parking lights will only work with the ignition off. A warning buzzer
will sound for as long as the driver's door is open.
Fig. 61 Turn signal and
main beam headlight
lever
document_0900452a81b1b9de.book Seite 62 Donnerstag, 26. Juli 2007 9:16 09
Page 118 of 342
Driving 116DrivingSteeringApplies to vehicles: with manually adjustable steering columnAdjusting the steering wheel position
The height and reach of the steering wheel can be
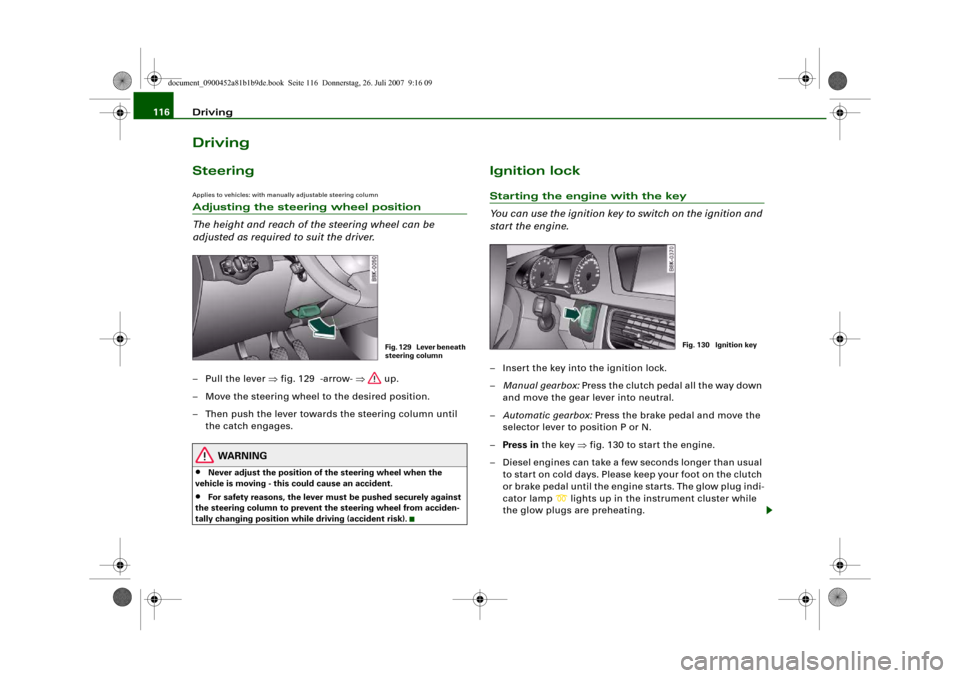
adjusted as required to suit the driver.– Pull the lever ⇒fig. 129 -arrow- ⇒ up.
– Move the steering wheel to the desired position.
– Then push the lever towards the steering column until
the catch engages.
WARNING
•
Never adjust the position of the steering wheel when the
vehicle is moving - this could cause an accident.
•
For safety reasons, the lever must be pushed securely against
the steering column to prevent the steering wheel from acciden-
tally changing position while driving (accident risk).
Ignition lockStarting the engine with the key
You can use the ignition key to switch on the ignition and
start the engine.– Insert the key into the ignition lock.
–Manual gearbox: Press the clutch pedal all the way down
and move the gear lever into neutral.
–Automatic gearbox: Press the brake pedal and move the
selector lever to position P or N.
–Press in the key ⇒fig. 130 to start the engine.
– Diesel engines can take a few seconds longer than usual
to star t on cold days. Please keep your foot on the clutch
or brake pedal until the engine starts. The glow plug indi-
cator lamp
lights up in the instrument cluster while
the glow plugs are preheating.
Fig. 129 Lever beneath
steering column
Fig. 130 Ignition key
document_0900452a81b1b9de.book Seite 116 Donnerstag, 26. Juli 2007 9:16 09
Page 124 of 342
Driving 122a fault in the parking brake. Have the fault repaired by a qualified
workshop without delay ⇒page 32.
Note
•
The parking brake can be applied at any time - even when the
ignition is switched off. However, the ignition must be switched on
before the parking brake can be released.
•
Any slight noise which may be heard when the parking brake is
applied or released is quite normal and no cause for concern.
•
The parking brake runs an automatic test cycle at regular inter-
vals when the vehicle is parked. This may also cause a slight noise,
which is normal.
Parking
Please note the following points to ensure there is no risk
of the car rolling away accidentally after it is parked.Parking t he c ar
– Use the foot brake to stop the vehicle.
– Pull the switch to apply the parking brake.
– Automatic gearbox: Move the selector lever to P.
– Switch off the engine ⇒.
– Manual gearbox: Engage the first gear.
When parking on slopes
– Turn the steering wheel so that the vehicle would roll into
the kerb if it did start to move accidentally.
WARNING
•
Always take the key with you when leaving the vehicle – even
if you only intend to be gone for a short time. This is especially
important if children are left in the car. They might otherwise be
able to start the engine, release the parking brake or use power-
operated equipment such as the electric windows - this could lead
to injuries.
•
Do not leave anyone (especially children) in the vehicle when it
is locked. Locked doors could delay assistance in an emergency,
potentially putting lives at risk.
Driving away from a standstill
The parking brake auto release function releases the
parking brake automatically when you wish to start
moving.Applying the parking brake when stopping
– Pull the switch to apply the parking brake.
Releasing the parking brake when driving away
– Drive off in the normal way: the parking brake will be
released automatically and the vehicle will start moving.On vehicles with automatic gearbox, you can apply the parking
brake when stopping at traffic lights, etc. Then you do not have to
hold the car with the footbrake, as the parking brake will stop it
creeping forward while a gear is engaged in the automatic transmis-
sion. When you drive off in the normal way, the parking brake will be
released automatically and the vehicle will start moving.
Driving away on a slope
When driving away on a gradient, the parking brake auto release
function prevents the vehicle from rolling back unintentionally. The
document_0900452a81b1b9de.book Seite 122 Donnerstag, 26. Juli 2007 9:16 09
Page 125 of 342
Driving123
Controls
Safety
Driving tips
General maintenance
Self-help
Technical data braking force of the parking brake is only released when there is
enough power at the wheels to make the vehicle move in the desired
direction.
Note
For safety reasons the parking brake will only release automatically
if the driver's seat belt is engaged in its buckle.Driving away when towing a trailer
Please note the following points to prevent the vehicle
from rolling back unintentionally on a gradient.– Pull and hold the parking brake switch and press the
accelerator. The parking brake will remain engaged and
prevent any tendency to roll back down the slope.
– You can release the parking brake switch as soon as the
engine is delivering enough power to the wheels.Depending on the weight of the vehicle and trailer and the steep-
ness of the slope, there may be a tendency to roll back downhill
when driving away from a standstill. You can prevent this by pulling
out the parking brake switch as you press the accelerator (in the
same way as with a conventional handbrake).Emergency braking function
This feature enables you to stop the vehicle if the main
brake system should fail or if the pedal is obstructed.– Pull out and hold the parking brake switch to stop the
vehicle with the parking brake in an emergency.
– The brakes will be released immediately if you release the
switch or press down the accelerator.
If you pull out and hold the parking brake switch at a road speed
above about 8 km/h, this will initiate an emergency brake applica-
tion. The brakes are then applied hydraulically at all four wheels.
The effect is the same as an emergency stop (full brake application)
⇒
To prevent the emergency braking function from being used acci-
dentally, a warning buzzer sounds when the switch is operated. The
brakes are released immediately when you release the switch or
press down the accelerator.
WARNING
You should only use the emergency braking function in a real
emergency, for example if the brake system should fail or if the
brake pedal is obstructed. If you use the emergency braking func-
tion by activating the parking brake switch, the effect is similar to
a full brake application (emergency stop). Please remember that
the ESP (with its combined ABS, EDL and traction control func-
tions) is still subject to certain physical limits. In a corner or in bad
road or weather conditions an emergency stop can cause the
vehicle to skid or lose steering control.Driver messages in the instrument cluster displayCaution: Vehicle parked too steep
This message can appear when you apply the parking brake if the
car is parked on a gradient steeper than about 30%.
In this case the parking brake may not be strong enough to prevent
the vehicle from rolling back accidentally.
Please release parking brake
However, please remember that, for safety reasons, the parking
brake will only release automatically if the driver's seat belt is
buckled.
document_0900452a81b1b9de.book Seite 123 Donnerstag, 26. Juli 2007 9:16 09
Page 130 of 342
adaptive cruise control (ACC) 128adaptive cruise control (ACC)Speed and distance control systemApplies to vehicles: with adaptive cruise controlDescription
The adaptive cruise control is a combined speed and
distance control system to assist the driver.Adaptive cruise control allows you to maintain any desired constant
speed between 30 and 200 km/h. In addition, the system controls
the distance maintained to the vehicle in front (subject to certain
limitations as described below).
The system can be used to greatest effect on long motorway jour-
neys or on other main roads with long straight sections.
How is the system operated?
The adaptive cruise control system is operated via a control lever on
the steering wheel ⇒page 131, “Setting the speed” and
⇒page 133, “Setting the distance”.Driver messages
When the system is being used, important information is displayed
in the speedometer and on the instrument cluster display screen
⇒page 134, “Driver messages”.
Please note the following points:
The adaptive cruise control has certain limits determined by the
system itself. This means that the driver may in some situations
have to intervene and control the speed and distance to the vehicle
in front himself ⇒page 138, “Driver intervention prompt” and
⇒page 140, “System limitations”.
WARNING
Please always direct your full attention to the road, even when you
are using adaptive cruise control. It is always the driver who is
responsible for determining the speed and for keeping a safe
distance to the other vehicles on the road.•
For safety reasons, the adaptive cruise control must not be
used in city traffic, stop-go traffic, roads with a lot of bends or in
difficult driving conditions (such as ice, fog, loose grit or gravel,
heavy rain, aquaplaning) - this could cause an accident!
•
When you take a turn-off, drive along a motorway exit lane or
pass through roadwork sections, please temporarily switch off the
adaptive cruise control in order to avoid the vehicle accelerating to
the selected speed.
•
The adaptive cruise control can only control the distance to
vehicles in front. As a rule, it cannot recognize vehicles travelling
in other lanes. For this reason, please temporarily switch off the
system if you are travelling in the inside lane and vehicles in the
overtaking lane are travelling at a slower speed than you are.
Otherwise, you would overtake these vehicles on the inside.
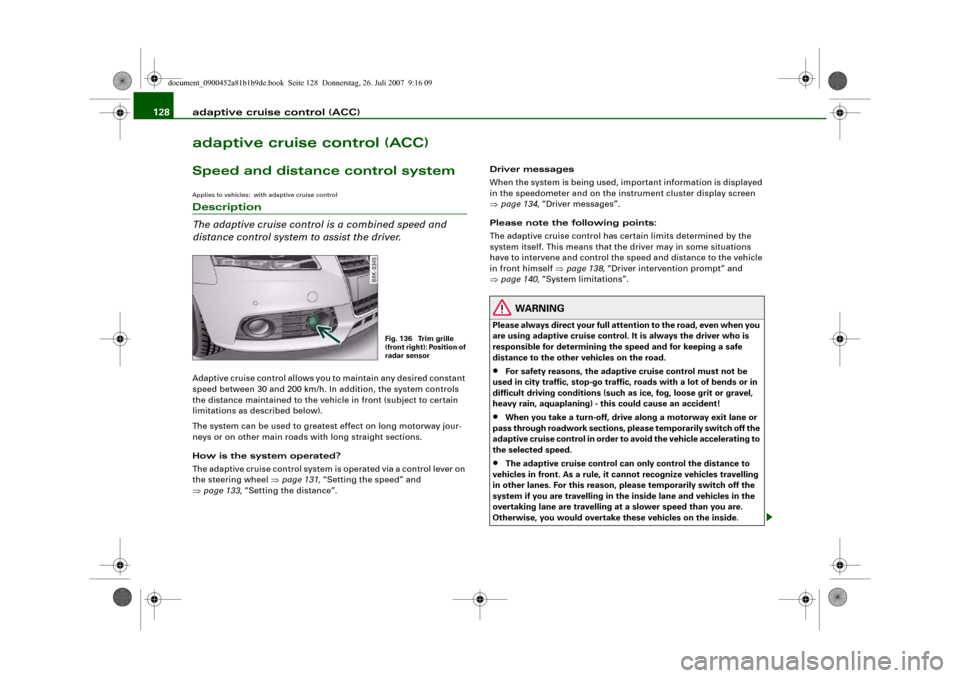
Fig. 136 Trim grille
(front right): Position of
radar sensor
document_0900452a81b1b9de.book Seite 128 Donnerstag, 26. Juli 2007 9:16 09
Page 147 of 342
Audi lane assist145
Controls
Safety
Driving tips
General maintenance
Self-help
Technical data
Audi lane assistAudi lane assistApplies to vehicles: with lane assistDescription
The lane assist system assists the driver in keeping the
vehicle in the right lane.The system uses a camera to detect the markings of the lane you are
driving in. If the vehicle approaches one of the detected lane mark-
ings, the steering wheel vibrates to warn the driver that the vehicle
might be about to cross one of the markings. The lane assist system
is functional when it has detected lane markings on both sides of
the lane you are driving in. The green lamp
in the instrument
cluster indicates that the function is activated and fully functional.
If you operate the turn signal before crossing one of the lane mark-
ings (while the lane assist system is functional), the system will
detect that the lane change is intended and will not warn the driver.
As the system is designed for driving on motorways and other major
roads, it is only active above a speed of about 65 km/h.
WARNING
•
The lane assist system does not keep the vehicle in its lane. It
merely warns the driver when the vehicle is in danger of crossing
the markings of the lane. As the driver you are always responsible
for staying in your own lane.
•
The camera cannot detect all lane markings. Therefore it is
possible that variations in the road surface or objects might be
detected as lane markings, which can lead to false warnings, or
warnings not being given.
•
The camera's view might be obstructed, for example by vehi-
cles travelling in front, rain, snow, a lot of water on the road or adverse light. This can result in the system not detecting the lane
markings correctly.
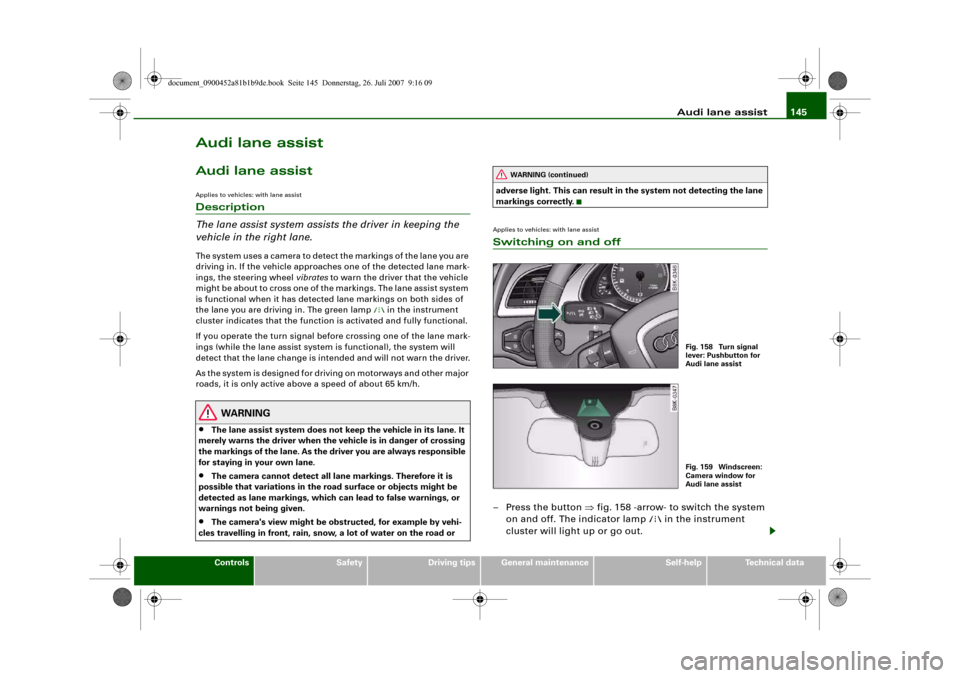
Applies to vehicles: with lane assistSwitching on and off– Press the button ⇒fig. 158 -arrow- to switch the system
on and off. The indicator lamp
in the instrument
cluster will light up or go out.
WARNING (continued)
Fig. 158 Turn signal
lever: Pushbutton for
Audi lane assistFig. 159 Windscreen:
Camera window for
Audi lane assist
document_0900452a81b1b9de.book Seite 145 Donnerstag, 26. Juli 2007 9:16 09
Page 149 of 342
Audi lane assist147
Controls
Safety
Driving tips
General maintenance
Self-help
Technical data
•
Unfilled lines: The lane assist is switched on but not ready for
warning ⇒page 146, fig. 161,
Version : High-resolution display
•
Solid white lines: The lane assist is switched on and ready to
warn.
•
Solid red line (left or right): The lane assist warns you before you
cross the lane demarcation ⇒page 146, fig. 160.
•
Unfilled lines: The lane assist is switched on but not ready for
warning ⇒page 146, fig. 161.
Messages in the instrument cluster display
Should the lane assist be deactivated automatically, the indicator
lamp in the instrument cluster will go out and one of the following
messages will appear in the instrument cluster display:
Audi lane assist not available: currently no sensor vision
This message is displayed when the camera is no longer functional
after the system has continuously failed to detect the lane mark-
ings. This can have the following causes:
•
The outside of the camera window ⇒page 145, fig. 159 is dirty
or frosted. Please remove dirt or ice from this area of the wind-
screen.
•
The inside of the camera window is misted up. In this case,
please wait for the camera window to demist before switching on
the lane assist system again.
•
Due to the conditions (e.g. snow-covered road) the system has
not been able to detect the lane markings for a long period. Do not
switch the lane assist system on again before the lane markings are
discernible.
Audi lane assist currently not available
A temporary error is preventing the lane assist system from fully
functioning. Try switching on the lane assist system again later.
Audi lane assist: system faultThe system should be checked by an Audi dealership or other qual-
ified workshop.
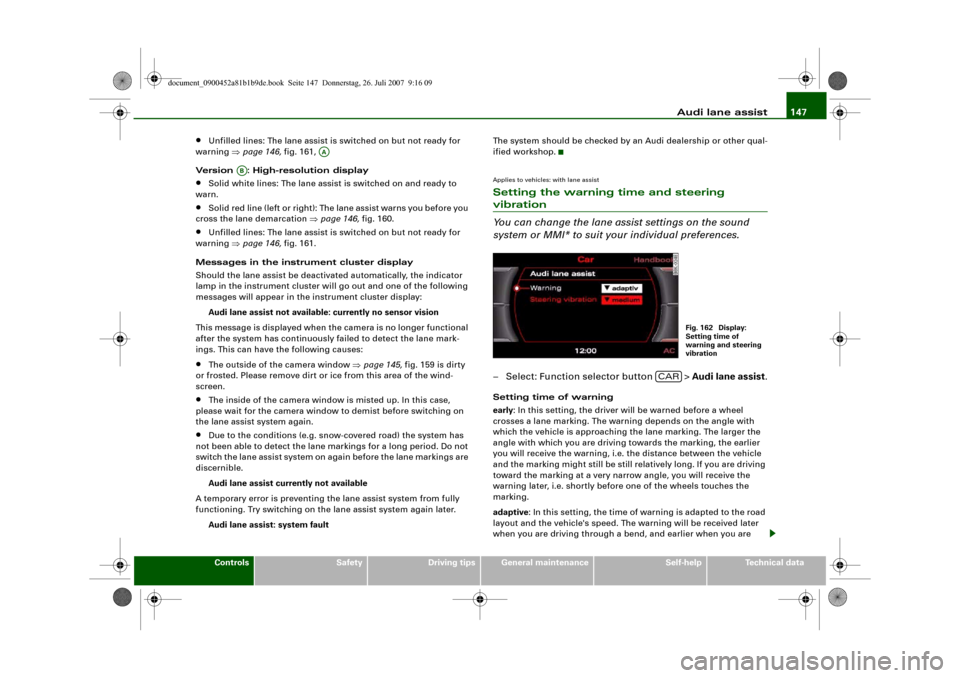
Applies to vehicles: with lane assistSetting the warning time and steering vibration
You can change the lane assist settings on the sound
system or MMI* to suit your individual preferences.– Select: Function selector button > Audi lane assist.Setting time of warning
early: In this setting, the driver will be warned before a wheel
crosses a lane marking. The warning depends on the angle with
which the vehicle is approaching the lane marking. The larger the
angle with which you are driving towards the marking, the earlier
you will receive the warning, i.e. the distance between the vehicle
and the marking might still be still relatively long. If you are driving
toward the marking at a very narrow angle, you will receive the
warning later, i.e. shortly before one of the wheels touches the
marking.
adaptive: In this setting, the time of warning is adapted to the road
layout and the vehicle's speed. The warning will be received later
when you are driving through a bend, and earlier when you are
AA
AB
Fig. 162 Display:
Setting time of
warning and steering
vibration
CAR
document_0900452a81b1b9de.book Seite 147 Donnerstag, 26. Juli 2007 9:16 09
Page 150 of 342
Audi lane assist 148driving on a straight section. On narrow roads, the system will give
off warnings later than on wide roads.
late: In this setting, the driver will be warned when a wheel crosses
a lane marking.
Setting steering wheel vibration
You can set the steering vibration to low, medium or strong. The
steering wheel will vibrate so that you can check your selection.
Note
•
The lane assist is not active while you are changing the setting;
the brief vibration of the steering wheel is only intended to help you
make the desired setting.
•
Your personal settings are stored automatically and assigned to
the remote control key which is being used.
document_0900452a81b1b9de.book Seite 148 Donnerstag, 26. Juli 2007 9:16 09