Page 65 of 185
64
Practical information
Ashtray Storage tray and bottle holder (1.5 L) Cup holder
Any liquid transported in the vehicle in
a cup (mug or similar), which may spill,
presents a risk of damage on contact with
the instrument panel and centre console
controls. "Take care".
12 volt socket
The maximum power of the socket, which is
of the lighter type, is 120 W.
Page 66 of 185
65
Practical information
ERGONOMICS and COMFORT
3
Ticket storage
According to the configuration of the vehicle. Overhead storage unit
This is located above the sun visors and
has two compartments for storing a jumper,
a file, ...
Be aware that storing a hard object in direct
contact with the compartment may result in
noise. Tip: the central cavity of the overhead
storage unit, located in the extension of the
vehicle’s roof between the rear space and
the cab, permits the transportation of long
objects. Take care to support and wedge
them securely.
The tunnel may be added to by an internal
rack, offered as an accessory.
For raised vehicles, a shelf located above
the overhead storage unit permits the
storing of small objects and materials
(straps, cloths, gloves, helmets, etc...).
Page 67 of 185
66
Practical information
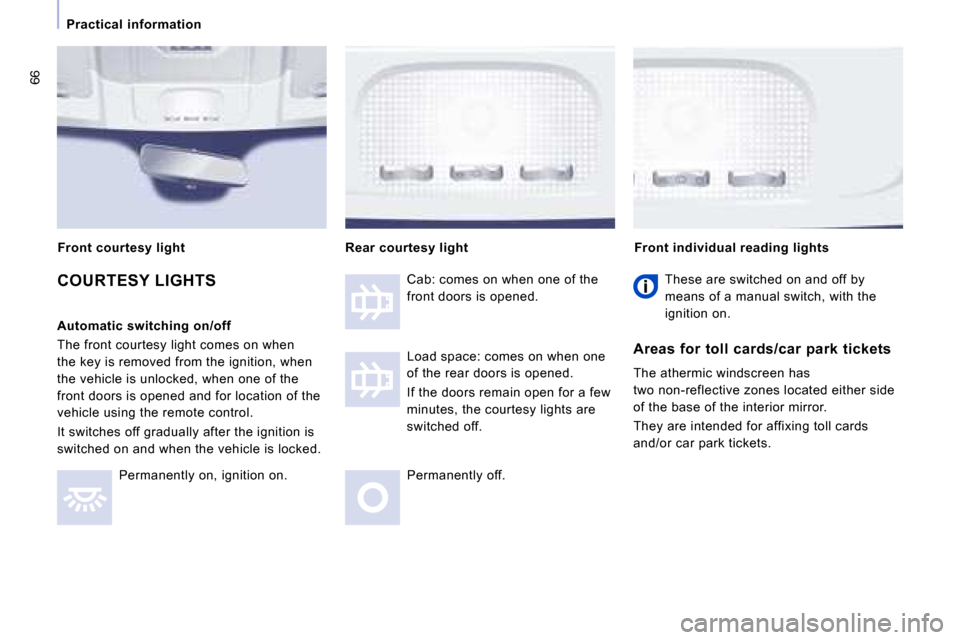
COURTESY LIGHTS
Automatic switching on/off
The front courtesy light comes on when
the key is removed from the ignition, when
the vehicle is unlocked, when one of the
front doors is opened and for location of the
vehicle using the remote control.
It switches off gradually after the ignition is
switched on and when the vehicle is locked. Permanently on, ignition on. Cab: comes on when one of the
front doors is opened.
Load space: comes on when one
of the rear doors is opened.
If the doors remain open for a few
minutes, the courtesy lights are
switched off.
Permanently off. Front individual reading lights
Rear courtesy light
These are switched on and off by
means of a manual switch, with the
ignition on.
Areas for toll cards/car park tickets
The athermic windscreen has
two non-reflective zones located either side
of the base of the interior mirror.
They are intended for affixing toll cards
and/or car park tickets.
Front courtesy light
Page 68 of 185
67
Practical information
ERGONOMICS and COMFORT
3
LOAD SPACE LAYOUT
Depending on the vehicle’s equipment, the
various fittings below enhance your load
space. Locations for stowing rail
Locations for securing a stowing rail are
available on each side of the vehicle.
Stowing rings
Use the stowing rings on the rear floor to
secure your loads.
As a safety precaution in case of sharp
braking, you are advised to place heavy
objects as far forwards towards the cab as
possible.
You are advised to immobilise the load by
securing it firmly using the stowing rings on
the floor. Trims
The lower parts of the sides are fitted with
load protection trims.
Roof box on raised version
This is a storage compartment located in the
load space, above the cab roof.
Page 69 of 185
68
Practical information
12 volt socket
This operates with the ignition off, therefore
limit its use to avoid discharging the battery.
Maximum power: 120 W. Ladder type vertical separation or
partition
Behind the driver ’s seat, a ladder type
vertical separation or partition protects the
driver against the risk of load movement.
Load retainer
On the floor, behind the front seats, a
horizontal partition protects the driver and
front passengers against the risk of load
movement.
Panel or glazed separation partitions permit
separation of the load space from the cab.
Page 70 of 185
69
Practical information
ERGONOMICS and COMFORT
3
Tunnel and internal rack
Located above the cab, access to the tunnel
is via the load space. The tunnel can be added to by an internal rack whi
ch will enable you to transport long, light
items (electrical rods, pipes, etc...).
Page 71 of 185

70
Mirrors and windows
MIRRORS
MIRRORS AND WINDOWS Electric folding/unfolding
If your vehicle is fitted with this function, the
mirrors can be folded or unfolded electrically
from the inside, with the vehicle parked and
the ignition on:
- Place switch A in the centre position.
- Pull switch A rearwards. Manual exterior mirrors
Move the lever in all four directions to
adjust.
When the vehicle is parked, the exterior
mirrors can be folded back manually.
The mirror is spherical to broaden the field
of side vision. Objects observed are, in
reality, closer than they appear. Therefore,
take this into account in order to judge the
distance correctly.
Heated mirrors
If your vehicle is fitted with this function,
press the rear screen demisting button. If the mirror casing has come out of its
initial location, with the vehicle stationary,
reposition the mirror casing manually or use
the electric folding switch.
There is no risk of breakage even in the
presence of ice.
Electric exterior mirrors
- Move switch
A to the right or to the left
to select the corresponding mirror.
- Move knob B in all four directions to
adjust.
- Return switch A to the centre position.
Page 72 of 185
71
Mirrors and windows
ERGONOMICS and COMFORT
3
Manual interior mirror
The interior mirror has two positions:
- day (normal),
- night (anti-dazzle).
To change from one to the other, push or
pull the lever on the lower edge of the mirror.