2007 YAMAHA YBR250 recommended oil
[x] Cancel search: recommended oilPage 42 of 74

6-9
6
PERIODIC MAINTENANCE AND MINOR REPAIR
The engine oil should be between the
minimum and maximum level marks.
12
3
1. Engine oil filler cap
2. Maximum level mark
3. Minimum level mark4. If the engine oil is below the minimum level mark, add sufficient
oil of the recommended type to
raise it to the correct level.
To change the engine oil (with or
without oil filter element
replacement) 1. Start the engine, warm it up for several minutes, and then turn it
off.
2. Place an oil pan under the engine to collect the used oil.
1
1. Dipstick3. Remove the engine oil filler bolt anddrain bolt to drain the oil from the
crankcase.
-2-3-4-5
1
1. Engine oil drain boltCheck the washer for damage and
replace it if necessary.
4. Remove the oil filter element drainbolt to drain the oil from the oil filter
element.Skip steps 5-7 if the oil filter element is
not being replaced.5. Remove the oil filter element coverby removing the bolts.1. Oil filter element cover bolts
2. Oil filter element drain bolt6. Remove and replace the oil filterelement and O-rings.
cap 6.pmd 24/1/2007, 14:37
9
Page 43 of 74

6-10
6
PERIODIC MAINTENANCE AND MINOR REPAIR
2
2
1
1. Oil filter element
2. O-ringMake sure that the O-rings are properly
seated.7. Install the oil filter element coverby installing the bolts, then
tightening them to the specified
torque.Tightening torque:Oil filter element cover bolt: 10 Nm (1,0 m.kgf, 7.4 ft.lbf)8. Install the engine oil drain bolt, and
then tighten it to the specified
torque.
9. Install the oil filter element drain bolt, and then tighten it to the
specified torque.
Tightening torque:Engine oil drain bolt: 20 Nm (2.0 m.kgf, 15 ft.lbf)
Oil filter element drain bolt: 7 Nm (0.7 m.kgf, 5.25 ft.lbf)10. Add the specified amount of the
recommended engine oil, and then
install and tighten the oil filler bolt.Recommended engine oil:See page 8-1
Oil quantity: Without oil filter element
replacement:1.35 L (1.43 US qt) (1.19
Imp.qt)
With oil filter element replacement:1.45 L (1.53 US qt) (1.28
Imp.qt)
ECA11620
l
l l
l
l
In order to prevent clutch
slippage (since the engine oil
also lubricates the clutch), do not
mix any chemical additives. Do
not use oils with a diesel
specification of “CD” or oils of a
higher quality than specified. In addition, do not use oils labeled
“ENERGY CONSERVING II” or
higher.
l
l l
l
l
Make sure that no foreign
material enters the crankcase.
11. Start the engine, and then let it idle
for several minutes while checking
it for oil leakage. If oil is leaking,
immediately turn the engine off and
check for the cause.
12. Turn the engine off, and then check the oil level and correct it if
necessary.
cap 6.pmd 24/1/2007, 14:37
10
Page 44 of 74

6-11
6
PERIODIC MAINTENANCE AND MINOR REPAIR
EAU20880
Cleaning the air filter elementThe air filter should be cleaned at the
specified intervals. It should be cleaned
more frequently when riding in unusually
wet or dusty areas.1. Remove panel B. (See page 6-6.)
1 2
2
1. Air filter case cover
2. Screw2. Remove the air filter case by
removing the screws.
3. Remove the air filter from the case.
1
1. Air filter element
4. Remove the air filter element from its guide and clean it with solvent.
After cleaning, remove the
remaining solvent by squeezing
the element.5. Apply recommended oil to theentire surface of the element and
squeeze out the excess oil. It
should be wet but not dripping.Recommended oil:Engine oil6. Insert the air filter element guide
into the air filter and install it in the
case.
7. Install the air filter case cover and panel by installing the screws.
ECA10480
l
l l
l
l
Make sure that the air filter
element is properly seated in the
air filter case.
l
l l
l
l
The engine should never be
operated without the air filter
element installed, otherwise the
piston(s) and/or cylinder(s) may
become excessively worn.
cap 6.pmd 24/1/2007, 14:37
11
Page 51 of 74

6-18
6
PERIODIC MAINTENANCE AND MINOR REPAIR
EAU37001
Checking the front brake
fluid level
LOWERLOWER
UP
1
1. Minimum level markInsufficient brake fluid may allow air to
enter the brake system, possibly
causing it to become ineffective.
Before riding, check that the brake fluid
is above the minimum level mark and
replenish if necessary. A low brake fluid
level may indicate worn brake pads and/
or brake system leakage. If the brake
fluid level is low, be sure to check the
brake pads for wear and the brake
system for leakage.
Observe these precautions:l
When checking the fluid level, make
sure that the top of the master
cylinder is level by turning the
handlebars.
l
Use only the recommended quality
brake fluid, otherwise the rubber
seals may deteriorate, causing
leakage and poor braking
performance.Recommended brake fluid: DOT 4
If DOT 4 is not available, DOT 3 can be
used.l
Refill with the same type of brake
fluid. Mixing fluids may result in a
harmful chemical reaction and lead
to poor braking performance.
l
Be careful that water does not enter
the master cylinder when refilling.
Water will significantly lower the
boiling point of the fluid and may
result in vapor lock.
l
Brake fluid may deteriorate painted
surfaces or plastic parts. Always
clean up spilled fluid immediately.
l
As the brake pads wear, it is normal
for the brake fluid level to gradually
go down. However, if the brake fluid
level goes down suddenly, have a
Yamaha dealer check the cause.
EAU22720
Changing the brake fluidHave a Yamaha dealer change the brake
fluid at the intervals specified in the
NOTE after the periodic maintenance
and lubrication chart. In addition, have
the oil seals of the brake master cylinder
and caliper as well as the brake hose
replaced at the intervals listed below or
whenever they are damaged or leaking.l
Oil seals: Replace every two years.
l
Brake hose: Replace every four
years.
cap 6.pmd 24/1/2007, 14:38
18
Page 54 of 74

6-21
6
PERIODIC MAINTENANCE AND MINOR REPAIR
EAU23100
Checking and lubricating the
cablesThe operation of all control cables and
the condition of the cables should be
checked before each ride, and the
cables and cable ends should be
lubricated if necessary. If a cable is
damaged or does not move smoothly,
have a Yamaha dealer check or replace
it.Recommended lubricant:Engine oil
EWA10720
Damage to the outer sheath may
interfere with proper cable operation
and will cause the inner cable to rust.
Replace a damaged cable as soon as
possible to prevent unsafe
conditions.
EAU23111
Checking and lubricating the
throttle grip and cableThe operation of the throttle grip should
be checked before each ride. In addition,
the cable should be lubricated at the
intervals specified in the periodic
maintenance chart.
EAU23140
Checking and lubricating the
brake and clutch levers
1
2
1. Brake lever
2. Lubrication point1. Clutch lever
2. Lubrication pointThe operation of the brake and clutch
levers should be checked before each
ride, and the lever pivots should be
lubricated if necessary.
cap 6.pmd 18/4/2007, 14:35
21
Page 56 of 74

6-23
6
PERIODIC MAINTENANCE AND MINOR REPAIR
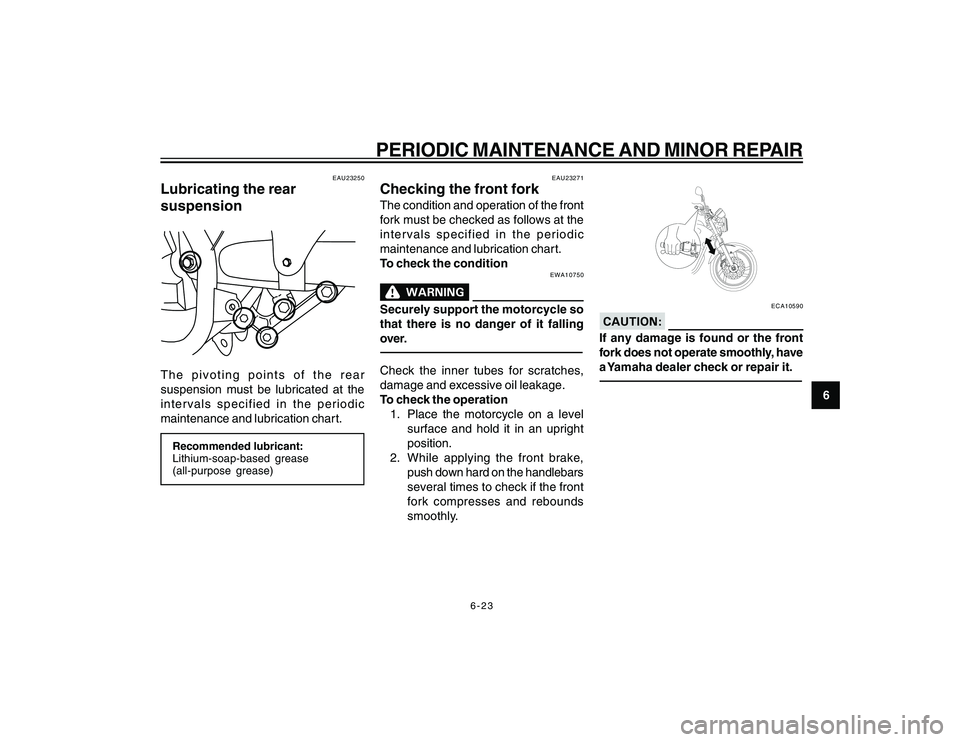
EAU23250
Lubricating the rear
suspensionThe pivoting points of the rear
suspension must be lubricated at the
intervals specified in the periodic
maintenance and lubrication chart.Recommended lubricant:
Lithium-soap-based grease
(all-purpose grease)
EAU23271
Checking the front forkThe condition and operation of the front
fork must be checked as follows at the
intervals specified in the periodic
maintenance and lubrication chart.
To check the condition
EWA10750
Securely support the motorcycle so
that there is no danger of it falling
over.Check the inner tubes for scratches,
damage and excessive oil leakage.
To check the operation1. Place the motorcycle on a level surface and hold it in an upright
position.
2. While applying the front brake, push down hard on the handlebars
several times to check if the front
fork compresses and rebounds
smoothly.
ECA10590
If any damage is found or the front
fork does not operate smoothly, have
a Yamaha dealer check or repair it.
cap 6.pmd 24/1/2007, 14:38
23
Page 67 of 74

7-2
MOTORCYCLE CARE AND STORAGE
7
After normal use
Remove dirt with warm water, a mild
detergent, and a soft, clean sponge, and
then rinse thoroughly with clean water.
Use a toothbrush or bottlebrush for hard-
to-reach areas. Stubborn dirt and insects
will come off more easily if the area is
covered with a wet cloth for a few
minutes before cleaning.After riding in the rain, near the sea oron salt-sprayed roads
Since sea salt or salt sprayed on roads
during winter are extremely corrosive in
combination with water, carry out the
following steps after each ride in the rain,
near the sea or on salt-sprayed roads.Salt sprayed on roads in the winter may
remain well into spring.1. Clean the motorcycle with coldwater and a mild detergent, after
the engine has cooled down.
ECA10790
Do not use warm water since it
increases the corrosive action of the
salt.2. Apply a corrosion protection sprayon all metal, including chrome- and
nickel-plated, surfaces to prevent
corrosion.
After cleaning 1. Dry the motorcycle with a chamois or an absorbing cloth.
2. Immediately dry the drive chain and lubricate it to prevent it from
rusting.
3. Use a chrome polish to shine chrome, aluminum and stainless-
steel parts, including the exhaust
system. (Even the thermally
induced discoloring of stainless-
steel exhaust systems can be
removed through polishing.)
4. To prevent corrosion, it is recommended to apply a corrosion
protection spray on all metal,
including chrome- and nickel-
plated, surfaces. 5. Use spray oil as a universal cleaner
to remove any remaining dirt.
6. Touch up minor paint damage caused by stones, etc.
7. Wax all painted surfaces.
8. Let the motorcycle dry completely before storing or covering it.
EWA11130
l
l l
l
l
Make sure that there is no oil or
wax on the brakes or tires.
If necessary, clean the brake
discs and brake linings with a
regular brake disc cleaner or
acetone, and wash the tires with
warm water and a mild
detergent. Before riding at
higher speeds, test the
motorcycle’s braking
performance and cornering
behavior.
ECA10800
l
l l
l
l
Apply spray oil and wax
sparingly and make sure to wipe
off any excess.
l
l l
l
l
Never apply oil or wax to any
cap 7.pmd 24/1/2007, 14:38
2
Page 70 of 74

8-1
SPECIFICATIONS
8
Dimensions:Overall length:2025 mm (79.7 in)
Overall width: 745 mm (29.3 in)
Overall height:
1065 mm (41.9 in)
Seat height:
805 mm (31.7 in)
Wheelbase: 1360 mm (53.5 in)
Ground clearance:
190 mm (7.5 in)
Minimum turning radius:
2395 mm (94.3 in)Weight:With oil and fuel:154.0 kg (339 lb)Engine:Engine type:Air cooled 4-stroke, SOHC
Cylinder arrangement: Forward-inclined single cylinder
Displacement:
249.0 cm
3 (15.2 cu.in)
Bore x stroke:
74.0 x 58.0 mm (2.91 x 2.28 in)
Compression ratio: 9.80:1
Starting system:
Electric starter
Lubrication system:
Wet sump
Engine oil:Type:SAE20W40 or SAE20W50Recommended engine oil grade: API service SF, SG type or higher
Engine oil quantity:
Without oil filter element replacement 1.35 L (1.43 US qt) (1.19 imp. qt)
With oil filter element replacement
1.45 L (1.53 US qt) (1.28 imp. qt)Air filter:Air filter element:Wet elementFuel:Recommended fuel:Regular unleaded gasoline only
Fuel tank capacity:
19.2 L (5.07 US gal) (4.22 imp. gal)
Fuel reserve amount:
4.5 L (1.19 US gal) (1.00 imp. gal)
Fuel injection:Manufacturer:AISAN
Model/quantity: 1100-87F70/1Spark plug:Manufacturer/model:NGK/DR8EA
Spark plug gap:
0.6-0.7 mm (0.024 - 0.028 in)Clutch:Clutch type:Wet, multiple-discTransmission:Primary reduction system:Spur gear
Primary reduction ratio:
74/24 (3.083)
Secondary reduction system: Chain drive
Secondary reduction ratio:
44/15 (2.933)
Transmission type:
Constant mesh 5-speed
Operation: Left foot operation
Gear ratio:
1st:
36/14 (2.571)
2nd:
32/19 (1.684)
3rd:
cap 8.pmd 24/1/2007, 14:38
1