Page 25 of 78
INSTRUMENT AND CONTROL FUNCTIONS
3-10
3
EAU13932
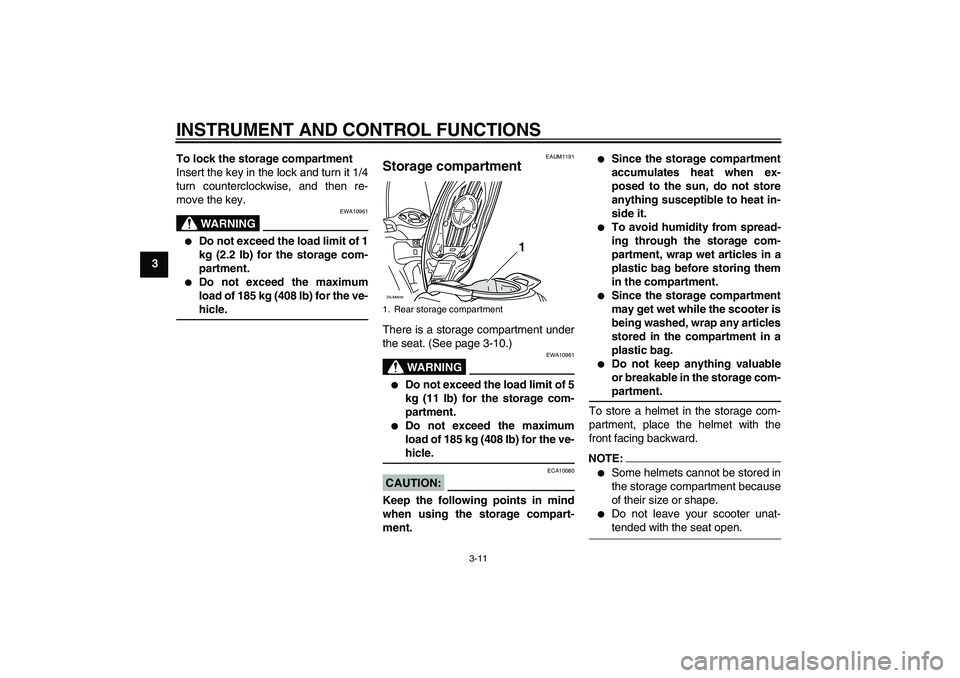
Seat To open the seat
1. Place the scooter on the center-
stand.
2. Insert the key into the main switch,
and then turn it counterclockwise
to “OPEN”.NOTE:Do not push inward when turning thekey.
3. Fold the seat up.
To close the seat
1. Fold the seat down, and then push
it down to lock it in place.2. Remove the key from the main
switch if the scooter will be left un-
attended.
NOTE:Make sure that the seat is properly se-cured before riding.
EAUM1182
Storage compartment To unlock the storage compartment
Insert the key in the lock and turn it 1/4
turn clockwise.
To open the storage compartment
when it is unlocked
Turn the knob 1/4 turn clockwise. The
knob will return to its original position
after released.
To close the storage compartment
Push the lid into the original position.
1. Open.ZAUM0644
PUSHOPEN
1
1. Lock.
2. Front storage compartmentZAUM0645
OPEN
OPEN
UNLOCKLOCK
OPEN
OPEN
UNLOCKLOCK
OPEN
OPEN
UNLOCKLOCK
1
2
Page 26 of 78

INSTRUMENT AND CONTROL FUNCTIONS
3-11
3To lock the storage compartment
Insert the key in the lock and turn it 1/4
turn counterclockwise, and then re-
move the key.
WARNING
EWA10961
�
Do not exceed the load limit of 1
kg (2.2 lb) for the storage com-
partment.
�
Do not exceed the maximum
load of 185 kg (408 lb) for the ve-hicle.
EAUM1191
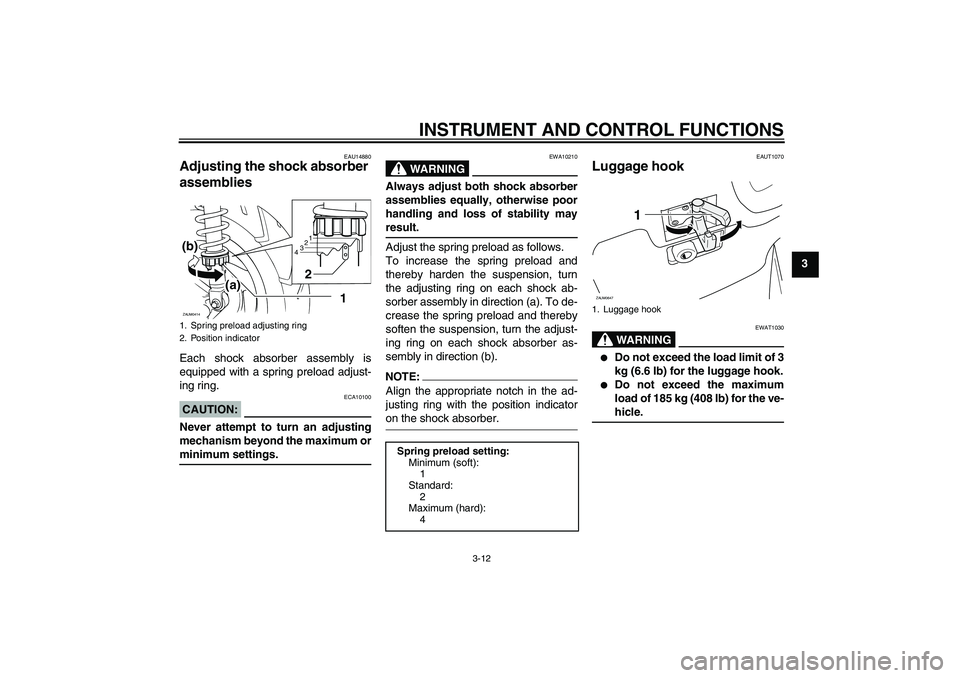
Storage compartment There is a storage compartment under
the seat. (See page 3-10.)
WARNING
EWA10961
�
Do not exceed the load limit of 5
kg (11 lb) for the storage com-
partment.
�
Do not exceed the maximum
load of 185 kg (408 lb) for the ve-hicle.
CAUTION:
ECA10080
Keep the following points in mind
when using the storage compart-
ment.
�
Since the storage compartment
accumulates heat when ex-
posed to the sun, do not store
anything susceptible to heat in-
side it.
�
To avoid humidity from spread-
ing through the storage com-
partment, wrap wet articles in a
plastic bag before storing them
in the compartment.
�
Since the storage compartment
may get wet while the scooter is
being washed, wrap any articles
stored in the compartment in a
plastic bag.
�
Do not keep anything valuable
or breakable in the storage com-partment.
To store a helmet in the storage com-
partment, place the helmet with the
front facing backward.
NOTE:�
Some helmets cannot be stored in
the storage compartment because
of their size or shape.
�
Do not leave your scooter unat-tended with the seat open.
1. Rear storage compartmentZAUM0646
1
Page 27 of 78

INSTRUMENT AND CONTROL FUNCTIONS
3-12
3
EAU14880
Adjusting the shock absorber
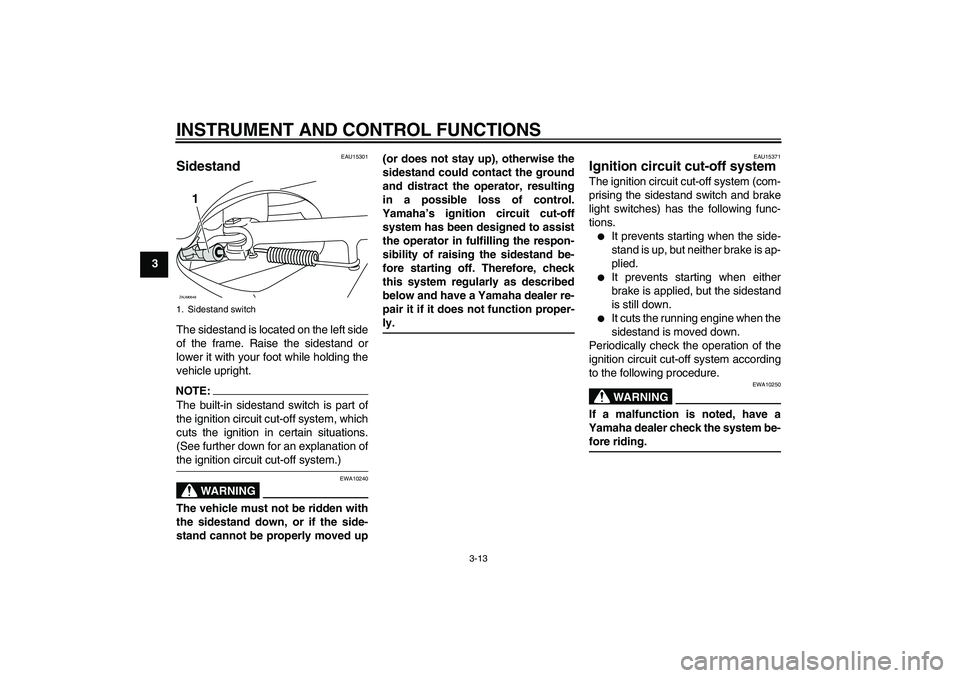
assemblies Each shock absorber assembly is
equipped with a spring preload adjust-
ing ring.CAUTION:
ECA10100
Never attempt to turn an adjusting
mechanism beyond the maximum orminimum settings.
WARNING
EWA10210
Always adjust both shock absorber
assemblies equally, otherwise poor
handling and loss of stability mayresult.
Adjust the spring preload as follows.
To increase the spring preload and
thereby harden the suspension, turn
the adjusting ring on each shock ab-
sorber assembly in direction (a). To de-
crease the spring preload and thereby
soften the suspension, turn the adjust-
ing ring on each shock absorber as-
sembly in direction (b).NOTE:Align the appropriate notch in the ad-
justing ring with the position indicatoron the shock absorber.
EAUT1070
Luggage hook
WARNING
EWAT1030
�
Do not exceed the load limit of 3
kg (6.6 lb) for the luggage hook.
�
Do not exceed the maximum
load of 185 kg (408 lb) for the ve-hicle.
1. Spring preload adjusting ring
2. Position indicator
1
2
3
4
1
2
(b)
(a)
ZAUM0414
Spring preload setting:
Minimum (soft):
1
Standard:
2
Maximum (hard):
4
1. Luggage hook
1
ZAUM0647
Page 28 of 78

INSTRUMENT AND CONTROL FUNCTIONS
3-13
3
EAU15301
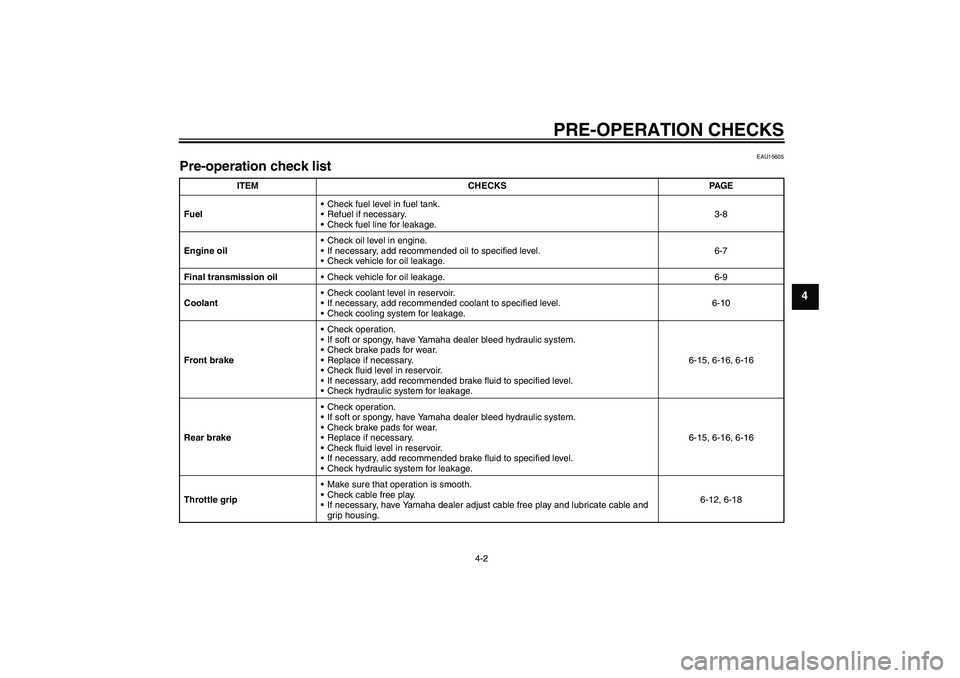
Sidestand The sidestand is located on the left side
of the frame. Raise the sidestand or
lower it with your foot while holding the
vehicle upright.NOTE:The built-in sidestand switch is part of
the ignition circuit cut-off system, which
cuts the ignition in certain situations.
(See further down for an explanation ofthe ignition circuit cut-off system.)
WARNING
EWA10240
The vehicle must not be ridden with
the sidestand down, or if the side-
stand cannot be properly moved up(or does not stay up), otherwise the
sidestand could contact the ground
and distract the operator, resulting
in a possible loss of control.
Yamaha’s ignition circuit cut-off
system has been designed to assist
the operator in fulfilling the respon-
sibility of raising the sidestand be-
fore starting off. Therefore, check
this system regularly as described
below and have a Yamaha dealer re-
pair it if it does not function proper-
ly.
EAU15371
Ignition circuit cut-off system The ignition circuit cut-off system (com-
prising the sidestand switch and brake
light switches) has the following func-
tions.�
It prevents starting when the side-
stand is up, but neither brake is ap-
plied.
�
It prevents starting when either
brake is applied, but the sidestand
is still down.
�
It cuts the running engine when the
sidestand is moved down.
Periodically check the operation of the
ignition circuit cut-off system according
to the following procedure.WARNING
EWA10250
If a malfunction is noted, have a
Yamaha dealer check the system be-fore riding.
1. Sidestand switchZAUM0648
1
Page 29 of 78
INSTRUMENT AND CONTROL FUNCTIONS
3-14
3
With the engine turned off:
1. Move the sidestand down.
2. Make sure that the engine stop switch is turned on.
3. Turn the key on.
4. Keep the front or rear brake applied.
5. Push the start switch.
Does the engine start?
With the engine still off:
6. Move the sidestand up.
7. Keep the front or rear brake applied.
8. Push the start switch.
Does the engine start?
With the engine still running:
9. Move the sidestand down.
Does the engine stall?
The system is OK. The scooter can be ridden.
This check is most reliable if performed with
a warmed-up engine.The sidestand switch may be defective.
The scooter should not be ridden until
checked by a Yamaha dealer.
The brake switch may be defective.
The scooter should not be ridden until
checked by a Yamaha dealer.
The sidestand switch may be defective.
The scooter should not be ridden until
checked by a Yamaha dealer.
YES NO YES NO NO YESNOTE:
Page 30 of 78
PRE-OPERATION CHECKS
4-1
4
EAU15592
The condition of a vehicle is the owner’s responsibility. Vital components can start to deteriorate quickly and unexpectedly,
even if the vehicle remains unused (for example, as a result of exposure to the elements). Any damage, fluid leakage or loss
of tire air pressure could have serious consequences. Therefore, it is very important, in addition to a thorough visual inspec-
tion, to check the following points before each ride.NOTE:Pre-operation checks should be made each time the vehicle is used. Such an inspection can be accomplished in a very shorttime; and the added safety it assures is more than worth the time involved.
WARNING
EWA11150
If any item in the Pre-operation check list is not working properly, have it inspected and repaired before operatingthe vehicle.
Page 31 of 78

PRE-OPERATION CHECKS
4-2
4
EAU15605
Pre-operation check list
ITEM CHECKS PAGE
FuelCheck fuel level in fuel tank.
Refuel if necessary.
Check fuel line for leakage.3-8
Engine oilCheck oil level in engine.
If necessary, add recommended oil to specified level.
Check vehicle for oil leakage.6-7
Final transmission oilCheck vehicle for oil leakage. 6-9
CoolantCheck coolant level in reservoir.
If necessary, add recommended coolant to specified level.
Check cooling system for leakage.6-10
Front brakeCheck operation.
If soft or spongy, have Yamaha dealer bleed hydraulic system.
Check brake pads for wear.
Replace if necessary.
Check fluid level in reservoir.
If necessary, add recommended brake fluid to specified level.
Check hydraulic system for leakage.6-15, 6-16, 6-16
Rear brakeCheck operation.
If soft or spongy, have Yamaha dealer bleed hydraulic system.
Check brake pads for wear.
Replace if necessary.
Check fluid level in reservoir.
If necessary, add recommended brake fluid to specified level.
Check hydraulic system for leakage.6-15, 6-16, 6-16
Throttle gripMake sure that operation is smooth.
Check cable free play.
If necessary, have Yamaha dealer adjust cable free play and lubricate cable and
grip housing.6-12, 6-18
Page 32 of 78
PRE-OPERATION CHECKS
4-3
4
Wheels and tiresCheck for damage.
Check tire condition and tread depth.
Check air pressure.
Correct if necessary.6-13, 6-15
Brake leversMake sure that operation is smooth.
Lubricate lever pivoting points if necessary.6-18
Centerstand, sidestandMake sure that operation is smooth.
Lubricate pivots if necessary.6-19
Chassis fastenersMake sure that all nuts, bolts and screws are properly tightened.
Tighten if necessary.—
Instruments, lights, signals
and switchesCheck operation.
Correct if necessary.—
Sidestand switchCheck operation of ignition circuit cut-off system.
If system is defective, have Yamaha dealer check vehicle.3-13 ITEM CHECKS PAGE