8-4
1
2
3
4
5
6
78
9
10
11
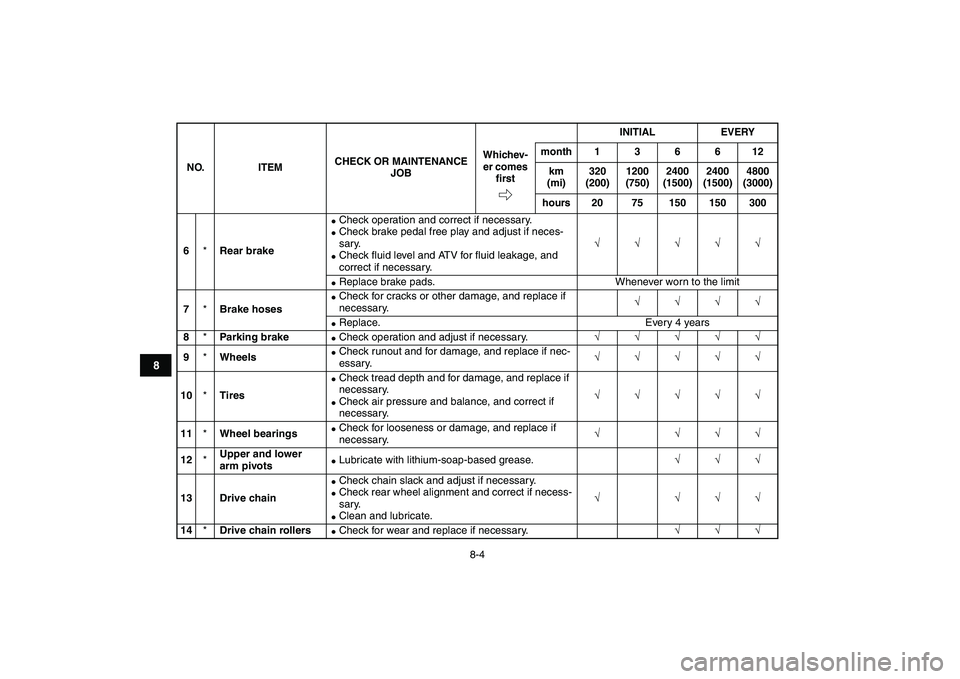
6
*
Rear brake
�
Check operation and correct if necessary.
�
Check brake pedal free play and adjust if neces-
sary.
�
Check fluid level and ATV for fluid leakage, and
correct if necessary.
√√√√√
�
Replace brake pads. Whenever worn to the limit
7
*
Brake hoses
�
Check for cracks or other damage, and replace if
necessary.
√√√√
�
Replace. Every 4 years
8
*
Parking brake
�
Check operation and adjust if necessary.
√√√√√
9
*
Wheels
�
Check runout and for damage, and replace if nec-
essary.
√√√√√
10
*
Tires
�
Check tread depth and for damage, and replace if
necessary.
�
Check air pressure and balance, and correct if
necessary.
√√√√√
11
*
Wheel bearings
�
Check for looseness or damage, and replace if
necessary.
√ √√√
12
*
Upper and lower
arm pivots
�
Lubricate with lithium-soap-based grease.
√√√
13 Drive chain
�
Check chain slack and adjust if necessary.
�
Check rear wheel alignment and correct if necess-
sary.
�
Clean and lubricate.
√ √√√
14
*
Drive chain rollers
�
Check for wear and replace if necessary.
√√√
NO. ITEMCHECK OR MAINTENANCE
JOBINITIAL EVERY
Whichev-
er comes
firstmonth 1 3 6 6 12
km
(mi)320
(200)1200
(750)2400
(1500)2400
(1500)4800
(3000)
hours 20 75 150 150 300
8-39
1
2
3
4
5
6
78
9
10
11
3. If the drive chain slack is incorrect, adjust it as
follows.
To adjust the drive chain slack
1. Loosen the axle holding nuts.2. Loosen the locknut on each side of the swing-
arm. To tighten the drive chain, turn the ad-
justing bolts in direction (a). To loosen the
drive chain, turn the adjusting bolts in direction
(b) and push the wheels forward. Turn each
adjusting bolt exactly the same amount to
maintain correct axle alignment.NOTE:
There are alignment marks on each side of the
swingarm and on the wheel hubs. Use them to
check for proper wheel axle alignment.
1. Drive chain slack
1
1. Axle holding nut (upper)
2. Axle holding nut (lower)
1
2