Page 35 of 140

4-13
1
2
34
5
6
7
8
9
10
11
WARNING
EWB00400
Always adjust the shock absorber assemblies
on the left and right side to the same setting.
Uneven adjustment can cause poor handling
and loss of stability, which could lead to an ac-
cident.
EBU19100
Adjusting the rear shock absorber
assembly
The spring preload, rebound damping and com-
pression damping forces of the rear shock absorb-
er assembly can be adjusted to suit the rider’s
weight and the riding conditions.
WARNING
EWB00430
This shock absorber assembly contains highly
pressurized nitrogen gas. Read and under-
stand the following information before han-
dling the shock absorber assembly.
�
Do not tamper with or attempt to open the
cylinder assembly.
�
Do not subject the shock absorber assembly
to an open flame or other high heat source.
This may cause the unit to explode due to ex-cessive gas pressure.
�
Do not deform or damage the cylinder in any
way. Cylinder damage will result in poor
damping performance.
�
Do not dispose of a damaged or worn out
shock absorber assembly yourself. Take the
shock absorber assembly to a Yamaha deal-
er for any service.
Spring preload
1. Loosen the locknut.
2. Turn the adjusting nut in direction (a) to in-
crease the spring preload and thereby harden
the suspension, and in direction (b) to de-
crease the spring preload and thereby soften
the suspension.
Page 39 of 140

5-1
1
2
3
45
6
7
8
9
10
11
EBU19200
PRE-OPERATION CHECKS
EBU19220
Pre-operation check list
Before operating this ATV, be sure to check the items listed in the following table.
NOTE:
The maintenance of some items in the table has to be performed by a Yamaha dealer. Refer to the “Periodic
maintenance and lubrication chart” on page 8-3 to determine which service should be performed by a
Yamaha dealer.
ITEM ROUTINE PAGE
Fuel
�
Check fuel level in fuel tank, and add recommended fuel if neces-
sary.
�
Check fuel line for leakage. Correct if necessary.4-8, 5-4
Transmission oil
�
Check oil level in transmission case, and add recommended oil to
specified level if necessary.
�
Check ATV for oil leakage. Correct if necessary.5-4, 8-9
Coolant
�
Check coolant level in reservoir, and add recommended coolant to
specified level if necessary.
�
Check cooling system for leakage. Correct if necessary.5-4, 8-11
Front brake
�
Check operation. If soft or spongy, have Yamaha dealer bleed
hydraulic system.
�
Check brake pads for wear, and replace if necessary.
�
Check brake fluid level in reservoir, and add recommended brake
fluid to specified level if necessary.
�
Check hydraulic system for leakage. Correct if necessary.5-4, 8-31, 8-32, 8-33
Page 77 of 140

8-1
1
2
3
4
5
6
78
9
10
11
EBU21654
PERIODIC MAINTENANCE AND MINOR REPAIR
EBU21670
Safety is an obligation of the owner. Periodic in-
spection, adjustment and lubrication will keep your
ATV in the safest and best operating condition
possible. The most important points of inspection,
adjustment, and lubrication are explained on the
following pages.
The intervals given in the periodic maintenance
and lubrication chart should be considered as a
general guide under normal riding conditions.
However, DEPENDING ON THE WEATHER,
TERRAIN, GEOGRAPHICAL LOCATION, AND
INDIVIDUAL USE, THE MAINTENANCE INTER-
VALS MAY NEED TO BE SHORTENED.
WARNING
EWB01840
Never service an engine while it is running.
Moving parts can catch clothing or parts of the
body, causing injury. Electrical components
can cause shocks or start fires. Turn off the en-
gine when performing maintenance unless
otherwise specified. Have a Yamaha dealer
perform the service if you are not familiar with
maintenance work.
EBU21690
Owner’s manual and tool kit
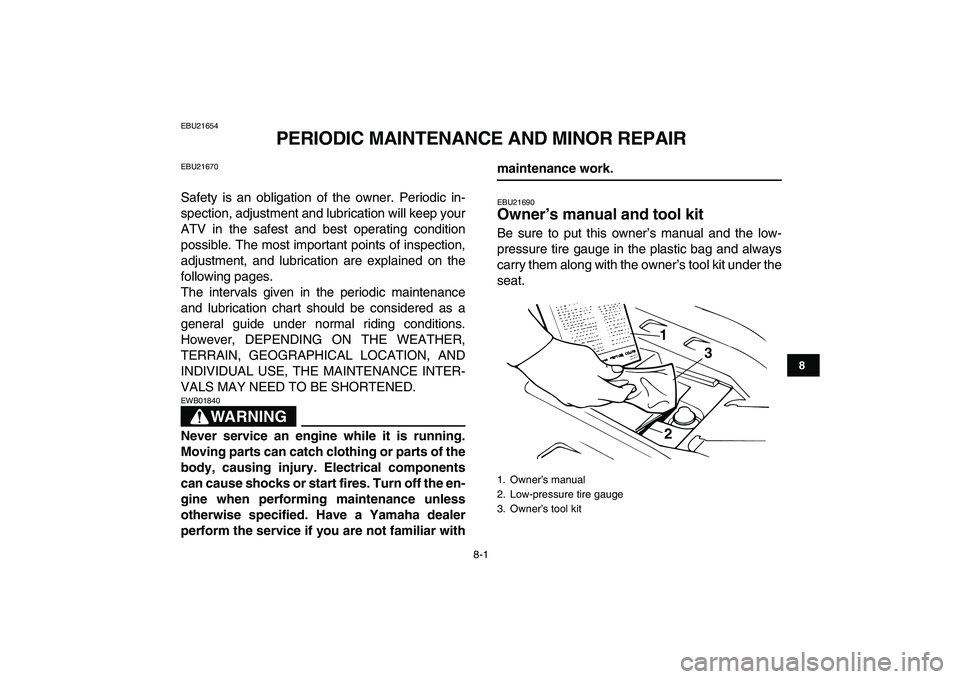
Be sure to put this owner’s manual and the low-
pressure tire gauge in the plastic bag and always
carry them along with the owner’s tool kit under the
seat.
1. Owner’s manual
2. Low-pressure tire gauge
3. Owner’s tool kit
1
23
Page 78 of 140
8-2
1
2
3
4
5
6
78
9
10
11
The service information included in this manual
and the tools provided in the owner’s tool kit are in-
tended to assist you in the performance of preven-
tive maintenance and minor repairs. However,
additional tools such as a torque wrench may be
necessary to perform certain maintenance work
correctly.
NOTE:
If you do not have the tools or experience required
for a particular job, have a Yamaha dealer perform
it for you.
WARNING
EWB01850
Never modify this ATV through improper in-
stallation or use of accessories, as it may
cause changes in handling, which in some sit-
uations could lead to an accident. All parts and
accessories added to this ATV should be gen-
uine Yamaha or equivalent components de-
signed for use on this ATV and should be
installed and used according to instructions. If
you have questions, consult an authorized
Yamaha ATV dealer.
Page 82 of 140
8-6
1
2
3
4
5
6
78
9
10
11
EBU23070
NOTE:
�
The air filter needs more frequent service if you are riding in unusually wet or dusty areas.
�
Hydraulic brake service
�
Regularly check and, if necessary, correct the brake fluid level.
�
Every two years replace the internal components of the brake master cylinders and calipers, and
change the brake fluid.
�
Replace the brake hoses every four years and if cracked or damaged.
24
*
Exhaust system
�
Check for leakage and replace gasket(s) if neces-
sary.
�
Check for looseness and tighten all screw clamps
and joints if necessary.
√√√
25 Spark arrester
�
Clean.
√√√
26
*
Front and rear brake
switches
�
Check operation and correct if necessary.
√√√√√
27
*
Lights and switches
�
Check operation and correct if necessary.
�
Adjust headlight beams.
√√√√√
NO. ITEMCHECK OR MAINTENANCE
JOBINITIAL EVERY
Whichev-
er comes
firstmonth 1 3 6 6 12
km
(mi)320
(200)1200
(750)2400
(1500)2400
(1500)4800
(3000)
hours 20 75 150 150 300
Page 110 of 140

8-34
1
2
3
4
5
6
78
9
10
11
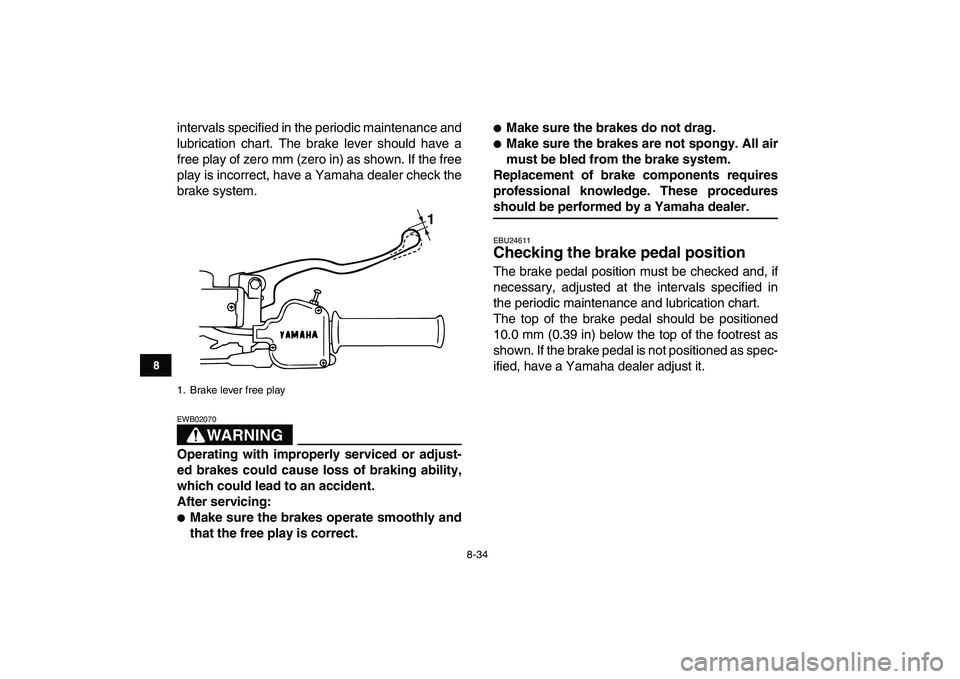
intervals specified in the periodic maintenance and
lubrication chart. The brake lever should have a
free play of zero mm (zero in) as shown. If the free
play is incorrect, have a Yamaha dealer check the
brake system.
WARNING
EWB02070
Operating with improperly serviced or adjust-
ed brakes could cause loss of braking ability,
which could lead to an accident.
After servicing:
�
Make sure the brakes operate smoothly and
that the free play is correct.
�
Make sure the brakes do not drag.
�
Make sure the brakes are not spongy. All air
must be bled from the brake system.
Replacement of brake components requires
professional knowledge. These procedures
should be performed by a Yamaha dealer.
EBU24611
Checking the brake pedal position
The brake pedal position must be checked and, if
necessary, adjusted at the intervals specified in
the periodic maintenance and lubrication chart.
The top of the brake pedal should be positioned
10.0 mm (0.39 in) below the top of the footrest as
shown. If the brake pedal is not positioned as spec-
ified, have a Yamaha dealer adjust it.
1. Brake lever free play
1
Page 111 of 140
8-35
1
2
3
4
5
6
78
9
10
11
WARNING
EWB02110
Operating with improperly serviced or adjust-
ed brakes could cause loss of braking ability,
which could lead to an accident.
After servicing:
�
Make sure the brakes operate smoothly and
that the brake pedal position is correct.
�
Make sure the brakes do not drag.
�
Make sure the brakes are not spongy. All air
must be bled from the brake system.
Replacement of brake components requires
professional knowledge. These procedures
should be performed by a Yamaha dealer.
EBU24670
Adjusting the parking brake free play
The parking brake free play must be checked and,
if necessary, adjusted at the intervals specified in
the periodic maintenance and lubrication chart.
Cable length “A” should measure 46–50 mm
(1.81–1.97 in). Adjust the parking brake free play
as follows.
1. Release the parking brake.
2. Fully loosen the locknut and the adjusting bolt
at the clutch lever.
1. Brake pedal position
1
1. Cable length “A”
1
Page 113 of 140

8-37
1
2
3
4
5
6
78
9
10
11
WARNING
EWB02090
Operating with improperly serviced or adjust-
ed brakes could cause the brakes to malfunc-
tion, resulting in reduced braking
performance. This could increase the chance
of a collision or accident. After adjusting the
parking brake free play, block the rear of the
ATV off the ground and spin the rear wheels.
Check to make sure there is no brake drag. If
brake drag is noticed, perform the adjustment
again.
EBU24740
Brake light switches
The operation of the brake light switches must be
checked and, if necessary, adjusted at the inter-
vals specified in the periodic maintenance and lu-
brication chart.
The brake light switch for the brake pedal can be
adjusted as follows, but the other brake light
switches should be adjusted by a Yamaha dealer.
NOTE:
The brake light switch is properly adjusted when
the brake light comes on just before braking takes
effect.
Turn the adjusting nut while holding the brake light
switch in place. To make the brake light come on
earlier, turn the adjusting nut in direction (a). To
make the brake light come on later, turn the adjust-
ing nut in direction (b).
EBU24810
Adjusting the clutch lever free play
The clutch lever free play must be checked and, if
necessary, adjusted at the intervals specified in
the periodic maintenance and lubrication chart.
The clutch lever free play should measure as
1. Brake light switch
2. Brake light switch adjusting nut
1
2
(a)
(b)