2007 VOLVO S80 flat tire
[x] Cancel search: flat tirePage 6 of 251
harmful substances (CO, HC, NOx) from the exhaust pipe by approximately 95-99% and the search to eliminate the
remaining emissions continues. Volvo is the only automobile manufacturer to offer CFC-free retrofit kits for the air
conditioning system of all models as far back as the 1975 model 240. Advanced electronic engine controls and cleaner
fuels are bringing us closer to our goal. After Volvo vehicles and parts have fulfilled their use, recycling is the next
critical step in completing the life cycle. The metal content is about 75% of the total weight of a vehicle, which makes
the vehicle among the most recycled industrial products. In order to have efficient and well controlled recycling, all
Volvo variants have printed dismantling manuals, indicating the weight and material of individual components. For
Volvo, all homogeneous plastic parts weighing more than 3.4 oz. (100 grams) are marked with international symbols
that indicate how the component is to be sorted for recycling. In addition to continuous environmental refinement of
conventional gasoline-powered internal combustion engines, Volvo is actively looking at advanced technology
alternative-fuel vehicles.
When you drive a Volvo, you become our partner in the work to lessen the car's impact on the environment. To reduce
your vehicle's environmental impact, you can:
Maintain proper air pressure in your tires. Tests have shown decreased fuel economy with improperly inflated tires.
Follow the recommended maintenance schedule in your Warranty and Service Records Information booklet.
Drive at a constant speed whenever possible.
See a trained and qualified Volvo service technician as soon as possible for inspection if the check engine
(malfunction indicator) light illuminates, or stays on after the vehicle has started.
Properly dispose of any vehicle-related waste such as used motor oil, used batteries, brake pads, etc.
When cleaning your vehicle, please use genuine Volvo car care products. All Volvo car care products are
formulated to be environmentally friendly.
WARNING
PROPOSITION 65 WARNING!
Engine exhaust, some of its constituents, and certain vehicle components contain or emit chemicals known to the
state of California to cause cancer, and birth defects or other reproductive harm. In addition, certain fluids contained
in vehicles and certain products of component wear contain or emit chemicals known to the State of California to
cause cancer, and birth defects or other reproductive harm.
Contents | Top of Page
ProCarManuals.com
Page 13 of 251

As the movement of the seats' occupants compresses the airbags, some of the gas is expelled at a controlled rate to
provide better cushioning. Both seat belt tensioners also deploy, minimizing seat belt slack. The entire process,
including inflation and deflation of the airbags, takes approximately one fifth of a second.
The location of the front airbags is indicated by "SRS AIRBAG" embossed on the steering wheel pad and above the
glove compartment, and by decals on both sun visors and on the front and far right side of the dash.
The driver's side front airbag is folded and located in the steering wheel hub.
The passenger's side front airbag is folded behind a panel located above the glove compartment.
WARNING
The airbags in the vehicle are designed to be a SUPPLEMENT to-not a replacement for-the three-point seat belts.
For maximum protection, wear seat belts at all times. Be aware that no system can prevent all possible injuries that
may occur in an accident.
Never drive a vehicle with a steering wheel-mounted airbag with your hands on the steering wheel pad/airbag
housing.
The front airbags are designed to help prevent serious injury. Deployment occurs very quickly and with
considerable force. During normal deployment and depending on variables such as seating position, one may
experience abrasions, bruises, swellings, or other injuries as a result from deployment of one or both of the airbags.
When installing any accessory equipment, make sure that the front airbag system is not damaged. Any interference
in the system could cause malfunction.
Front airbag deployment
The front airbags are designed to deploy during certain frontal or front -angular collisions, impacts, or decelerations,
depending on the crash severity, angle, speed
19 01 Safety
Safety in the passenger compartment
and object impacted. The airbags may also deploy in certain non-frontal collisions where rapid deceleration occurs.
The SRS sensors, which trigger the front airbags, are designed to react to both the impact of the collision and the
inertial forces generated by it, and to determine if the intensity of the collision is sufficient for the seat belt tensioners
and/or airbags to be deployed.
However, not all frontal collisions activate the front airbags.
ProCarManuals.com
Page 167 of 251
At highway driving speeds, fuel consumption will be lower with the air conditioning on and the windows closed
than with the air conditioning off and the windows open.
Using the onboard trip computer's fuel consumption modes can help you learn how to drive more economically.
Other factors that decrease gas mileage are:
Dirty air cleaner
Dirty engine oil and clogged oil filter
Dragging brakes
Incorrect front end alignment
Some of the above mentioned items and others are checked at the standard maintenance intervals.
WARNING
Driving with the trunk open : Driving with the trunk open could lead to poisonous exhaust gases entering the
passenger compartment. If the trunk must be kept open for any reason, proceed as follows:
Close the windows
Set the ventilation system control to air flow to floor, windshield and side windows and the blower control to its
highest setting.
Weight distribution affects handling
At the specified curb weight your vehicle has a tendency to understeer, which means that the steering wheel has to be
turned more than might seem appropriate for the curvature of a bend. This ensures good stability and reduces the risk
of rear wheel skid. Remember that these properties can alter with the vehicle load. The heavier the load in the cargo
area, the less the tendency to understeer.
Handling, roadholding
Vehicle load, tire design and inflation pressure all affect vehicle handling. Therefore, check that the tires are inflated to
the recommended pressure according to the vehicle load. See the "Tire pressure" section. Loads should be distributed
so that capacity weight
171 05 During your trip
Driving recommendations
or maximum permissible axle loads are not exceeded.
Driving through water
The vehicle can be driven through water up to a depth of approximately 9 in. (25 cm), at a maximum speed of 6 mph
(10 km/h).
Take particular care when driving through flowing water.
Clean the electrical connections for trailer wiring after driving in mud or water
When driving through water, maintain low speed and do not stop in the water.
WARNING
After driving through water, press lightly on the brake pedal to ensure that the brakes are functioning normally.
Water or mud can make the brake linings slippery, resulting in delayed braking effect.
ProCarManuals.com
Page 177 of 251
Removal:
Open the cover 30 degrees and lift straight up.
Installation:
Insert the cover in the grooves behind the upholstery and close the cover.
Roof loads
Using load carriers
Load carriers are available as Volvo accessories. Observe the following points when in use:
To avoid damaging your vehicle and to achieve maximum safety when driving, we recommend using the load
carriers that Volvo has developed especially for your vehicle.
Volvo-approved removable roof racks are designed to carry the maximum allowable roof load for this vehicle: 220
lbs (100 kg). For non-Volvo roof racks, check the manufacturer's weight limits for the rack.
Never exceed the rack manufacturer's weigh limits and never exceed the maximum rated roof load of 220 lbs (100
kg).
Avoid single-point loads. Distribute loads evenly.
Place heavier cargo at the bottom of the load.
Secure the cargo correctly with appropriate tie-down equipment.
Check periodically that the load carriers and load are properly secured.
Remember that the vehicle's center of gravity and handling change when you carry a load on the roof.
The vehicle's wind resistance and fuel consumption will increase with the size of the load.
Drive smoothly. Avoid rapid starts, fast cornering and hard braking.
182 05 During your trip
Towing a trailer
Introduction
Volvo recommends the use of Volvo trailer hitches that are specially designed for the vehicle.
NOTE
See page 244
for the maximum trailer and tongue weights recommended by Volvo.
Observe the legal requirements of the state/province in which the vehicles are
All Volvo models are equipped with energy- absorbing shock-mounted bumpers. Trailer hitch installation should
not interfere with the proper operation of this bumper system.
Trailer towing does not normally present any particular problems, but take into consideration:
Increase tire pressure to recommended full. See the tire inflation tables on pages 221 and 222.
When your vehicle is new, avoid towing heavy trailers during the first 620 miles (1,000 km).
Maximum speed when towing a trailer: 50 mph (80 km/h).
Engine and transmission are subject to increased loads. Therefore, engine coolant temperature should be closely
watched when driving in hot climates or hilly terrain. Use a lower gear and turn off the air conditioner if the
temperature gauge needle enters the red range.
If the automatic transmission begins to overheat, a message will be displayed in the text window.
Avoid overload and other abusive operation.
ProCarManuals.com
Page 180 of 251
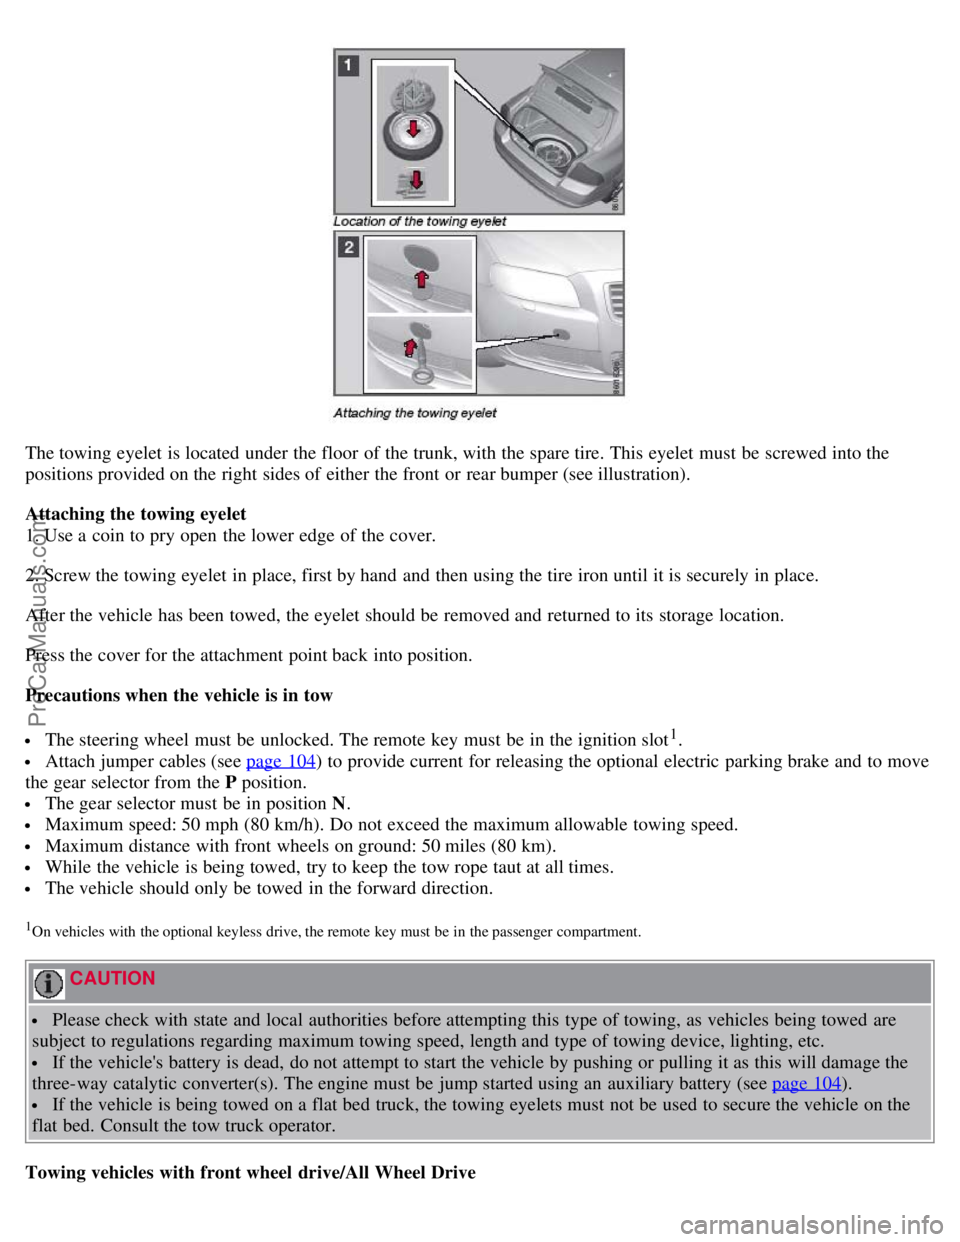
The towing eyelet is located under the floor of the trunk, with the spare tire. This eyelet must be screwed into the
positions provided on the right sides of either the front or rear bumper (see illustration).
Attaching the towing eyelet
1. Use a coin to pry open the lower edge of the cover.
2. Screw the towing eyelet in place, first by hand and then using the tire iron until it is securely in place.
After the vehicle has been towed, the eyelet should be removed and returned to its storage location.
Press the cover for the attachment point back into position.
Precautions when the vehicle is in tow
The steering wheel must be unlocked. The remote key must be in the ignition slot1.
Attach jumper cables (see page 104) to provide current for releasing the optional electric parking brake and to move
the gear selector from the P position.
The gear selector must be in position N .
Maximum speed: 50 mph (80 km/h). Do not exceed the maximum allowable towing speed.
Maximum distance with front wheels on ground: 50 miles (80 km).
While the vehicle is being towed, try to keep the tow rope taut at all times.
The vehicle should only be towed in the forward direction.
1On vehicles with the optional keyless drive, the remote key must be in the passenger compartment.
CAUTION
Please check with state and local authorities before attempting this type of towing, as vehicles being towed are
subject to regulations regarding maximum towing speed, length and type of towing device, lighting, etc.
If the vehicle's battery is dead, do not attempt to start the vehicle by pushing or pulling it as this will damage the
three-way catalytic converter(s). The engine must be jump started using an auxiliary battery (see page 104
).
If the vehicle is being towed on a flat bed truck, the towing eyelets must not be used to secure the vehicle on the
flat bed. Consult the tow truck operator.
Towing vehicles with front wheel drive/All Wheel Drive
ProCarManuals.com
Page 212 of 251
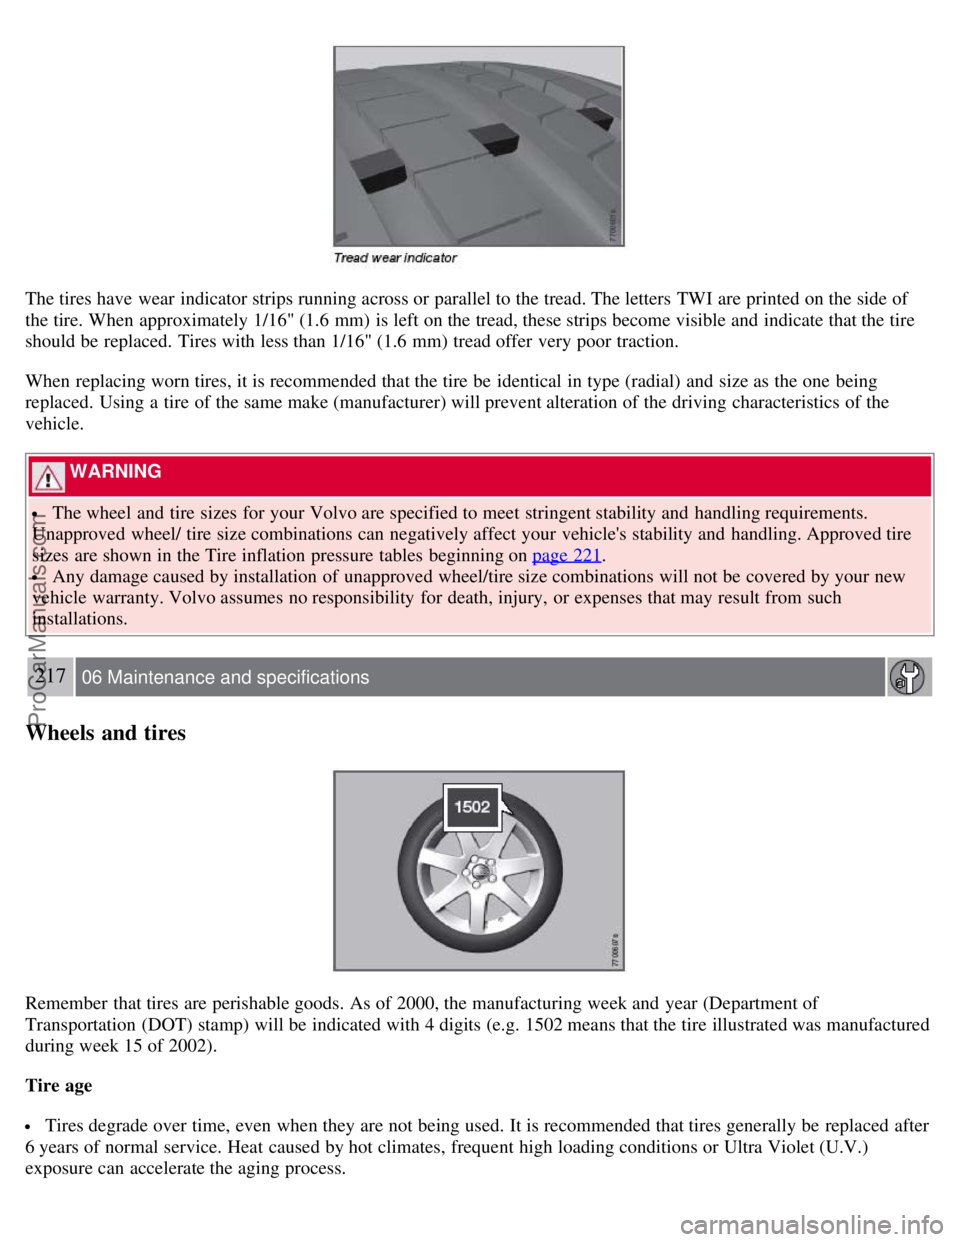
The tires have wear indicator strips running across or parallel to the tread. The letters TWI are printed on the side of
the tire. When approximately 1/16" (1.6 mm) is left on the tread, these strips become visible and indicate that the tire
should be replaced. Tires with less than 1/16" (1.6 mm) tread offer very poor traction.
When replacing worn tires, it is recommended that the tire be identical in type (radial) and size as the one being
replaced. Using a tire of the same make (manufacturer) will prevent alteration of the driving characteristics of the
vehicle.
WARNING
The wheel and tire sizes for your Volvo are specified to meet stringent stability and handling requirements.
Unapproved wheel/ tire size combinations can negatively affect your vehicle's stability and handling. Approved tire
sizes are shown in the Tire inflation pressure tables beginning on page 221
.
Any damage caused by installation of unapproved wheel/tire size combinations will not be covered by your new
vehicle warranty. Volvo assumes no responsibility for death, injury, or expenses that may result from such
installations.
217 06 Maintenance and specifications
Wheels and tires
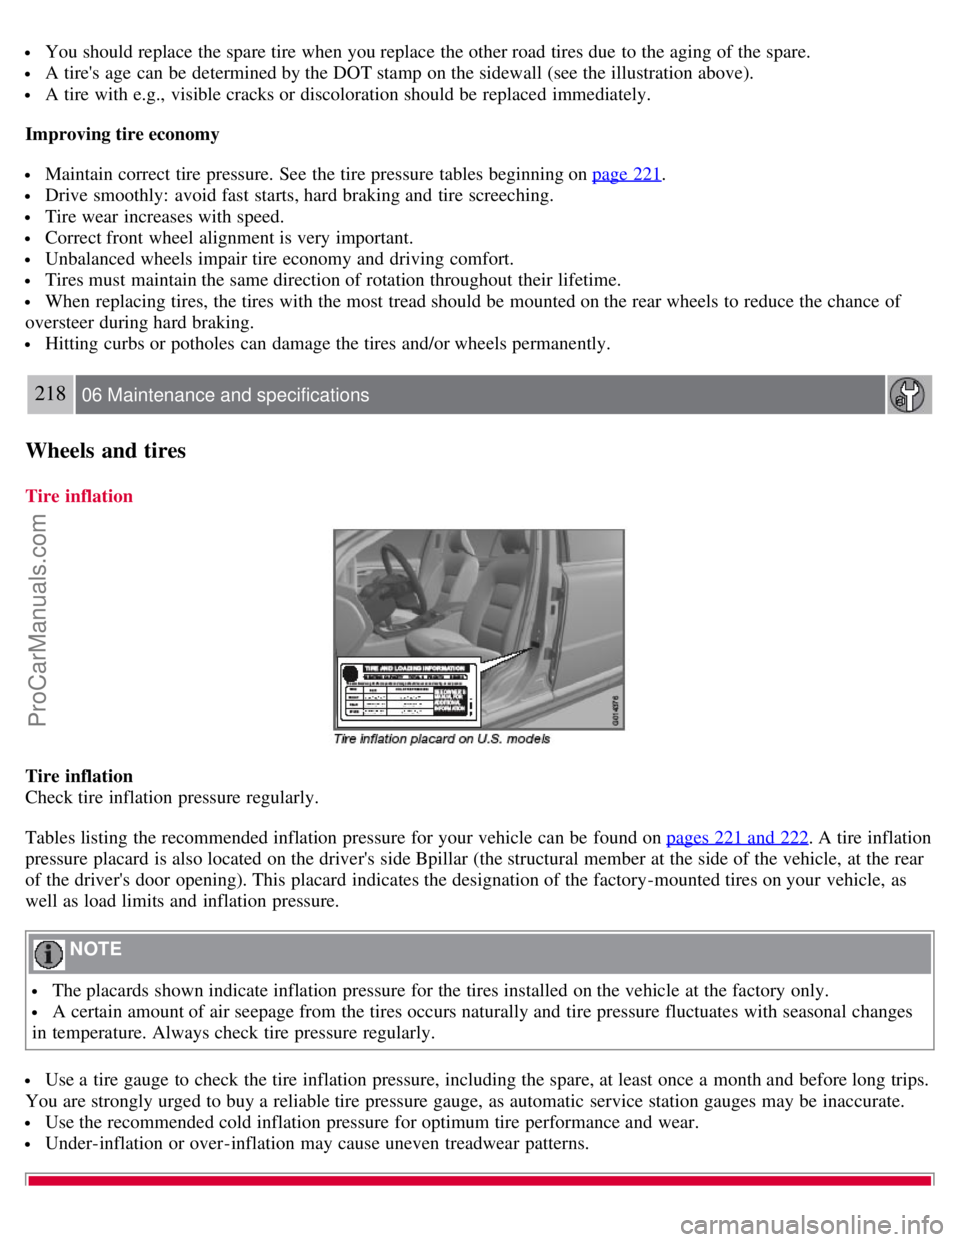
Remember that tires are perishable goods. As of 2000, the manufacturing week and year (Department of
Transportation (DOT) stamp) will be indicated with 4 digits (e.g. 1502 means that the tire illustrated was manufactured
during week 15 of 2002).
Tire age
Tires degrade over time, even when they are not being used. It is recommended that tires generally be replaced after
6 years of normal service. Heat caused by hot climates, frequent high loading conditions or Ultra Violet (U.V.)
exposure can accelerate the aging process.
ProCarManuals.com
Page 213 of 251
You should replace the spare tire when you replace the other road tires due to the aging of the spare.
A tire's age can be determined by the DOT stamp on the sidewall (see the illustration above).
A tire with e.g., visible cracks or discoloration should be replaced immediately.
Improving tire economy
Maintain correct tire pressure. See the tire pressure tables beginning on page 221.
Drive smoothly: avoid fast starts, hard braking and tire screeching.
Tire wear increases with speed.
Correct front wheel alignment is very important.
Unbalanced wheels impair tire economy and driving comfort.
Tires must maintain the same direction of rotation throughout their lifetime.
When replacing tires, the tires with the most tread should be mounted on the rear wheels to reduce the chance of
oversteer during hard braking.
Hitting curbs or potholes can damage the tires and/or wheels permanently.
218 06 Maintenance and specifications
Wheels and tires
Tire inflation
Tire inflation
Check tire inflation pressure regularly.
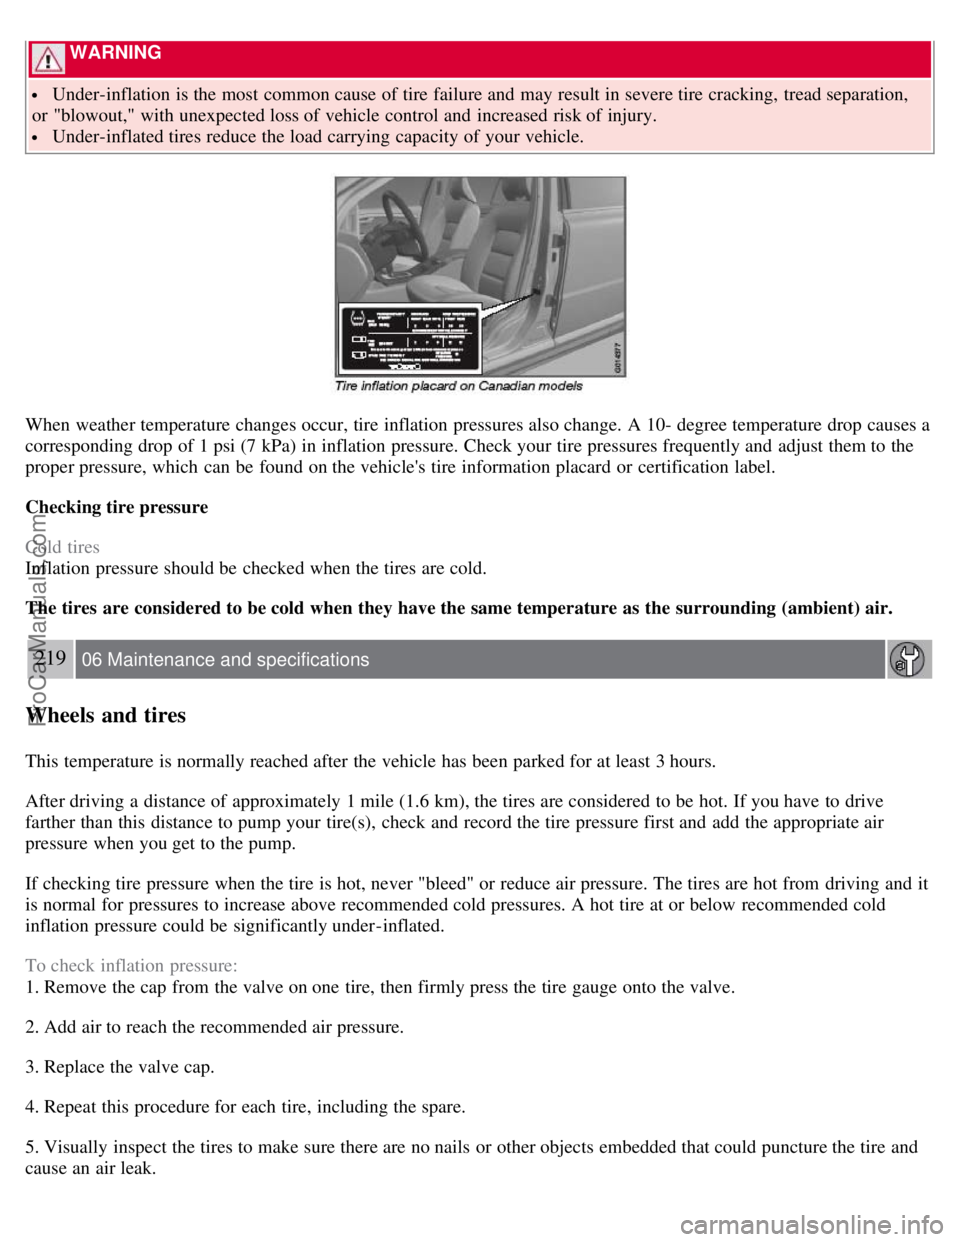
Tables listing the recommended inflation pressure for your vehicle can be found on pages 221 and 222
. A tire inflation
pressure placard is also located on the driver's side Bpillar (the structural member at the side of the vehicle, at the rear
of the driver's door opening). This placard indicates the designation of the factory-mounted tires on your vehicle, as
well as load limits and inflation pressure.
NOTE
The placards shown indicate inflation pressure for the tires installed on the vehicle at the factory only.
A certain amount of air seepage from the tires occurs naturally and tire pressure fluctuates with seasonal changes
in temperature. Always check tire pressure regularly.
Use a tire gauge to check the tire inflation pressure, including the spare, at least once a month and before long trips.
You are strongly urged to buy a reliable tire pressure gauge, as automatic service station gauges may be inaccurate.
Use the recommended cold inflation pressure for optimum tire performance and wear.
Under-inflation or over-inflation may cause uneven treadwear patterns.
ProCarManuals.com
Page 214 of 251
WARNING
Under-inflation is the most common cause of tire failure and may result in severe tire cracking, tread separation,
or "blowout," with unexpected loss of vehicle control and increased risk of injury.
Under-inflated tires reduce the load carrying capacity of your vehicle.
When weather temperature changes occur, tire inflation pressures also change. A 10- degree temperature drop causes a
corresponding drop of 1 psi (7 kPa) in inflation pressure. Check your tire pressures frequently and adjust them to the
proper pressure, which can be found on the vehicle's tire information placard or certification label.
Checking tire pressure
Cold tires
Inflation pressure should be checked when the tires are cold.
The tires are considered to be cold when they have the same temperature as the surrounding (ambient) air.
219 06 Maintenance and specifications
Wheels and tires
This temperature is normally reached after the vehicle has been parked for at least 3 hours.
After driving a distance of approximately 1 mile (1.6 km), the tires are considered to be hot. If you have to drive
farther than this distance to pump your tire(s), check and record the tire pressure first and add the appropriate air
pressure when you get to the pump.
If checking tire pressure when the tire is hot, never "bleed" or reduce air pressure. The tires are hot from driving and it
is normal for pressures to increase above recommended cold pressures. A hot tire at or below recommended cold
inflation pressure could be significantly under-inflated.
To check inflation pressure:
1. Remove the cap from the valve on one tire, then firmly press the tire gauge onto the valve.
2. Add air to reach the recommended air pressure.
3. Replace the valve cap.
4. Repeat this procedure for each tire, including the spare.
5. Visually inspect the tires to make sure there are no nails or other objects embedded that could puncture the tire and
cause an air leak.
ProCarManuals.com