2007 VOLVO S40 steering
[x] Cancel search: steeringPage 129 of 208

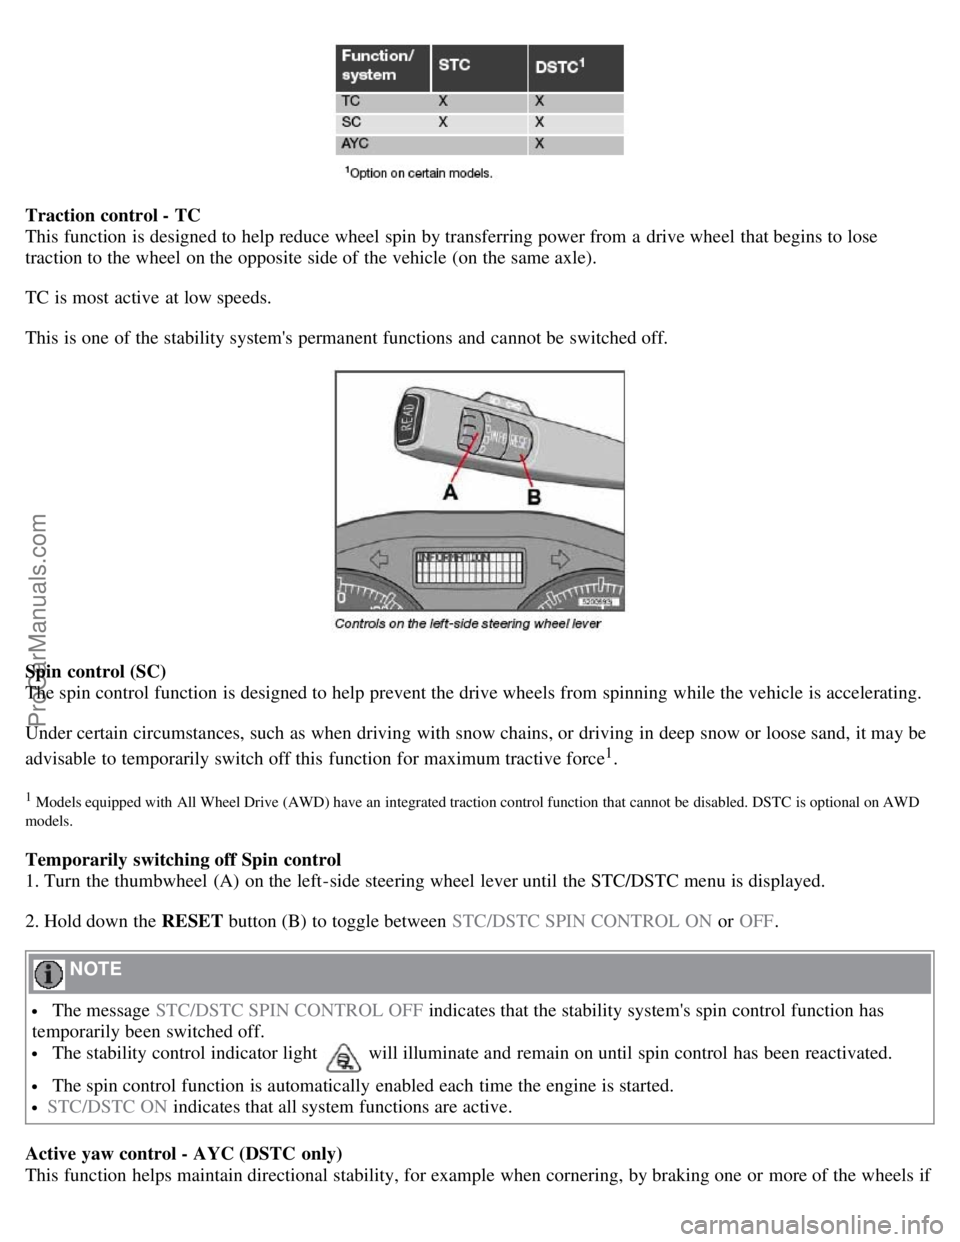
Traction control - TC
This function is designed to help reduce wheel spin by transferring power from a drive wheel that begins to lose
traction to the wheel on the opposite side of the vehicle (on the same axle).
TC is most active at low speeds.
This is one of the stability system's permanent functions and cannot be switched off.
Spin control (SC)
The spin control function is designed to help prevent the drive wheels from spinning while the vehicle is accelerating.
Under certain circumstances, such as when driving with snow chains, or driving in deep snow or loose sand, it may be
advisable to temporarily switch off this function for maximum tractive force
1.
1 Models equipped with All Wheel Drive (AWD) have an integrated traction control function that cannot be disabled. DSTC is optional on AWD
models.
Temporarily switching off Spin control
1. Turn the thumbwheel (A) on the left-side steering wheel lever until the STC/DSTC menu is displayed.
2. Hold down the RESET button (B) to toggle between STC/DSTC SPIN CONTROL ON or OFF.
NOTE
The message STC/DSTC SPIN CONTROL OFF indicates that the stability system's spin control function has
temporarily been switched off.
The stability control indicator light will illuminate and remain on until spin control has been reactivated.
The spin control function is automatically enabled each time the engine is started.
STC/DSTC ON indicates that all system functions are active.
Active yaw control - AYC (DSTC only)
This function helps maintain directional stability, for example when cornering, by braking one or more of the wheels if
ProCarManuals.com
Page 131 of 208

The system has been temporarily switched off due to high brake temperature. "TRACTION CONTROL
TEMPORARILY OFF" will be displayed. The system will automatically switch on again when the brakes have cooled.
WARNING
The stability system is intended to help improve driving safety. It supplements, but can never replace, the driver's
judgement and responsibility when operating the vehicle. Speed and driving style should always be adapted to traffic
and road conditions.
144 06 Starting and driving
Towing
Emergency towing
The towing eyelet is located under the floor of the cargo area. This eyelet must be screwed into the positions provided
on the right sides of either the front or rear bumper (see illustrations).
To attach the towing eyelet:
1. Use a coin or screwdriver to pry open the lower edge of the cover.
2. Screw the towing eyelet in place first by hand and then using the tire iron until it is securely in place.
After the vehicle has been towed, the eyelet should be removed and returned to the tool bag. Press the cover back into
position.
Towing a vehicle with all four wheels on the ground
WARNING
Volvo does not recommend towing a disabled vehicle behind another vehicle. Significant difficulty in steering and
braking, combined with unfavorable weather, traffic, and road conditions may make it impossible to maintain vehicle
control.
1. Apply the parking brake.
2. Insert the key into the ignition to unlock the steering wheel. The steering wheel must be unlocked. With the engine
off and the vehicle at a standstill, great effort will be required to turn the steering wheel.
ProCarManuals.com
Page 132 of 208

WARNING
Towing a vehicle with a locked steering wheel will make the vehicle impossible to steer.
3. Turn the ignition key to position II.
4. Place the gear selector in neutral. For vehicles with automatic transmissions, follow instruction on page 138
,
"Shiftlock override" to allow the gear selector to be moved from the Park position.
5. Keep firm pressure on the brake pedal while releasing the parking brake.
6. When towing has been completed, return the gear selector to Park (automatic) or Reverse (manual) and apply the
parking brake.
The following points should also be observed:
Never exceed 50 mph (80 km/h) . Never exceed local towing speed limits and heed all local towing restrictions.
Never tow farther than 50 miles (80 km) .
Keep the tow rope taut at all times while the vehicle is in motion.
The disabled vehicle should be towed in the forward direction only.
145 06 Starting and driving
Towing
WARNING
Never allow a vehicle to be towed without a driver behind the wheel of the disabled vehicle.
Never remove the key from the ignition while the vehicle is moving. The steering wheel could lock, making it
impossible to steer the vehicle.
When the engine is not running, steering resistance and the effort needed to apply the brakes will be great.
Never attempt to tow a vehicle with a dead battery at night.
CAUTION
Check with state and local authorities before attempting this type of towing, as vehicles being towed are subject to
regulations regarding maximum towing speed, length and type of towing device, lighting, marker flags, etc.
Never attempt to push- or tow-start a vehicle with a dead battery. This would inject unburned fuel into the three-
way catalytic converter(s), causing overheating, backfiring, and damage. See page 146
for instructions on jump
starting the vehicle.
Towing vehicles with front wheel drive
ProCarManuals.com
Page 133 of 208

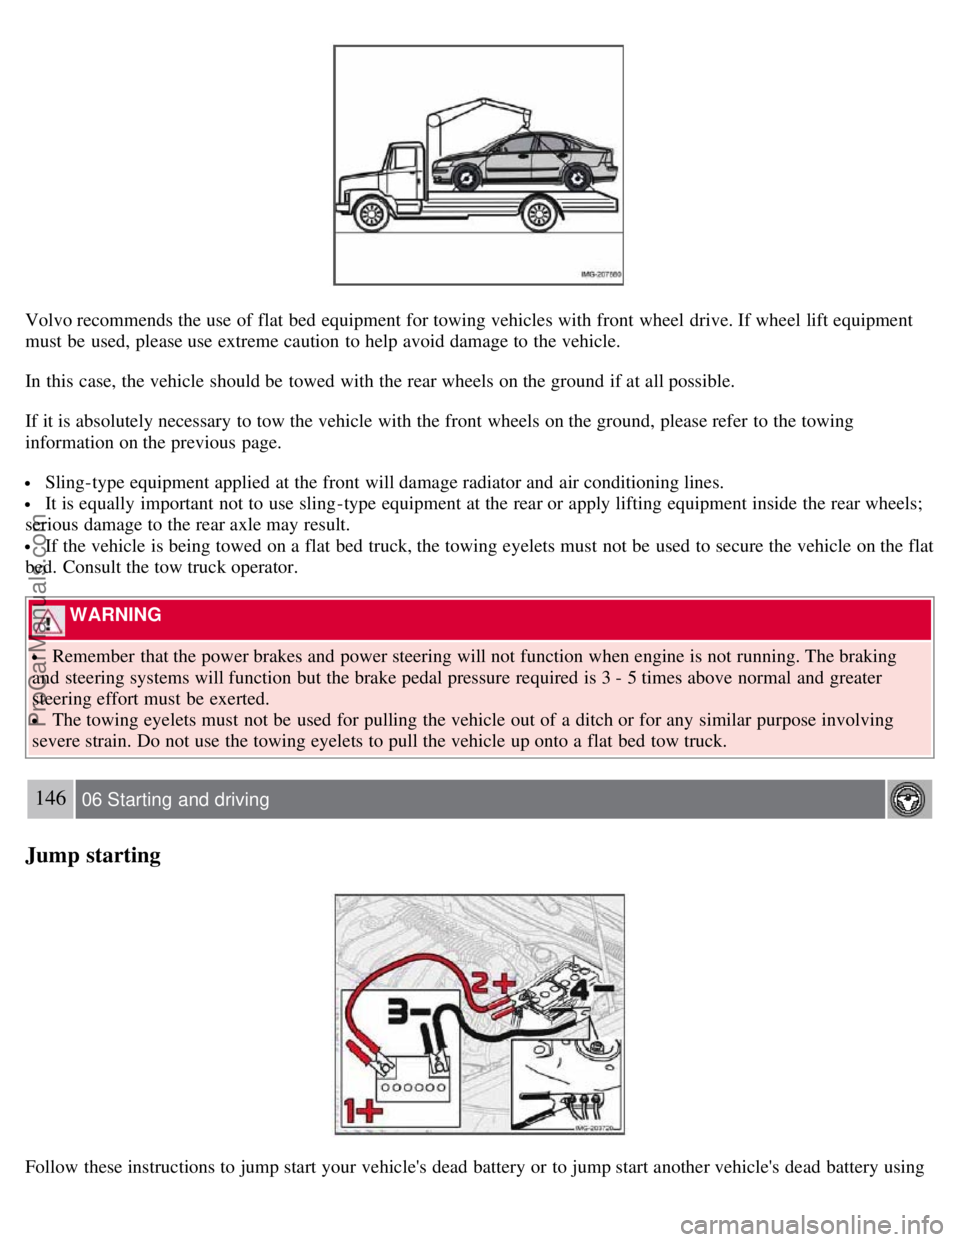
Volvo recommends the use of flat bed equipment for towing vehicles with front wheel drive. If wheel lift equipment
must be used, please use extreme caution to help avoid damage to the vehicle.
In this case, the vehicle should be towed with the rear wheels on the ground if at all possible.
If it is absolutely necessary to tow the vehicle with the front wheels on the ground, please refer to the towing
information on the previous page.
Sling-type equipment applied at the front will damage radiator and air conditioning lines.
It is equally important not to use sling -type equipment at the rear or apply lifting equipment inside the rear wheels;
serious damage to the rear axle may result.
If the vehicle is being towed on a flat bed truck, the towing eyelets must not be used to secure the vehicle on the flat
bed. Consult the tow truck operator.
WARNING
Remember that the power brakes and power steering will not function when engine is not running. The braking
and steering systems will function but the brake pedal pressure required is 3 - 5 times above normal and greater
steering effort must be exerted.
The towing eyelets must not be used for pulling the vehicle out of a ditch or for any similar purpose involving
severe strain. Do not use the towing eyelets to pull the vehicle up onto a flat bed tow truck.
146 06 Starting and driving
Jump starting
Follow these instructions to jump start your vehicle's dead battery or to jump start another vehicle's dead battery using
ProCarManuals.com
Page 151 of 208

NOTE
This nut can also be used on steel wheels.
Lockable wheel nut
If steel wheels with lockable wheel nuts are used in combination with wheel covers, the lockable wheel nut must be
fitted to the stud nearest the air valve. The wheel cover cannot otherwise be installed on the wheel.
169 07 Wheels and tires
Tire rotation
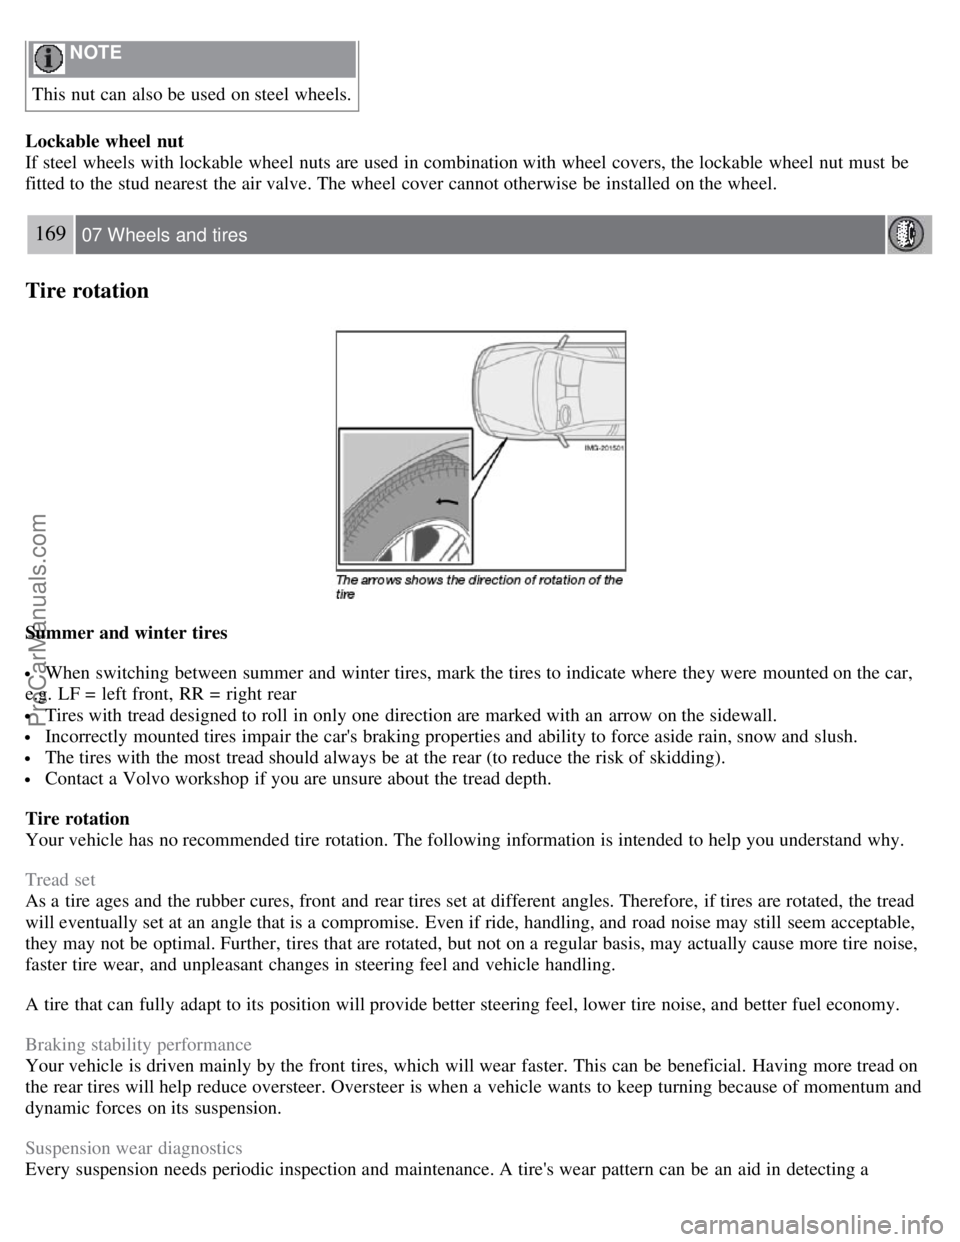
Summer and winter tires
When switching between summer and winter tires, mark the tires to indicate where they were mounted on the car,
e.g. LF = left front, RR = right rear
Tires with tread designed to roll in only one direction are marked with an arrow on the sidewall.
Incorrectly mounted tires impair the car's braking properties and ability to force aside rain, snow and slush.
The tires with the most tread should always be at the rear (to reduce the risk of skidding).
Contact a Volvo workshop if you are unsure about the tread depth.
Tire rotation
Your vehicle has no recommended tire rotation. The following information is intended to help you understand why.
Tread set
As a tire ages and the rubber cures, front and rear tires set at different angles. Therefore, if tires are rotated, the tread
will eventually set at an angle that is a compromise. Even if ride, handling, and road noise may still seem acceptable,
they may not be optimal. Further, tires that are rotated, but not on a regular basis, may actually cause more tire noise,
faster tire wear, and unpleasant changes in steering feel and vehicle handling.
A tire that can fully adapt to its position will provide better steering feel, lower tire noise, and better fuel economy.
Braking stability performance
Your vehicle is driven mainly by the front tires, which will wear faster. This can be beneficial. Having more tread on
the rear tires will help reduce oversteer. Oversteer is when a vehicle wants to keep turning because of momentum and
dynamic forces on its suspension.
Suspension wear diagnostics
Every suspension needs periodic inspection and maintenance. A tire's wear pattern can be an aid in detecting a
ProCarManuals.com
Page 164 of 208

2. Power steering fluid reservoir (concealed behind the headlight)
3. Dipstick - engine oil
4. Radiator
5. Cooling fan
6. Washer fluid reservoir
7. Engine oil filler cap
8. Brake/clutch fluid reservoir
9. Battery
10. Relay/fuse box
11. Air cleaner
WARNING
The cooling fan may start or continue to operate (for up to 6 minutes) after the engine has been switched off.
189 09 Maintenance and servicing
Engine oil
Changing engine oil and oil filter
See page 231
for oil specifications. Refer to the Warranty and Service Records Information booklet for information on the
oil change intervals.
Volvo recommends
.
NOTE
Volvo does not recommend the use of oil additives.
Synthetic oil is not used when the oil is changed at the normal maintenance intervals except at owner request and at
additional charge. Please consult your Volvo retailer.
Checking and adding oil
The oil level should be checked every time the vehicle is refueled. This is especially important during the period up to the
first scheduled maintenance service
The car should be parked on a level surface when the oil is checked.
If the engine is warm , wait for at least 10- 15 minutes after the engine has been switched off before checking the oil.
ProCarManuals.com
Page 167 of 208

The cooling system must always be kept filled to the correct level, and the level must be between the MIN and MAX
marks. If it is not kept filled, there can be high local temperatures in the engine which could result in damage. Different
types of antifreeze/coolant may not be mixed. Check coolant regularly!
WARNING
Never remove the radiator cap while the engine is warm. Wait until the vehicle cools. If it is necessary to top off the
coolant when the engine is warm, unscrew the expansion tank cap slowly so that the overpressure dissipates.
Brake fluid
The brake fluid should always be between the MIN and MAX marks on the side of the reservoir. Check, without removing
the cap, that there is sufficient fluid in the reservoir.
Fluid type : DOT 4+ boiling point >536°F (280°C), P/N 9437433
Replace : The fluid should be replaced according to the intervals specified in the Warranty and Service Records
Information booklet. When driving under extremely hard conditions (mountain driving, etc), it may be necessary to replace
the fluid more often. Consult your Volvo retailer. Always entrust brake fluid changing to an authorized Volvo retailer.
Power steering fluid
The fluid level is checked at each service interval.
Fluid type : Volvo power steering fluid or equivalent.
Replace : No fluid change required.
WARNING
If a problem should occur in the power steering system or if the vehicle has no electrical current and must be towed, it is
still possible to steer the vehicle. However, keep in mind that greater effort will be required to turn the steering wheel.
192 09 Maintenance and servicing
Wiper blades
Replacing windshield wiper blades
ProCarManuals.com
Page 184 of 208

3. MODE - select a sound source
4. TUNING dial
5. SOUND button
Selecting a sound source
Press AM/FM (2) repeatedly to toggle between FM1, FM2, and AM.
Press MODE (3) repeatedly to toggle between the CD player and the optional external sound source AUX or the
optional Sirius satellite radio.
The currently selected sound source will be shown in the display.
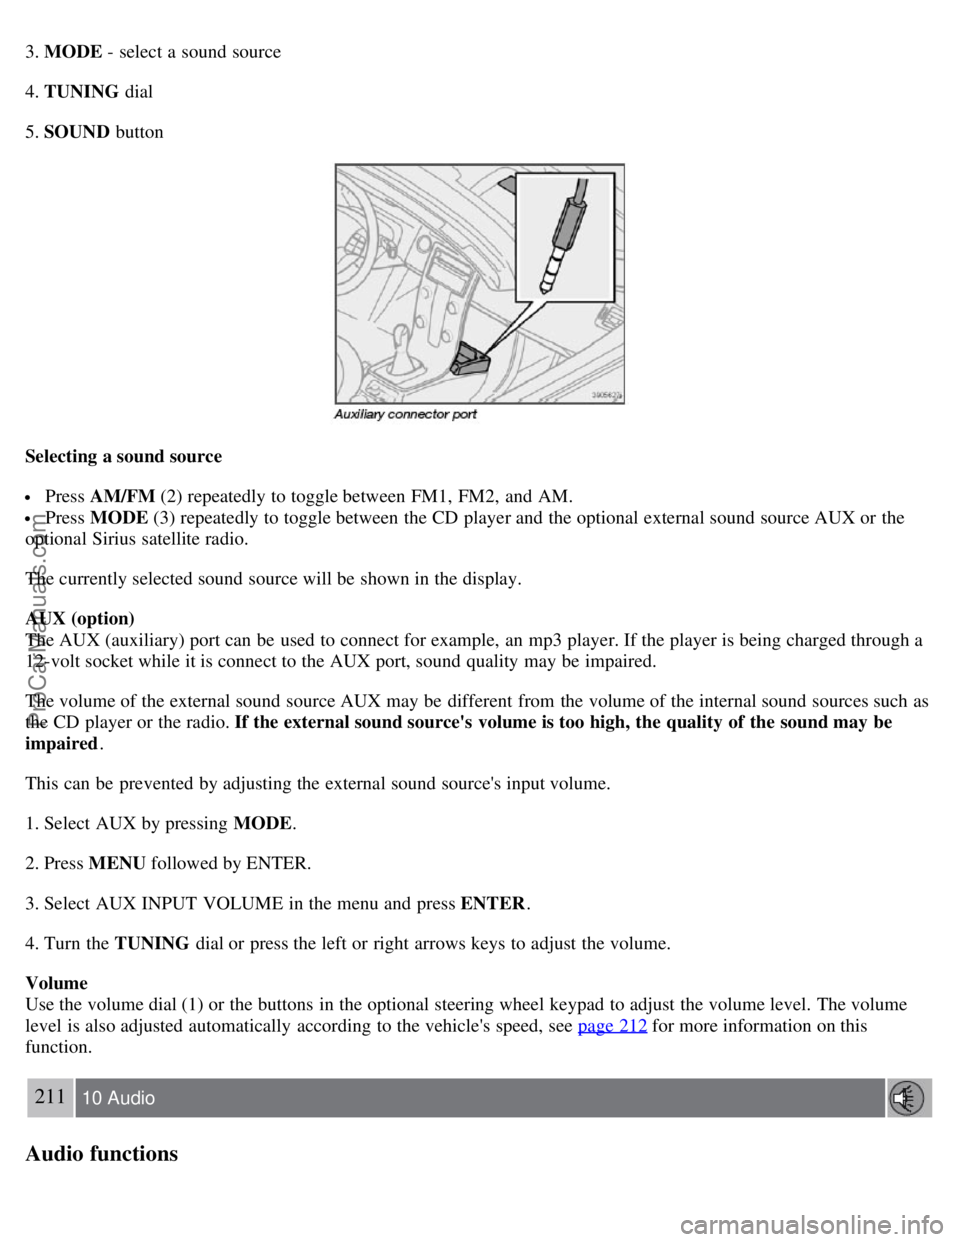
AUX (option)
The AUX (auxiliary) port can be used to connect for example, an mp3 player. If the player is being charged through a
12-volt socket while it is connect to the AUX port, sound quality may be impaired.
The volume of the external sound source AUX may be different from the volume of the internal sound sources such as
the CD player or the radio. If the external sound source's volume is too high, the quality of the sound may be
impaired .
This can be prevented by adjusting the external sound source's input volume.
1. Select AUX by pressing MODE .
2. Press MENU followed by ENTER.
3. Select AUX INPUT VOLUME in the menu and press ENTER .
4. Turn the TUNING dial or press the left or right arrows keys to adjust the volume.
Volume
Use the volume dial (1) or the buttons in the optional steering wheel keypad to adjust the volume level. The volume
level is also adjusted automatically according to the vehicle's speed, see page 212
for more information on this
function.
211 10 Audio
Audio functions
ProCarManuals.com