2007 VOLVO S40 display
[x] Cancel search: displayPage 80 of 208

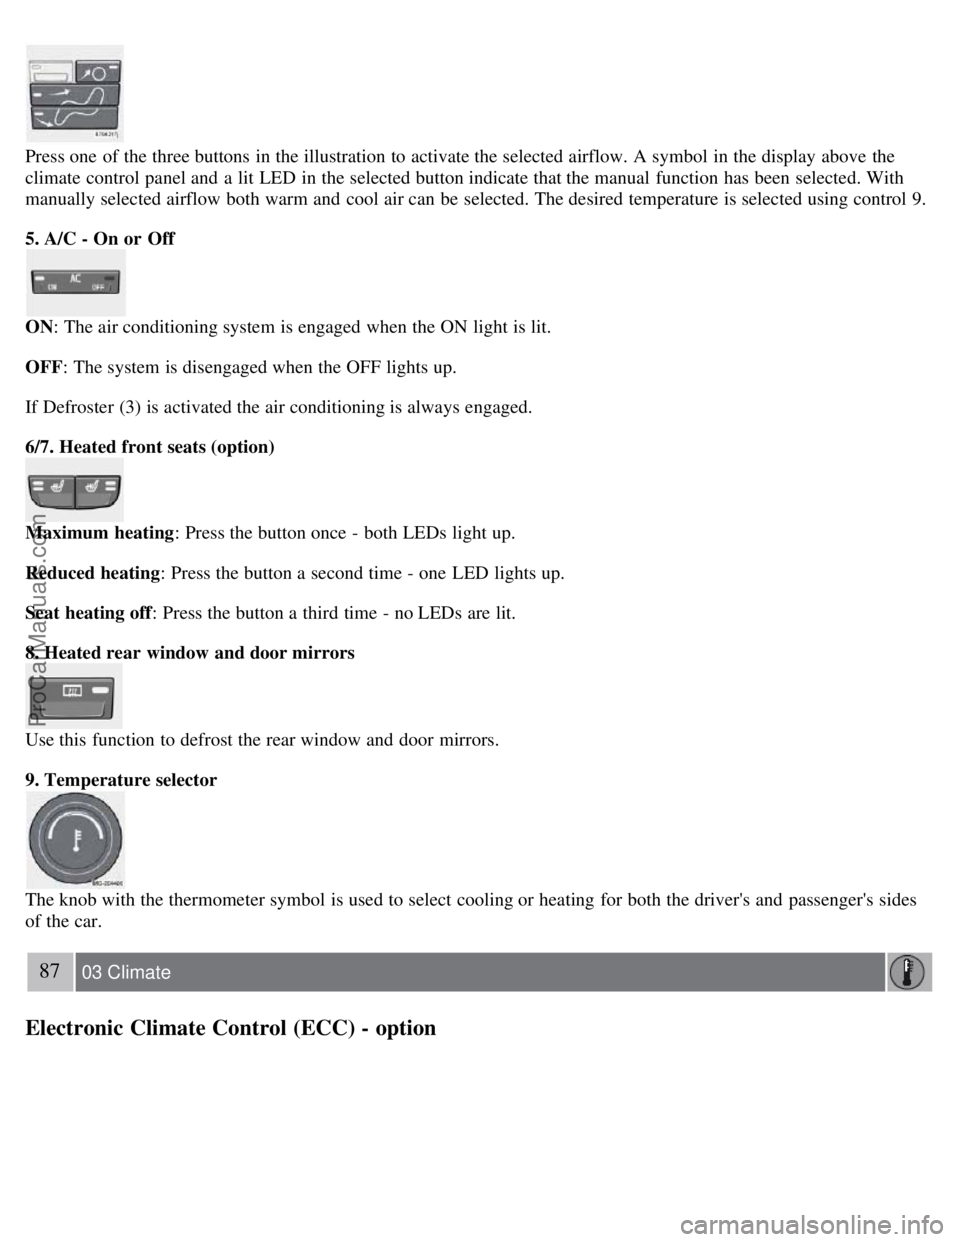
Press one of the three buttons in the illustration to activate the selected airflow. A symbol in the display above the
climate control panel and a lit LED in the selected button indicate that the manual function has been selected. With
manually selected airflow both warm and cool air can be selected. The desired temperature is selected using control 9.
5. A/C - On or Off
ON: The air conditioning system is engaged when the ON light is lit.
OFF: The system is disengaged when the OFF lights up.
If Defroster (3) is activated the air conditioning is always engaged.
6/7. Heated front seats (option)
Maximum heating: Press the button once - both LEDs light up.
Reduced heating : Press the button a second time - one LED lights up.
Seat heating off : Press the button a third time - no LEDs are lit.
8. Heated rear window and door mirrors
Use this function to defrost the rear window and door mirrors.
9. Temperature selector
The knob with the thermometer symbol is used to select cooling or heating for both the driver's and passenger's sides
of the car.
87 03 Climate
Electronic Climate Control (ECC) - option
ProCarManuals.com
Page 81 of 208

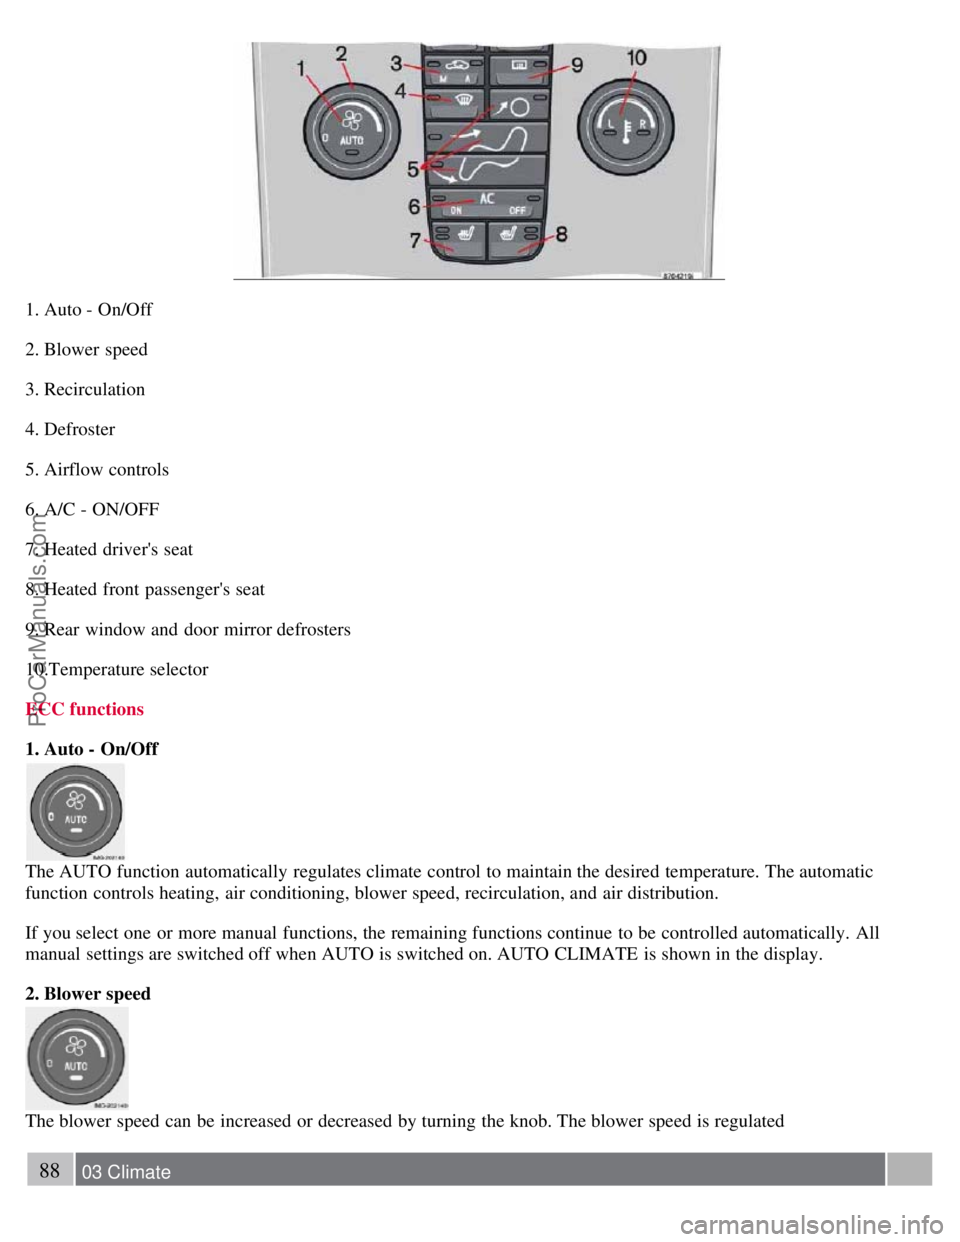
1. Auto - On/Off
2. Blower speed
3. Recirculation
4. Defroster
5. Airflow controls
6. A/C - ON/OFF
7. Heated driver's seat
8. Heated front passenger's seat
9. Rear window and door mirror defrosters
10.Temperature selector
ECC functions
1. Auto - On/Off
The AUTO function automatically regulates climate control to maintain the desired temperature. The automatic
function controls heating, air conditioning, blower speed, recirculation, and air distribution.
If you select one or more manual functions, the remaining functions continue to be controlled automatically. All
manual settings are switched off when AUTO is switched on. AUTO CLIMATE is shown in the display.
2. Blower speed
The blower speed can be increased or decreased by turning the knob. The blower speed is regulated
88 03 Climate
ProCarManuals.com
Page 82 of 208

Electronic Climate Control (ECC) - option
automatically if AUTO is selected. The previously set blower speed is disconnected.
NOTE
If the knob is turned counterclockwise and the blower indication in the display goes out, the blower and the air
conditioning are switched off. The display shows the blower symbol and OFF.
3. Recirculation
This function can be used to shut out exhaust fumes, smoke, etc from the passenger compartment. The air in the
passenger compartment is then recirculated, i.e. no air from outside the car is taken into the car when this function is
activated.
If the air in the car recirculates for too long, there is a risk of condensation forming on the insides of the windows,
especially in winter.
Timer
The timer function minimizes the risk of fogging, or stale air when the recirculation function is selected. See page 74
for information on setting the recirculation timer.
NOTE
Recirculation is always disengaged if the defroster button is engaged to clear ice or condensation from the side
windows.
4. Defroster
Directs airflow to the windshield and side windows and increases blower speed. When the defroster is activated:
Air flows to the windows at high blower speed.
The LED in the defroster button lights up when this function is activated. The air conditioning system is controlled
to provide maximum air dehumidification.
The air conditioning is automatically switched on (can be switched off by pressing button 6).
The air is not recirculated.
5. Airflow controls
Press one of the three buttons in the illustration to activate the selected airflow. A symbol in the display above the
climate control panel and a lit LED in the selected button indicate that the manual function has been selected. With
manually selected airflow both warm and cool air can be selected. See also the table on page 90
.
ProCarManuals.com
Page 98 of 208

When the battery begins to lose its charge, the Information symbol in the instrument panel (see page 51) lights up and
REMOTE BATTERY LOW VOLTAGE is shown in the information display.
Replacing the battery in the remote control
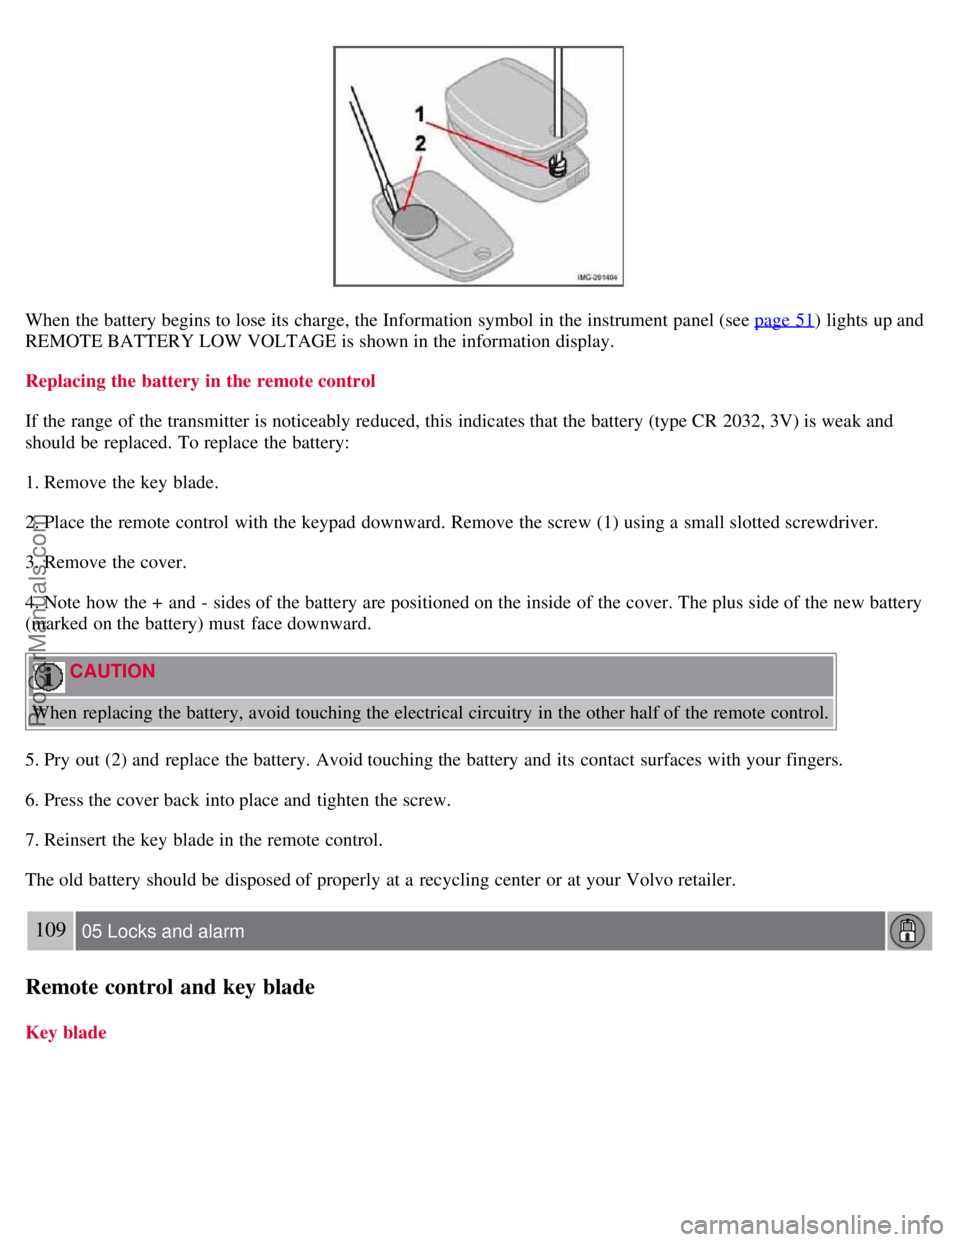
If the range of the transmitter is noticeably reduced, this indicates that the battery (type CR 2032, 3V) is weak and
should be replaced. To replace the battery:
1. Remove the key blade.
2. Place the remote control with the keypad downward. Remove the screw (1) using a small slotted screwdriver.
3. Remove the cover.
4. Note how the + and - sides of the battery are positioned on the inside of the cover. The plus side of the new battery
(marked on the battery) must face downward.
CAUTION
When replacing the battery, avoid touching the electrical circuitry in the other half of the remote control.
5. Pry out (2) and replace the battery. Avoid touching the battery and its contact surfaces with your fingers.
6. Press the cover back into place and tighten the screw.
7. Reinsert the key blade in the remote control.
The old battery should be disposed of properly at a recycling center or at your Volvo retailer.
109 05 Locks and alarm
Remote control and key blade
Key blade
ProCarManuals.com
Page 100 of 208

110 05 Locks and alarm
Valet locking
Valet locking
By utilizing the remote control with the key blade removed, the valet locking feature enables you to block access to the
trunk and glove compartment for e.g. valet parking or when the car is brought to the retailer for service.
With the valet locking function activated:
The vehicle's doors can be locked or unlocked
The engine can be started
The glove compartment cannot be unlocked
Access to the trunk is blocked (the trunk lid cannot be unlocked or opened, and the rear seat backrests are locked in the
upright position)
Activating the valet locking function
1. Remove the key blade from the remote control.
2. Turn the key blade 180° clockwise in the glove compartment lock to lock the glove compartment and disconnect the
trunk lock from the central locking system (a message appears in the information display).
3. Lock the rear seat backrests in the upright position by inserting the key blade into the locks located on the upper
outboard edge of the backrests.
Passenger's side : Turn the key counterclockwise to lock the backrest.
Driver's side : Turn the key clockwise to lock the backrest.
4. Give the parking attendant or service personnel only the remote control (with the key blade removed).
Deactivating the valet locking function
Turn the key blade 180° counterclockwise in the glove compartment lock to deactivate
111 05 Locks and alarm
Valet locking
ProCarManuals.com
Page 102 of 208

additional information.
Unlocking the vehicle
1. A keyless drive remote control must be on the same side of the vehicle as the door to be opened, and be within 5
feet (1.5 meters) of the lock or the trunk opening control (see the shaded areas in the illustration).
2. Pull a door handle to unlock and open the door or press the trunk opening control on the trunk lid.
Locking the vehicle
The doors and the trunk can be locked by pressing the lock button in any of the outside door handles.
NOTE
If one or more doors and/or the trunk is not fully closed when the lock button is pressed, the door(s) or trunk will not
be locked.
Locking or unlocking the vehicle with the key blade
The driver's door on vehicles equipped with keyless drive can be locked or unlocked with the remote control's
detachable key blade if necessary. See page 109
for information on removing the key blade from the remote control.
To access the keyhole in the driver's door:
113 05 Locks and alarm
Keyless drive (option as available)
1. Pry off the keyhole cover by inserting the key blade or a small screwdriver in the hole on the underside of the cover
(indicated by the arrow in the inset illustration in page above).
2. Insert the key blade as far as possible in the driver's door lock. Turn the key blade clockwise approximately one
quarter turn to unlock the driver's door only. This will trigger the alarm.
Disabling the alarm : Press the Unlock button on the keyless drive remote control. If the batteries in the remote are
weak, remove the keyless drive start control from the ignition switch by pressing the catch (see the illustration on page
131) and pulling the control out of the ignition switch. Insert the ignition key section of a keyless drive remote control
in the ignition switch.
Keyless drive remote control and driver's seat memory
This function is only available on vehicles equipped with the optional power driver's seat.
When you leave the car with a keyless drive remote control in your possession and lock any door, the position of
the driver's seat will be stored in the seat's memory.
The next time a door is opened by a person with the same remote control in his/her possession, the driver's seat will
automatically move to the position that it was in when the door was most recently locked.
NOTE
If several people carrying keyless drive remote controls approach the vehicle at the same time, the driver's seat will
assume the position it was in for the person who opens a door first.
Keyless drive information messages
If anyone leaves the vehicle with the only keyless drive remote control in his or her possession while the ignition is
switched on, a message will be shown in the information display and an audible signal will sound.
ProCarManuals.com
Page 103 of 208

NOTE
This message will only be displayed if the start control is in position I or II.
The message will be erased from the display and the audible signal will stop when the remote control has been
returned to the vehicle and one of the following has occurred:
A door has been opened and closed
The start control has been turned to position 0
The READ button (see page 55 for the location of this button) has been pressed.
CAUTION
Keyless drive remote controls should never be left in the vehicle. In the event of a break-in, a remote found in the
vehicle could make it possible to start the engine.
Electromagnetic fields or metal obstructions can interfere with the keyless drive system. Avoid placing the remote
control near cellular phones, metallic objects or e.g., in a metal briefcase.
Canada - IC:267T- 5WK48952, 267T- 5WK48964, 267T-5WK48891
NOTE
This device complies with RSS -210 of Industry Canada. Operation is subject to the following two conditions: (1)
This device may not cause harmful interference, and (2) this device must accept interference received, including
interference that may cause undesired operation.
CAUTION
Changes or modifications not expressly approved by the manufacturer could void the user's authority to operate the
equipment.
114 05 Locks and alarm
Keyless drive (option as available)
USA - FCC ID:KR55WK48952, KR55WK48964
NOTE
This device complies with part 15 of the FCC Rules. Operation is subject to the following two conditions: (1) This
device may not cause harmful interference, and (2) this device must accept interference received, including
interference that may cause undesired operation.
CAUTION
Changes or modifications not expressly approved by the manufacturer could void the user's authority to operate the
equipment. Siemens VDO
5WK48891
Tested To Comply With FCC Standards For Automobile Use
115 05 Locks and alarm
Locking and unlocking
Locking/unlocking the car from the inside
ProCarManuals.com
Page 107 of 208

The indicator light flashes every two seconds - the alarm is armed
The indicator light flashes rapidly before the ignition is switched on - the alarm has been triggered. The message
"ALARM TRIGGERED, CHECK CAR" will also be displayed.
Fault in the alarm system : If a fault has been detected in the alarm system, a message will be shown in the
information display. Contact your Volvo retailer to have the alarm system inspected and repaired if necessary.
Arming the alarm
Press the LOCK button on the remote control, or press the central lock button on one of the front doors with the door
open. One long flash of the turn signals will confirm that the alarm is armed.
Disarming the alarm
Press the UNLOCK button on the remote control or insert the key in the ignition
1 to disarm the alarm. Two short
flashes from the car's direction indicators confirm that the alarm has been deactivated and that all doors are unlocked.
Turning off (stopping) the alarm
If the alarm is sounding, it can be stopped by pressing the UNLOCK button on the remote control or by inserting the
key in the ignition
1 On vehicles with the optional keyless drive, press in the start control in the ignition switch.
118 05 Locks and alarm
Alarm
switch. The driver's door must first be unlocked with the key blade.
NOTE
On vehicles equipped with the optional keyless drive, the start control must be removed from the ignition switch
before the key can be inserted. See page 131
for instructions.
Audible/visual alarm signal
An audible alarm signal is given by a battery powered siren. The alarm cycle lasts for 30 seconds.
NOTE
The visual alarm signal is given by flashing all turn signals and turning on the interior lighting for approximately 5
minutes.
Temporarily turning off the accessory alarm sensor(s)
ProCarManuals.com