2007 VOLVO S40 warning
[x] Cancel search: warningPage 145 of 208

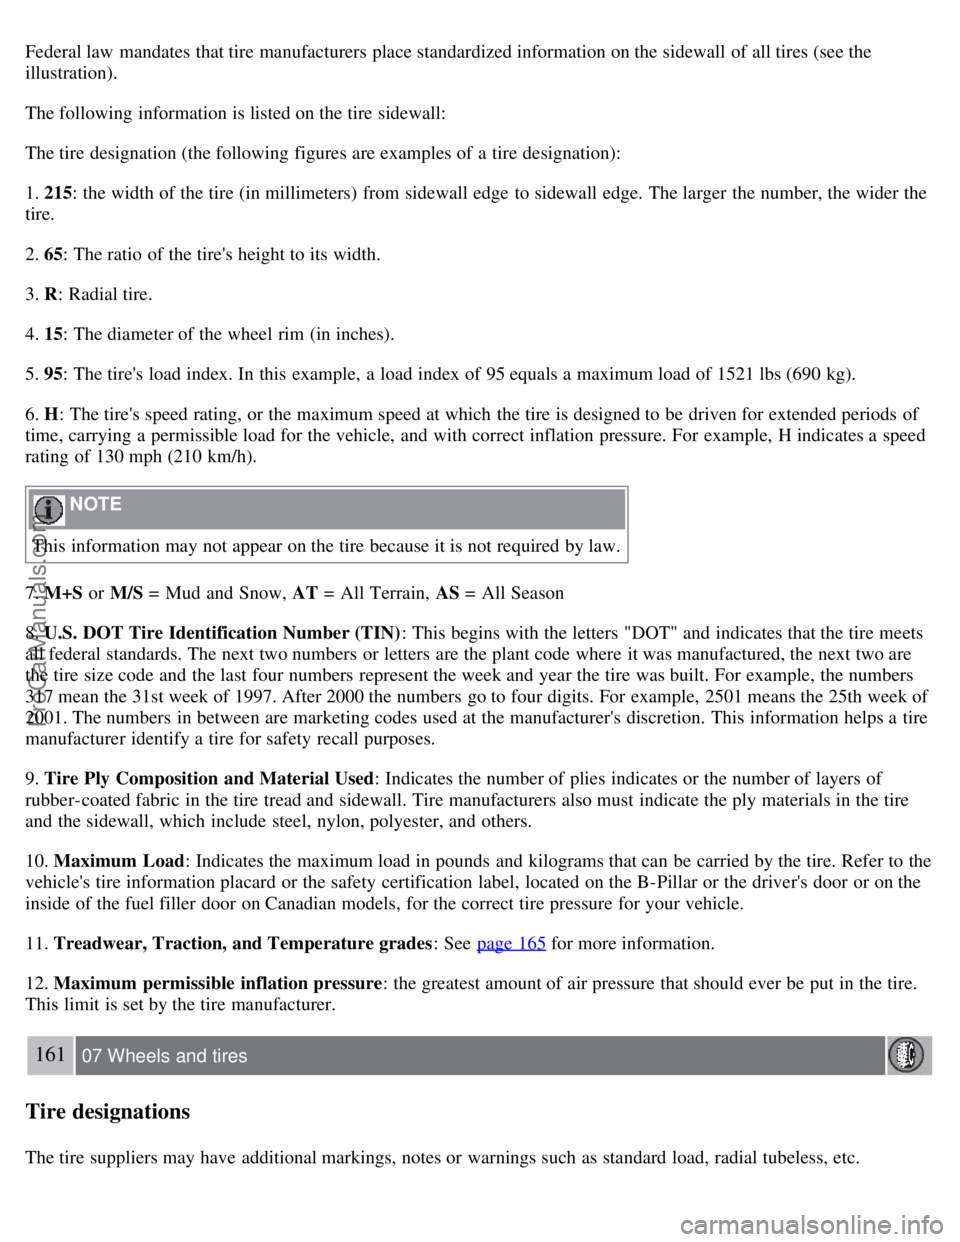
Federal law mandates that tire manufacturers place standardized information on the sidewall of all tires (see the
illustration).
The following information is listed on the tire sidewall:
The tire designation (the following figures are examples of a tire designation):
1. 215: the width of the tire (in millimeters) from sidewall edge to sidewall edge. The larger the number, the wider the
tire.
2. 65: The ratio of the tire's height to its width.
3. R: Radial tire.
4. 15: The diameter of the wheel rim (in inches).
5. 95: The tire's load index. In this example, a load index of 95 equals a maximum load of 1521 lbs (690 kg).
6. H : The tire's speed rating, or the maximum speed at which the tire is designed to be driven for extended periods of
time, carrying a permissible load for the vehicle, and with correct inflation pressure. For example, H indicates a speed
rating of 130 mph (210 km/h).
NOTE
This information may not appear on the tire because it is not required by law.
7. M+S or M/S = Mud and Snow, AT = All Terrain, AS = All Season
8. U.S. DOT Tire Identification Number (TIN) : This begins with the letters "DOT" and indicates that the tire meets
all federal standards. The next two numbers or letters are the plant code where it was manufactured, the next two are
the tire size code and the last four numbers represent the week and year the tire was built. For example, the numbers
317 mean the 31st week of 1997. After 2000 the numbers go to four digits. For example, 2501 means the 25th week of
2001. The numbers in between are marketing codes used at the manufacturer's discretion. This information helps a tire
manufacturer identify a tire for safety recall purposes.
9. Tire Ply Composition and Material Used : Indicates the number of plies indicates or the number of layers of
rubber-coated fabric in the tire tread and sidewall. Tire manufacturers also must indicate the ply materials in the tire
and the sidewall, which include steel, nylon, polyester, and others.
10. Maximum Load : Indicates the maximum load in pounds and kilograms that can be carried by the tire. Refer to the
vehicle's tire information placard or the safety certification label, located on the B-Pillar or the driver's door or on the
inside of the fuel filler door on Canadian models, for the correct tire pressure for your vehicle.
11. Treadwear, Traction, and Temperature grades : See page 165
for more information.
12. Maximum permissible inflation pressure : the greatest amount of air pressure that should ever be put in the tire.
This limit is set by the tire manufacturer.
161 07 Wheels and tires
Tire designations
The tire suppliers may have additional markings, notes or warnings such as standard load, radial tubeless, etc.
ProCarManuals.com
Page 147 of 208

All weight added to the curb weight, including cargo and optional equipment. When towing, trailer hitch tongue load
is also part of cargo weight.
NOTE
For trailer towing information, please refer to the section "Towing a trailer" on page 147
.
Permissible axle weight
The maximum allowable weight that can be carried by a single axle (front or rear). These numbers are shown on the
Federal/Canadian Motor Vehicle Safety Standards (FMVSS/CMVSS) label. The total load on each axle must never
exceed its maximum permissible weight.
Gross vehicle weight (GVW)
The vehicle's curb weight + cargo + passengers.
NOTE
The location of the various labels in your vehicle can be found on page 227.
A table listing important weight limits for your vehicle can be found on page 229.
Steps for Determining Correct Load Limit
(1) Locate the statement ''the combined weight of occupants and cargo should never exceed XXX pounds'' on your
vehicle's placard.
(2) Determine the combined weight of the driver and passengers that will be riding in your vehicle.
(3) Subtract the combined weight of the driver and passengers from XXX kilograms or XXX pounds.
(4) The resulting figure equals the available amount of cargo and luggage load capacity. For example, if the ''XXX''
amount equals 1400 lbs. and there will be five 150 lb. passengers in your vehicle, the amount of available cargo and
luggage load capacity is 650 lbs. (1400-750 (5 x 150) = 650 lbs.)
(5) Determine the combined weight of luggage and cargo being loaded on the vehicle. That weight may not safely
exceed the available cargo and luggage load capacity calculated in Step 4.
(6) If your vehicle will be towing a trailer, load from your trailer will be transferred to your vehicle. Consult this
manual
1 to determine
1 See "Towing a trailer" on page 147.
164 07 Wheels and tires
Vehicle loading
how this reduces the available cargo and luggage load capacity of your vehicle.
WARNING
Exceeding the permissible axle weight, gross vehicle weight, or any other weight rating limits can cause tire
overheating resulting in permanent deformation or catastrophic failure.
Do not use replacement tires with lower load carrying capacities than the tires that were original equipment on the
ProCarManuals.com
Page 148 of 208

vehicle because this will lower the vehicle's GVW rating. Replacement tires with a higher limit than the originals do
not increase the vehicle's GVW rating limitations.
165 07 Wheels and tires
Uniform tire quality gradings
Uniform tire quality gradings
ALL PASSENGER VEHICLE TIRES MUST CONFORM TO FEDERAL SAFETY REQUIREMENTS IN
ADDITION TO THESE GRADES
Quality grades can be found, where applicable, on the tire sidewall between the tread shoulder and maximum
section width. For example:
Treadwear 200 Traction AA Temperature A
TREADWEAR
The treadwear grade is a comparative rating based on the wear rate of the tire when tested under controlled conditions
on a specified government test course. For example, a tire graded 150 would wear one and one half (1 1/2) times as
well on the government course as a tire graded 100. The relative performance of tires depends upon the actual
conditions of their use, however, and many depart significantly from the norm due to variation in driving habits,
maintenance practices and differences in road characteristics and climate.
TRACTION
The traction grades, from highest to lowest, are AA, A, B, and C, as measured under controlled conditions on specified
government test surfaces of asphalt and concrete. A tire marked C may have poor traction performance. The traction
grade assigned to this tire is based on braking (straight-ahead) traction tests and is not a measure of cornering (turning)
traction.
WARNING
The traction grade assigned to this tire is based on braking (straight-ahead) traction tests and is not a measure of
cornering (turning) traction.
TEMPERATURE
The temperature grades are AA (the highest), A, B, and C, representing the tire's resistance to the generation of heat
and its ability to dissipate heat when tested under controlled conditions on a specified indoor laboratory test wheel.
Sustained high temperature can cause the material of the tire to degenerate and reduce tire life, and excessive
temperature can lead to sudden tire failure. The grade C corresponds to a minimum level of performance that all
passenger vehicle tires must meet under the Federal Motor Safety Standard No. 109. Grades B and A represent higher
levels of performance on the laboratory test wheel than the minimum required by law.
WARNING
The temperature grade for this tire is established for a tire that is properly inflated and not overloaded. Excessive
speed, under-inflation, or excessive loading, either separately or in combination, can cause heat buildup and tire
failure.
166 07 Wheels and tires
ProCarManuals.com
Page 150 of 208

The spare tire in your car is called a "Temporary Spare".
Recommended tire pressure (see the placard on the B-pillar or on the fuel filler door) should be maintained irrespective
of which position on the car the temporary spare tire is used on.
In the event of damage to this tire, a new one can be purchased from your Volvo retailer.
WARNING
Current legislation prohibits the use of the "Temporary Spare" tire other than as a temporary replacement for a
punctured tire. It must be replaced as soon as possible by a standard tire. Road holding and handling may be affected
with the "Temporary Spare" in use. Do not exceed 50 mph (80 km/h). Do not drive farther than 50 miles (80 km) on
a temporary spare tire.
CAUTION
The car must not be driven with wheels of different dimensions or with a spare tire other than the one that came with
the car. The use of different size wheels can seriously damage your car's transmission.
168 07 Wheels and tires
Wheel nuts
Types of wheel nuts
There are two different types of wheel nut, depending on whether the wheels are steel or aluminum.
Steel rims - low nut
Steel rims are normally secured using the low type of nut, although steel rims may also use the high type.
WARNING
Never use the short type of nut for aluminum wheels. This could cause the wheel to come loose.
Aluminum wheels - high nut
Only the high type of nut can be used for aluminum wheels. This is considerably different from other types of nut
because it has a rotating conical thrust washer.
ProCarManuals.com
Page 153 of 208

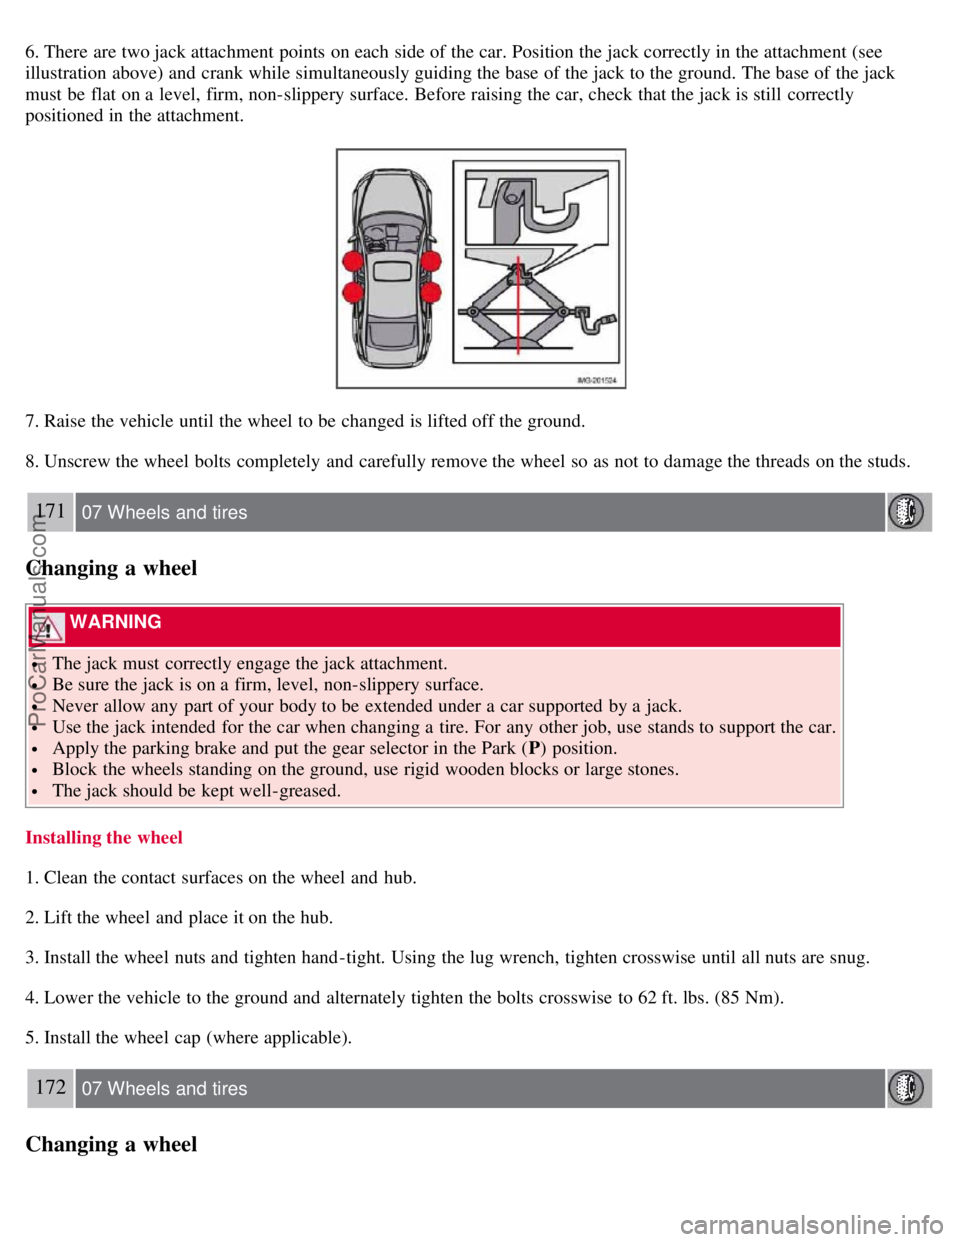
6. There are two jack attachment points on each side of the car. Position the jack correctly in the attachment (see
illustration above) and crank while simultaneously guiding the base of the jack to the ground. The base of the jack
must be flat on a level, firm, non-slippery surface. Before raising the car, check that the jack is still correctly
positioned in the attachment.
7. Raise the vehicle until the wheel to be changed is lifted off the ground.
8. Unscrew the wheel bolts completely and carefully remove the wheel so as not to damage the threads on the studs.
171 07 Wheels and tires
Changing a wheel
WARNING
The jack must correctly engage the jack attachment.
Be sure the jack is on a firm, level, non-slippery surface.
Never allow any part of your body to be extended under a car supported by a jack.
Use the jack intended for the car when changing a tire. For any other job, use stands to support the car.
Apply the parking brake and put the gear selector in the Park (P) position.
Block the wheels standing on the ground, use rigid wooden blocks or large stones.
The jack should be kept well-greased.
Installing the wheel
1. Clean the contact surfaces on the wheel and hub.
2. Lift the wheel and place it on the hub.
3. Install the wheel nuts and tighten hand -tight. Using the lug wrench, tighten crosswise until all nuts are snug.
4. Lower the vehicle to the ground and alternately tighten the bolts crosswise to 62 ft. lbs. (85 Nm).
5. Install the wheel cap (where applicable).
172 07 Wheels and tires
Changing a wheel
ProCarManuals.com
Page 156 of 208

Exterior plastic components
Cleaning exterior plastic components should be done with a cleaning agent specially designed for this purpose.
Solvents or stain removers should not be used. Consult your Volvo retailer.
NOTE
When washing the car, remember to remove dirt from the drain holes in the doors and sills.
NOTE
During high pressure washing, the spray mouthpiece must never be closer to the vehicle than 13" (30 cm). Do not
spray into the locks.
When washing or steam cleaning the engine, avoid spraying water or steam directly on the electrical components
or toward the rear side of the engine. Special moonroof cautions:
Always close the moonroof and sun shade before washing your vehicle.
Never use abrasive cleaning agents on the moonroof.
Never use wax on the rubber seals around the moonroof
Automatic washing - simple and quick
We do NOT recommend washing your car in an automatic wash during the first six months (because the paint will not
have hardened sufficiently).
An automatic wash is a simple and quick way to clean your car, but it is worth remembering that it may not be as
thorough as when you yourself go over the car with sponge and water. Keeping the underbody clean is most important,
especially in the winter. Some
177 08 Car care
Washing and cleaning the car
automatic washers do not have facilities for washing the underbody.
CAUTION
Before driving into an automatic car wash, turn off the optional rain sensor to avoid damaging the windshield
wipers.
Make sure that side view mirrors, auxiliary lamps, etc, are secure, and that any antenna(s) are retracted or
removed. Otherwise there is risk of the machine dislodging them.
Chromed wheels : Clean chrome-plated wheels using the same detergents used for the body of the vehicle.
Aggressive wheel-cleaning agents can permanently stain chrome-plated wheels
WARNING
When the car is driven immediately after being washed, apply the brakes several times in order to remove any
moisture from the brake linings.
Engine cleaning agents should not be used when the engine is warm. This constitutes a fire risk.
Exterior lighting
Condensation may form temporarily on the inside of the lenses of exterior lights such as headlights, fog lights, or
taillights. This is normal and the lights are designed to withstand moisture. Normally, condensation will dissipate after
the lights have been on for a short time.
ProCarManuals.com
Page 163 of 208

information on planning a trip.
Maintain your vehicle in accordance with your vehicle's maintenance schedule.
187 09 Maintenance and servicing
Hood and engine compartment
Opening the hood
To open the hood:
1. Pull the lever located under the left side of the dash to release the hood lock.
2. Lift the hood slightly.
3. Press up the release control located under the front edge of the hood (at the center) up to the right, and lift the hood.
WARNING
Check that the hood locks engage properly when closed.
188 09 Maintenance and servicing
Hood and engine compartment
Engine compartment
1. Cooling system expansion tank
ProCarManuals.com
Page 164 of 208

2. Power steering fluid reservoir (concealed behind the headlight)
3. Dipstick - engine oil
4. Radiator
5. Cooling fan
6. Washer fluid reservoir
7. Engine oil filler cap
8. Brake/clutch fluid reservoir
9. Battery
10. Relay/fuse box
11. Air cleaner
WARNING
The cooling fan may start or continue to operate (for up to 6 minutes) after the engine has been switched off.
189 09 Maintenance and servicing
Engine oil
Changing engine oil and oil filter
See page 231
for oil specifications. Refer to the Warranty and Service Records Information booklet for information on the
oil change intervals.
Volvo recommends
.
NOTE
Volvo does not recommend the use of oil additives.
Synthetic oil is not used when the oil is changed at the normal maintenance intervals except at owner request and at
additional charge. Please consult your Volvo retailer.
Checking and adding oil
The oil level should be checked every time the vehicle is refueled. This is especially important during the period up to the
first scheduled maintenance service
The car should be parked on a level surface when the oil is checked.
If the engine is warm , wait for at least 10- 15 minutes after the engine has been switched off before checking the oil.
ProCarManuals.com