2007 VOLVO S40 door lock
[x] Cancel search: door lockPage 4 of 208

09 Maintenance and servicing
Volvo maintenance184
Maintaining your car185
Hood and engine compartment187
Engine oil189
Fluids190
Wiper blades192
Battery193
Bulbs195
Replacing front bulbs196
Replacing taillight bulbs200
Replacing interior bulbs201
Fuses202
10 Audio
Audio functions 210
Radio functions213
Sirius satellite radio (option or
retailer-installed accessory)215
CD player/CD changer (option)
219
Audio menu223
11 Specifications
Label information226
Dimensions and weights228
Engine oil231
Engine specifications233
Electrical system234
Volvo programs236
6 01 Safety
General information
Shiftlock (automatic transmission)
When your car is parked, the gear selector is locked in the Park ( P) position. To release the selector from this position,
turn the ignition key to position II (or start the engine), depress the brake pedal, press the button on the front side of the
gear selector and move the selector from Park ( P).
Keylock (automatic transmission)
When the ignition is switched off, the gear selector must be in the Park ( P) position before the key can be removed
from the ignition switch.
Anti-lock Brake System (ABS)
The ABS system in your car performs a selfdiagnostic test when the vehicle first reaches the speed of approximately
12 mph (20 km/h). The brake pedal will pulsate several times and a sound may be audible from the ABS control
module. This is normal.
Fuel filler door
Press the button on the light switch panel when the car is at a standstill to open the fuel filler door.
Fuel filler cap
After refueling, close the fuel filler cap by turning it clockwise until it clicks into place. If this cap is not closed tightly
or if the engine is running when the car is refueled, the Malfunction Indicator Lamp ("Check Engine" light) may
indicate a fault.
Points to keep in mind
Before you operate your vehicle for the first time, please familiarize yourself with the new-engine oil consumption
information on page 189
. You should also be familiar with the information found in the chapters "Instruments and
controls," and "Starting and driving."
Information contained in the balance of the manual is extremely useful and should be read after operating the
vehicle for the first time.
The manual is structured so that it can be used for reference. For this reason, it should be kept in the vehicle for
ProCarManuals.com
Page 27 of 208

regulations existing in your state or province. Recent accident statistics have shown that children are safer in rear
seating positions than front seating positions when properly restrained. A child restraint system can help protect a child
in a vehicle. Here's what to look for when selecting a child restraint system:
It should have a label certifying that it meets applicable Federal Motor Vehicle Safety Standards (FMVSS 213) - or
in Canada, CMVSS 213.
Make sure the child restraint system is approved for the child's height, weight and development - the label required
by the standard or regulation, or instructions for infant restraints, typically provide this information.
In using any child restraint system, we urge you to carefully look over the instructions that are provided with the
restraint. Be sure you understand them and can use the device properly and safely in this vehicle. A misused child
restraint system can result in increased injuries for both the infant or child and other occupants in the vehicle.
When a child has outgrown the child safety seat, you should use the rear seat with the standard seat belt fastened. The
best way to help protect the child here is to place the child on a cushion so that the seat belt is properly located on the
hips (see the illustration on page 40
). Legislation in your state or province may mandate the use of a child seat or
cushion in combination with the seat belt, depending on the child's age and/or size. Please check local regulations.
A specially designed and tested booster cushion (not available in Canada) can be obtained from your Volvo retailer for
children weighing 33 - 80 lb. (15 - 36 kg) and 38-54 inches (97 - 137 cm) in height.
31 01 Safety
Child safety
WARNING
Do not use child safety seats or child booster cushions/backrests in the front passenger's seat. We also recommend
that children under 4 feet 7 inches (140 cm) in height who have outgrown these devices sit in the rear seat with the
seat belt fastened.
Keep vehicle doors and trunk locked and keep keys out of a child's reach. Unsupervised children could lock
themselves in an open trunk and risk injury. Children should be taught not to play in vehicles.
On hot days, the temperature in the trunk or vehicle interior can rise very quickly. Exposure to these high
temperatures for even a short period of time can cause heat-related injury or death. Small children are particularly at
risk.
32 01 Safety
Child safety
Automatic Locking Retractor/Emergency Locking Retractor
To make child seat installation easier, each seat belt (except for the driver's belt) is equipped with a locking mechanism
to help keep the seat belt taut.
When attaching the seat belt to a child seat:
Attach the seat belt to the child seat according to the child seat manufacturer's instructions.
Pull the seat belt out as far as possible.
Insert the seat belt latch plate into the buckle (lock) in the usual way.
Release the seat belt and pull it taut around the child seat.
ProCarManuals.com
Page 41 of 208

47 02 Instruments and controls
Instrument overview
1. Steering wheel adjustment66
2. Hood opener187
3. Controls in front doors(see inset illustration at next page)
4. Left steering wheel lever60
5. Lighting panel58
6. Door open handle and locking button115
7. Climate system air vent84
8. Side window air vent84
9. Cruise control63
10. Horn, airbag18
11. Main instrument panel49
12. Audio controls (option)211
13. Right steering wheel lever64
14. Ignition switch128
15. Moonroof control (option)72
16. Not in use
17. Movement detector (option), alarm sensor118
18. Courtesy lighting switch97
19. Driver's side reading light97
20. Passenger's side reading light97
21. Seat belt reminder53
ProCarManuals.com
Page 42 of 208

22. Rear-view mirror70
23. Display for climate control, personal settings, and audio system74/210
24. Audio system 210
25. Controls for personal settings and audio system74/210
26. Controls for climate system 85/87
27. Gear selector, manual 133-134
Gear selector, automatic135
28. Hazard warning flashers66
29. Door open handle, and locking button115
30. Glove compartment100/116
31. Parking brake 67
32. 12-volt socket57
33. Not in use
34. Not in use
48 02 Instruments and controls
Instrument overview
Control panel in driver's door
1. Lockout switch for rear windows68
2. Power windows68
3. Door mirror button, driver's side71
4. Door mirror adjustment control71
5. Door mirror button, passenger's side71
49 02 Instruments and controls
Instrument panel
Instrument panel
ProCarManuals.com
Page 52 of 208

The single rear fog light is located in the driver's side taillight cluster.
The rear fog light will only function in combination with the high/low beam headlights or the optional front fog lights.
1. Turn the ignition key to position II.
2. Press button 5 to turn on the rear fog light.
An indicator light in the button illuminates when the rear fog light is on.
NOTE
The rear fog light is considerably brighter than the normal taillights and should be used only when conditions such as
fog, rain, snow, smoke or dust reduce visibility for other vehicles to less than 500 ft. (150 meters).
59 02 Instruments and controls
Lighting panel
Instrument panel lighting
The instrument panel lighting illuminates when the ignition is in position II and the light switch (1) is in either position
or .
NOTE
To make it easier to read the odometer, trip odometer, clock, and ambient temperature, these gauges illuminate when
the vehicle is unlocked and when the key has been removed from the ignition switch. The lighting will go out when
the vehicle is locked.
Move the thumb wheel (2) up to increase brightness or down to decrease brightness.
Unlocking the fuel filler door
With the ignition switched off, press button 4 to unlock the fuel filler door. Please note that the fuel filler door will
remain unlocked until the car begins to move forward.
An audible click will be heard when the fuel filler door re-locks.
60 02 Instruments and controls
Left-side steering wheel lever
Lever positions
ProCarManuals.com
Page 54 of 208

When you leave your car at night, you can make use of the home safe lighting function to illuminate the area in front
of the car.
1. Remove the key from the ignition switch.
2. Pull the direction indicator lever as far as possible towards the steering wheel (to position 4) and release it.
3. Exit the car and lock the doors.
The headlights and parking lights will illuminate and remain on for 30
1, 60 or 90 seconds. The time interval can be
changed according to your preferences by using the Personal Settings function, see page 74
for more information.
1 Factory setting
61 02 Instruments and controls
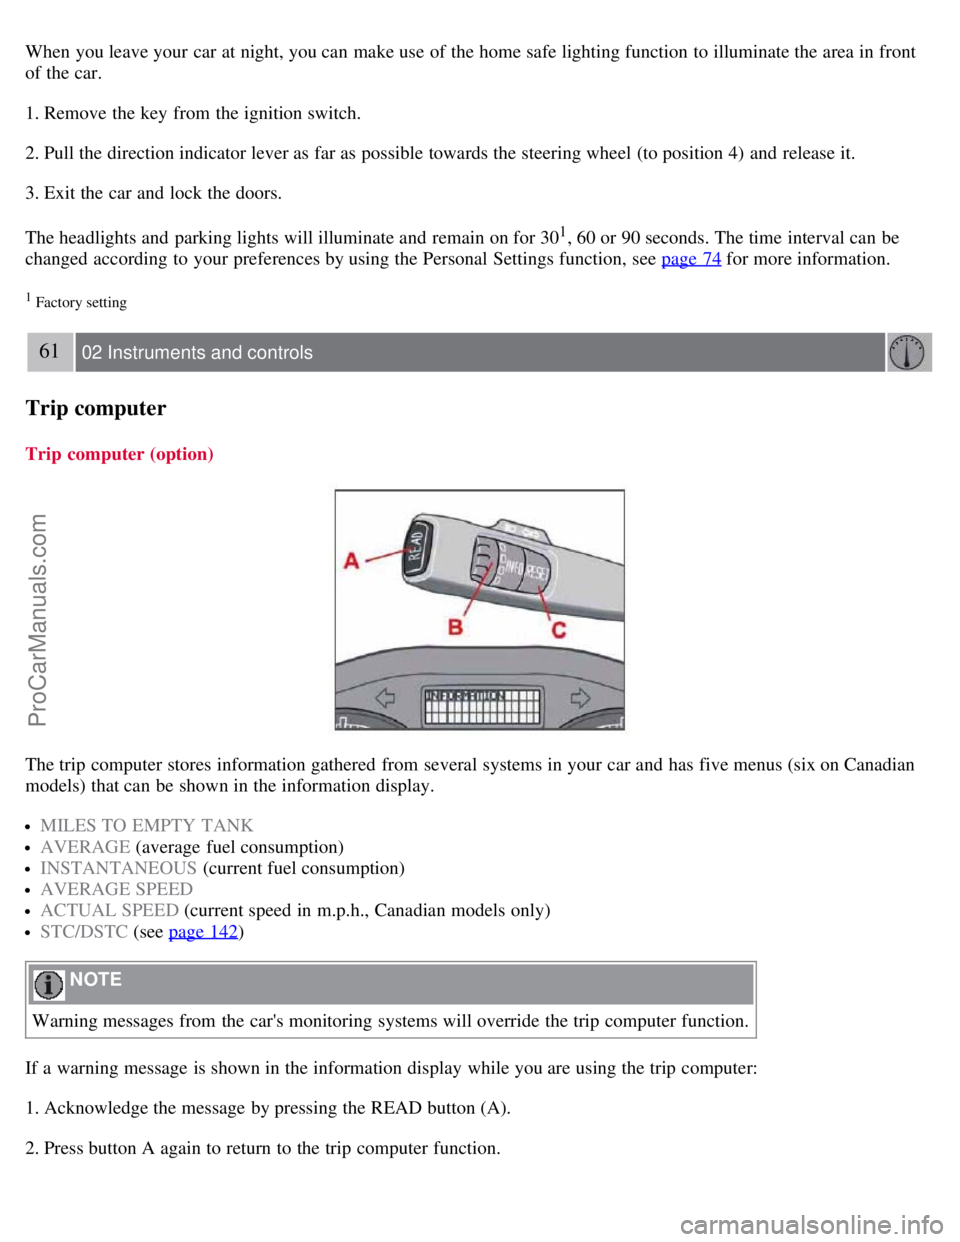
Trip computer
Trip computer (option)
The trip computer stores information gathered from several systems in your car and has five menus (six on Canadian
models) that can be shown in the information display.
MILES TO EMPTY TANK
AVERAGE (average fuel consumption)
INSTANTANEOUS (current fuel consumption)
AVERAGE SPEED
ACTUAL SPEED (current speed in m.p.h., Canadian models only)
STC/DSTC (see page 142)
NOTE
Warning messages from the car's monitoring systems will override the trip computer function.
If a warning message is shown in the information display while you are using the trip computer:
1. Acknowledge the message by pressing the READ button (A).
2. Press button A again to return to the trip computer function.
ProCarManuals.com
Page 63 of 208

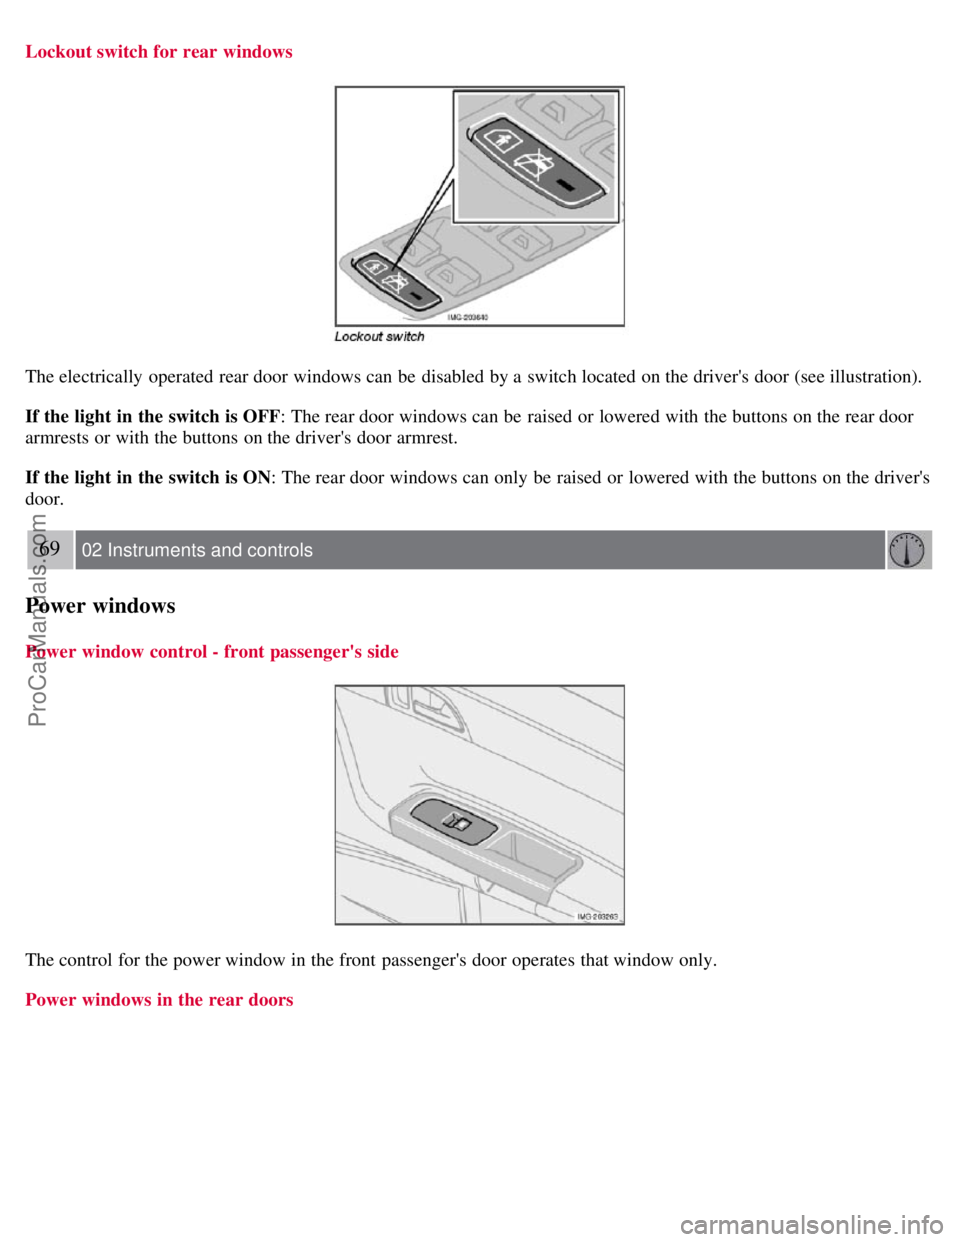
Lockout switch for rear windows
The electrically operated rear door windows can be disabled by a switch located on the driver's door (see illustration).
If the light in the switch is OFF: The rear door windows can be raised or lowered with the buttons on the rear door
armrests or with the buttons on the driver's door armrest.
If the light in the switch is ON: The rear door windows can only be raised or lowered with the buttons on the driver's
door.
69 02 Instruments and controls
Power windows
Power window control - front passenger's side
The control for the power window in the front passenger's door operates that window only.
Power windows in the rear doors
ProCarManuals.com
Page 66 of 208

3. Press button (1) for at least 3 seconds to display the number of the current magnetic zone.
4. Press button (1) repeatedly until the number for the required geographical area (1-15) is displayed. "C" will be
displayed again.
5. Drive slowly in a circle at a maximum speed of 6 m.p.h. (10 km/h) until a compass direction is displayed.
Calibration is complete.
Power door mirrors
To adjust the mirrors:
Driver's door mirror:
Press the L button (a light in the switch will go on) to activate the adjustment control. Use this control to adjust the
driver's door mirror.
Passenger's door mirror:
Press the R switch (a light in the switch will go on) to activate the adjustment control. Use this control to adjust the
passenger's door mirror.
After you have adjusted the mirror(s), press the L or R switch again (the LED will go out) to deactivate the adjustment
control.
Storing the mirrors' position
The position of the door mirrors is stored when the vehicle is locked. The next time the driver's door is unlocked with
the same remote control and that door is opened within 2 minutes, the optional power driver's seat and side door
ProCarManuals.com