2007 VOLKSWAGEN JETTA high
[x] Cancel search: highPage 171 of 477

Booklet 2.1 Safety first
Side Curtain Protection
provide supplemental protection to properly restrained oc
cupants.
Fi g. 28 Th e Side Curtain Pro tec tio n™ a irba gs loca ted above the w indows on bo th s ides .
The S ide Curt ain airbags are in th e
header area on both side s of the veh icle 28 .
Th e general loca tion is iden tified by the word
The Side Curtain Protec tion airbag system
a irba g sys te m suppl eme nts the safe ty belts and
ca n help to r educe the risk of injury for occu
pant s' heads and upper tor so on the sid e of the
ve hicl e th at is s tru ck in a side collisio n . The Side
C urtain
airbag inflates only in sid e
impa cts and only when the veh icle acce le ration
regi stere d by the control unit i s high enough. If
thi s rate is below the refe rence value pro
grammed into th e co ntrol unit, the side airba gs
w ill not be tri gge re d , eve n though the car may be
badly damag ed as a resu lt of th e co llision. It is
not pos sib le to define an airbag triggering range
that will cover eve ry po ssible ang le of impact ,
s inc e th e circum stanc es will vary co nsidera bly
be tween o ne co llisio n and another. Important
fa ctors include , for example, the nat ure {hard or
so ft) o f the impactin g
the ang le of im
pa ct, vehicle speed, etc. 49, "How Sid e
Curtain Protectio n airbags work" .
As ide fr om the ir nor mal sa fe ty function , safety
b elt s wo rk to he lp keep the dr iver or front pas -
48 Airbag syste m
senge r in po sit io n in the event of a co llision so
that t he S ide Curta in Protectio n™ a irbags ca n
provid e prot ection .
Th e airbag syste m is not a subs titut e for your
safe ty belt. Hath er, it is part of the overall occu
pant r estraint system in you r ve hicle. Always re
memb er that the airbag system can only help to
protect you if you are wearing your safety belt
and wearing it prop erl y. This is another reaso n
you sh ould alwa ys wear your safety belt s,
n o t ju st becau se the law r equir es you to do so
13, "Safety belts".
Veh icle damage, repair costs or eve n the lack of
vehicle damage is not necessa rily an indi cation
of prop er airbag operation. lt is imp orta nt to re
m emb er that while the Side Curtain Protec-
ti on
airbag system is de sig ned to help reduce
the like lihood of se rious injuries, oth er injuri es,
for examp le, swe lling, bruis ing, and minor abra
s ions can als o be assoc iated w it h th ese a irbags.
too, these airba gs w ill deploy onl y
once and on ly in certain kinds of collisions
yo ur safet y belt s are a lways there to offer prote c
ti on in thos e accide nts in whi ch airbags are not
s upp osed
depl oy or when they hav e al rea dy
d eployed .
Page 177 of 477
Booklet 2.1 Safety first
8. Rear facing child restraint systems, manufac
tured on or alter December l, 1999.
( W hen the res tra in t sys te m comes e quipp ed
w ith a re mo vable ba se, co mpli ance ha s to be
ce rtified with or wit hout the ba se).
• Britax Hand le wit h Care
191
• Centur y Ass ura 4553
• Centu ry Sm art Fit 4 543
• Cosco Arriva 02727
• Eve nflo Disc overy A dju st 212
• Evenflo Fir st Ch oice
204
• Gra co Infant 8 11 57
C. For war d-facing convertible child res trai nt
systems, manufactured on or after Dece mber l ,
1999:
• Brit ax Rou ndabou t
161
• Brit ax Expressway J SOFIX
• Centur y Enco re
• Century 1000
• Cosco Ol ymp ia n 0280 3
• Cosco Touriv a 02519
• Even flo Horizon V 425
• Evenfl o Meda llion 25 4
• Saf ety 1s t Co mfort Ride 22-400
D. Forward-fac ing toddler /be lt po sitioning
booster systems, manufactur ed on or after D e
cember l, 1999 :
• Brita x Roadster
9004
• Century Next Step 4920
• Cosco High Back Booste r
• Eve nfl o Hig ht Fit 2 45
L'.0, WARNING
To redu ce the ri sk of serio us inju ry, mak e sur e
that the PASSENGER AIR BAG OFF li ght comes
on and sta ys on when eve r a child restraint is
in stall ed on the front pa ssenger sea t and the
ignition is switched on.
• Take the child res traint
the front pa s
s enger seat a nd install it properl y at one of the
rear seat position s if th e PASSENGER AIR BAG
OFF light does not sta y o n.
• Have the airbag system insp ec ted by yo ur
aut hori zed Volkswag en dealer immediately.
Important safety instructions for using child seats
Correct use of chil d seat s substant ially reduce s the risk of injury in an ac cident!
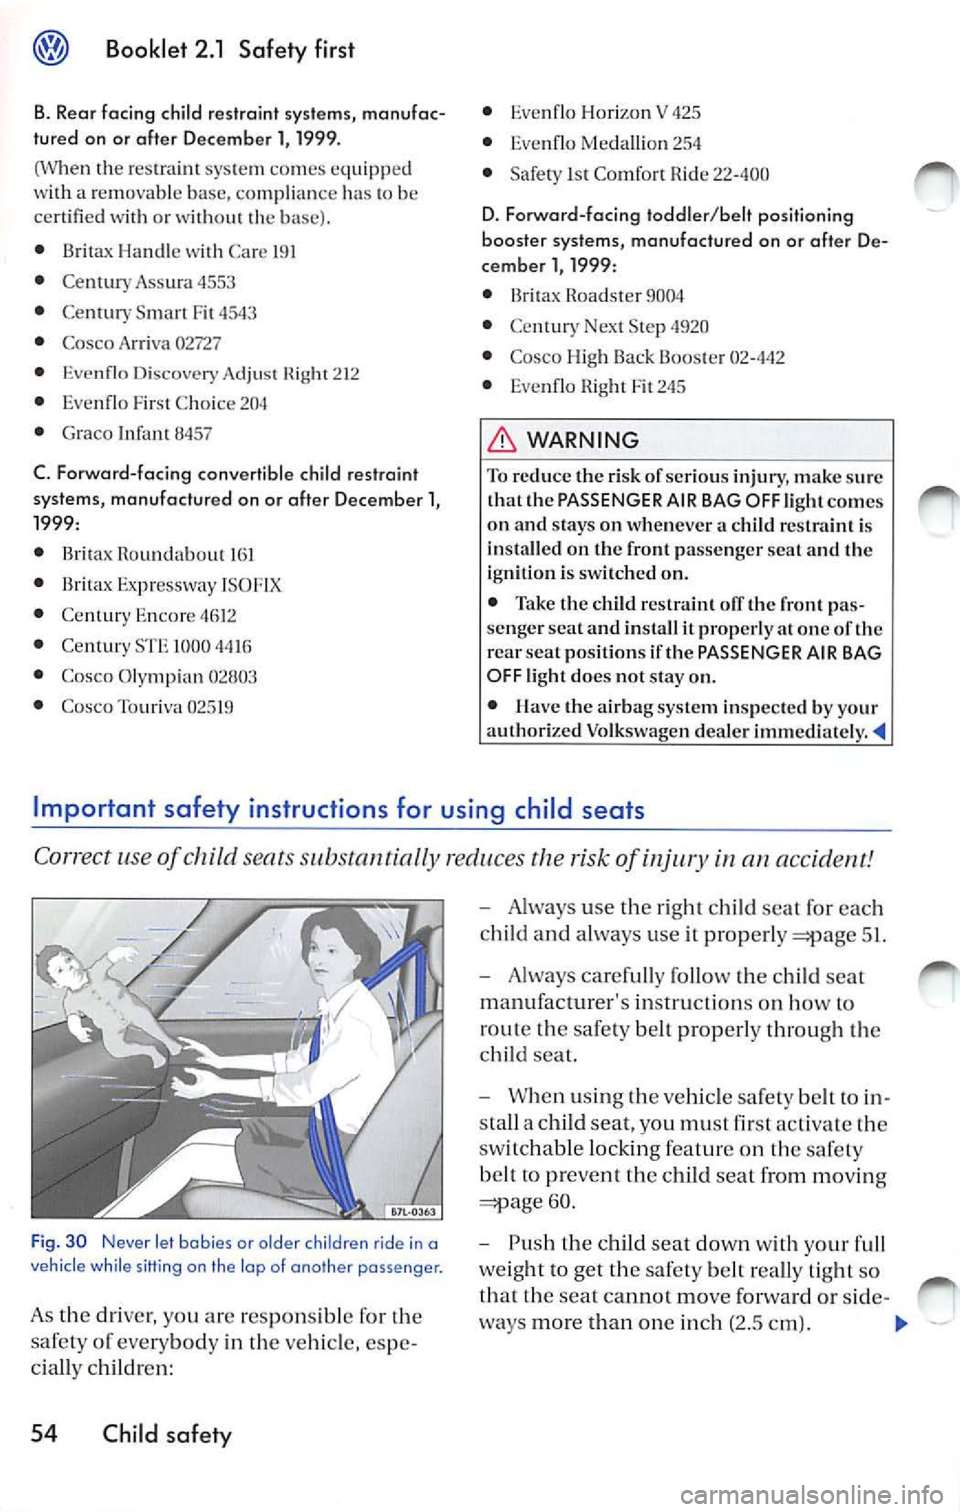
Fi g. 3 0 Neve r le t babi es or older c hildren rid e in a
v ehicl e wh ile s itting on th e lop o f a no th er passenge r.
As the driver, yo u ar e res pon sible for th e
s a fety of eve ry bod y in th e ve hicle , espe
ci all y chil dren:
54 Child safety
-Alway s use the right child seat for each
c hi ld and alwa ys use it prop erly
51.
- Alw ays caref ully foll ow the child seat
m anu fac turer 's in stru ction s on how to
rou te the sa fe ty bel t pr oper ly throu gh
child seat.
- When usin g th e ve h icle safety belt
10 in
s ta ll a child seat, you must fir st a ctivat e
sw itchab le lock ing fea tur e on th e safe ty
b elt
p reven t th e child seal from mov ing
60.
- Push th e c hild sea t d ow n with yo ur full
weig ht to get the sa fe ty belt re all y light so
th at the seat cannot mov e for ward or side -
w ays more th an one inch (2.5 cm ).
»,,
Page 193 of 477

Booklet 2.1 Safety first
Releasing
- Loo sen th e te nsio n on th e stra p fo l
lo wing the CRS manufacturer's in struc
ti on s
- Depre ss the spring catc h on the hook.
- Hold th e spr ing catch in th e depr ess ed
po siti on.
- Move the hook in direct io n of the
ve
hicle floor so that th ere is enough spa ce to
r e le a se th e co nnector from th e lower an
c hora ge.
- Rele a se the tether strap
WARNING
Imp roper use of the LATCH system can in
crease the risk of serious personal injury and
death in an accide nt.
WARNING (continued )
• These anchors were developed solely for
c hild seals using the "LATCH" system.
• Never allach other child seats, belts or
o th er obj ects lo these an chor s.
• Alwa ys make sure that you hear a click
when latchin g the seat in pl ace. If you do not
h ea r a cli ck th e seal is not secure and cou ld fly
forward and
the interior of the vehicle, or
be ejec ted from the vehicl e.
WARNING
Improp er installation of child restraint s will
increase the ri sk of injur y in an accident.
• Alw ays follow the
manufacturer's in
s tru ction s for prop er in stallation of the
and prop er use te ther strap s as well as the
l owe r an chorages or safe ty belts in your ve
hicl e.
• Alway s read and heed th e important infor
mation and WARNINGS about ch ild safety and
the installation of CRSs
51, "Child
s afety ".
Where can I get additional information about child
restraints and their use?
There are numb er of so urces of additiona l in
for mation ab o u1 se )ec 1ion, insta lla tion and
u se :
N HTSA advises that the bes t child safety
i s
t h e o ne fits your child and fits in your ve
hi cle, a nd that you will u se c orrectly and consis
tent ly.
Tr y before you bu y!
National Highwa y
Safe ty Adm inistration
Tel.: (888) DAS H-2 -DOT
www.nh tsa. dot.gov
P rog ra m Profess io nals
T e l.: (734) 324-7550
70 Child safety
W\vw.prog ramprofessionnls.org
N ational SAFE KIDS Campaign
Te l.: (202) 662-0600
WW\V.safek ids.o rg
Sa fet y BeltSafe U.S .A
T el. : (800 ) 745-SA FE (E nglish )
Te l.: (80 0) 74 7-SANO (Spa nish)
www .carsea t.o rg
Volk swa gen Custo m er C AHE
T e l.: (800) 822-8987
Tran sport Canada
Te l.: (8 88) 675-6863
www. tc .gc .ca
Page 206 of 477

Booklet 3.1 Controls and Equipment
help you t o fami liarize yo urself the control s and displays
quickly.
Re lease hand le
Central locking button
Light switc h ............ •... ..•.
A ir out le ts
Th um b whee l for ope nin g and
cl osing th e air outl et
T urn sig n al a nd high beam head-
li ght lever ..................... .
In strum ent clu ste r:
Inst rum ents ...... ........... .
Display s .... .... ........ .... .
Warn ing lights ............... .
Lever for win dshi eld wipe r and
was her an d for Mu lti-fun ctio n
indicator. ............ ......... . .
Sto rage compartm ent or ai r outlet
fo r in di rec t ve ntilation .......... .
Emerge ncy flas her sw itch ... ... . .
Warni ng light fo r fro nt passe nger
a irbag switched off 2.1 ,
c h ap te r "Mo nitoring th e advan ced
a irb ag sys te m "
Fron t passe nge r a irb ag 2.1, c hap te r "Airbag
sys tem"
Openi ng leve r and lock for glove
co mp artm ent
Fuel fi ller flap release b utton
= bo okle t 3.2, cha pter "F illing
Hea r lid releas e butt on and overr ide
lock .... .. .... ....... ....... ... .
Power w indow switch es ..... ... .
Sw it c h for adj ust ing the pow er mir rors ................. .
Engine hood re lease leve r 3.2. cha pte r "Op ening the
e ngi ne
In strument cluster illumin atio n
49
5
7
20
53 .9
48
37
sw itch . . . . . . . . . . . . . . . . . . . . . . . . . .
C rui se contr ol leve r
Driv era irha g 2.1 , cha pter
"A irb ag
I lorn {wo rks onl y whe n the ig ni tio n
is on)
L eve r for adjustable steering
co lumn ...... ................. .
Ig niti on lock ................... .
Thumb w hee l fo r l eft se at heati ng
Co ntr ols for
Hea tin g and ve ntilat ion . ..... .
Clima tic ........ ..... ....... .
Clima troni c ................. .
Ad ditional storage comp artme nt
Powe r outl et . ............ ... .
ON/OFF b utton fo r Elec tronic Sta
b ili za tion Pr ogram {ESP) or Ant i
sli p regu latio n (ASH)
Park ing brak e re lease leve r ...... .
Cup hold er ... .... .... .........•
Levers in the center conso le
Sh ift le ver (ma nual
t ra nsmi ssio n) ....... .... .
Se lec tor le ve r (A utomatic tran s-
111i ssio n / Dir ect shi ft gearbox)
Thu111b whee l for r ight seat
heat ing .. .... ..... .... ........ .
So un d sys te111 =book le t
Tips
90
93
80
8 1
84
73
73
104
• Some feature s m en tion ed arc s ta nd ard
e quip111en t o n so me m od els on ly and opti ons on
o th ers.
• For tec hn ica l reasons, t he
of
t h e sw itches and indica tor/warn ing lig h ts ma y
di ffer. T he
factor is t he sy mbol o n th e
sw itch its elf.
Instrument panel 3
Page 209 of 477

Booklet 3.1 Controls and Equipment
Tachometer
The tachomete r display s the engi ne s pee d in rev olutions p er minute (rpm).
If, fo r examp le, the n eedle is di rec 1ly ove r 1h e 2.
this corre sp on ds 10 a n eng in e sp ee d of2000 rpm
( r evo lution s per minut e).
T he red zone on the dial indi ca tes 1he m ax imum
e n gin e spee d th at may be use d brie fly w hen the
e n gin e is warm an d aft er it has bee n b roken in
properly. However . it is ad visa ble 10 up sh if1 or
m ove 1he se lec 1o r lev er 1 0
D (or take yo ur fool ofT
th e acce le rator pedal 10 slow down ) b efo re I h e
n eed le rea ches the red zo ne.
Engine coolant tempera ture gauge
Th.i s gaug e sh ow s the en gi ne coola nt tem peratur e.
Fi g. 4 Sect ion of th e i nstrument cluster: engine
coola nt tempe ra tu re gauge
Engine cold
Avoid high en gin e s pee ds and heavy en gin e
l o ad s
nee dle
s h ould b e in th e middl e of the ga uge. The lem
pe rat ur e ma y also rise whe n the en gin e is
work ing hard, espec iall y at high out sid e te mp er
a tur es. D o no t worry if th e wa rning light and a
warning message does not appea r in th e displa y.
I f th e sy mbol
Jc: and a wa rning text app ear th e
d is pla y, eith er the coo la n1 t emp eratur e is
hi gh or the coo la nt l eve l is 100 low "Tips a nd Advice", c hapte r "Coo lant."
6 Instrument panel
N ee dle in warning zon e©
If need le is in the warning zo ne, the symb ol wi ll light up. If yo ur vehicle is equi pp ed wit h
1hc m essage displa y feature, an in forma tion tex t
wi ll al so appea r in the display . See yo ur a uth o
rize d Volksw age n dea le r fo r m ore inform atio n .
the coo la nt 1e mp erature is too high, or th e
coo lanl le vel loo low . Stop the vehicle and
ofT the e ngine. Check the coo la nt leve l "Ti ps and Advice", c hapter
Do not cont inue driving if th e coo lant level is
c orre ct and yo u have wa rnin g in th e in stru
ment clus1e r te llin g yo u th ere is a prob le m. Con-
the nea res t auth orized Volk swagen dea le r
fo r ass is ta nce.
WARNING
Stop! Before working in the en gin e co mpart
ment, alwa ys read a nd heed all WARNI NGS
"Tips and Advice", c hapter
"Wo rking in th e en gi ne compartment. " The
e ngin e co mpartm ent of any motor veh icle is a
potentiall y dang erou s area and can ca use se
riou s pers onal injury .
of th e air inlet red uce the
coo ling efTec1 of th e coo la nt. If is ho1 out sid e drive high e ngin e loads, th ere is a
ri sk of the en gin e ove rhea tin g. .,
Page 214 of 477

Booklet 3.1 Control s and Equipment
• Wh en th e ve hicle is stat io nar y or tra vellin g at
ve ry lo w sp ee ds, the te mp era tur e di sp la ye d m ay
b e sli ghtl y hi gher th an th e actua l o ut side te m -as res ult of th e heat r adi ate d fr om th e
Applies to vehicles : With Highline o r Midline instrument cluster
Warning or information te xt in the disp lay
Malfun ction s are s hown in th e di spl ay wa rnin g light s a nd warning infor
m ation me ssages.
Fig . 9 Warn ing text in the display of a Midline in st rumen t cluster: STO P Oi l pressure
T he sys te m run s a c hec k on ce rtai n co mpo nem s
an d fun cti on s w hen th e ig niti on is sw itc hed on
an d whil e the ve hicle is m ov ing. Fun ction al 111 al
f un cti on s are indi cate d by sy mbols w ith warn
in gs a nd in form ation t exts in th e di sp lay. An
ac ou sti c w arnin g is give n in certain cases. The
scree n may vary according to th e ve rs ion of th e
in strum ent cluste r yo ur vehicle has.
Warning symbo ls
Th ere ar e re d warnin g sy111bols (p riority I) and
ye llo w warnin g sy mb ols ( prior ity 2).
E xamp les of priority
1 wa rning s (red)
• Bra ke sys te m symb ol
or wi th th e
wa rnin g tex t STOP Broke fluid Owner 's manual!
• Coo lant symbol
with the w arnin g STOP Check coolant! Owner's manual!
• En gin e oil pr essure sy mbol
't=:r: with the
w arnin g text STOP Oil pressure engine off!
Owner's manual!.
If one o f the se malfun ction s occ urs, th e wa rnin g
li g ht will flas h or lig h t u p and will be acco 111pa
ni ecl b y three acoustic warning s. This is a clan
ger wa rnin g. Pull off th e roa d where it is sa fe
a nd sw itch off the e ng in e i111m edi ate ly . Co nta ct
your auth ori zed Vo lkswagen dea ler or a q uali
fi ed wo rks hop imm edia te ly and h ave the m al
fun ctio n r epa ired .
I f severa l priorit y
wa rnin gs are detec ted at th e
sa me tim e, the symb ols w ill ap pe ar one aft er th e
o th er fo r abo ut 2 seco nd s at a tim e.
a se t
ti 111e , th e in fo rm ati on tex t wi ll disap pear, how
eve r th e sy mbo l w ill app ear in th e dis pl ay a nd
s tay on as a re 111ind er for yo u to have the m al
f un cti on r epai red.
lo ng as pri or ity I wa rnin g is sh own in the
di sp lay, yo u will not be abl e to see an y o ther
m en us
7.
Examples of priority 2 warnings (yellow):
• Fu el sy mb ol with th e in fo rm ation tex t
Pl ease refuel!
• Windshie ld was her flui d sy mb ol with th e
i n fo rm atio n tex t Top up wa sh fluid!.
•
p ad sy 111b ol with inform atio n tex t
Check broke pods!
• Imm obili zer sy mb ol with th e info rmati on
tex t Immobilizer active!
If one o f th ese situ ations occ urs,
wa rnin g
sy mb ol li ght s up, an d yo u wi ll hear one acou stic
warning . C hec k th e c ause as soon as poss ible.
If seve ral p riorit y
wa rnin gs arc detec te d at th e
sa me tim e, th e sy mb ols di spl aye d on e aft er
th e oth er fo r ab out 2 seco nds at a tim e. a
se t tim e, th e inf ormati on te xt w ill disa ppe ar,
ho weve r the symb ol w ill app ear at the sid e of th e
di sp lay a nd stay on
a re 111ind er fo r yo u t o
c h eck th e c ause as so on as poss ible .
Pr ior ity 2 warnin g m essa ges will n ot be sh ow n
until all Priority I warnin g m ess ages have bee n
co rrec te d!
Instrument panel 11
Page 216 of 477

Booklet 3.1 Controls and Equipment
Applies to vehicles: H ighline instrumen t cluster and multi-function steering wheel
Example of using the menus with the mult i- function steering wheel
All menus in the i nstrwnen t cluster can be used following the steps described here.
Fig . 10 In the multi -fu nction steering wh eel: button lo toggle between the disp lays, button to con
f irm o se lect ion and button © to select o menu or
submenu.
T he se lling of a speed warning w ill be used
as an exam pie of how lo use the menus .
The speed warn ing feat ure is a helpfu l re
minder if you are, for example, usi ng
wi nter ti res whi ch arc no t suit ed for th e top
s p ee d of
ve hicle.
l. Opening the Set up menu
Switch on the ignition. A ve hicle p icto
gram appea rs .
Press butlon the mult ifunct io n
s tee rin g whee l until the Set up (Settings)
menu is disp layed.
The example menu Winter tires 2. Opening the Winter
tires menu
hig hli ght
the menu item Winier tires. The hig h
li ghted menu item is between two hori
zonta l lines. Th ere is also a trian gle on the
Mark the m enu opt ion Wint er tire s.
Press The Winter tires
menu opens.
3. Setting th e speed warning
Highlight th e menu it em+ 5 mi/h
( (+
10 km /h )) or 5 mi /h ((-10 km /h)) usi ng
th e ar row keys and p ress
butto n to
increa se or decrease the speed s how n at
th e top of t he di sp lay.
4 . Switching the speed warning on
and off
U sing th e arrow keys , select th e menu
i tem
On I Off a nd press to
sw itch the sp ee d wa rnin g on o r off. When
t h e s peed warnin g is swi tched olT, three
da she s --- appea r at the top of the disp lay .
5. Exiting the Winter tires menu
Se lect the m enu item Back .
The fu nction "Winter tires" w ill generate a v is
ible and acoustic warn ing once the ve hicl e has
r eac hed th e set speed .
In di splay
Winter tires
X mi /h (X km/ h) or--- Function
Th e na m e of the displaye d m enu
D isp lay of the speed cur ren tly set
or dashes if the function is switched off.
ON/OFF Swi tc h es the fu nction on or
+ 5 mi /h (+10 km/h ) In crease the set va lue by 5 mp h (10 km/h ).
Instrument pan el 13
Page 227 of 477

Booklet 3.1 Controls and Equipment
Generator
This warning light signal s a m alfun ction in ge nerator.
Th e w arni ng lig ht lig ht s up when th e ig niti on
i s sw itch ed on . It sh ould go o ut when th e e ngin e
s tart s runnin g.
If th e w arnin g ligh t
lights up while driv ing .
t h e ge nera to r i s no lo nge r ch a rgi ng th e ba ucry.
Burned-out light bulb
Yo u sh ou ld imm ed ia tely drive 1 0 q u al ifie d d eale rs hip .
I l owever, you sh o uld avoid usin g elec tr ic a l
is no t ab so lut ely necessa ry be
cau se w ill d rain th e ba ttery furth er.
The warning light lights a bul b exte rior li ghtin g is
T he w arnin g lig ht light s up when a bulb i n vehicl e's exte ri or light in g is no t
Turn
Th e warnin g light fla sh es w hen sig nal s ar e bein g use d.
Depen ding on w hich tu rn signa l is opera ted, ei
th er th e lef t or in dicato r la mp fl ashes.
Bo th indi cato r light s w ill flas h at th e sam e tim e the em erge ncy wa rnin g light s are
sw itch ed on.
I f one tu rn sig nal fa ils, th e in dica to r l amp will
s tart flas hin g tw ice as
Engine coolant level I temperatu re
Th e warning symbo l li ght s if th e coolant is too high or if
coolant l eve l is too low .
There is a fault if:
• The wa rning symbol do es not go out again a few seco nds.
• Th e warning symb ol li g ht s up or fl ashes
w hil e th e ve hicle is m ov in g. Thr ee wa rnings
Thi s m ean s that eith er th e coo la nt leve l is too
l ow or coolant t emp eratur e is hi gh .
C oo lant level too low
The followin g information tex t is di spla yed: STOP Check coolant Owner's manual! 3.2 "Tip s and Advice" , c h apt er
"C oolant "
24 Instrument panel
Fir st l ook at th e coo la nt te mp eratur e gauge. If
t h e nee dle is in th e no rmal ran ge, top ofTw ith
coo lant at
ea rliest
Coo lant temperature too high
The fo llow ing in form atio n t ext is di spla yed: ST OP Check coolant Owner's manual!.
lo ok a t the coo la nt gau ge. The is 1 00 high if the need le is
over 10 th e far ri ght on th e di al. Stop the veh icle, olT the engi ne and wait for it to cool
down. Chec k th e coo lant level.
I f
coo la nt leve l is corr ect, th e ove rheat ing
m ay be cau sed b y fa n C hec k th e
r a diat or fa n fuse and have re pla ced if neces
s a ry 3 .2 'Tip s and /\dvi ce", c h apt er
" Fu ses".