2007 VOLKSWAGEN GOLF tow
[x] Cancel search: towPage 133 of 444
replace any airbag in your vehicle and assure system effectiveness in a crash.
Booklet 2.1 Safety first
Never permit salvaged or recycled ai rb ags
to be installed in your
low ering th e veh icle, changing the
s tiffness of th e suspe nsion , including the spring s, suspe nsion struts, shock absorber s etc.
ca n change th e forces that are meas ured by th e
air bag senso rs and sen t to the electron ic control
unit. s u sp ensio n chang es for ample, increase the force level s m eas ured by the
sensors and make the airb ag system deploy in
cras hes in wh ic h it wou ld no t dep loy if th e
c h a nges had no t bee n made. kind s of ch a nges may reduce the force leve ls mea sured by the senso rs and preve nt the airbag from ploying whe n it should.
The Advanced Airbag will not work the
way it s houl d if th e o ptional safety belt exte nder is not removed from the safety belt latch when
the seat i s occup ie d and the sa fe ty belt is not bei ng used. Leaving th e extender attach ed to the safety belt buck le when the front seat is
s ig na l the airbag control unit that the front seat is occup ied and that the sa fety belt is being used. The elec tron ic co ntro l unit for the airbag system
will then rece ive incorrect information that will cause the safe ty belt pretens ioner to deploy
has deployed can not be re pair ed.
T he entir e safety belt must be rep laced . For that
rea son, a lways re move the sa fety belt exte nde r
w hen it is not nee ded and stow it sa fely
23. In ad d ition, the safet y belt extender must never be used to secure child rest raint s to
th e front passenge r seat.
T he se ns
ors in the safety belt buckle for the driver and front passenge r seat tell th e troni c control module if the safe ty belt is latc hed or If th e sa fe ty belt is being used, the front airbag
will deploy
at a sl ightly highe r rate of hi cle dece leration than if the sa fe ty belt is not
b eing used . Therefore , in a particular collision, it
i s possible that an airbag will not deplo y at a seatin g position where the safety belt is being
u sed but infla te at the position where the safe ty belt is not bei ng use d. It is important that n othing interfere with the safety belt buck les so
that the sensors can send the correct tion abou t safety belt use to the elec tron ic
C hanging the ve hicl e's suspension including
us e of unapproved tire-rim combinations ca n change Advanced Airbag performance and crease the risk of se rious personal injury in a
c ras h.
Never install s uspension components that do not h ave the same performance ist ics as th e components originally in stalled on your ve hicl e.
Never use tire-rim combin a ti o ns th at have not been approved by Volkswage n.
Leaving the optional safety belt extender tached to th e safety belt latch on the front senger seat when the safety belt is not being
u se d will prevent the Adva nced fro m functioning properl y and ca n in crease the risk of se riou s pe rso nal injury in a
Always remove the safety belt extende r
w hen it is not needed and stow it safely whe n
it is not bei ng used with the safety belt.
Never use th e safety belt exte nder to secure
a c hild restraint at any seating position.
buckle and the cente r conso le can cause the sensors
Airbag system 45
Page 155 of 444
2.1 Safety first
cally when the belt is wound all the way back into the retractor.
-the red button on the safety belt
buckle.
The belt tongue will pop out of the
-Guide the safety belt back by ha nd so
that it rolls easily onto the retractor and the
trim around the retractor will not be
aged.
Always let th e sa fe ty belt retract completely into its s towed position. The sa fety belt can now be used as an ordinary safety belt withou t th e
vated inadvertently, the safety belt must be
WARNING
Improperly installed child seats increase the risk of serious personal injury and death in a
collision .
Never unfasten the safety belt to deactivate the switchable locking feature for child
ously injured in an accident.
WARNINGS whenever using a child restrained in a vehicle
i s being page 53. Special precautions apply when installing a child seat on the front passe ng er page
safety 67
Page 195 of 444
Applies to vehicles' with
and drive 1:
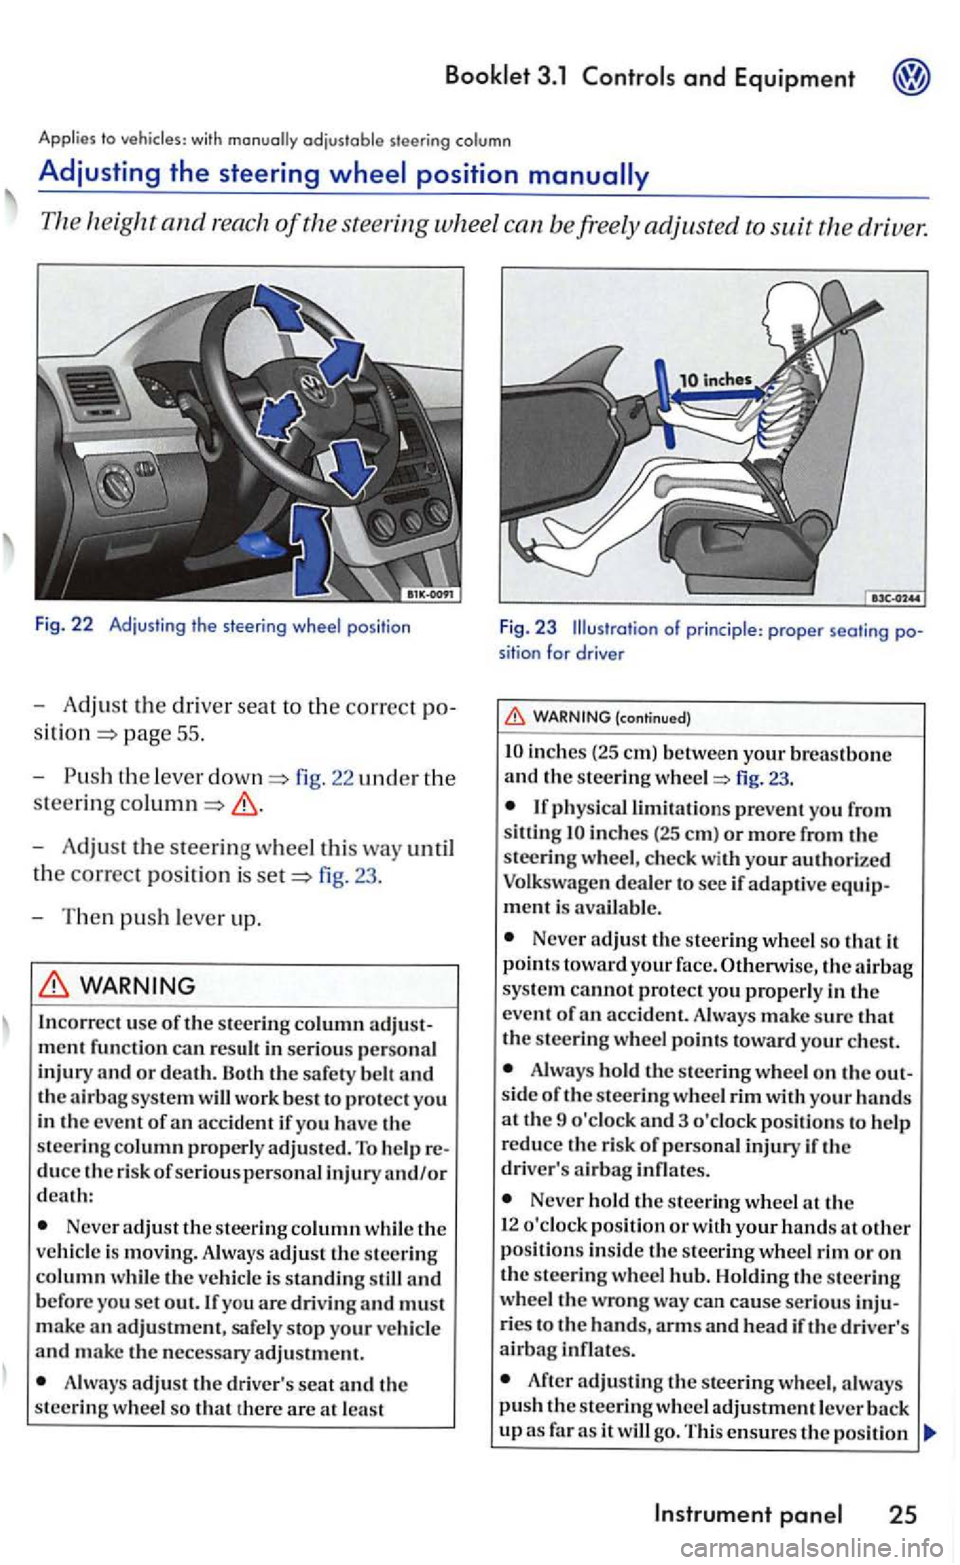
Fig. 22 Adjust in g t he s tee ring wheel pos itio n
-Adjust the dri ver seat to the correct po
pag e 55 .
- Push
the leve r fig. 22 uncl er the
steering
-Adjust the steering wheel this way until
t h e
correct posit ion is fig. 23 .
- T hen
push lever up.
WARNING
In correc t use of the stee ring column
Neve r adjust the steer ing column while th e
ve hicl e is movin g. Always adjust th e steering column w hil e th e veh icle is standing still and b efore you set out. If you are drivin g and must
m ake an adjustment, safe ly stop your ve hicl e and make the necessary adjustment.
A lways adjus t th e driv er's seat and th e
steering w hee l so that th ere are at lea st
F ig. 23 Illustration of princi ple : proper seati ng position for drive r
(continued)
inch es (2 5 em) betwe en your breastbone and th e s teering fig. 23.
inches (25 em ) or more from the
steeri ng w heel, c hec k with your authori ze d
Volkswagen deale r to see if adaptive equipment is avai la ble .
Never adjust the steering wheel so that it
p oin ts toward your face. Otherwise, the sys te m cannot protect yo u properly in the
e ve nt of
Alwa ys hold the s teering wheel o n the out
s id e of the s teering whee l rim with your hands at th e 9 o'clock and 3 o 'clock pos itions to help
r educe th e risk of p ersonal injury if th e
driver' s
Never hold the stee rin g wheel th e
1 2 o'clock pos ition or w ith your hands at other position s in side th e s teering wheel rim or on the steerin g wheel Holdin g th e s teerin g
wheel the wrong wa y ca n cause serious inju
ries t o the hands, arm s and hea d if the driver's airbag infl ates.
After adjusting the stee rin g wheel, a lwa ys push the s teerin g wh eel adjustment leve r
Instrument
Page 215 of 444
3.1
Emergency switch
Use the eme1gency flasher del ete space to attention
your icle in cas e of an emerge ncy.
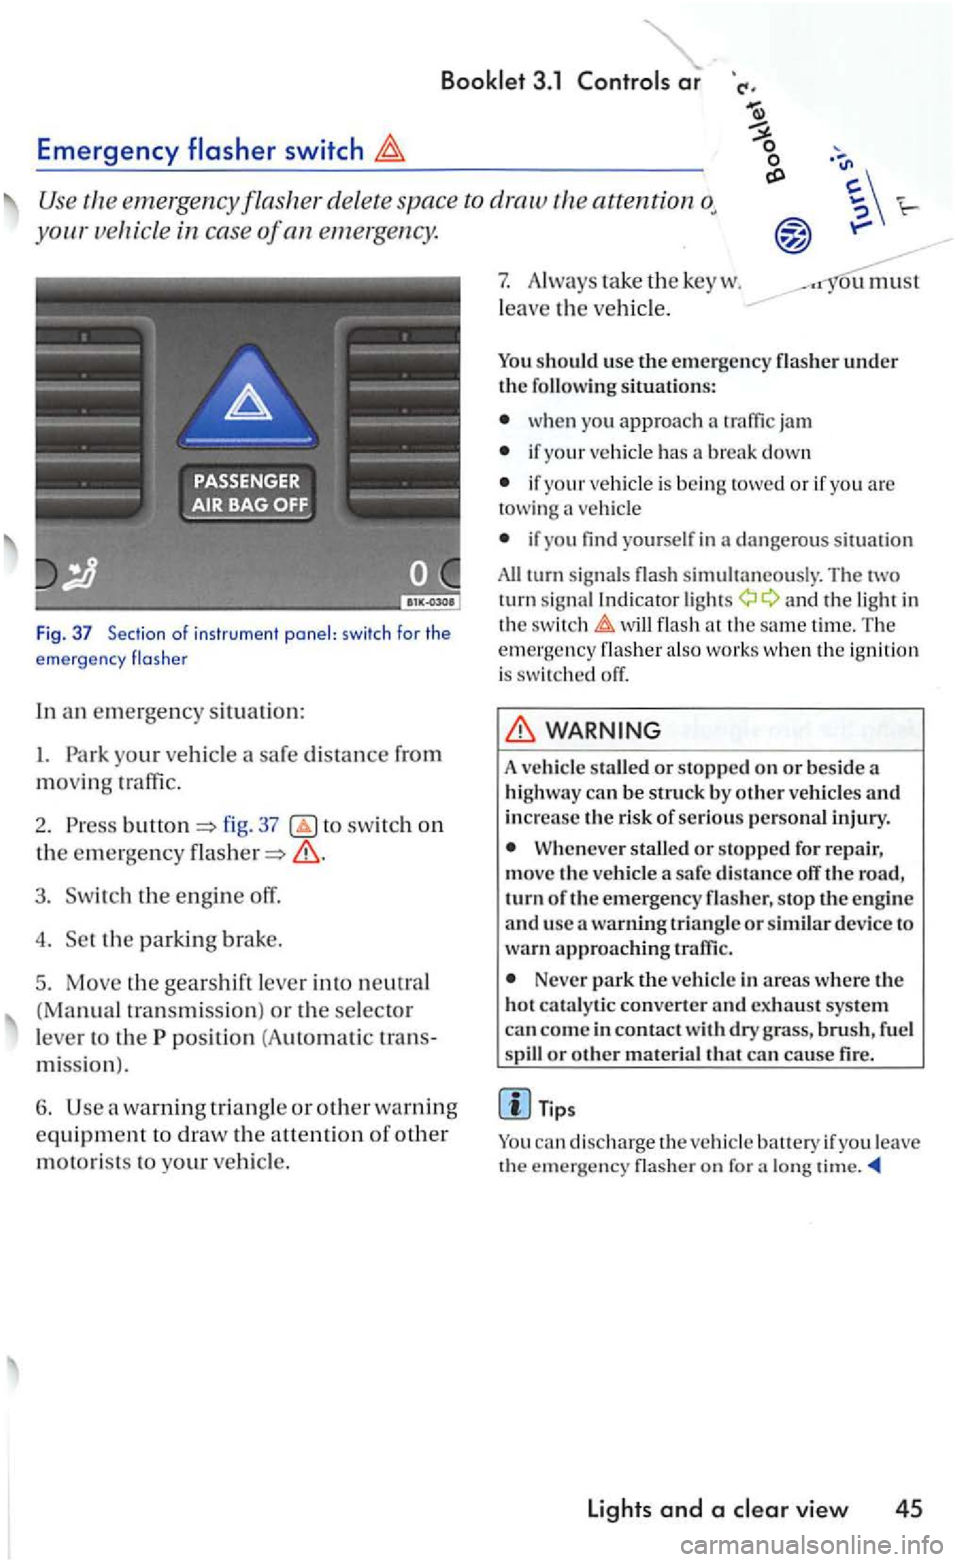
Fig. 37 Section o f ins trume nt panel: swi tch for the
e mergency flas he r
In an em ergen cy situation:
I. Park your vehicl e
fig. 37 switch on
the emergency
3. Switch the engine off.
4. Set the parkin g brake.
5. Move the gea rshift lever into neutral
(Manual tra nsmiss ion ) or the selector
l e ve r to the
position (A uto m ati c tran s
mi ssio n
).
6. Use warning tria ng le or other warning
equipme nt to draw the a uention of other
motorists to your vehicl e.
7. Always ta ke the key w .
l
eave the ve hicl e.
ou must
You should use th e e mergency
wh en you approach
if your vehicle has a break down
if your vehicle is bein g towed or if yo u are towing vehicl e
if yo u find yourself in dange ro us s ituation
All turn sig nal s simultaneously. Th e tw o
turn sig nal Indi cator a nd the light in
the t im e. Th e emergency also wo rk s w he n th e ig n ition is switch ed off.
WARNING
A vehicle staUed or stopp ed on or bes ide a
hi ghway can b e struck by o ther ve hicle s and increase the risk of se rious pe rso nal injury.
When eve r stalled or stopped for re pair,
mov e th e vehicle a safe dis ta n ce off the road, turn o f th e emerg ency flas her, s top the e n gin e
a nd usc a warning triangl e or similar device to wa rn ap proac hing traffic .
Never park the ve hicle in areas where the
hot cat a ly tic converter and exhaust syste m
can co me in contact dry grass , brush , f uel or othe r mate rial that can cause fire.
a lo ng
lights and a
Page 216 of 444
and Equipment
and high beam
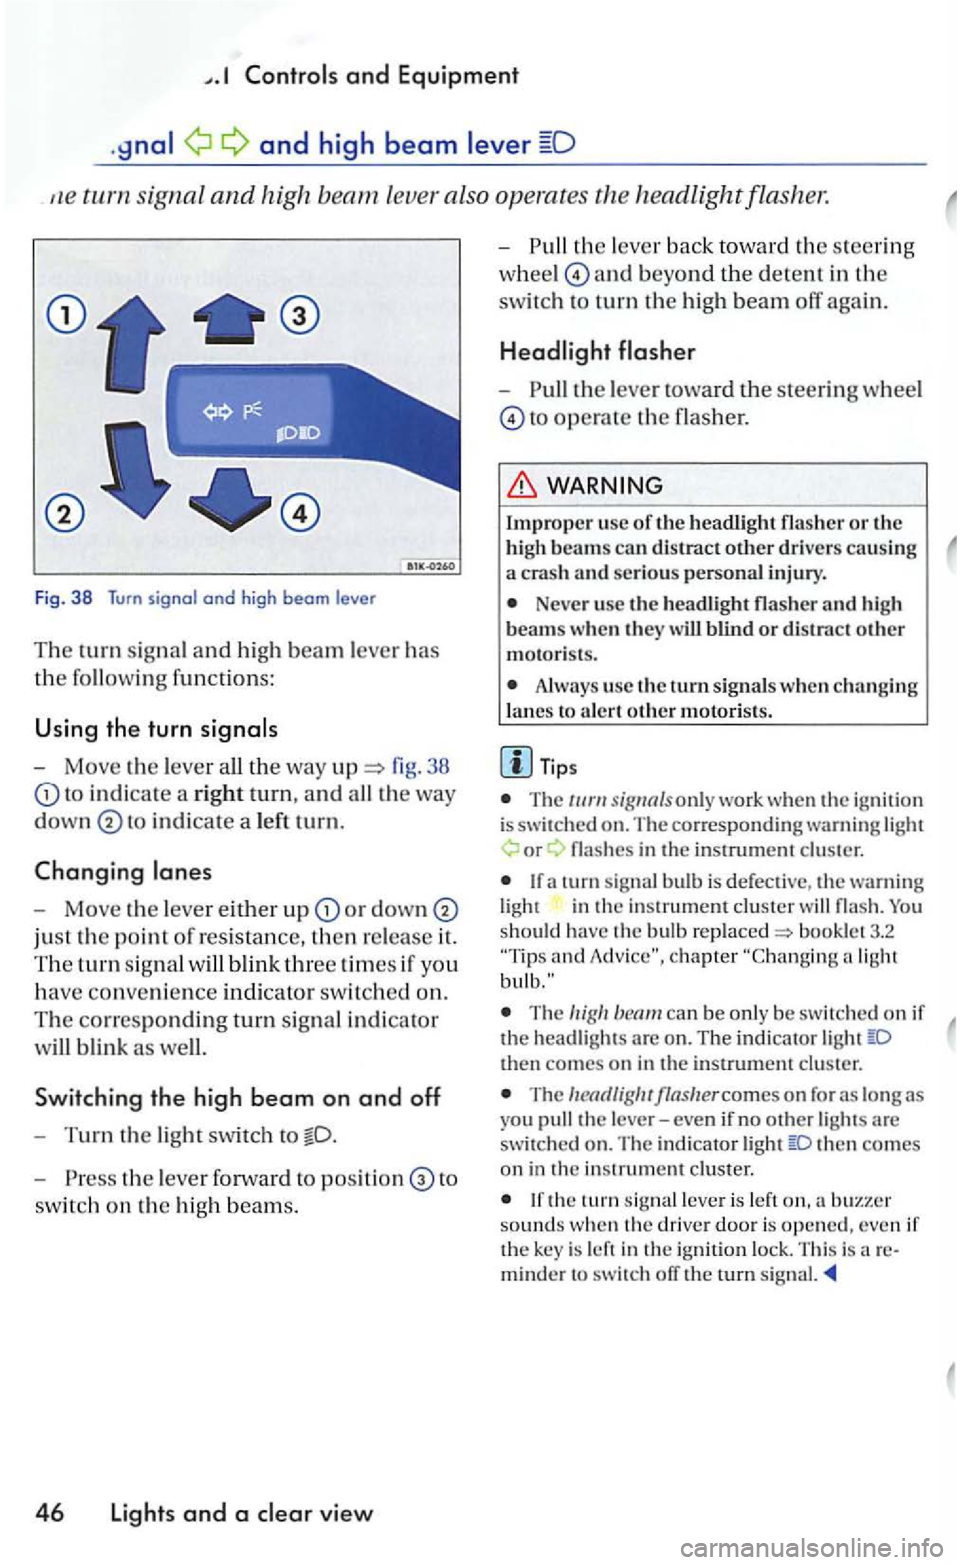
signa l and high leve r also operates
Fig. 38 Turn signal and high beam le ve r
Th e turn signal a n d hi gh beam lever has
the followin g functions:
U sing the turn
- Move the lever 38
to in d icate a rig ht tu rn, and
in dicate a le ft tu rn.
Changing
-Move the leve r either u p or down
just the point of resistance, then re lease it.
The tu rn sig n al
Sw itchin g the high b eam on and off
-Turn the light swit ch to
- P ress the lever forward to to
switc h on the hig h beam s.
4 6 Lights and a view
-th e lever back to wa rd th e s teering
w hee l
and beyond the dete n t in the
switc h to turn th e high beam off again.
-the lever toward the steeri ng wheel
to operate the flasher.
Impro per usc of th e headli ght flasher o r the
h igh beams can distract other drive rs causing a crash an d serious personal injury.
Neve r use the headli gh t flasher and h igh
beam s w hen th ey w ill blind o r distract other motoris ts .
Always use the turn s ig nals w hen ch a nging
l a nes to a le rt oth e r m otori sts .
T ips
T he only work whe n the ig nition is switched on. The co rre sponding warning or
in the in strument cluster
and
The can be only be sw itc hed on if the head ligh ts are o n . The indi cator then comes on in the instrument cluster.
The
then co mes on in the in strument cluster.
the tu rn leve r is left sounds w hen th e driver door is opened, even if the key is left in the ign ition lock. This is areminder to switch ofT the rurn signal.
Page 220 of 444
and Equipment
Brief wiping
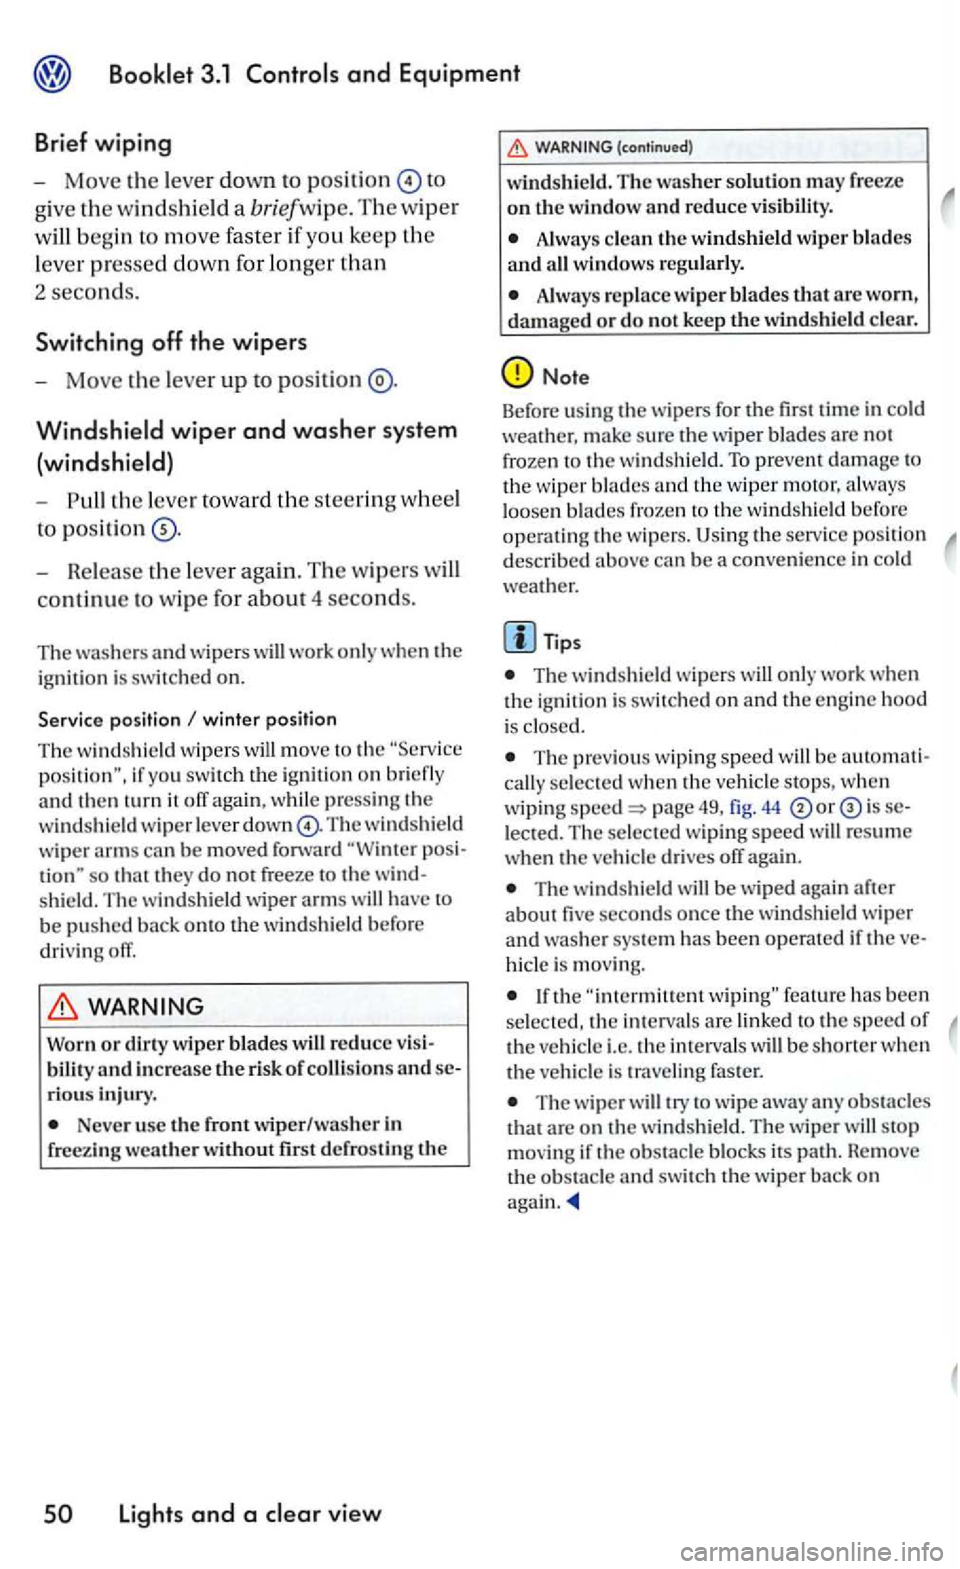
- Move the lever down to positi on
give the windshi eld a briefwip e. The w iper
will begin to m ove faster if yo u keep th e
l ever pre
ssed down for longer than
2 seconds.
Switching off the wipers
-Move the leve r up to
Windshield wiper and washer system
(windshi eld)
-th e lever toward the s teerin g wheel
t o
pos iti on
win ter position
The windshi eld wipers will move to th e ''Se rvice if yo u switch the igniti on on br iefly and then it ofT aga in, w hile press in g t he
win dshi eld wiper lever dow n The w indshie ld wiper arms ca n be moved forward so that they do not free ze to the
the wind shield be fo re
driving ofT.
Worn or dirt y wiper blades will reduce bility and increase th e risk of colli sions and rio us inju ry.
Never use t11e front wiper/wash er in
free zing weat her fi rst defro sting the
(continued)
wi ndshie ld . T he washer solution m ay freeze on the window and reduce
Always clean th e windshield wiper blades and all windows regu larly .
A lway s replace wi per blades that are worn, damaged or do not kee p the windshie ld clear.
Note
Befo re u sin g th e wiper s for the fir st tim e in co ld weather, m ake su re the wiper blades are not
fro zen t o th e windshield. To p revent damage to
th e w iper b lades and the wip er motor, a lways
l oose n blades frozen to the windsh ie ld b efore operating the w ipers. Usin g th e serv ice po sition describe d above can be a convenience in co ld weather.
Th e w indshie ld wipe rs will onl y wo rk when the ig nition is switch e d on and th e e ngin e hood
is close d.
Th e prev iou s w iping sp ee d will be cally selec ted when the vehi cle s top s, when wiping page 49, fig. 44 or is lected . The selected wipin g spee d will resume when the ve hicle drives off aga in.
The windshi eld will be wiped aga in after about five second s once the windshie ld wiper and was her sys te m h as been operated if th e
hicl e is mov ing.
If th e "int ermittent feature has been
se lec te d, the int ervals are linked to th e speed of the ve hicl e i.e. the interva ls will b e sh o rt er w he n
th e vehicle is trave ling faster.
T he wiper will try to wipe away an y obstacles that are on t h e windshield . The w ip er will stop
m oving if the obstacle blocks its pat11. Remo ve
t h e o bstacle and switch the wip er back on
Page 221 of 444
Rear window wiper
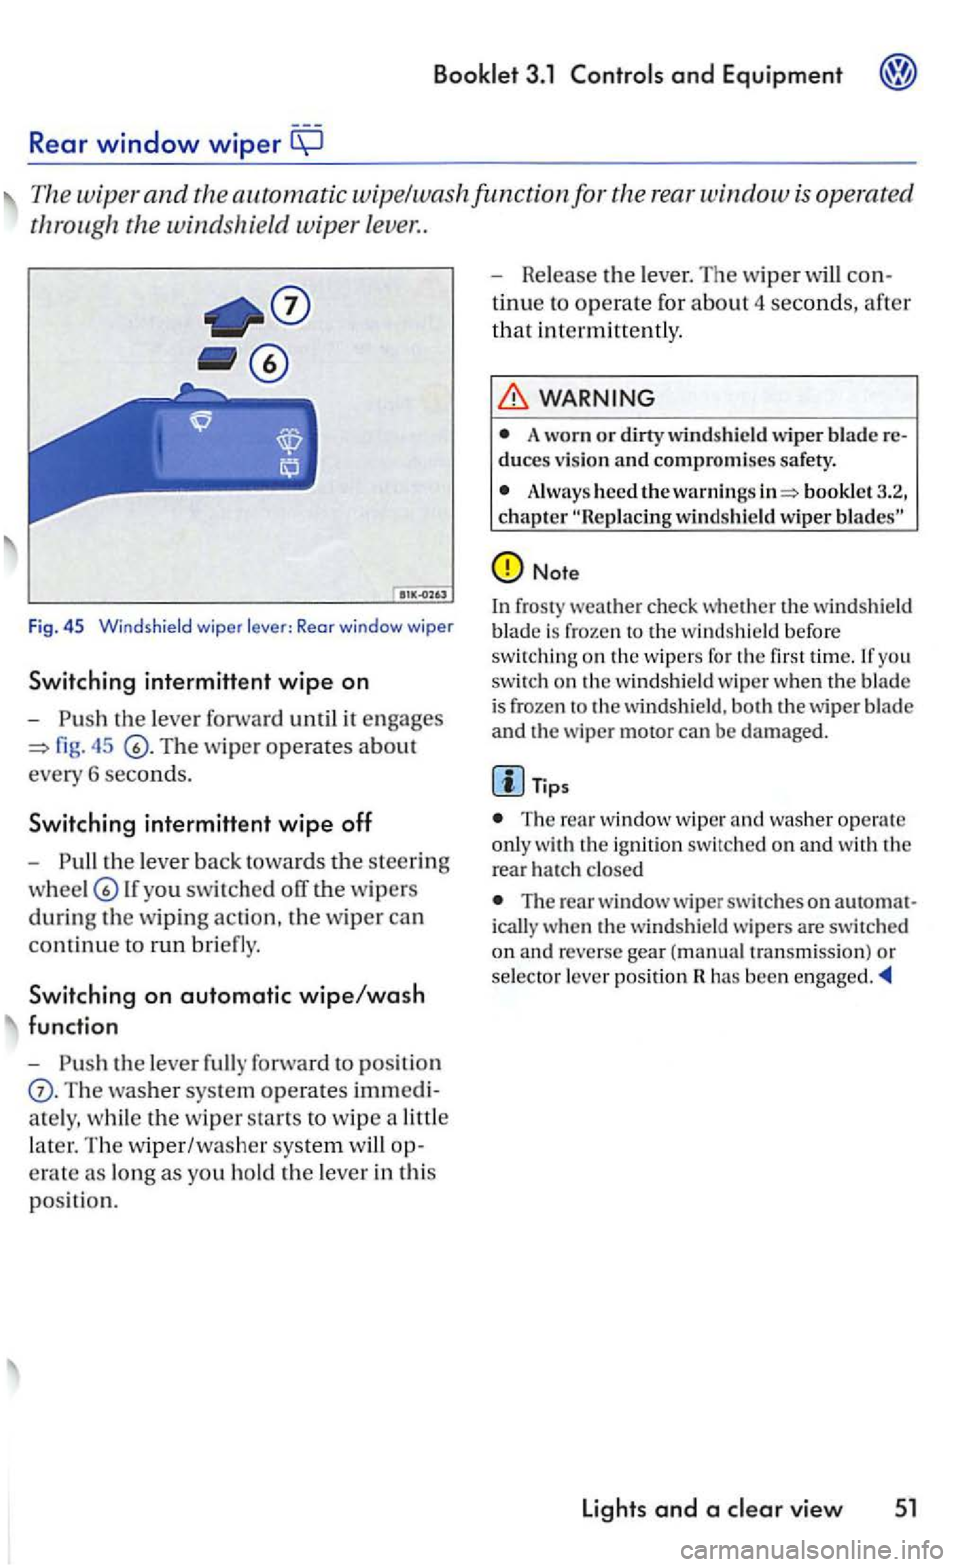
The wiper and the automatic wipe/wa sh func tion for the rear w indow
fig. 45
th e lev er back tow ard s th e s teering
lf you swit ch ed off the w ipers
during th e w ipin g action , th e w iper ca n
c
ontinu e to run bri efly.
Switching on automatic wipe/wash
function
-
Th e washer sys te m operates imm edi
a te ly , w hi le
the w ip er sta rts to wip e a littl e
l
ater. Th e w iper/washe r system op
e rat e as long
as you ho ld the le ver in th is
p os itio n. -
Release th
e le ver. The wip er will con
t
inue to operate for abou t 4 seconds, afte r
th
at i n termitt en tly .
WARNING
A worn or dirty wind shield wiper blade re duces v ision and compromises safety.
Alway s heed the warni ngs booklet 3.2, chapter
Note
In fros ty weat he r check whether the win dshield
b lade is froze n the w indshi eld befo re swit chin g on th e w ipers for you switch on th e w indshield wip e r when th e blade is frozen th e w ind shi eld, bot h th e wiper b lade
and the wiper motor can be damage d.
Tips
The window wi per and was her ope rat e
o nl y the rear h a tc h closed
The rear w indow wiper swi tc hes on auto m at
i c all y w hen th e windsh ie ld w ip ers are switc hed
o n an d reverse gear (manual tra n sm iss ion) or selec to r l ever pos ition has been
Lights and a
Page 222 of 444
with headlight washer system
l1eadlig ht
49, 44 is pulled toward s the ste ering
w heel -while low or high beams turned on. llowever, insect
WARNING
A lways read and heed the ..
Note
To avoid make sure that the headlight washers work properly in winter. Keep the n ozzle in the bumper free of snow and remove any ice with de-icer
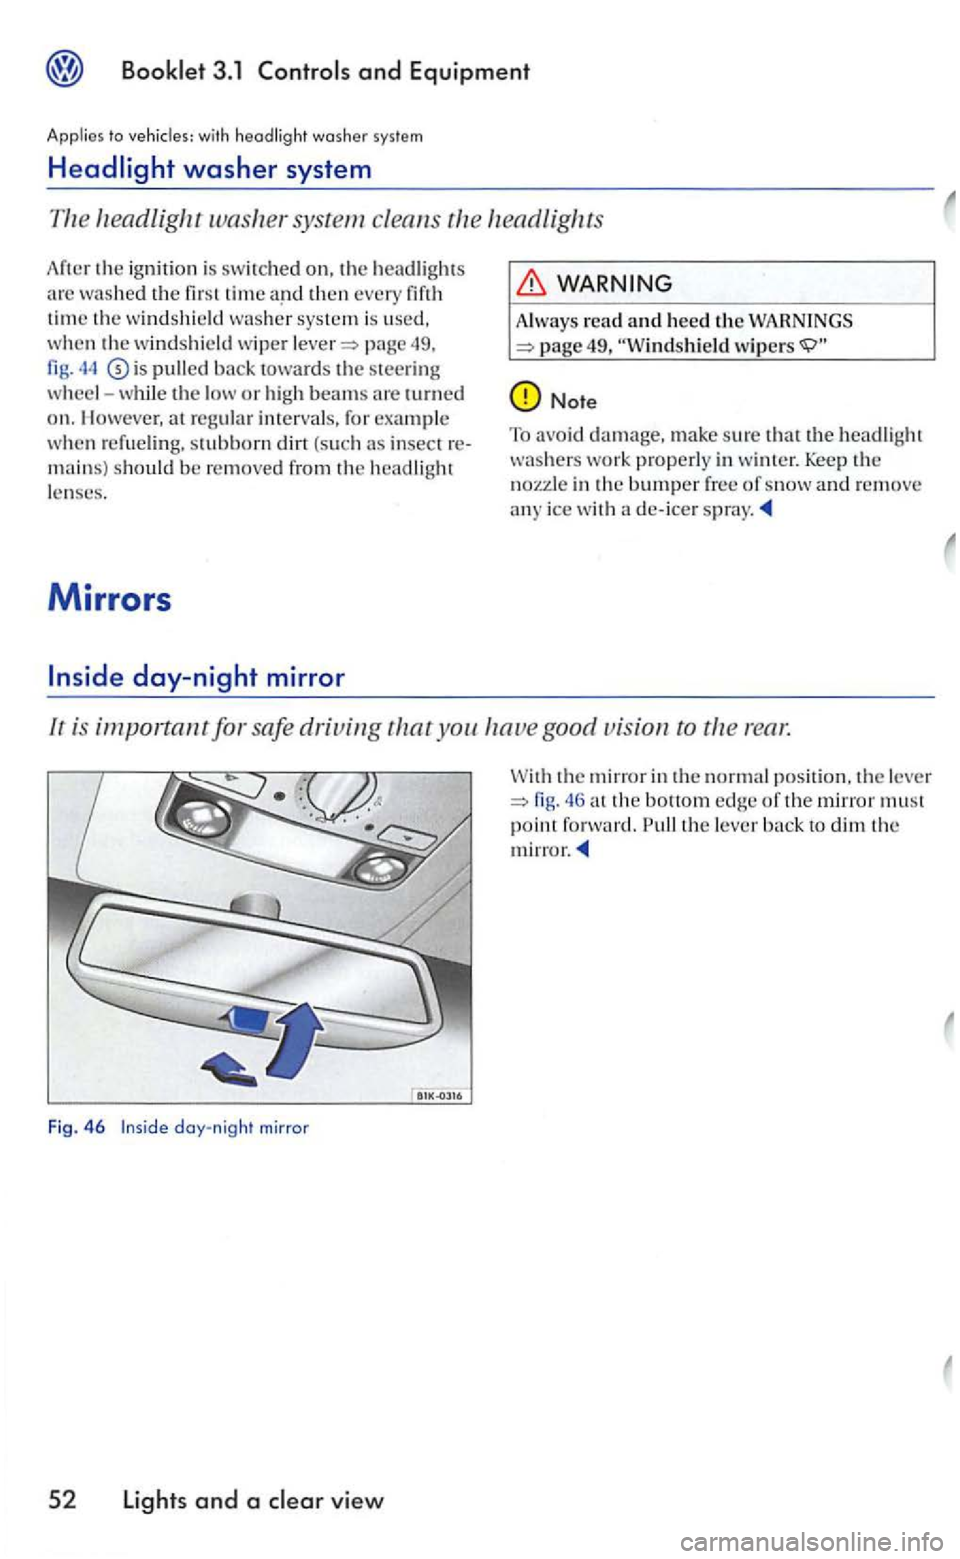
lr is important for safe driving you good vision ro rear.
Fig. 46 day-night mirror
5 2 Lights and a view
the mirror in the normal position. th e le ve r the bottom edge of th e mirror must point forward. the lever