Page 42 of 458

42
12p032
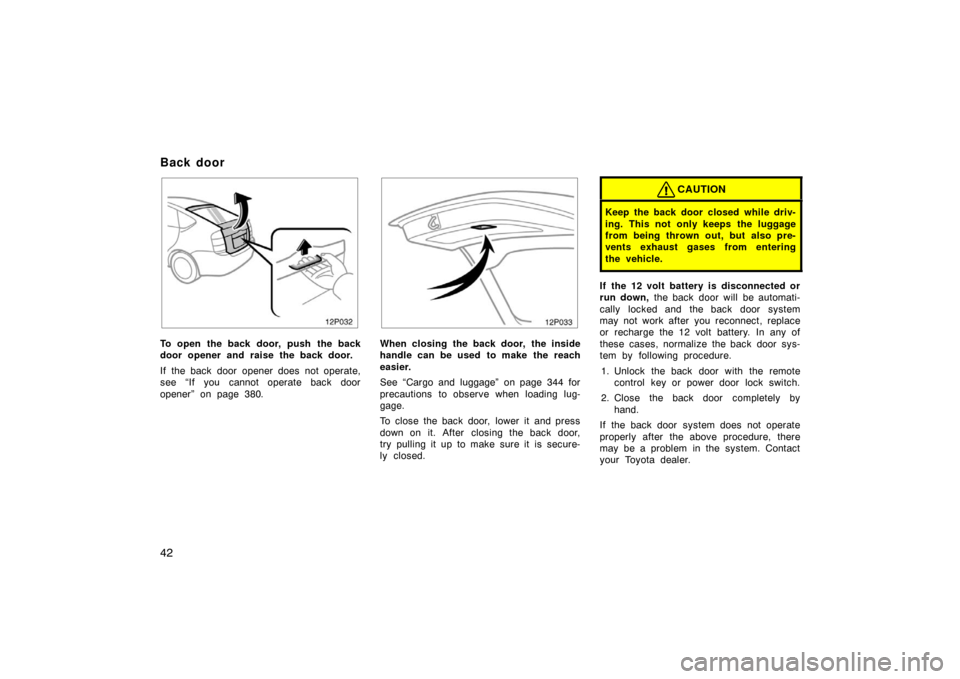
To open the back door, push the back
door opener and raise the back door.
If the back door opener does not operate,
see “If you cannot operate back door
opener” on page 380.
12p033
When closing the back door, the inside
handle can be used to make the reach
easier.
See “Cargo and luggage” on page 344 for
precautions to observe when loading lug-
gage.
To close the back door, lower it and press
down on it. After closing the back door,
try pulling it up to make sure it is secure-
ly closed.
CAUTION
Keep the back door closed while driv-
ing. This not only keeps the luggage
from being thrown out, but also pre-
vents exhaust gases from entering
the vehicle.
If the 12 volt battery is disconnected or
run down, the back door will be automati-
cally locked and the back door system
may not work after you reconnect, replace
or recharge the 12 volt battery. In any of
these cases, normalize the back door sys-
tem by following procedure.
1. Unlock the back door with the remote control key or power door lock switch.
2. Close the back door completely by hand.
If the back door system does not operate
properly after the above procedure, there
may be a problem in the system. Contact
your Toyota dealer.
Back door
Page 47 of 458

47
21p007b
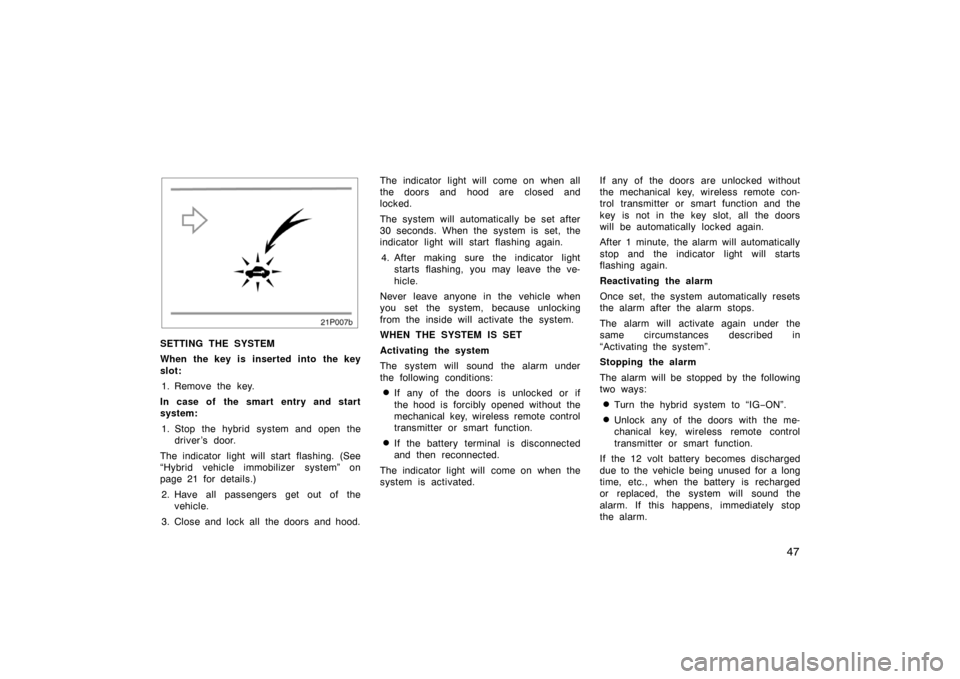
SETTING THE SYSTEM
When the key is inserted into the key
slot:1. Remove the key.
In case of the smart entry and start
system: 1. Stop the hybrid system and open the driver ’s door.
The indicator light will start flashing. (See
“Hybrid vehicle immobilizer system” on
page 21 for details.) 2. Have all passengers get out of the vehicle.
3. Close and lock all the doors and hood. The indicator light will come on when all
the doors and hood are closed and
locked.
The system will automatically be set after
30 seconds. When the system is set, the
indicator light will start flashing again.
4. After making sure the indicator light starts flashing, you may leave the ve-
hicle.
Never leave anyone in the vehicle when
you set the system, because unlocking
from the inside will activate the system.
WHEN THE SYSTEM IS SET
Activating the system
The system will sound the alarm under
the following conditions:
�If any of the doors is unlocked or if
the hood is forcibly opened without the
mechanical key, wireless remote control
transmitter or smart function.
�If the battery terminal is disconnected
and then reconnected.
The indicator light will come on when the
system is activated. If any of the doors are unlocked without
the mechanical key, wireless remote con-
trol transmitter or smart function and the
key is not in the key slot, all the doors
will be automatically locked again.
After 1 minute, the alarm will automatically
stop and the indicator light will starts
flashing again.
Reactivating the alarm
Once set, the system automatically resets
the alarm after the alarm stops.
The alarm will activate again under the
same circumstances described in
“Activating the system”.
Stopping the alarm
The alarm will be stopped by the following
two ways:
�Turn the hybrid system to “IG
−ON”.
�Unlock any of the doors with the me-
chanical key, wireless remote control
transmitter or smart function.
If the 12 volt battery becomes discharged
due to the vehicle being unused for a long
time, etc., when the battery is recharged
or replaced, the system will sound the
alarm. If this happens, immediately stop
the alarm.
Page 48 of 458

48
CANCELING THE SYSTEM
The system will be cancelled by the
above mentioned two ways.
If the tail lights come on for 2 seconds,
the theft deterrent system has been
alarmed. Check to see if there is any
abnormality on your vehicle.
TESTING THE SYSTEM1. Open all the windows.
2. Set the system as described above. The doors should be locked with the
mechanical key, wireless remote control
transmitter or smart function. Be sure
to wait until the indicator light goes off
or starts flashing.
3. Unlock any door from the inside. The system s hould activate the alarm.
4. Stop the alarm as described above.
5. Repeat this operation for the other doors and hood. When testing the back
door, also check that the system is
activated when the 12 volt battery ter-
minal is disconnected and then recon-
nected. When testing the hood, release
the lock with the hood lock release
lever and raise the hood.
If the system does not work properly,
have it checked by your Toyota dealer.
21p117
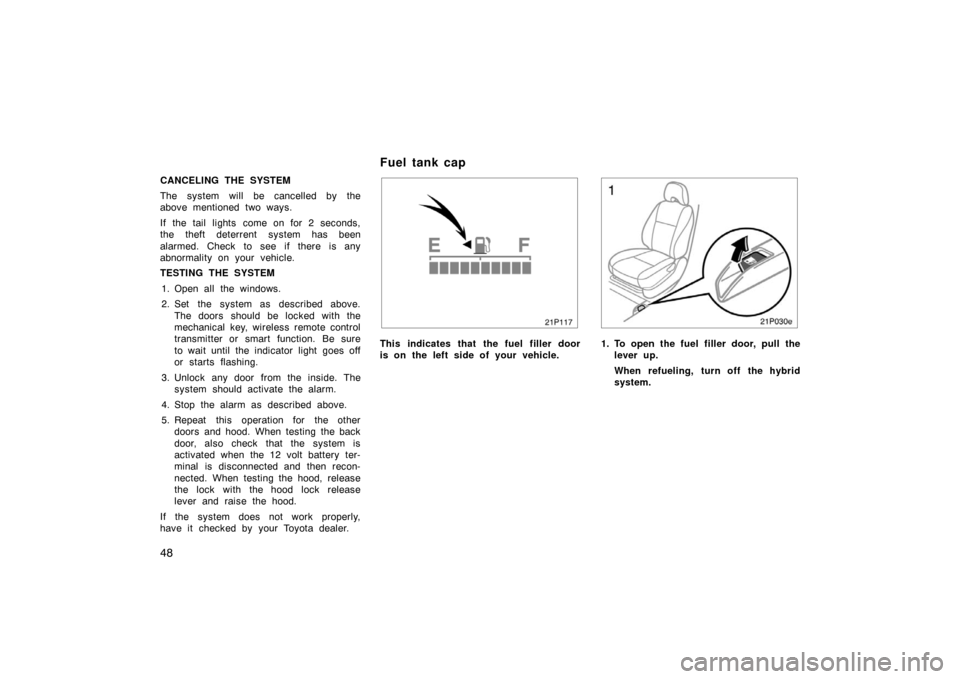
This indicates that the fuel filler door
is on the left side of your vehicle.
21p030e
1. To open the fuel filler door, pull the lever up.
When refueling, turn off the hybrid
system.
Fuel tank cap
Page 118 of 458
11 8
For instructions on adding washer fluid,
see “Adding washer fluid” on page 422.
NOTICE
Do not operate the rear wiper if the
rear window is dry. It may scratch the
glass.
24p116
Ty p e 1
23p009c
Ty p e 2
To defog or defrost the rear window,
push the “CLIMATE” button to display
air conditioner screen and touch the
switch.
Operating the steering switch can also de-
fog or defrost the rear window. (See “Cli-
mate remote control” on page 299.)
The hybrid system must be in the “IG−
ON” mode.
The thin heater wires on the inside of the
rear window will quickly clear the surface.
An indicator will come on to indicate the
defogger is operating.
Touch the switch once again to turn the
defogger off.
The system will automatically shut off af-
ter the defogger has operated about 15
minutes.
Rear window and outside rear
view mirror defoggers
Page 241 of 458

241
OPERATION OF INSTRUMENTS AND
CONTROLS
Audio system
Reference242
. . . . . . . . . . . . . . . . . . . . . . . . . . . . . . . . . . . . .\
. . . . . . . . . . . .
Using your audio system 246
. . . . . . . . . . . . . . . . . . . . . . . . . . . . . . . . . . . . \
Radio operation 252
. . . . . . . . . . . . . . . . . . . . . . . . . . . . . . . . . . . . \
. . . . . . . .
Radio operation (XMr satellite radio br oadcast)260
. . . . . . . . . . . . . . . .
Compact disc player operation (Type 1 and Type 2) 266
. . . . . . . . . . . .
Compact disc player operation (Type 3) 271
. . . . . . . . . . . . . . . . . . . . . . .
MP3/WMA player operation 273
. . . . . . . . . . . . . . . . . . . . . . . . . . . . . . . . . .
Audio remote controls 277
. . . . . . . . . . . . . . . . . . . . . . . . . . . . . . . . . . . . \
. . .
AUX adapter 278
. . . . . . . . . . . . . . . . . . . . . . . . . . . . . . . . . . . . \
. . . . . . . . . . .
Audio system operating hints 279
. . . . . . . . . . . . . . . . . . . . . . . . . . . . . . . .
SECTION 2– 8
Page 277 of 458

277
26p246b
(o) Displaying the file information
Touch the “DETAIL” switch on the fold-
er list or file list screen.
Up to 32 characters of album title, track,
artist’s name or music genre can be dis-
played. However, some information may
not be displayed correctly or at all, de-
pending on the recorded content.(p) If the player malfunctions
If the player or another unit equipped with
the player malfunctions, your audio system
will display the following error messages.
If “CD CHECK” appears on the display,
it indicates that the disc is dirty, damaged
or it was inserted up side down. Clean the
disc or insert it correctly.
If “CD ERROR” appears on the display,
the following causes are possible.
�There is trouble inside the system.
Eject the disc.
�The inside of the player unit may be
too hot due to the very high ambient
temperature. Eject the disc and allow
the player to cool down.
If “NO DATA DISC” appears on the dis-
play, it indicates that a disc with no MP3
or WMA data has been inserted. Remove
the disc from the player and insert a MP3
or WMA data disc.
If the malfunction is not rectified, take
your vehicle to your Toyota dealer.
26p112
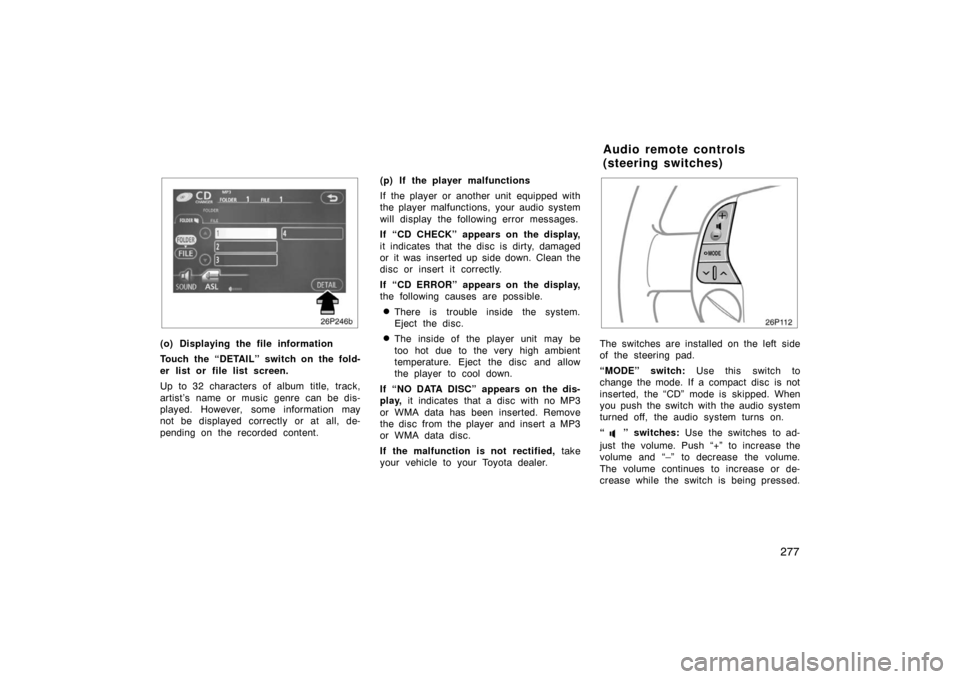
The switches are installed on the left side
of the steering pad.
“MODE” switch: Use this switch to
change the mode. If a compact disc is not
inserted, the “CD” mode is skipped. When
you push the switch with the audio system
turned off, the audio system turns on.
“
” switches: Use the switches to ad-
just the volume. Push “+” to increase the
volume and “–” to decrease the volume.
The volume continues to increase or de-
crease while the switch is being pressed.
Audio remote controls
(steering switches)
Page 287 of 458
287
OPERATION OF INSTRUMENTS AND
CONTROLS
Air conditioning system
Controls288
. . . . . . . . . . . . . . . . . . . . . . . . . . . . . . . . . . . . .\
. . . . . . . . . . . . . .
Climate remote control 299
. . . . . . . . . . . . . . . . . . . . . . . . . . . . . . . . . . . . \
. .
Instrument panel ventss 299
. . . . . . . . . . . . . . . . . . . . . . . . . . . . . . . . . . . . \
Air conditioning filter 300
. . . . . . . . . . . . . . . . . . . . . . . . . . . . . . . . . . . . \
. . . .
SECTION 2– 9
Page 299 of 458
299
27p104
The switches are installed on both sides
of the steering pad.
“A/C AUTO” switch: Use this switch to
turn on the automatic mode. (For details,
see page 292.) Pressing this switch in the
automatic control turns the blower off.
“
TEMP” switch: Use this switch to
set the desired temperature. (For details,
see page 293.)
“
” switch: Use this switch to change
the air intake mode. (For details, see
page 296.)
“
” switch: Use this switch to remove
interior fog on the windshield. (For details,
see page 297.) “
” switch:
Use this switch to turn on
or off the rear window and outside rear
view mirror defoggers. (For details, see
page 118.)
CAUTION
Operate the switches with due care
while you are driving to avoid acci-
dents.
27p006a
If air flow control is not satisfactory, check
the instrument panel vents. The instrument
panel vents may be opened or closed as
shown.
Climate remote control
(steering switches) Instrument panel vents