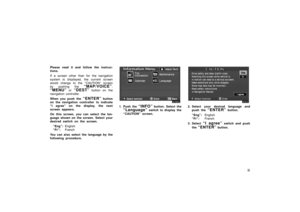
Page 89 of 138
lxxxix
CHANGING THE LOCATION
Move the cursor to your desired point,
and push the
“ENTER” button of the
navigation controller.CHANGING THE AREA SIZE
Select one of the “detour gauge” on the
left side of this screen if you want to
change the area size.1. Select the
“Delete” switch of the
“Area to avoid” to display the “De-
lete area to avoid” screen.
2. Select the area you want to delete
from the list.
“Delete all”: All registered areas to avoid
in the system are deleted.
3. Messages appear depending on the
type of deletion. If you want to de-
lete, select the
“Yes” switch. To
cancel the deletion, select the
“No”
switch.
(c) Deleting area to avoid
Page 90 of 138
xc
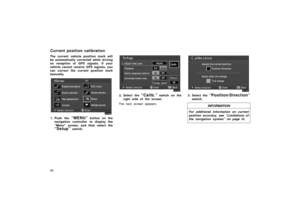
The current vehicle position mark will
be automatically corrected while driving
on reception of GPS signals. If your
vehicle cannot receive GPS signals, you
can correct the current position mark
manually.
1. Push the “MENU” button on the
navigation controller to display the
“Menu” screen, and then select the
“Setup” switch.
2. Select the “Calib.” switch on the
right side of the screen.
The next screen appears.3. Select the “Position/Direction”
switch.
INFORMATION
For additional information on current
position accuracy, see “Limitations of
the navigation system” on page lii.
Current position calibration
Page 91 of 138

xci
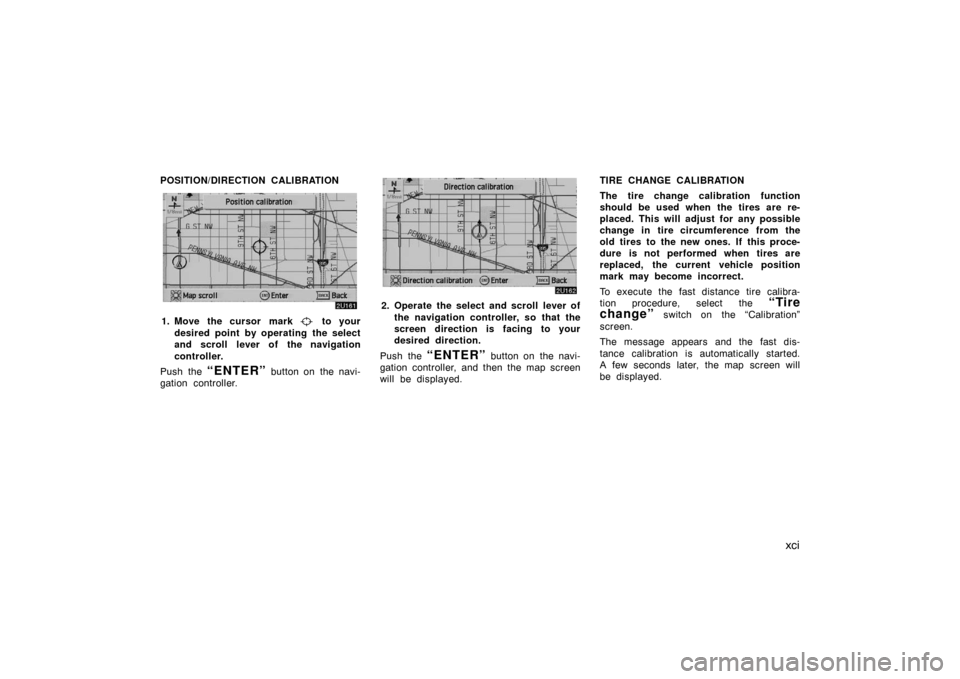
POSITION/DIRECTION CALIBRATION
1. Move the cursor mark to your
desired point by operating the select
and scroll lever of the navigation
controller.
Push the
“ENTER” button on the navi-
gation controller.
2. Operate the select and scroll lever of
the navigation controller, so that the
screen direction is facing to your
desired direction.
Push the
“ENTER” button on the navi-
gation controller, and then the map screen
will be displayed.TIRE CHANGE CALIBRATION
The tire change calibration function
should be used when the tires are re-
placed. This will adjust for any possible
change in tire circumference from the
old tires to the new ones. If this proce-
dure is not performed when tires are
replaced, the current vehicle position
mark may become incorrect.
To execute the fast distance tire calibra-
tion procedure, select the
“Tire
change”
switch on the “Calibration”
screen.
The message appears and the fast dis-
tance calibration is automatically started.
A few seconds later, the map screen will
be displayed.
Page 92 of 138
xcii
1. Push the “MENU” button on the
navigation controller to display the
“Menu” screen.
2. Select the “Edit route” switch on
the screen.
3. Select the “Add” switch of “Des-
tination”.
4. Input an additional destination in the
same way as the destination input.
(See page xxxi.)5. The “Add destination” screen ap-
pears. Select the
“Add” switch on
the right side of the screen that you
want to add as destination.
Edit route
(a) Adding a destination
Page 93 of 138
xciii
1. Push the “MENU” button on the
navigation controller to display the
“Menu” screen and select the
“Edit
route”
switch on the screen.
2. Select the “Reorder” switch of
“Destination”.
3. Choose the destinations in the order
of arrival by selecting the
switch
on the left side of the screen.
After you finished selecting the destina-
tions, select the
“OK” switch.
The previous screen will be displayed.1. Push the
“MENU” button on the
navigation controller to display the
“Menu” screen and select the
“Edit
route”
switch on the screen.
2. Select the “Delete” switch of
“Destination”.
(b) Reordering a destination (c) Deleting a destination
Page 94 of 138
xciv
3. Select the switch of the destina-
tion that you want to delete.
Select the
“Del. all” switch if you want
to delete all destinations.
4. Messages appear depending on the
type of deletion. If you want to de-
lete, select the
“Yes” switch. To
cancel the deletion, select the
“No”
switch.To delete a previous destination:
1. Push the
“MENU” button to dis-
play the “Menu” screen and select
the
“Marked points” switch on
the screen.
2. Select the
“Del. prev. dest.”
switch.
3. Do the same procedure as deleting
a destination.1. Push the
“MENU” button on the
navigation controller to display the
“Menu” screen and select the
“Edit
route”
switch on the screen.
2. Select the “Add” switch of the
“Set preferred road” and then the
following screen appears.
Setting a preferred road
(a) Adding a preferred road
Page 95 of 138
xcv
3. Move the cursor to your desired
location and push
“ENTER” button
on the navigation controller.
Messages appear to confirm your request
on the screen.
Select the
“Enter” switch to register
the road.
Select the
“Next” switch if you want to
change the road.
4. The “Add preferred road” screen ap-
pears. Select the
“Add” switch if
you want to add as preferred road.1. Push the
“MENU” button on the
navigation controller to display the
“Menu” screen and select the
“Edit
route”
switch on the screen.
2. Select the “Modify” switch of the
“Set preferred road”. The “Modify
preferred road” screen appears.
(b) Modifying a preferred road
Page 96 of 138
xcvi
3. Select the preferred road which you
want to modify and select the
switch.
4. Do the same procedure as “(a) Add-
ing a preferred road”. (See page
xciv.)1. Push the
“MENU” button on the
navigation controller to display the
“Menu” screen and select the
“Edit
route”
switch on the screen.
2. Select the “Delete” switch of the
“Set preferred road”. The “Delete
preferred road” screen appears.
3. Select the preferred road which you
want to delete.
Select the
“Del. all” switch if you want
to delete all the preferred roads.
4. Messages appear depending on the
type of deletion. If you want to de-
lete, select the
“Yes” switch. To
cancel the deletion, select the
“No”
switch.
(c) Deleting a preferred road