2007 SUZUKI GRAND VITARA engine oil
[x] Cancel search: engine oilPage 159 of 211

Downloaded from www.Manualslib.com manuals search engine 9-21 INSPECTION AND MAINTENANCE
66J21-03E
deposits with a wire or pin and adjust the
spark plug gap.
To access the spark plugs:
1) Remove the engine cover.
2) Disconnect the coupler (1) while push-
ing the release lever.
3) Remove the bolt.
4) Pull the ignition coil out.
80G093
BrakesBrake Fluid
64J154
Check the brake fluid level by looking at
the reservoir in the engine compartment.
Check that the fluid level is between the
“MAX” and “MIN” lines. If the brake fluid
level is near the “MIN” line, fill it up to the
“MAX” line with DOT3 brake fluid.
65D477
CAUTION
When replacing spark plugs, you
should use the brand and type speci-
fied for your vehicle. For the speci-
fied plugs, refer to the
“SPECIFICATIONS” section at the
end of this book. If you wish to use a
brand of spark plug other than the
specified plugs, consult your SUZUKI
dealer.1.0 – 1.1 mm
(0.039 – 0.043 in.)
WARNING
Failure to follow the guidelines below
can result in personal injury or seri-
ous damage to the brake system.
If the brake fluid in the reservoir
drops below a certain level, the
brake warning light on the instru-
ment panel will come on (the
engine must be running with the
parking brake fully disengaged.)
Should the light come on, immedi-
ately ask your SUZUKI dealer to
inspect the brake system.
A rapid fluid loss indicates a leak in
the brake system which should be
inspected by your SUZUKI dealer
immediately.
Brake fluid can harm your eyes and
damage painted surfaces. Use cau-
tion when refilling the reservoir.
(Continued)
Brakes: 6
Page 170 of 211

Downloaded from www.Manualslib.com manuals search engine 9-32 INSPECTION AND MAINTENANCE
66J21-03E
GLOSSARY OF TIRE TERMINOL-
OGYAccessory Weight – the combined weight
(in excess of those standard items which
may be replaced) of automatic transmis-
sion, power steering, power brakes, power
windows, power seats, radio, and heater,
to the extent that these items are available
as factory-installed equipment (whether
installed or not).
Cold Tire Inflation Pressure – the pressure
in a tire that has been driven less than 1
mile or has been standing for three hours
or more.
Curb Weight – the weight of a motor vehi-
cle with standard equipment including the
maximum capacity of fuel, oil, and coolant,
and, if so equipped, air conditioning and
additional weight optional engine.
Intended Outboard Sidewall – (1) the side-
wall that contains a whitewall, bears white
lettering or bears manufacturer, brand,
and/or model name molding that is higher
or deeper than the same molding on the
other sidewall of the tire, or (2) the outward
facing sidewall of an asymmetrical tire that
has a particular side that must always face
outward when mounted on a vehicle.
Maximum Inflation Pressure – the maxi-
mum cold inflation pressure a tire is
designed to support in normal service.
Maximum Loaded Vehicle Weight – the
sum of curb weight, accessory weight,vehicle capacity weight (total load capac-
ity), and production options weight.
Normal Occupant Weight – 68 kilograms
times the number of occupants specified in
the second column of Table 1 (shown
below).
Occupant distribution – distribution of
occupants in a vehicle as specified in the
third column of Table 1 (shown below).
Production Options Weight – the combined
weight of those installed regular production
options weighing over 2.3 kilograms in
excess of those standard items which they
replace, not previously considered in curb
weight or accessory weight, including
heavy duty brakes, ride levelers, roof rack,
heavy duty battery, and special trim.
Recommended Inflation Pressure – the
cold tire inflation pressure recommended
by a manufacturer.
Rim – metal support for a tire or tire and
tube assembly upon which the tire beads
are seated.
Vehicle Capacity Weight – the rated cargo
and luggage load plus 68 kilograms (150
lbs) times the vehicle’s designated seating
capacity.
Vehicle Maximum Load on the Tire – the
load on an individual tire that is determined
by distributing to each axle its share of the
maximum loaded vehicle weight and divid-
ing by two.Vehicle Normal Load on the Tire – the load
on an individual tire that is determined by
distributing to each axle its share of the
curb weight, accessory weight, and normal
occupant weight (distributed in accordance
with Table 1 shown below) and dividing by
2.
TABLE 1 – Occupant Loading and Dis-
tribution For Vehicle Normal Load For
Various Designated Seating Capacities
Designated
seating capac-
ity, number of
occupantsVehicle nor-
mal load, num-
ber of
occupantsOccupant
distribution in
a normally
loaded vehicle
2 through 4 2 2 in front
5 through 10 32 in front, 1 in
second seat
Battery: 9
Fuses: 7
Page 175 of 211

Downloaded from www.Manualslib.com manuals search engine 9-37 INSPECTION AND MAINTENANCE
66J21-03E
Fuse under the Dash BoardFuse box
64J192
64J15865D045
The fuse box is located under the driver’s
side of the dashboard. To remove a fuse,
use the fuse puller provided in the fuse
box.
SPARE SPARE SPARE
SPARE
USE THE DESIGNATED
FUSES AND RELAYS ONLYSPARE SPARE
(A)
(B)
(C)
(D)
(E)
(F)
(G)
(H)(I)
(J)
(L)
(M)
(N)
(O)
(P)
(Q)
(R)
(S)
(T)
(U)
(K)(V)
(W)
(A) 15A STOP Stop lamp fuse
(B) – – Blank
(C) 15A ACC 3Accessory socket
fuse
(D) 10A CRUISE Cruise control fuse
(E) 15A ACC 2Cigar or Accessory
socket fuse
(F) 20A WIP Wiper fuse
(G) 15A IG2 SIGIgnition signal & Seat
heater fuse
(H) 10A BACK Back lamp fuse
(I) 10A ABS/ESPABS or ESP control-
ler fuse
(J) 15A A/B Air bag fuse
(K) – – Blank
(L) 15A HAZ Hazard light fuse
(M) 7.5A ST SIG Starter signal fuse
(N) 20ARR
BLOWBlank
(O) 25A S/R Sun roof motor fuse
(P) 15A DOME Dome lamp fuse
(Q) 10A TAIL Tail light fuse
(R) 20A D/LDoor lock actuator
fuse
(S) 15A ACCRadio, Remote door
mirror fuse
(T) 10A METER Meter fuse
(U) 20A IG COIL Ignition coil fuse
(V) 20A P/W T Power window fuse
(W) 30A P/W Power window fuse
Bulb Replacement: 7
Page 176 of 211

Downloaded from www.Manualslib.com manuals search engine 9-38 INSPECTION AND MAINTENANCE
66J21-03E
NOTE:
Make sure that the fuse box cover always
carries spare fuses.
60A243
81A283
Headlight AimingSince special procedures are required, we
recommend you take your vehicle to your
SUZUKI dealer for headlight alignment.
WARNING
Always be sure to replace a blown
fuse with a fuse of the correct amper-
age. Never use a substitute such as
aluminum foil or wire to replace a
blown fuse. If you replace a fuse and
the new one blows in a short period
of time, you may have a major electri-
cal problem. Have your vehicle
inspected immediately by your
SUZUKI dealer.
BLOWNOKBLOWN OK
Bulb Replacement: 7
Page 177 of 211

Downloaded from www.Manualslib.com manuals search engine 9-39 INSPECTION AND MAINTENANCE
66J21-03E
Bulb ReplacementNOTE:
If it is difficult to replace headlight bulbs or
clearance light bulbs due to under-hood
components trust this job to your dealer.
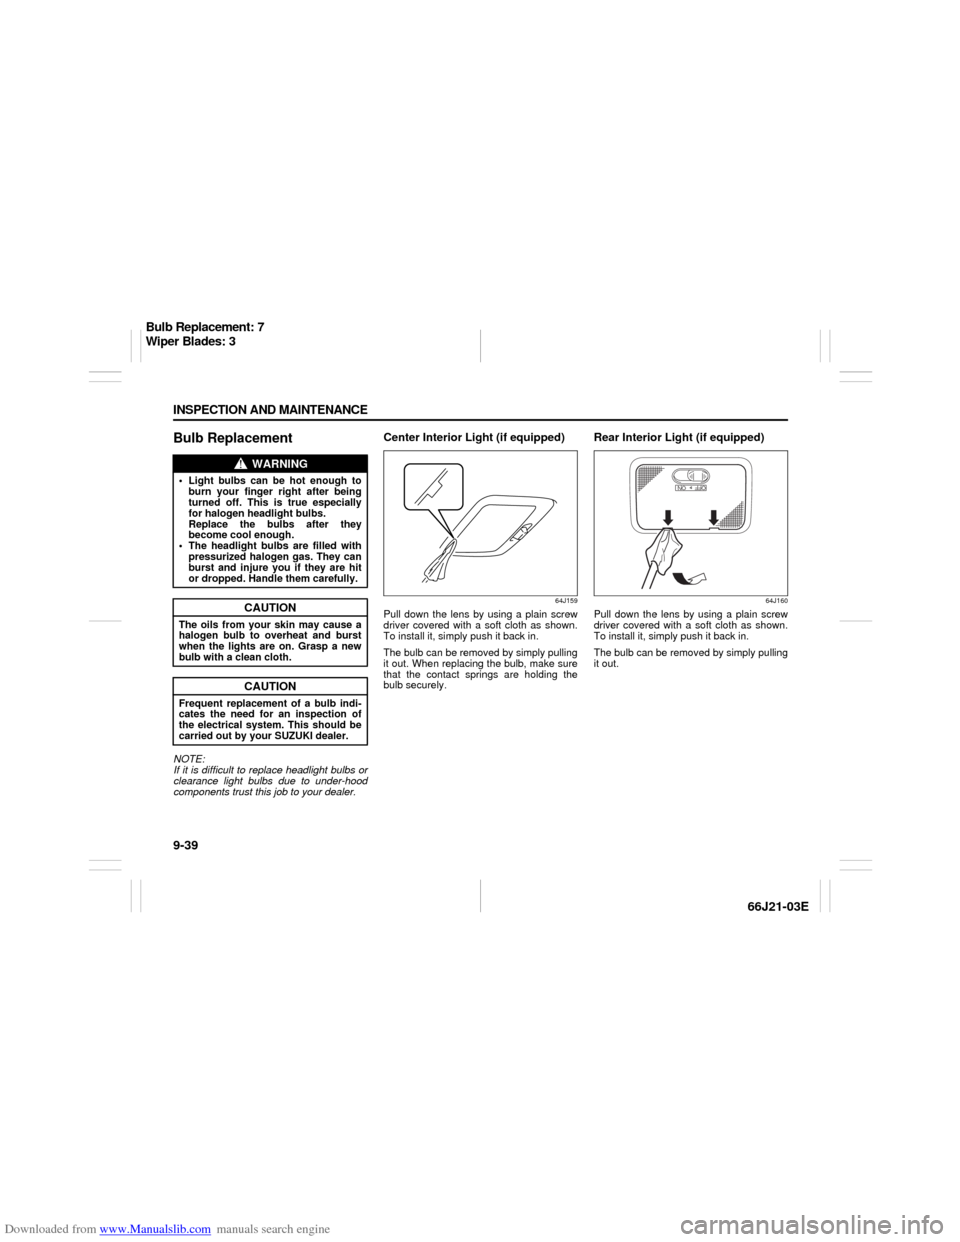
Center Interior Light (if equipped)
64J159
Pull down the lens by using a plain screw
driver covered with a soft cloth as shown.
To install it, simply push it back in.
The bulb can be removed by simply pulling
it out. When replacing the bulb, make sure
that the contact springs are holding the
bulb securely.
Rear Interior Light (if equipped)
64J160
Pull down the lens by using a plain screw
driver covered with a soft cloth as shown.
To install it, simply push it back in.
The bulb can be removed by simply pulling
it out.
WARNING
Light bulbs can be hot enough to
burn your finger right after being
turned off. This is true especially
for halogen headlight bulbs.
Replace the bulbs after they
become cool enough.
The headlight bulbs are filled with
pressurized halogen gas. They can
burst and injure you if they are hit
or dropped. Handle them carefully.
CAUTION
The oils from your skin may cause a
halogen bulb to overheat and burst
when the lights are on. Grasp a new
bulb with a clean cloth.
CAUTION
Frequent replacement of a bulb indi-
cates the need for an inspection of
the electrical system. This should be
carried out by your SUZUKI dealer.
Bulb Replacement: 7
Wiper Blades: 3
Page 185 of 211

Downloaded from www.Manualslib.com manuals search engine 9-47 INSPECTION AND MAINTENANCE
66J21-03E
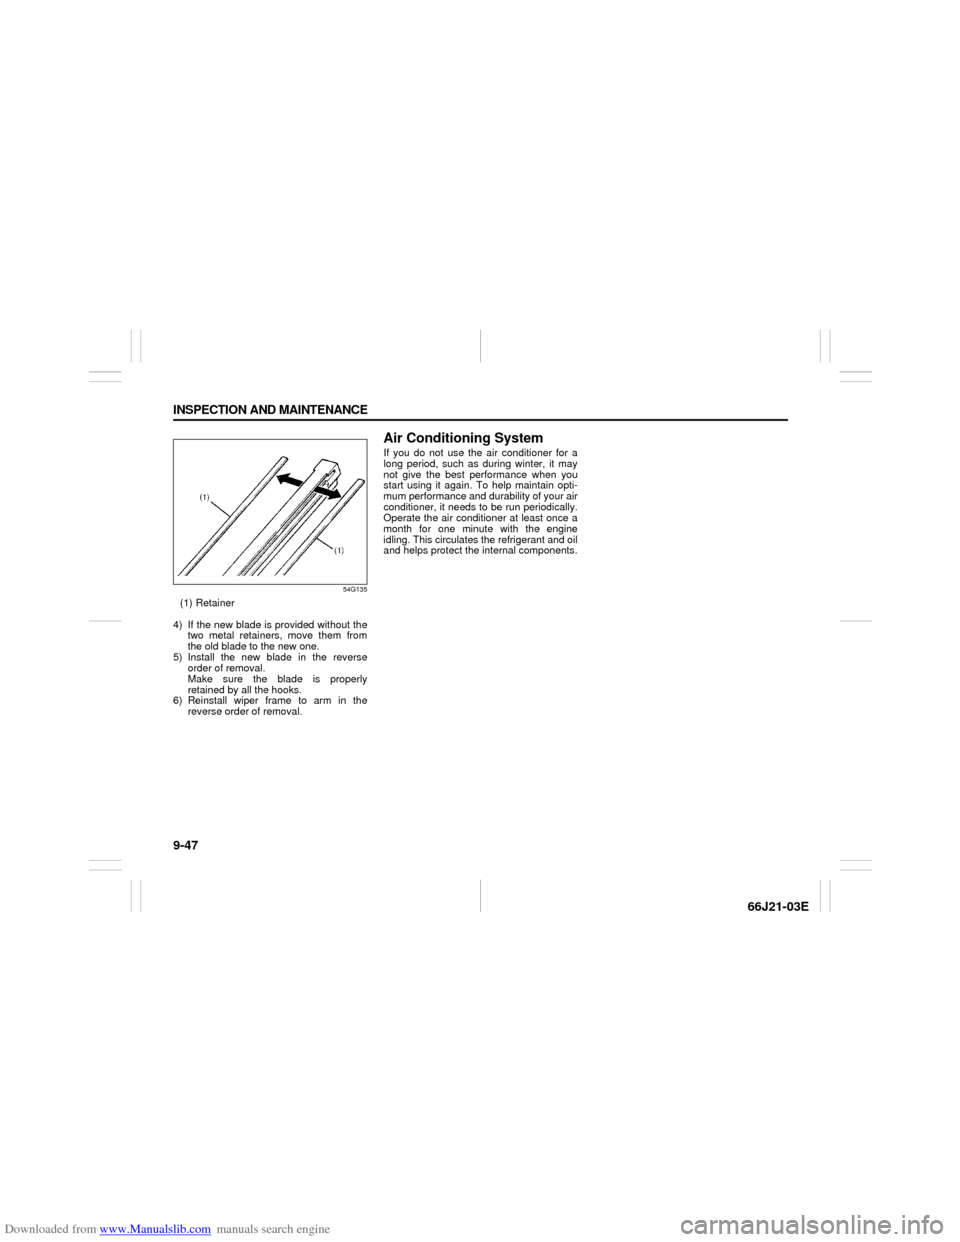
54G135
(1) Retainer
4) If the new blade is provided without the
two metal retainers, move them from
the old blade to the new one.
5) Install the new blade in the reverse
order of removal.
Make sure the blade is properly
retained by all the hooks.
6) Reinstall wiper frame to arm in the
reverse order of removal.
Air Conditioning SystemIf you do not use the air conditioner for a
long period, such as during winter, it may
not give the best performance when you
start using it again. To help maintain opti-
mum performance and durability of your air
conditioner, it needs to be run periodically.
Operate the air conditioner at least once a
month for one minute with the engine
idling. This circulates the refrigerant and oil
and helps protect the internal components.
Page 187 of 211

Downloaded from www.Manualslib.com manuals search engine 11-1 APPEARANCE CARE
66J21-03E
Corrosion PreventionIt is important to take good care of your
vehicle to protect it from corrosion.
Listed below are instructions for how to
maintain your vehicle to prevent corrosion.
Please read and follow these instructions
carefully.Important Information About Corro-
sionCommon causes of corrosion
1) Accumulation of road salt, dirt, moisture
or chemicals in hard to reach areas of
the vehicle underbody or frame.
2) Chipping, scratches and any damage to
treated or painted metal surfaces
resulting from minor accidents or
impact from stones and gravel.
Environmental conditions which accel-
erate corrosion
1) Road salt, dust control chemicals, sea
air or industrial pollution will all acceler-
ate the corrosion of metal.
2) High humidity will increase the rate of
corrosion particularly when the temper-
ature range is just above the freezing
point.
3) Moisture in certain areas of a vehicle
for an extended period of time may pro-
mote corrosion even though other body
sections may be completely dry.
4) High temperatures will cause an accel-
erated rate of corrosion to parts of thevehicle which are not well ventilated to
permit quick drying.
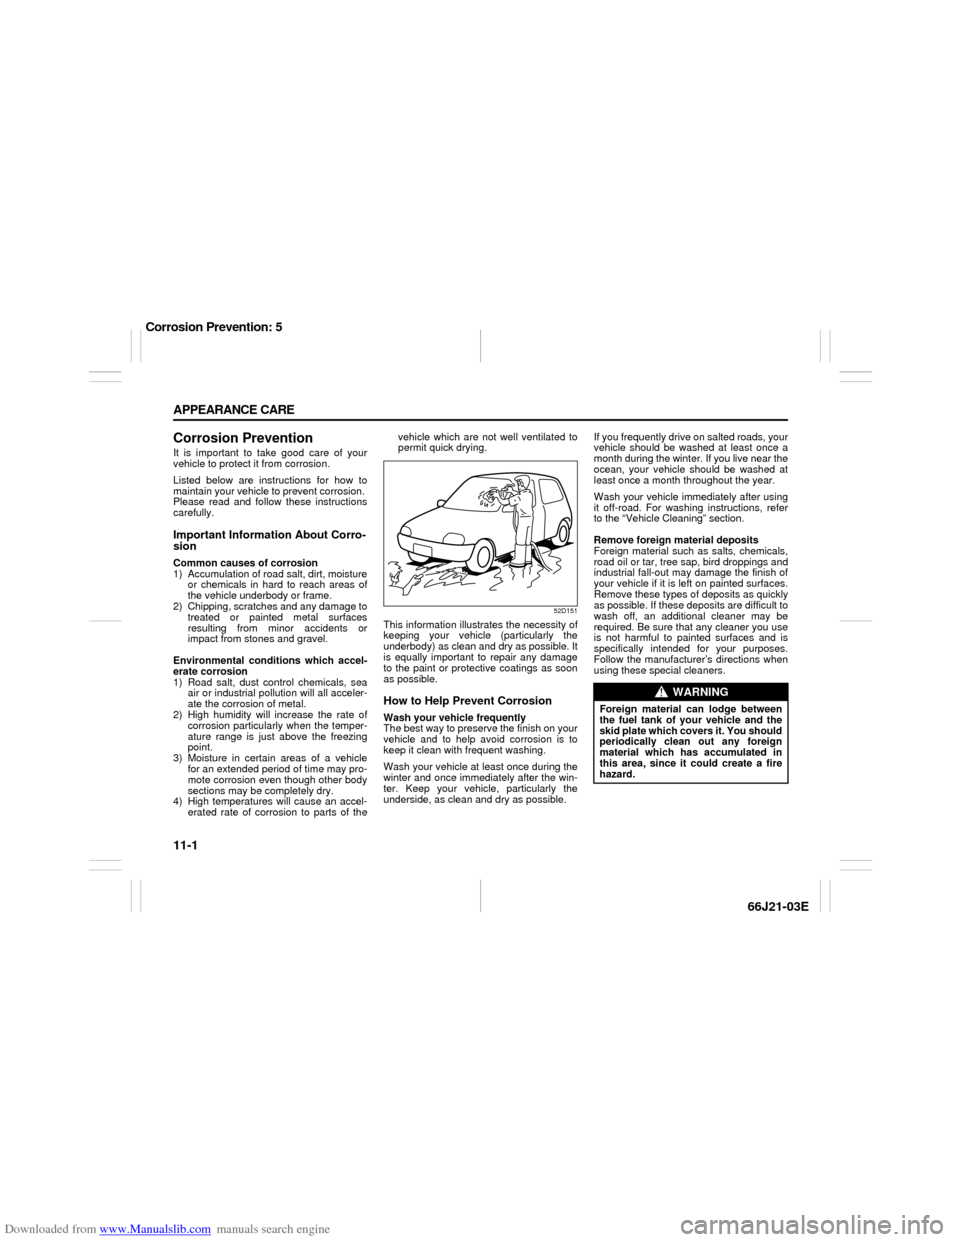
52D151
This information illustrates the necessity of
keeping your vehicle (particularly the
underbody) as clean and dry as possible. It
is equally important to repair any damage
to the paint or protective coatings as soon
as possible.How to Help Prevent CorrosionWash your vehicle frequently
The best way to preserve the finish on your
vehicle and to help avoid corrosion is to
keep it clean with frequent washing.
Wash your vehicle at least once during the
winter and once immediately after the win-
ter. Keep your vehicle, particularly the
underside, as clean and dry as possible.If you frequently drive on salted roads, your
vehicle should be washed at least once a
month during the winter. If you live near the
ocean, your vehicle should be washed at
least once a month throughout the year.
Wash your vehicle immediately after using
it off-road. For washing instructions, refer
to the “Vehicle Cleaning” section.
Remove foreign material deposits
Foreign material such as salts, chemicals,
road oil or tar, tree sap, bird droppings and
industrial fall-out may damage the finish of
your vehicle if it is left on painted surfaces.
Remove these types of deposits as quickly
as possible. If these deposits are difficult to
wash off, an additional cleaner may be
required. Be sure that any cleaner you use
is not harmful to painted surfaces and is
specifically intended for your purposes.
Follow the manufacturer’s directions when
using these special cleaners.
WARNING
Foreign material can lodge between
the fuel tank of your vehicle and the
skid plate which covers it. You should
periodically clean out any foreign
material which has accumulated in
this area, since it could create a fire
hazard.
Corrosion Prevention: 5
Page 189 of 211

Downloaded from www.Manualslib.com manuals search engine 11-3 APPEARANCE CARE
66J21-03E
Vehicle Cleaning
76G044S
Cleaning InteriorVinyl upholstery
Prepare a solution of soap or mild deter-
gent mixed with warm water. Apply the
solution to the vinyl with a sponge or soft
cloth and let it soak for a few minutes to
loosen dirt. Rub the surface with a clean,damp cloth to remove dirt and the soap
solution. If some dirt still remains on the
surface, repeat this procedure.
Fabric upholstery
Remove loose dirt with a vacuum cleaner.
Using a mild soap solution, rub stained
areas with a clean damp cloth. To remove
soap, rub the areas again with a cloth
dampened with water. Repeat this until the
stain is removed, or use a commercial fab-
ric cleaner for tougher stains. If you use a
fabric cleaner, carefully follow the manu-
facturer’s instructions and precautions.
Leather upholstery
Remove loose dirt with a vacuum cleaner.
Using a mild soap or saddle soap solution,
wipe dirt off with a clean damp soft cloth.
To remove soap, wipe the areas again with
a soft cloth dampened with water. Wipe the
areas dry with a soft dry cloth. Repeat this
until the dirt or stain is removed, or use a
commercial leather cleaner for tougher dirt
or stains. If you use a leather cleaner, care-
fully follow the manufacture’s instructions
and precautions. Do not use solvent type
cleaners or abrasive cleaners.
Seat belts
Clean seat belts with a mild soap and
water. Do not use bleach or dye on the
belts. They may weaken the fabric in the
belts.
Vinyl floor mats
Ordinary dirt can be removed from vinyl
with water or mild soap. Use a brush tohelp loosen dirt. After dirt is loosened,
rinse the mat thoroughly with water and
dry it in the shade.
Carpets
Remove dirt and soil as much as possible
with a vacuum cleaner. Using a mild soap
solution, rub stained areas with a clean
damp cloth. To remove soap, rub the areas
again with a cloth dampened with water.
Repeat this until the stain is removed, or
use a commercial carpet cleaner for
tougher stains. If you use a carpet cleaner,
carefully follow the manufacturer’s instruc-
tions and precautions.
Instrument panel and console
NOTE:
Wipe up spills containing chemicals, alco-
hol, etc., immediately with a soft, damp
cloth. Use a mild soap solution if neces-
sary. Do not use cleaners or polishes con-
taining strong solvents or acidic solutions.
These chemicals may stain and discolor
the instrument panel and console.
Cleaning the Exterior
WARNING
When cleaning the interior or exterior
of the vehicle, NEVER USE flammable
solvents such lacquer thinners, gas-
oline, benzene or cleaning materials
such as bleaches and strong house-
hold detergents. The materials could
cause personal injury or damage to
the vehicle.
CAUTION
It is important that your vehicle be
kept clean and free from dirt. Failure
to keep your vehicle clean may result
in fading of the paint or corrosion to
various parts of the vehicle body.
Vehicle Cleaning: 5