Page 96 of 211
Downloaded from www.Manualslib.com manuals search engine 4-34 INSTRUMENT PANEL
66J21-03E
Listening to the Radio
66J216
(1)
(4)(6)
(2)
(3)
(5)
(1)
(4)(6)
(2)
(3)
(5)
Type 1 AM/FM/XM CD PLAYER WITH CD CHANGER CONTROL
Type 2 AM/FM/XM 6-CD PLAYER WITH CD CHANGER CONTROL
Display
66J097
(1) Band switch button (FM/AM)
(2) Seek up button
(3) Seek down button
(4) Manual tuning knob
(5) Preset buttons (1 to 6)
(6) Auto store button (AS)/
Scan button (SCAN)
(A) Band
(B) Preset channel number
(C) Stereo indicator
(D) Frequency
(A)
(B)
(C)
(D)
Audio Systems:
Page 97 of 211

Downloaded from www.Manualslib.com manuals search engine 4-35 INSTRUMENT PANEL
66J21-03E
Selecting the reception band
Press the band switch button (1).
Each time the button is pressed, the recep-
tion band is switched as follows:
66J098
Seek tuning
Press the seek up button (2) or the seek
down button (3).
The unit stops searching for a station at a
frequency where a broadcast station is
available.
Manual tuning
Turn the manual tuning knob (4).
The frequency being received is displayed.
Preset memory
1) Select the desired station.
2) Select the preset button (5) to which
you want to store the station and press
and hold the button for 2 seconds or
longer.Auto store
Press and hold the auto store button (6) for
2 seconds or longer.
Six stations in total are automatically
stored to the preset buttons (5) in sequen-
tial order, starting from the lower frequen-
cies.
NOTE:
When the auto store is performed, the
station previously stored in the memory
at the position is overwritten.
When there are fewer than 6 stations
that can be stored even if 2 rounds of
auto store operation are performed, the
stations previously stored at the remain-
ing preset buttons (5) are not overwrit-
ten.
Scan tuning
1) Press the scan button (6).
Stations are automatically sought for in
a sequential order, starting from a sta-
tion being currently received, and scan
stops for 5 seconds at a frequency
where there is a station available.
2) Press the scan button (6) again to stop
scanning at the frequency being cur-
rently received.
Receiving a stereo broadcast station
If a stereo broadcast station is received,
the stereo indicator will light.
Radio ReceptionRadio reception can be affected by envi-
ronment, atmospheric conditions, or radio
signal’s power and distance from the sta-
tion. Nearby mountains and buildings may
interfere or deflect radio reception, causing
poor reception. Poor reception or radio
static can also be caused by electric cur-
rent from overhead wires or high voltage
power lines.
Audio Systems:
Page 106 of 211
Downloaded from www.Manualslib.com manuals search engine 4-44 INSTRUMENT PANEL
66J21-03E
Listening to a XM Satellite Radio (Option)
66J219
(5)(2)
(8)
(6)
(3)
(4)
(7)
(1)(5)(2)
(8)
(6)
(3)
(4)
(7)
(1)
Type 1 AM/FM/XM CD PLAYER WITH CD CHANGER CONTROL
Type 2 AM/FM/XM 6-CD PLAYER WITH CD CHANGER CONTROL
Display
66J107
(1) XM button
(2) Category button (CAT)
(3) Seek up button
(4) Seek down button
(5) Manual tuning knob
(6) Display button (DISP)
(7) Preset button (1 to 6)
(8) Scan button (SCAN)
(A) Band
(B) Channel number
(C) Category indicator
If you want to purchase XM Satellite Radio
Service, contact your SUZUKI dealer.
It is necessary to buy a special tuner to
receive XM broadcasting.
Your vehicle is capable of receiving XM
Satellite Radio anywhere in the United
States except Hawaii, Alaska, and Can-
ada.
(A)
(B) (C)
Audio Systems:
Page 107 of 211

Downloaded from www.Manualslib.com manuals search engine 4-45 INSTRUMENT PANEL
66J21-03E
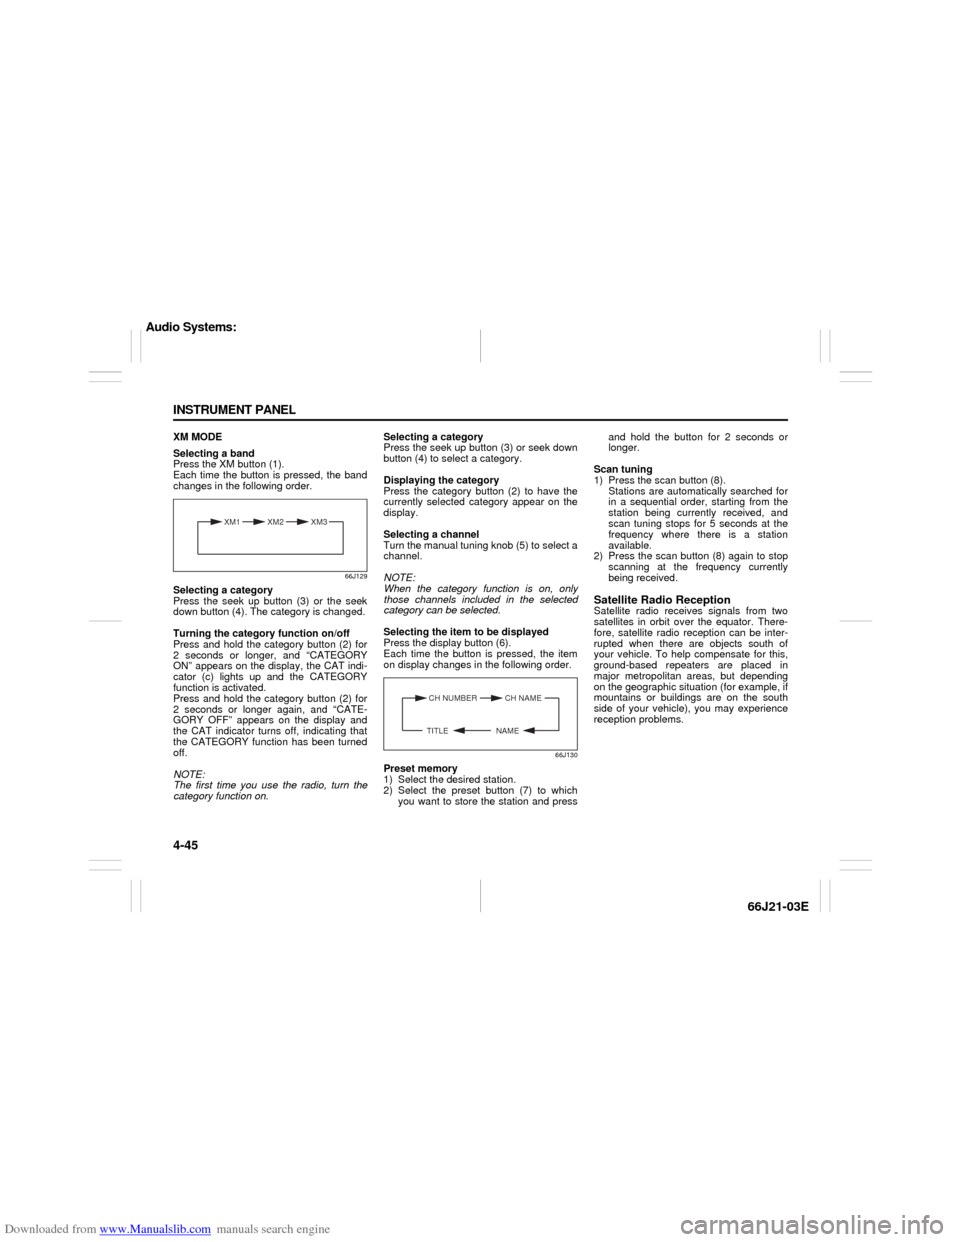
XM MODE
Selecting a band
Press the XM button (1).
Each time the button is pressed, the band
changes in the following order.
66J129
Selecting a category
Press the seek up button (3) or the seek
down button (4). The category is changed.
Turning the category function on/off
Press and hold the category button (2) for
2 seconds or longer, and “CATEGORY
ON” appears on the display, the CAT indi-
cator (c) lights up and the CATEGORY
function is activated.
Press and hold the category button (2) for
2 seconds or longer again, and “CATE-
GORY OFF” appears on the display and
the CAT indicator turns off, indicating that
the CATEGORY function has been turned
off.
NOTE:
The first time you use the radio, turn the
category function on.Selecting a category
Press the seek up button (3) or seek down
button (4) to select a category.
Displaying the category
Press the category button (2) to have the
currently selected category appear on the
display.
Selecting a channel
Turn the manual tuning knob (5) to select a
channel.
NOTE:
When the category function is on, only
those channels included in the selected
category can be selected.
Selecting the item to be displayed
Press the display button (6).
Each time the button is pressed, the item
on display changes in the following order.
66J130
Preset memory
1) Select the desired station.
2) Select the preset button (7) to which
you want to store the station and pressand hold the button for 2 seconds or
longer.
Scan tuning
1) Press the scan button (8).
Stations are automatically searched for
in a sequential order, starting from the
station being currently received, and
scan tuning stops for 5 seconds at the
frequency where there is a station
available.
2) Press the scan button (8) again to stop
scanning at the frequency currently
being received.
Satellite Radio ReceptionSatellite radio receives signals from two
satellites in orbit over the equator. There-
fore, satellite radio reception can be inter-
rupted when there are objects south of
your vehicle. To help compensate for this,
ground-based repeaters are placed in
major metropolitan areas, but depending
on the geographic situation (for example, if
mountains or buildings are on the south
side of your vehicle), you may experience
reception problems.
XM1 XM2
XM3
CH NUMBER CH NAME
NAME TITLE
Audio Systems:
Page 112 of 211

Downloaded from www.Manualslib.com manuals search engine 4-50 INSTRUMENT PANEL
66J21-03E
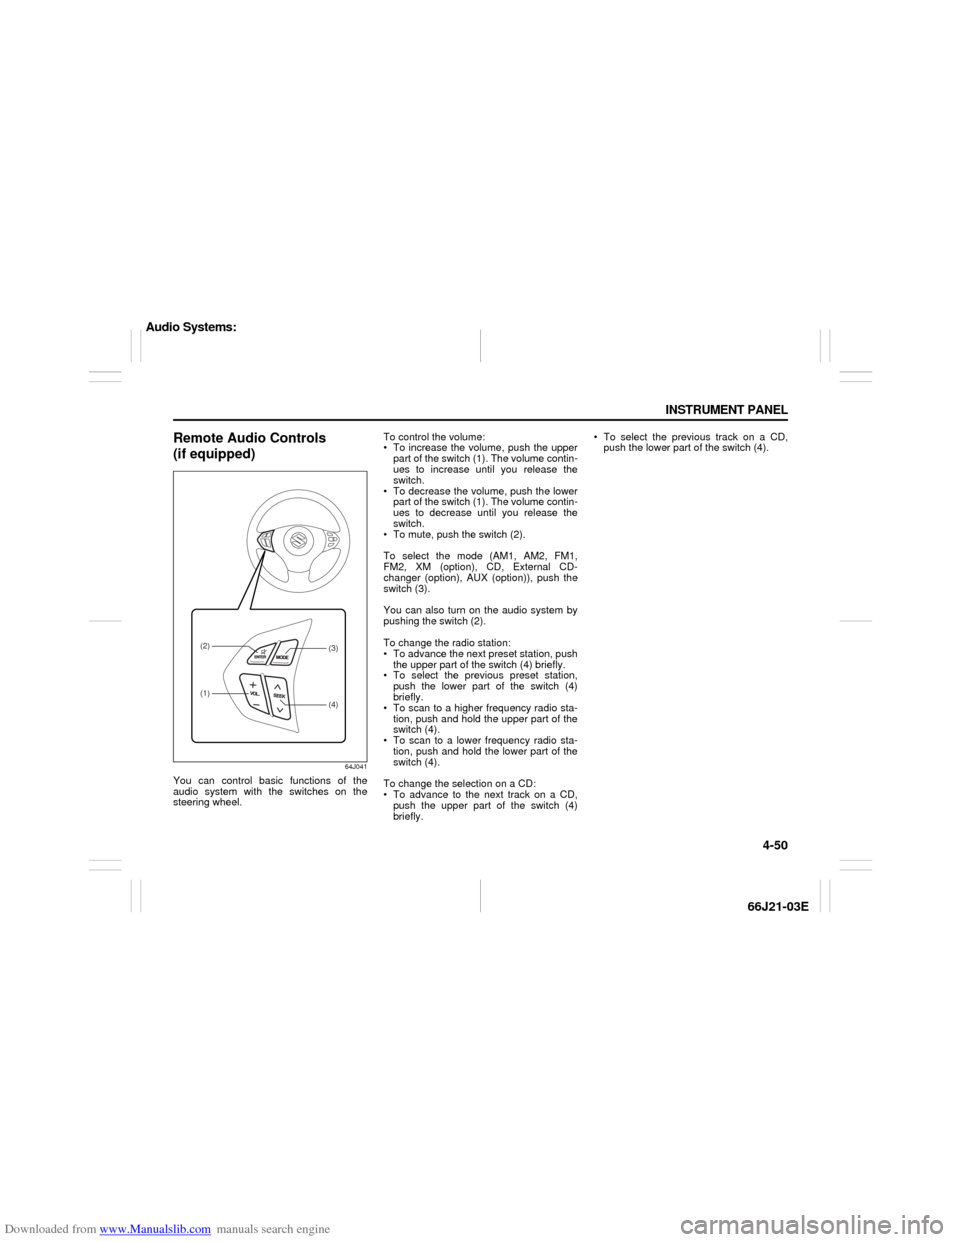
Remote Audio Controls
(if equipped)
64J041
You can control basic functions of the
audio system with the switches on the
steering wheel.To control the volume:
To increase the volume, push the upper
part of the switch (1). The volume contin-
ues to increase until you release the
switch.
To decrease the volume, push the lower
part of the switch (1). The volume contin-
ues to decrease until you release the
switch.
To mute, push the switch (2).
To select the mode (AM1, AM2, FM1,
FM2, XM (option), CD, External CD-
changer (option), AUX (option)), push the
switch (3).
You can also turn on the audio system by
pushing the switch (2).
To change the radio station:
To advance the next preset station, push
the upper part of the switch (4) briefly.
To select the previous preset station,
push the lower part of the switch (4)
briefly.
To scan to a higher frequency radio sta-
tion, push and hold the upper part of the
switch (4).
To scan to a lower frequency radio sta-
tion, push and hold the lower part of the
switch (4).
To change the selection on a CD:
To advance to the next track on a CD,
push the upper part of the switch (4)
briefly. To select the previous track on a CD,
push the lower part of the switch (4).
(1)(2)
(4)(3)
Audio Systems: