2007 SUZUKI FORENZA change time
[x] Cancel search: change timePage 113 of 225

3-37 INSTRUMENT PANEL
85Z03-03E
CDP MODE
Press the Seek Button for a short time to
go to the next track.
84Z026
Press and hold the Seek Button to fast
play.
Mode Button
Press the Mode Button to change the
mode. (“CDP” is displayed when a CD is in
the CDP deck)
84Z027
Track01 Track02
AM-1 AM-2
FM1 FM2
AM-A (CDP)
FM-A
Radio with Six-Disc CD (Double Display, MP3/WMA) (AGH-6400)
85Z019
1. Power/Volume knob
2. AM button
3. FM button
4. TUNE button
5. SEEK button
6. SCAN/AST button
7. Preset station buttons
1 DIR: Directory button
2 RPT: Repeat button3 RDM: Random button
4 INT: Introduction button
5 DSC–: Previous CDC button
6 DSC+: Next CDC button
8. SOUND (SCROLL) button
9. LOAD button
10. CDC button
11. EJECT button
12. INFO/DISP button6812
1
5 910
411
3
2
7
Page 114 of 225

3-38 INSTRUMENT PANEL
85Z03-03E
PLAYING THE RADIO
Power/Volume knob (1):
Press this knob to turn the system on and
off.
Turn the Power/Volume knob clockwise or
counterclockwise to increase or decrease
the volume.
Press this button for a short time to MUTE
the radio. Press the button again to cancel
MUTE.
Finding a Station
AM button (2):
Press this button to switch to an AM sta-
tion. The display will show the selection.
FM button (3):
Press this button to switch to an FM sta-
tion. The display will show the selection.
TUNE button (4):
Press this button to select radio stations.
(Manual tuning)
Press the up arrows to increase the fre-
quency.
Press the down arrows to decrease the fre-
quency.
The frequency of the AM band changes
10 kHz each time and the frequency of the
FM band changes 200 kHz each time.
SEEK button (5):
Press this button to search for and select
receivable radio stations. (Seek tuning)
To search for the next receivable higher
station, press the up arrows. To search for the previous receivable lower
station, press the down arrows.
SCAN/AST button (6):
Press this button to scan radio stations.
(Scan tuning)
Scan
The radio will go to a station, play for a few
seconds, and then go on to the next sta-
tion. Press this button again to stop scan-
ning.
The radio will only scan stations with a
strong signal that are in the selected band.
Automatic Store
Press and hold this button to use Auto
Store.
FM1’s 6 preset stations with the strongest
signal in the region can be automatically
stored. The display will show “AUTO
SCANNING”, and “SCANNING” will flash
on display.
Stored stations will flash for a short time on
display in sequence. Once the stations are
stored, the radio will switch to FM-A and
the first preset station will begin to play.
FM-A will appear on the display when lis-
tening to the automatically stored stations.
Press the AM or FM button to stop auto-
matic store.Preset station buttons (7):
Setting Preset Stations
Up to 36 stations (six FM1, six FM2, six
FM-A and six AM1, six AM2, six AM-A),
can be programmed on the six numbered
preset buttons, by performing the following
steps:
1) Turn the radio on.
2) Press the AM or FM button to select
FM1, FM2, FM-A, AM1, AM2 or AM-A.
3) Tune in the desired station.
4) Press and hold one of the six numbered
preset buttons.
The preset button number (Display:
CH#1 ~ CH#6) will flash on the display
when the station has been set. When-
ever that numbered preset button is
pressed, the memorized station will
return.
5) Repeat the previous four steps for each
preset button.
Page 118 of 225
3-42 INSTRUMENT PANEL
85Z03-03E
Playing an MP3/WMA
With the ignition on, insert a CD partway
into the slot, label side up. The player will
pull it in, then “LOADING”, and then “MP3”
or “WMA” will appear on the display. The
CD should begin playing. You can’t insert a
CD with the acc off. As each new track
starts to play, the track number, and the
song name will appear on the display.
If the ignition or radio is turned off with a
CD in the player, it will stay in the player.
When a CD is in the player and the ignition
is turned on, the radio must be turned on
before the CD will start playback. When
the ignition and radio are turned on, the
CD will start playing where it stopped, if it
was the last selected audio source.
The CD player can play the smaller 3 inch
(8 cm) single CDs with an adapter ring.
Full-size CDs and the smaller CDs are
loaded in the same manner.
If playing a CD-R, the sound quality may
be reduced due to CD-R quality, the
method of recording, the quality of the
music that has been recorded, and the way
the CD-R has been handled. There may be
an increase in skipping, difficulty in finding
tracks, and/or difficulty in loading and
ejecting. If these problems occur, check
the bottom surface of the CD. If the surface
of the CD is damaged, such as cracked,
broken, or scratched, the CD will not play
properly. If there is no apparent damage,
try a known good CD.Do not add any label to a CD, it could get
caught in the CD player. If a CD is
recorded on a personal computer and a
description label is needed, try labeling the
top of the recorded CD with a marking pen
instead.
If an error appears on the display, see “CD
Messages” later in this section.
All of the CD functions work the same
while playing an MP3/WMA, except for
those listed here. See “Playing a CD” ear-
lier for more information.
DIR (Directory) button (11):
Press this button to repeat the tracks in the
current directory. “DIR” will appear on the
display.
Press this button again to repeat the tracks
in all of the directories. “ALL” will appear on
the display.
Press this button again to turn off repeat
play.
SEEK (Previous/Next Folder) button (5)
(in MP3/WMA mode):
Press the up or down arrows to change the
folder. If the CD-R doesn’t have any folder,
“ROOT” will flash on display for a short
time.TUNE (Previous/Next Folder) button (4):
Press the up or down arrows to go to the
first track in the previous folder or to go to
the next folder. The player will continue
moving backward or forward through the
CD with each press of the up or down
arrows.
INFO/DISP (Information/Display) button
(12):
Press this button to display additional text
information related to the current MP3/
WMA song. A choice of additional informa-
tion such as: Song Title, Album Title, Artist,
and Bit rate may appear.
When information is not available, “No Info”
will appear on the display.
Press and hold this button to change the
display mode.
Scroll:
Press and hold the sound button [in MP3/
WMA mode]
The song title or other information of a
song will scroll on/off. The default mode is
scroll on.
Scroll mode can be changed only when
you press and hold the sound button.
Page 119 of 225
3-43 INSTRUMENT PANEL
85Z03-03E
CD Messages
CHECK CD:
If this message appears on the display
and/or the CD comes out, it could be for
one of the following reasons:
It is very hot. When the temperature
returns to normal, the CD will play.
You are driving on a very rough road.
When the road becomes smoother, the
CD will play.
The CD is dirty, scratched, wet, or
upside down.
The air is very humid. If so, wait about an
hour and try again.
The format of the CD may not be com-
patible. See “MP3/WMA Format” earlier
in this section.
There may have been a problem while
burning the CD.
The label may be caught in the CD
player.
If the CD is not playing correctly, for any
other reason, try a known good CD.
If any error occurs repeatedly or if an error
cannot be corrected, contact your SUZUKI
dealer. If the radio displays an error mes-
sage, write it down and provide it to your
SUZUKI dealer when reporting the prob-
lem.AUX Mode
Press this button to listen to the audio con-
tents from other devices; Walkman, Porta-
ble CD Player, Portable MP3 Player, i-pod,
XM receiver, etc.
1) Connect the output port of the device to
the aux jack of the head unit with an
aux connector.
2) Turn the device on.
3) Press this button.
If you want to control the volume level, use
the volume buttons of the head unit or the
device.
Using the Auxiliary Input Jack
Your radio system has an auxiliary input
jack located on the lower right side of the
faceplate. This is not an audio output; do
not plug a headphone set into the front
auxiliary input jack. You can however, con-
nect an external audio device such as an
iPod, laptop computer, MP3 player, CD
changer, or cassette tape player, etc. to the
auxiliary input jack for use as another
source for audio listening.
The auxiliary input jack will also accept cell
phone connectors. Plug the cell phone
connector into the auxiliary input jack to
hear the other side of a cell phone’s con-
versation through the vehicle sound sys-
tem.
Drivers are encouraged to set up their por-
table audio player while the vehicle isparked. See Defensive Driving for more
information on driver distraction.
To use a portable audio player, connect a
3.5 mm (1/8 inch) cable to the radio’s front
auxiliary input jack. When a device is con-
nected, press the radio CD/AUX button as
needed to begin playing audio from the
device over the car speakers.
CD/AUX (CD/Auxiliary) button (9):
Press this button once to play a CD while a
portable audio device is playing. Press this
button a second time and the system will
begin playing audio from the connected
portable audio player. Once in this mode,
“Auxinput” will appear on the display. If the
auxiliary jack does not detect the presence
of an output jack, the aux mode will be pre-
vented from coming up.
Power/Volume knob (1):
Turn this knob clockwise or counterclock-
wise to increase or decrease the volume of
the portable player. You may need to make
additional volume adjustments from the
portable device if the volume does not go
loud or soft enough.
Page 120 of 225
3-44 INSTRUMENT PANEL
85Z03-03E
STEERING WHEEL REMOTE OPER-
ATION (if equipped in the vehicle)Power Button
Press this button to turn the system on and
off. Press this button for a short time to
MUTE the sound. To cancel MUTE, press
this button again.
Volume Up Button
Press this button to increase the volume
level.
Volume Down Button
Press this button to decrease the volume
level.
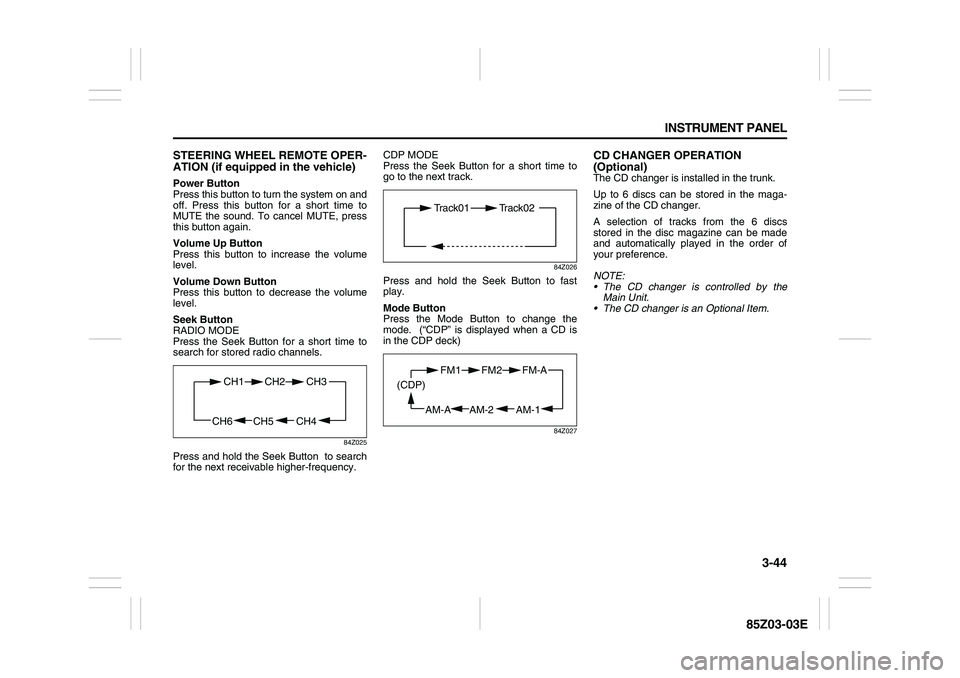
Seek Button
RADIO MODE
Press the Seek Button for a short time to
search for stored radio channels.
84Z025
Press and hold the Seek Button to search
for the next receivable higher-frequency.CDP MODE
Press the Seek Button for a short time to
go to the next track.
84Z026
Press and hold the Seek Button to fast
play.
Mode Button
Press the Mode Button to change the
mode. (“CDP” is displayed when a CD is
in the CDP deck)
84Z027
CD CHANGER OPERATION
(Optional)The CD changer is installed in the trunk.
Up to 6 discs can be stored in the maga-
zine of the CD changer.
A selection of tracks from the 6 discs
stored in the disc magazine can be made
and automatically played in the order of
your preference.
NOTE:
The CD changer is controlled by the
Main Unit.
The CD changer is an Optional Item.
CH4 CH5
CH1 CH2
CH6
CH3
Track01 Track02
AM-1 AM-2
FM1 FM2
AM-A (CDP)
FM-A
Page 123 of 225
3-47 INSTRUMENT PANEL
85Z03-03E
The CD changer is operated by the main
unit.
1) Press the power button on the main unit
to turn the audio system on.
2) If a disc is already inserted inside the
CD changer, press the “CD” button.
Playback starts at the beginning of the
track that you were previously listening
to.
3) If a disc is not inserted yet, load a disc
in the magazine. (Refer to “How to
change discs”.)
Then, press the “CD” button to play.
Playback starts from the No. 1 disc.
CD Changer Play:
To play the CD Changer while operating
the radio, press the “CD” button if a disc is
already inserted in the CD changer.
The mode is transferred to the CD changer
and the CD is played back from the track
that you were previously listening to.
If a disc is not in the CD changer, the mode
is not changed to the CD changer when
you press this button.
Track Up & Down:
The track up & down knob/button allows
you to make quick selections from your
playing disc.
1) To play the next track, rotate this knob
clockwise for less than 1 second or
press the track up button once. Each
time you rotate the knob or press thebutton, the disc will skip to the next
track.
2) To play the previous track, rotate this
knob counterclockwise for less than 1
second or press the track down button
once. Each time you rotate the knob or
press the button, the disc will skip to the
previous track.
Cue & Review:
This function allows desired point-search
within a track at a faster than normal play-
back speed.
1) To search for the desired point of a
track, rotate this knob and hold it or
press and hold the track up/down but-
ton. The audio level is reduced and the
disc will play at a faster than normal
playback speed. When the disc reaches
the desired point, release the knob/but-
ton and normal play will resume.
2) To cue (forward) the track, rotate this
knob clockwise or press the track up
button. To review (backward) the track,
rotate this knob counterclockwise or
press the track down button.
Repeat Play:
To repeatedly listen to the current track,
press the “2/RPT” button.
“RPT” is displayed in VFD and the current
track will be played back repeatedly until
this function is canceled.
To cancel this function, press this button
again.Track Introduction:
To quickly and conveniently scan the track,
use the “3 or 4/INT” button.
“INTRO” will be displayed in VFD and the
audio system will play the first 10 seconds
of each track.
When the player reaches the desired track,
press this button again and normal play will
resume.
Random Play:
To play a CD disc in random order, press
the “4 or 5/RDM” button.
“RDM” will be displayed in VFD and the
audio system will play the CD in random
order.
To cancel this function, press this button
again.
Disc Up / Down Button
To select another disc in ascending order,
press the “3 or 6/UP” button. The number
of the selected disc will appear on the
VFD.
To select another disc in descending order,
press the “5 or 6/DN” button. The number
of the selected disc will appear on the
VFD.
Page 128 of 225
4-4 DRIVING YOUR VEHICLE
85Z03-03E
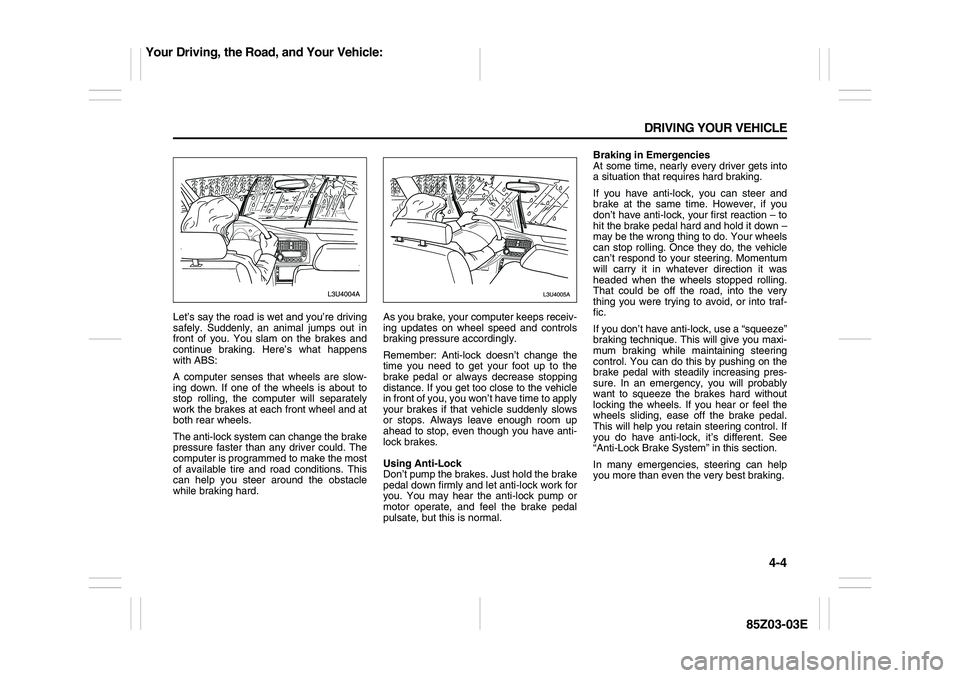
Let’s say the road is wet and you’re driving
safely. Suddenly, an animal jumps out in
front of you. You slam on the brakes and
continue braking. Here’s what happens
with ABS:
A computer senses that wheels are slow-
ing down. If one of the wheels is about to
stop rolling, the computer will separately
work the brakes at each front wheel and at
both rear wheels.
The anti-lock system can change the brake
pressure faster than any driver could. The
computer is programmed to make the most
of available tire and road conditions. This
can help you steer around the obstacle
while braking hard.As you brake, your computer keeps receiv-
ing updates on wheel speed and controls
braking pressure accordingly.
Remember: Anti-lock doesn’t change the
time you need to get your foot up to the
brake pedal or always decrease stopping
distance. If you get too close to the vehicle
in front of you, you won’t have time to apply
your brakes if that vehicle suddenly slows
or stops. Always leave enough room up
ahead to stop, even though you have anti-
lock brakes.
Using Anti-Lock
Don’t pump the brakes. Just hold the brake
pedal down firmly and let anti-lock work for
you. You may hear the anti-lock pump or
motor operate, and feel the brake pedal
pulsate, but this is normal.Braking in Emergencies
At some time, nearly every driver gets into
a situation that requires hard braking.
If you have anti-lock, you can steer and
brake at the same time. However, if you
don’t have anti-lock, your first reaction – to
hit the brake pedal hard and hold it down –
may be the wrong thing to do. Your wheels
can stop rolling. Once they do, the vehicle
can’t respond to your steering. Momentum
will carry it in whatever direction it was
headed when the wheels stopped rolling.
That could be off the road, into the very
thing you were trying to avoid, or into traf-
fic.
If you don’t have anti-lock, use a “squeeze”
braking technique. This will give you maxi-
mum braking while maintaining steering
control. You can do this by pushing on the
brake pedal with steadily increasing pres-
sure. In an emergency, you will probably
want to squeeze the brakes hard without
locking the wheels. If you hear or feel the
wheels sliding, ease off the brake pedal.
This will help you retain steering control. If
you do have anti-lock, it’s different. See
“Anti-Lock Brake System” in this section.
In many emergencies, steering can help
you more than even the very best braking.
Your Driving, the Road, and Your Vehicle:
Page 131 of 225
4-7 DRIVING YOUR VEHICLE
85Z03-03E
gerous move, since the passing vehicle
occupies the same lane as oncoming traf-
fic for several seconds. A miscalculation,
an error in judgment, or a brief surrender to
frustration or anger can suddenly put the
passing driver face to face with the worst of
all traffic accidents – the head-on collision.
So here are some tips for passing:
“Drive ahead.” Look down the road, to
the sides and to crossroads for situa-
tions that might affect your passing pat-
terns. If you have any doubt whatsoever
about making a successful pass, wait for
a better time.
Watch for traffic signs, pavement mark-
ings and lines. If you can see a sign up
ahead that might indicate a turn or an
intersection, delay your pass. A broken
center line usually indicates it’s all right
to pass (providing the road ahead is
clear). Never cross a solid line on your
side of the lane or a double solid line,
even if the road seems empty of
approaching traffic.
Do not get too close to the vehicle you
want to pass while you’re awaiting an
opportunity. For one thing, following too
closely reduces your area of vision,
especially if you’re following a larger
vehicle. Also, you won’t have adequate
space if the vehicle ahead suddenly
slows or stops. Keep back a reasonable
distance.
When it looks like a chance to pass is
coming up, start to accelerate but stay inthe right lane and don’t get too close.
Time your move so you will be increas-
ing speed as the time comes to move
into the other lane. If the way is clear to
pass, you will have a “running start” that
more than makes up for the distance you
would lose by dropping back. And if
something happens to cause you to can-
cel your pass, you need only slow down
and drop back again and wait for another
opportunity.
If other vehicles are lined up to pass a
slow vehicle, wait your turn. But take
care that someone isn’t trying to pass
you as you pull out to pass the slow vehi-
cle. Remember to glance over your
shoulder and check the blind spot.
Check your mirrors, glance over your
shoulder, and start your left lane change
signal before moving out of the right lane
to pass. When you are far enough ahead
of the passed vehicle to see its front in
your inside mirror, activate your right
lane change signal and move back into
the right lane. (Remember that your right
outside mirror is convex. The vehicle you
just passed may seem to be farther away
from you than it really is.)
Try not to pass more than one vehicle at
a time on two-lane roads. Reconsider
before passing the next vehicle.
Don’t overtake a slowly moving vehicle
too rapidly. Even though the brake lamps
are not flashing, it may be slowing down
or starting to turn. If you’re being passed, make it easy for
the following driver to get ahead of you.
Perhaps you can ease a little to the right.
Loss of ControlLet’s review what driving experts say about
what happens when the three control sys-
tems (brakes, steering and acceleration)
don’t have enough friction where the tires
meet the road to do what the driver has
asked.
In any emergency, don’t give up. Keep try-
ing to steer and constantly seek an escape
route or area of less danger.
Skidding
In a skid, a driver can lose control of the
vehicle. Defensive drivers avoid most skids
by taking reasonable care suited to exist-
ing conditions, and by not “overdriving”
those conditions. But skids are always pos-
sible.
The three types of skids correspond to
your vehicle’s three control systems. In the
braking skid, your wheels aren’t rolling. In
the steering or cornering skid, too much
speed or steering in a curve causes tires to
slip and lose cornering force. And in the
acceleration skid, too much throttle causes
the driving wheels to spin.
A cornering skid is best handled by easing
your foot off the accelerator pedal.
If your vehicle starts to slide, ease your
foot off the accelerator pedal and quickly
Your Driving, the Road, and Your Vehicle: