2007 SUBARU OUTBACK console
[x] Cancel search: consolePage 15 of 442

12 &Interior
! Passenger compartment area
1) Lower anchorages for child restraint
system (page 1-35)
2) Seatbelt (page 1-11)
3) Center console (page 6-5)
4) Front seat (page 1-2)
5) Rear seat (page 1-9)
Page 53 of 442
1-26Seat, seatbelt and SRS airbags
control module .Front passenger ’s frontal airbag ON
and OFF indicator. All related wiring
WARNING
If the warning light exhibits any of
the following conditions, there may
be a malfunction in the seatbelt
pretensioners and/or SRS airbag
system. Immediately take your vehi-
cle to your nearest SUBARU dealer
to have the system checked. Unless
checked and properly repaired, the
seatbelt pretensioners and/or SRS
airbags will operate improperly (e.g.
SRS airbags may inflate in a very
minor collision or not inflate in a
severe collision), which may in-
crease the risk of injury. . Flashing or flickering of the warn-
ing light
. No illumination of the warning
light when the ignition switch is
first turned to the “ON ”position
. Continuous illumination of the
warning light
. Illumination of the warning light
while driving &
System servicing
WARNING
. When discarding a seatbelt re-
tractor assembly or scrapping
the entire vehicle damaged by a
collision, consult your SUBARU
dealer.
. Tampering with or disconnecting
the system ’s wiring could result
in accidental activation of the
seatbelt pretensioner and/or air-
bag or could make the system
inoperative, which may result in
serious injury. The wiring har-
nesses of the seatbelt preten-
sioner and SRS airbag systems
are covered with yellow insula-
tion and the connectors of the
system are yellow for easy iden-
tification. Do not use electrical
test equipment on any circuit
related to the seatbelt preten-
sioner and airbag systems. For
required servicing of the seatbelt
pretensioner, see your nearest
SUBARU dealer.
CAUTION
The front sub sensors are located in
both front fenders and the airbag
control module including the impact
sensors is located under the center
console. If you need service or
repair in those areas or near the
front seatbelt retractors, have an
authorized SUBARU dealer perform
the work.
NOTE
If the front part of the vehicle is
damaged in an accident to the extent
that the seatbelt pretensioner does not
operate, contact your SUBARU dealer
as soon as possible.
Page 78 of 442

the front passenger’s seat and side trim/
pillar, door or center console box. This
may lift the seat cushion. ! If the passenger ’s frontal airbag OFF
indicator illuminates and the ON
indicator extinguishes even when
the front passenger ’s seat is occu-
pied by an adult
This can be caused by the adult incor-
rectly sitting in the front passenger ’s seat.
Turntheignitionswitchtothe “OFF ”
position. Ask the front passenger to set
the seatback to the upright position, sit up
straight in the center of the seat cushion,
correctly fasten the seatbelt, position his/
her legs out forward, and adjust the seat to
the rearmost position. Turn the ignition
switch to the “ON ”position. If the OFF
indicator remains illuminated while the ON
indicator remains extinguished, take the
following actions. . Turn the ignition switch to the “OFF ”
position.. Ensure that there is no article, book,
shoe, or other object trapped under the
seat, at the rear of the seat, or on the side
of the seat. . Ensure that the backward-forward po-
sition and seatback of front passenger ’s
seat are locked into place securely by
moving the seat back and forth. (Models equipped with manual seats only) .
Next, turn the ignition switch to the
“ ON ”position and wait 6 seconds to allow
the system to complete self-checking.
Following the system check, both indica-
tors extinguish for 2 seconds. Now, the
ON indicator should illuminate while the
OFF indicator remains extinguished.
If the OFF indicator still illuminates while
the ON indicator remains extinguished,
ask the occupant to move to the rear seat
and immediately contact your SUBARU
dealer for an inspection. ! Effect vehicle modifications made
for persons with disabilities may
have on Subaru advanced frontal
airbag system operation (U.S. only)
Changing or moving any parts of the front
seats, seat belts, front bumper, front side
frame, instrument panel, combination me-
ter, steering wheel, steering column, tire,
suspension or floor panel can affect the
operation of the Subaru advanced airbag
system. If you have any questions, you
may contact the following Subaru distribu-tors:
Subaru of America, Inc.
Customer Dealer Services Department P.O. Box 6000
Cherry Hill, NJ 08034-6000
1-800-SUBARU3 (1-800-782-2783)
Schuman Inc, dba Subaru of Hawaii
740 Halekauwila Street Honolulu, HI 96813 808-591-3075
’s Corporation dba Prestige Automo-
bile
491, East Marine Drive, Route 1 Dededo, Guam 671-633-2698
Trebol Motors
P.O. Box 11204, San Juan, Puerto Rico 00910 787-793-2828
There are currently no Subaru distributors
in any other U.S. territories. If you are in
such an area, please contact the Subaru
distributor or dealer from which you
bought your vehicle. Seat, seatbelt and SRS airbags
1-51
– CONTINUED –
Page 90 of 442
&SRS airbag system servicing
WARNING
. When discarding an airbag mod-
ule or scrapping the entire vehi-
cle damaged by a collision,
consult your SUBARU dealer.
. The SRS airbag has no user-
serviceable parts. Do not use
electrical test equipment on any
circuit related to the SRS airbag
system. For required servicing of
the SRS airbag, see your nearest
SUBARU dealer. Tampering with
or disconnecting the system ’s
wiring could result in accidental
inflation of the SRS airbag or
could make the system inopera-
tive, which may result in serious
injury. The wiring harnesses of
the SRS airbag system are cov-
ered with yellow insulation and
system connectors are yellow for
easy identification.
CAUTION
If you need service or repair in areas
listed in the following, have an
authorized SUBARU dealer perform
the work. The SRS airbag control
module, impact sensors and airbag
modules are stored in these areas. . Under the center console
. Inside each front fender
. Steering wheel and column and
nearby areas
. Top of the dashboard on front
passenger ’s side and nearby
areas
. Each front seat and nearby area
. Inside each center pillar
. In each roof side (from the front
pillar to a point over the rear seat)
. Between the rear seat cushion
and rear wheel house on each side
In the event that the SRS airbag is
deployed, replacement of the system
should be performed only by an author-
ized SUBARU dealer. When the compo-
nents of the SRS airbag system are
replaced, use only genuine SUBARUparts. NOTE
In the following cases, contact your
SUBARU dealer as soon as possible. .
The front part of the vehicle was
involved in an accident in which the
only the driver ’s SRS frontal airbag or
both driver ’s and front passenger ’s
SRS frontal airbags did not deploy.. The pad of the steering wheel, the
cover over the front passenger ’s SRS
frontal airbag, or either roof side (from
the front pillar to a point over the rear
seat) is scratched, cracked, or other-
wise damaged.. Either center pillar and rear wheel
house or a nearby area of the vehicle
was involved in an accident in which
the SRS side airbag and SRS curtain
airbag did not deploy.. The fabric or leather of either front
seatback is cut, frayed, or otherwisedamaged. Seat, seatbelt and SRS airbags
1-63
– CONTINUED –
Page 216 of 442
Interior light......................................................... 6-2
Dome light .......................................................... 6-2
Cargo area light (Station wagon) .......................... 6-2
Map light .............................................................. 6-2
Sun visors ........................................................... 6-3
Sun visor extension plate .................................... 6-3
Vanity mirror with light ........................................ 6-4
Storage compartment ......................................... 6-4
Glove box ........................................................... 6-5
Center console box ............................................. 6-5
Center panel compartment (if equipped)... ............ 6-6
Overhead console (if equipped) ........................... 6-7
Pocket ................................................................ 6-7
Cup holder ........................................................... 6-7
Front passenger ’s cup holder .............................. 6-8
Rear passenger ’s cup holder ............................... 6-8
Accessory power outlets .................................... 6-8
Coat hook ........................................................... 6-10
Rear passenger area .......................................... 6-10
Shopping bag hook ............................................ 6-11
For Sedan models .............................................. 6-11
For Station wagon models .................................. 6-11
Floor mat ............................................................ 6-12
Cargo area cover (Station wagon) .................... 6-12
Using the cover .................................................. 6-12 To remove the cover housing ...
.......................... 6-13
To remove the rear gate board . .......................... 6-13
Stowage of the cargo area cover and rear gate board .............................................................. 6-13
To install the cover housing ............................... 6-14
To install the rear gate board ... .......................... 6-15
Stowage boxes (Station wagon) ....................... 6-15
Convenient tie-down hooks (if equipped) ........ 6-16
Under-floor storage compartment .................... 6-16
Sedan ................................................................ 6-17
Station wagon ................................................... 6-17
HomeLink ®Wireless Control System
(if equipped) .................................................... 6-17
Garage door opener programming in the U.S.A. .............................................................. 6-18
Programming rolling-code-protected garage door openers in the U.S.A. ....................................... 6-19
Programming for entrance gates and garage door openers in Canada ........................................... 6-20
Programming other devices ............................... 6-21
Operating the HomeLink ®Wireless Control
System ............................................................ 6-21
Reprogramming a single HomeLink ®
button ............................................................. 6-21
Erasing HomeLink ®button memory ................... 6-21
In case a problem occurs ................................... 6-21
Interior equipment
6
Page 220 of 442
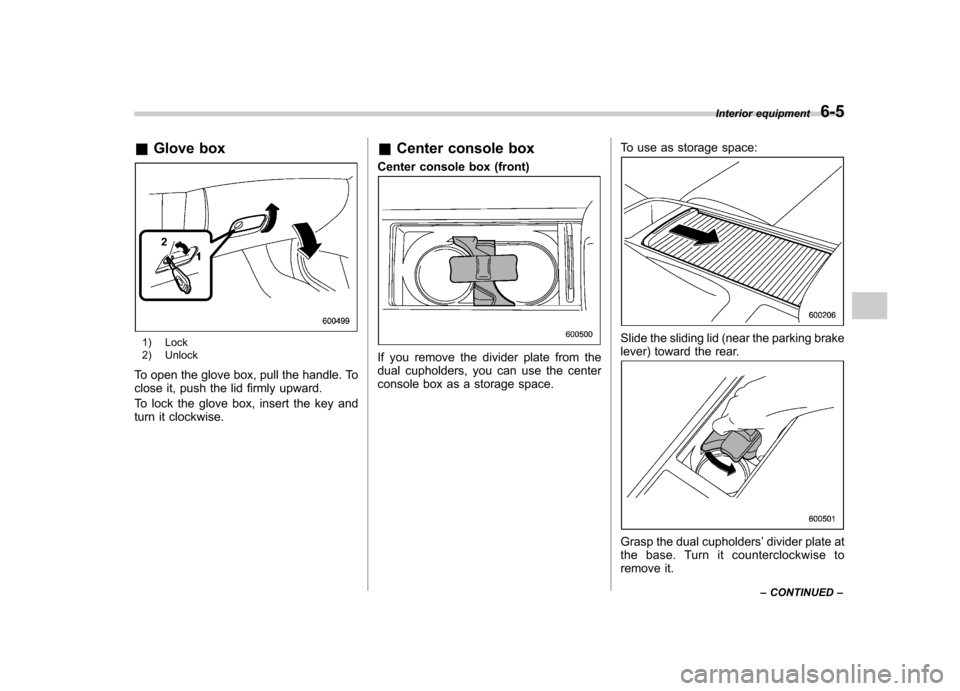
&Glove box
1) Lock
2) Unlock
To open the glove box, pull the handle. To
close it, push the lid firmly upward.
To lock the glove box, insert the key and
turn it clockwise. &
Center console box
Center console box (front)
If you remove the divider plate from the
dual cupholders, you can use the center
console box as a storage space. To use as storage space:
Slide the sliding lid (near the parking brake
lever) toward the rear.
Grasp the dual cupholders
’divider plate at
the base. Turn it counterclockwise to
remove it. Interior equipment
6-5
– CONTINUED –
Page 221 of 442
6-6Interior equipment
CAUTION
If you hold the divider plate at the
top while turning it counterclock-
wise, it may break.
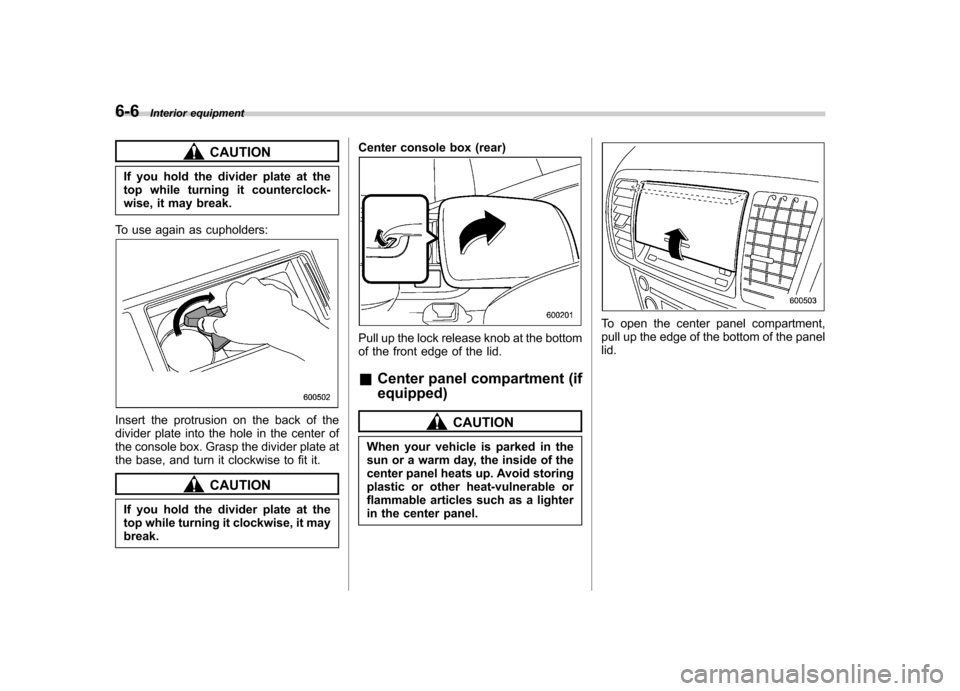
To use again as cupholders:
Insert the protrusion on the back of the
divider plate into the hole in the center of
the console box. Grasp the divider plate at
the base, and turn it clockwise to fit it.
CAUTION
If you hold the divider plate at the
top while turning it clockwise, it maybreak. Center console box (rear)
Pull up the lock release knob at the bottom
of the front edge of the lid. &
Center panel compartment (if equipped)
CAUTION
When your vehicle is parked in the
sun or a warm day, the inside of the
center panel heats up. Avoid storing
plastic or other heat-vulnerable or
flammable articles such as a lighter
in the center panel.
To open the center panel compartment,
pull up the edge of the bottom of the panellid.
Page 222 of 442
&Overhead console (if equipped)
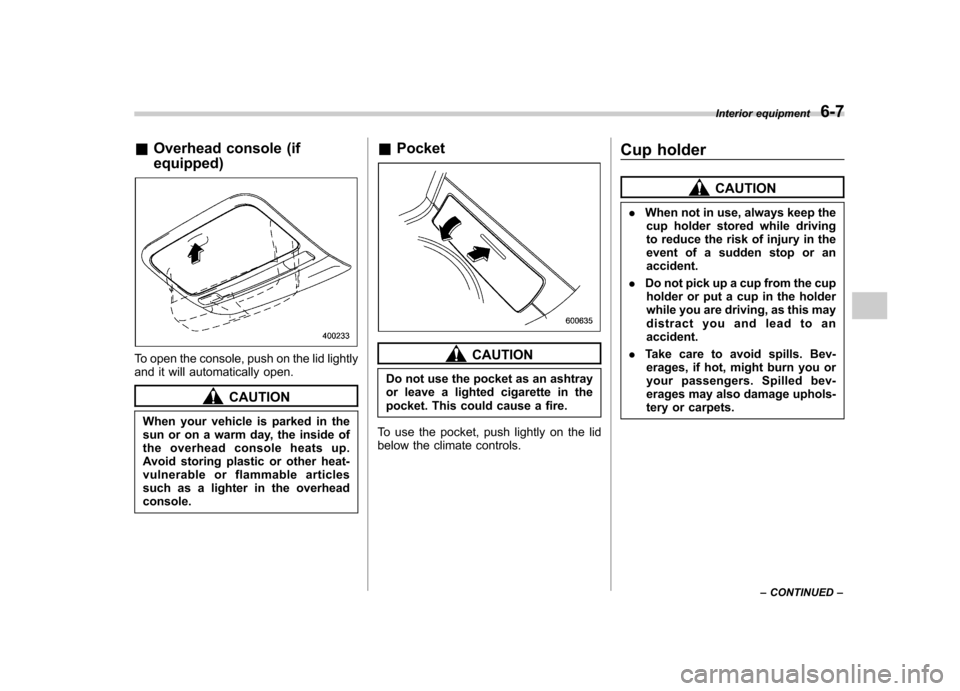
To open the console, push on the lid lightly
and it will automatically open.
CAUTION
When your vehicle is parked in the
sun or on a warm day, the inside of
the overhead console heats up.
Avoid storing plastic or other heat-
vulnerable or flammable articles
such as a lighter in the overheadconsole. &
Pocket
CAUTION
Do not use the pocket as an ashtray
or leave a lighted cigarette in the
pocket. This could cause a fire.
To use the pocket, push lightly on the lid
below the climate controls. Cup holder
CAUTION
. When not in use, always keep the
cup holder stored while driving
to reduce the risk of injury in the
event of a sudden stop or anaccident.
. Do not pick up a cup from the cup
holder or put a cup in the holder
while you are driving, as this may
distract you and lead to anaccident.
. Take care to avoid spills. Bev-
erages, if hot, might burn you or
your passengers. Spilled bev-
erages may also damage uphols-
tery or carpets. Interior equipment
6-7
– CONTINUED –