2007 SUBARU IMPREZA service schedule
[x] Cancel search: service schedulePage 4 of 364
2
Chapter 4: Climate control
This chapter informs you how to operate
the climate control.
Chapter 5: Audio
This chapter informs you how to operate
your audio system.
Chapter 6: Interior equipment
This chapter informs you how to operate
interior equipment.
Chapter 7: Starting and operating
This chapter informs you how to start and
operate your SUBARU.
Chapter 8: Driving tips
This chapter informs you how to drive your
SUBARU in various conditions and ex-
plains some safety tips on driving.
Chapter 9: In case of emergency
This chapter informs you what to do if you
have a problem while driving, such as a
flat tire or engine overheating.
Chapter 10: Appearance care
This chapter informs you how to keep your
SUBARU looking good.
Chapter 11: Maintenance and service
This chapter informs you when you need
to take your SUBARU to the dealer for
scheduled maintenance and informs you
how to keep your SUBARU running
properly.Chapter 12: Specifications
This chapter informs you about dimension
and capacities of your SUBARU.
Chapter 13: Consumer information and
Reporting safety defects
This chapter informs you about Uniform
tire quality grading standards and Report-
ing safety defects.
Chapter 14: Index
This is an alphabetical listing of all that
’sin
this manual. You can use it to quickly find
something you want to read.
& Safety warnings
You will find a number of WARNINGs,
CAUTIONs and NOTEs in this manual.
These safety warnings alert you to poten-
tial hazards that could result in injury to
you or others.
Please read these safety warnings as well
as all other portions of this manual care-
fully in order to gain a better understand-
ing of how to use your SUBARU vehicle
safely.
WARNING
A WARNING indicates a situation in
which serious injury or death could
result if the warning is ignored.
CAUTION
A CAUTION indicates a situation in
which injury or damage to your
vehicle, or both, could result if the
caution is ignored.
NOTE
A NOTE gives information or sugges-
tions how to make better use of yourvehicle. & Safety symbol
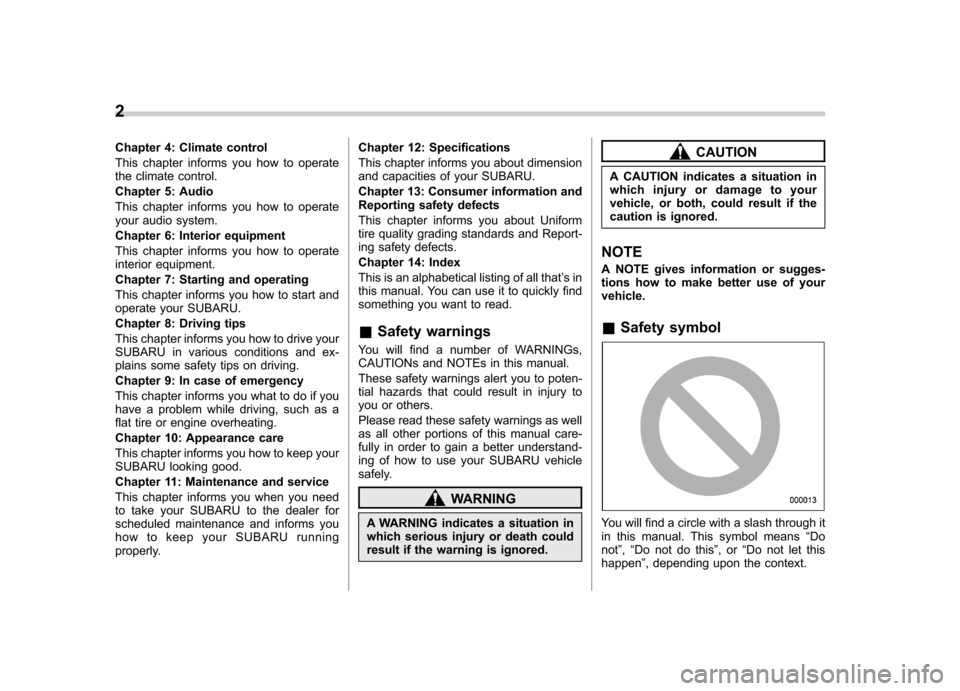
You will find a circle with a slash through it
in this manual. This symbol means “Do
not ”, “Do not do this ”,or “Do not let this
happen ”, depending upon the context.
Page 156 of 364

4-12Climate control
heated interior. This results in quicker
cooling by the air conditioner. Keep the
windows closed during the operation of
the air conditioner for maximum cooling
efficiency. &Lubrication oil circulation in
the refrigerant circuit
Operate the air conditioner compressor at
a low engine speed (at idle or low driving
speeds) a few minutes each month during
the off-season to circulate its oil. & Checking air conditioning
system before summer sea-son
Check the air conditioner unit for refriger-
ant leaks, hose conditions and proper
operation of each spring. Have your
SUBARU dealer perform this check. & Cooling and dehumidifying in
high humidity and low tem-
perature weather conditions
Under certain weather conditions (high
relative humidity, low temperatures, etc.) a
small amount of water vapor emission
from the air outlets may be noticed. This
condition is normal and does not indicate
any problem with the air conditioningsystem. &
Air conditioner compressor
shut-off when engine is
heavily loaded
To improve acceleration and gas mileage,
the air conditioner compressor is designed
to temporarily shut off during air condi-
tioner operation whenever the accelerator
is fully depressed such as during rapid
acceleration or when driving on a steepupgrade. & Refrigerant for your climate
control system
Your air conditioner uses ozone friendly
refrigerant HFC134a. Therefore, the meth-
od of adding, changing or checking the
refrigerant is different from the method for
CFC12 (Freon). Consult your SUBARU
dealer for service. Repairs needed as a
result of using the wrong refrigerant are
not covered under warranty. Air filtration system
If your vehicle
’s air conditioning system is
equipped with an air filtration system,
replace the filter element according to
the replacement schedule shown in the
following. This schedule should be fol-
lowed to maintain the filter ’s dust collec-
tion ability. Under extremely dusty condi-
tions, the filter should be replaced more
frequently. It is recommended that you
have your filter checked or replaced by
your SUBARU dealer. For replacement,
use only a genuine SUBARU air filter kit.
Replacement schedule: Every 12 months or 7,500 miles (12,000
km) whichever comes first
Page 230 of 364
8-4Driving tips
.Keep everyone and flammable
materials away from the exhaust
pipe while the engine is running.
The exhaust gas is very hot. Periodic inspections
To keep your vehicle in the best condition
at all times, always have the recom-
mended maintenance services listed in
the maintenance schedule in the
“War-
ranty and Maintenance Booklet ”per-
formed at the specified time or mileageintervals. Driving in foreign countries
When planning to use your vehicle in
another country: .
Confirm the availability of the correct
fuel. (Refer to the “Fuel requirements ”
section in chapter 7.). Comply with all regulations and re-
quirements of each country.
Page 277 of 364

Maintenance schedule....................................... 11-3
Maintenance precautions ................................... 11-3
Before checking or servicing in the engine compartment .................................................... 11-4
When you do checking or servicing in the engine compartment while the engine is running .......... 11-4
Engine hood ....................................................... 11-4
Engine compartment overview .......................... 11-6
Non-turbo models .............................................. 11-6
Turbo models ..................................................... 11-7
Engine oil ............................................................ 11-8
Checking the oil level ......................................... 11-8
Changing the oil and oil filter .............................. 11-9
Recommended grade and viscosity .................. 11-11
Recommended grade and viscosity under severe driving conditions .......................................... 11-12
Synthetic oil ..................................................... 11-12
Cooling system ................................................ 11-12
Cooling fan, hose and connections ................... 11-12
Engine coolant ................................................. 11-13
Air cleaner element .......................................... 11-15
Replacing the air cleaner element ..................... 11-15
Spark plugs ...................................................... 11-17
Recommended spark plugs .............................. 11-18
Drive belts ........................................................ 11-18
Manual transmission oil .................................. 11-19
Checking the oil level ....................................... 11-19
Recommended grade and viscosity .................. 11-20
Automatic transmission fluid .......................... 11-20
Checking the fluid level .................................... 11-20 Recommended fluid
......................................... 11-21
Front differential gear oil (AT vehicles) .......... 11-21
Checking the oil level ...................................... 11-21
Recommended grade and viscosity .................. 11-22
Rear differential gear oil .................................. 11-22
Checking the gear oil level ............................... 11-22
Recommended grade and viscosity .................. 11-23
Power steering fluid ........................................ 11-24
Checking the fluid level .................................... 11-24
Recommended fluid ......................................... 11-25
Brake fluid ........................................................ 11-25
Checking the fluid level .................................... 11-25
Recommended brake fluid ............................... 11-26
Clutch fluid (MT vehicles) ............................... 11-26
Checking the fluid level .................................... 11-26
Recommended clutch fluid ............................... 11-27
Brake booster .................................................. 11-27
Brake pedal ...................................................... 11-27
Checking the brake pedal free play .................. 11-27
Checking the brake pedal reserve distance....... 11-28
Clutch pedal (MT vehicles) .............................. 11-28
Checking the clutch function ............................ 11-28
Checking the clutch pedal free play .................. 11-28
Replacement of brake pad and lining ............ 11-29
Breaking-in of new brake pads and linings ....... 11-29
Parking brake stroke ....................................... 11-30
Tires and wheels .............................................. 11-30
Types of tires ................................................... 11-30
Tire inspection ................................................. 11-30
Tire pressures and wear .................................. 11-31
Maintenance and service
11
Page 279 of 364
Maintenance schedule
The scheduled maintenance items re-
quired to be serviced at regular intervals
are shown in the“Warranty and Main-
tenance Booklet ”.
For details of your maintenance schedule,
read the separate “Warranty and Main-
tenance Booklet ”. Maintenance precautions
When maintenance and service are re-
quired, it is recommended that all work be
done by an authorized SUBARU dealer.
If you perform maintenance and service
by yourself, you should familiarize yourself
with the information provided in this
section on general maintenance and
service for your SUBARU.
Incorrect or incomplete service could
cause improper or unsafe vehicle opera-
tion. Any problems caused by improper
maintenance and service performed by
you are not eligible for warranty coverage.
WARNING
. Testing of an All-Wheel Drive
vehicle must NEVER be per-
formed on a single two-wheel
dynamometer or similar appara-
tus. Attempting to do so will
result in transmission damage
and in uncontrolled vehicle
movement and may cause an
accident or injuries to persons
nearby.
. Always select a safe area when
performing maintenance on yourvehicle. .
Always be very careful to avoid
injury when working on the vehi-
cle. Remember that some of the
materials in the vehicle may be
hazardous if improperly used or
handled, for example, batteryacid.
. Your vehicle should only be ser-
viced by persons fully competent
to do so. Serious personal injury
may result to persons not experi-
enced in servicing vehicles.
. Always use the proper tools and
make certain that they are wellmaintained.
. Never get under the vehicle sup-
ported only by a jack. Always use
a safety stands to support thevehicle.
. Never keep the engine running in
a poorly ventilated area, such as
a garage or other closed areas.
. Do not smoke or allow open
flames around the fuel or battery.
This will cause a fire.
. Because the fuel system is under
pressure, replacement of the fuel
filter should be performed only
by your SUBARU dealer.
. Wear adequate eye protection to Maintenance and service
11-3
– CONTINUED –
Page 285 of 364
pipe, be sure to wipe it off.
If you check the oil level just after stopping
the engine, wait a few minutes for the oil to
drain back into the oil pan before checking
the level.
Just after driving or while the engine is
warm, the engine oil level reading may be
in a range between the upper level and
the notch mark. This is caused by thermal
expansion of the engine oil.
To prevent overfilling the engine oil, do not
add any additional oil above the upper
level when the engine is cold. & Changing the oil and oil filter
Change the oil and oil filter according to
the maintenance schedule in the “War-
ranty and Maintenance Booklet ”.
The engine oil and oil filter must be
changed more frequently than listed in
the maintenance schedule when driving
on dusty roads, when short trips are
frequently made, or when driving in
extremely cold weather.
1. Warm up the engine by letting the
engine idle for approximately 10 minutes
to ease draining the engine oil.
2. Park the vehicle on a level surface and
stop the engine.
3. Remove the oil filler cap.
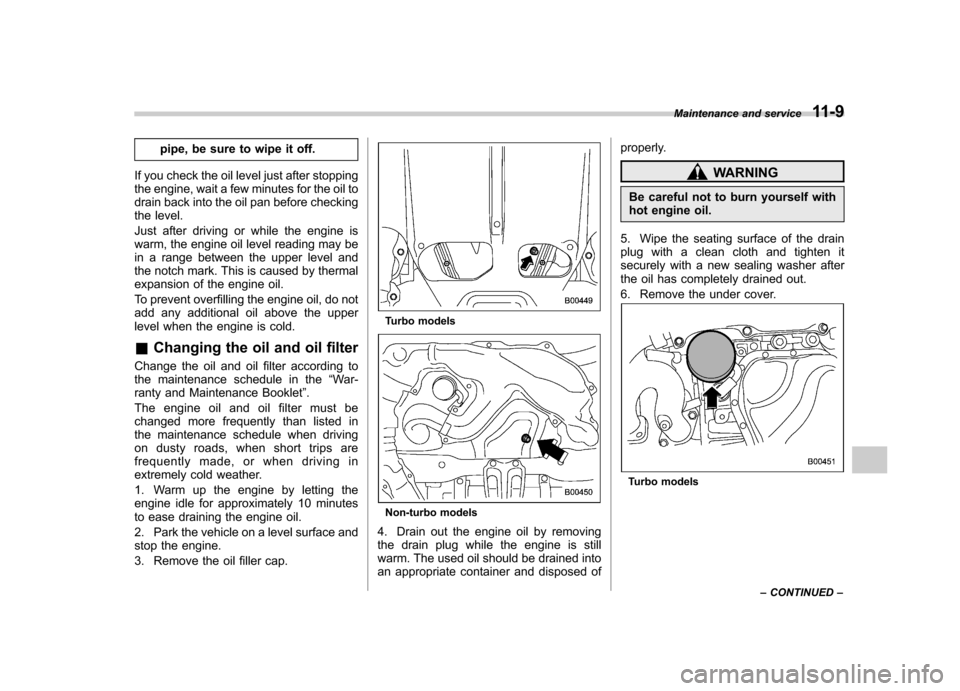
Turbo models
Non-turbo models
4. Drain out the engine oil by removing
the drain plug while the engine is still
warm. The used oil should be drained into
an appropriate container and disposed of properly.
WARNING
Be careful not to burn yourself with
hot engine oil.
5. Wipe the seating surface of the drain
plug with a clean cloth and tighten it
securely with a new sealing washer after
the oil has completely drained out.
6. Remove the under cover.
Turbo models Maintenance and service
11-9
– CONTINUED –
Page 288 of 364
11-12Maintenance and service
&Recommended grade and
viscosity under severe driv-
ing conditions
If the vehicle is used in desert areas, in
areas with very high temperatures, or
used for heavy-duty applications such as
towing a trailer, use of oil with the following
grade and viscosities is recommended.
API classification SM (or SL): SAE viscosity No.: 30, 40, 10W-50,
20W-40, 20W-50
& Synthetic oil
You can use synthetic engine oil that
meets the same requirements given for
conventional engine oil. When using
synthetic oil, you must use oil of the same
classification, viscosity and grade shown
in this Owner ’s Manual, and must follow
the oil and filter changing intervals shown
in the maintenance schedule. Cooling system
WARNING
Never attempt to remove the radia-
tor cap until the engine has been
shut off and has cooled down
completely. Since the coolant is
under pressure, you may suffer
serious burns from a spray of boil-
ing hot coolant when the cap isremoved.
CAUTION
. The cooling system has been
filled at the factory with a high
quality, corrosi on-inhibiting,
year-around coolant which pro-
vides protection against freezing
down to �33 8F( �36 8C). For add-
ing, use genuine SUBARU cool-
ant or an equivalent: a mixture of
50% soft water (or clear and
drinkable water) and 50% phos-
phate or non-amine type coolant.
Use of improper coolants may
result in corrosion in the cooling
system. It is important to main-
tain protection against freezing
and corrosion, even if freezing temperatures are not expected.
Never mix different kinds of cool-ant.
. Do not splash the engine coolant
over painted parts. The alcohol
contained in the engine coolant
may damage the paint surface.
& Cooling fan, hose and con- nections
Your vehicle employs an electric cooling
fan which is thermostatically controlled to
operate when the engine coolant reaches
a specific temperature.
If the radiator cooling fan does not operate
even when the engine coolant tempera-
ture gauge exceeds the normal operating
range, the cooling fan circuit may be
defective. Check the fuse and replace it
if necessary. If the fuse is not blown, have
the cooling system checked by your
SUBARU dealer.
If frequent addition of coolant is neces-
sary, there may be a leak in the engine
cooling system. It is recommended that
the cooling system and connections be
checked for leaks, damage, or looseness.
Page 290 of 364
11-14Maintenance and service
according to the maintenance schedule.
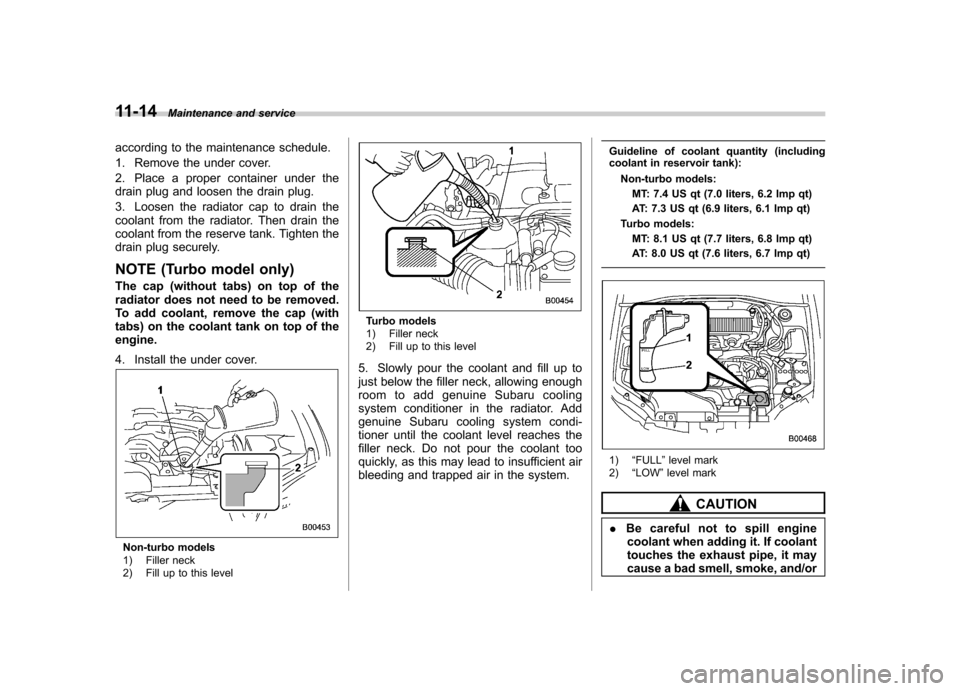
1. Remove the under cover.
2. Place a proper container under the
drain plug and loosen the drain plug.
3. Loosen the radiator cap to drain the
coolant from the radiator. Then drain the
coolant from the reserve tank. Tighten the
drain plug securely.
NOTE (Turbo model only)
The cap (without tabs) on top of the
radiator does not need to be removed.
To add coolant, remove the cap (with
tabs) on the coolant tank on top of theengine.
4. Install the under cover.
Non-turbo models
1) Filler neck
2) Fill up to this level
Turbo models
1) Filler neck
2) Fill up to this level
5. Slowly pour the coolant and fill up to
just below the filler neck, allowing enough
room to add genuine Subaru cooling
system conditioner in the radiator. Add
genuine Subaru cooling system condi-
tioner until the coolant level reaches the
filler neck. Do not pour the coolant too
quickly, as this may lead to insufficient air
bleeding and trapped air in the system. Guideline of coolant quantity (including
coolant in reservoir tank):
Non-turbo models:MT: 7.4 US qt (7.0 liters, 6.2 Imp qt)
AT: 7.3 US qt (6.9 liters, 6.1 Imp qt)
Turbo models: MT: 8.1 US qt (7.7 liters, 6.8 Imp qt)
AT: 8.0 US qt (7.6 liters, 6.7 Imp qt)
1) “FULL ”level mark
2) “LOW ”level mark
CAUTION
. Be careful not to spill engine
coolant when adding it. If coolant
touches the exhaust pipe, it may
cause a bad smell, smoke, and/or