2007 SUBARU IMPREZA engine
[x] Cancel search: enginePage 203 of 364

7-6Starting and operating
CAUTION
Resultant vehicle damage due to
improper testing is not covered
under the SUBARU Limited War-
ranty and is the responsibility of
the state inspection program or its
contractors or licensees.
The EPA has issued regulations for
inspecting the On-Board Diagnostic
(OBD) system as part of the state emis-
sions inspection. The OBD system is
designed to detect engine and transmis-
sion problems that might cause vehicle
emissions to exceed allowable limits.
These inspections apply to all 1996 model
year and newer passenger cars and light
trucks. Over 30 states plus the District of
Columbia have implemented the OBD
system inspection. . The inspection of the OBD system
consists of a visual operational check of the “CHECK ENGINE ”warning light/mal-
function indicator lamp (MIL) and an
examination of the OBD system with an
electronic scan tool while the engine isrunning. . Avehicle
passes the OBD system
inspection if proper the “CHECK ENGINE ”
warning light/MIL illumination is observed,
there is nostored diagnostic trouble codes, and the OBD system readiness
monitors are complete. .
A vehicle
fails the OBD inspection if the
“ CHECK ENGINE ”warning light/MIL is
not properly operating or there are one or
more diagnostic trouble codes stored in
the vehicle ’s computer with the “CHECK
ENGINE ”warning light/MIL illuminated.
. A state emission inspection may reject
(not pass or fail) a vehicle if the number of
OBD system readiness monitors “Not
Ready ”is greater than one. Under this
condition, the vehicle operator should be
instructed to drive his/her vehicle for a few
days to set the monitors and return for an
emission re-inspection. . Owners of rejected or failing vehicles
should contact their SUBARU Dealer for service. Preparing to drive
You should perform the following checks
and adjustments every day before you
start driving.
1. Check that all windows, mirrors, and
lights are clean and unobstructed.
2. Check the appearance and condition
of the tires. Also check tires for properinflation.
3. Look under the vehicle for any sign of leaks.
4. Check that the hood, trunk (Sedan)
and rear gate (Wagon) are fully closed.
5. Check the adjustment of the seat.
6. Check the adjustment of the inside
and outside mirrors.
7. Fasten your seatbelt. Check that your
passengers have fastened their seatbelts.
8. Check the operation of the warning
and indicator lights when the ignition
switch is turned to the
“ON ”position.
9. Check the gauges, indicator and warn-
ing lights after starting the engine.
NOTE
Engine oil, engine coolant, brake fluid,
washer fluid and other fluid levels
should be checked daily, weekly or at
fuel stops.
Page 204 of 364

Starting the engine
CAUTION
Do not operate the starter motor
continuously for more than 10 sec-
onds. If the engine fails to start after
operating the starter for 5 to 10
seconds, wait for 10 seconds or
more before trying again.
& Manual transmission vehicle
1. Apply the parking brake.
2. Turn off unnecessary lights and ac- cessories.
3. Press the clutch pedal to the floor and
shift the shift lever into neutral. Hold the
clutch pedal to the floor while starting theengine.
The starter motor will only operate when
the clutch pedal is pressed fully to the
floor.
4. Turn the ignition switch to the “ON ”
position and check the operation of the
warning and indicator lights. Refer to the“ Warning and indicator lights ”section
(chapter 3).
5. Turn the ignition switch to the “START ”
position without depressing the accelera-
tor pedal. Release the key immediately after the engine has started.
If the engine does not start, try the following.
(1) Turn the ignition switch to the“OFF ”position and wait for at least
10 seconds. After checking that the
parking brake is firmly set, turn the
ignition switch to the “START ”position
while depressing the accelerator pedal
slightly (approximately a quarter of the
full stroke). Release the accelerator
pedal as soon as the engine starts.
(2) If this fails to start the engine, turn
the ignition switch back to the “OFF ”
position and wait for at least 10
seconds. Then fully depress the accel-
erator pedal and turn the ignition
switch to the “START ”position. If the
engine starts, quickly release the
accelerator pedal.
(3) If this fails to start the engine, turn
the ignition switch again to the “OFF ”
position. After waiting for 10 seconds
or longer, turn the ignition switch to the“ START ”position without depressing
the accelerator pedal.
(4) If the engine still refuses to start,
contact your nearest SUBARU dealer
for assistance.
6. Confirm that all warning and indicator
lights have gone off after the engine has
started. The fuel injection system auto- matically lowers the idle speed as the
engine warms up.
NOTE
The engine may be difficult to start
when the battery has been discon-
nected and reconnected (for mainte-
nance or other purposes). This diffi-
culty is caused by the electronically
controlled throttle ’s self-diagnosis
function. To overcome it, keep the
ignition switch in the “ON ”position
for approximately 10 seconds before
starting the engine. & Automatic transmission ve- hicle
1. Apply the parking brake.
2. Turn off unnecessary lights and ac- cessories.
3. Shift the selector lever to the “P ”or “N ”
position (preferably “P ”position).
The starter motor will only operate when
the selector lever is at the “P ” or “N ”
position.
4. Turn the ignition switch to the “ON ”
position and check the operation of the
warning and indicator lights. Refer to the“ Warning and indicator lights ”section
(chapter 3).
5. Turn the ignition switch to the “START ”
Starting and operating
7-7
– CONTINUED –
Page 205 of 364
7-8Starting and operating
position without depressing the accelera-
tor pedal. Release the key immediately
after the engine has started.
If the engine does not start, try the following.
(1) Turn the ignition switch to the“OFF ”position and wait for at least
10 seconds. After checking that the
parking brake is firmly set, turn the
ignition switch to the “START ”position
while depressing the accelerator pedal
slightly (approximately a quarter of the
full stroke). Release the accelerator
pedal as soon as the engine starts.
(2) If this fails to start the engine, turn
the ignition switch back to the “OFF ”
position and wait for at least 10
seconds. Then fully depress the accel-
erator pedal and turn the ignition
switch to the “START ”position. If the
engine starts, quickly release the
accelerator pedal.
(3) If this fails to start the engine, turn
the ignition switch again to the “OFF ”
position. After waiting for 10 seconds
or longer, turn the ignition switch to the“ START ”position without depressing
the accelerator pedal.
(4) If the engine still refuses to start,
contact your nearest SUBARU dealer
for assistance. 6. Confirm that all warning and indicator
lights have gone out after the engine has
started. The fuel injection system auto-
matically lowers the idle speed as the
engine warms up.
While the engine is warming up, make
sure that the selector lever is at the
“P ”or
“ N ”position and that the parking brake is
applied.
NOTE
The engine may be difficult to start
when the battery has been discon-
nected and reconnected (for mainte-
nance or other purposes). This diffi-
culty is caused by the electronically
controlled throttle ’s self-diagnosis
function. To overcome it, keep the
ignition switch in the “ON ”position
for approximately 10 seconds before
starting the engine.
CAUTION
If you restart the engine while the
vehicle is moving, shift the selector
lever into the “N ” position. Do not
attempt to place the selector lever of
a moving vehicle into the “P ” posi-
tion. Stopping the engine
The ignition switch should be turned off
only when the vehicle is stopped and the
engine is idling.
WARNING
Do not stop the engine when the
vehicle is moving. This will cause
loss of power to the power steering
and the brake booster, making steer-
ing and braking more difficult. It
could also result in accidental acti-
vation of the “LOCK ”position on the
ignition switch, causing the steering
wheel to lock.
Page 206 of 364
Manual transmission–6
speeds (WRX-STI)
The manual transmission is a fully syn-
chromeshed, 6-forward-speed and 1-re-
verse-speed transmission.
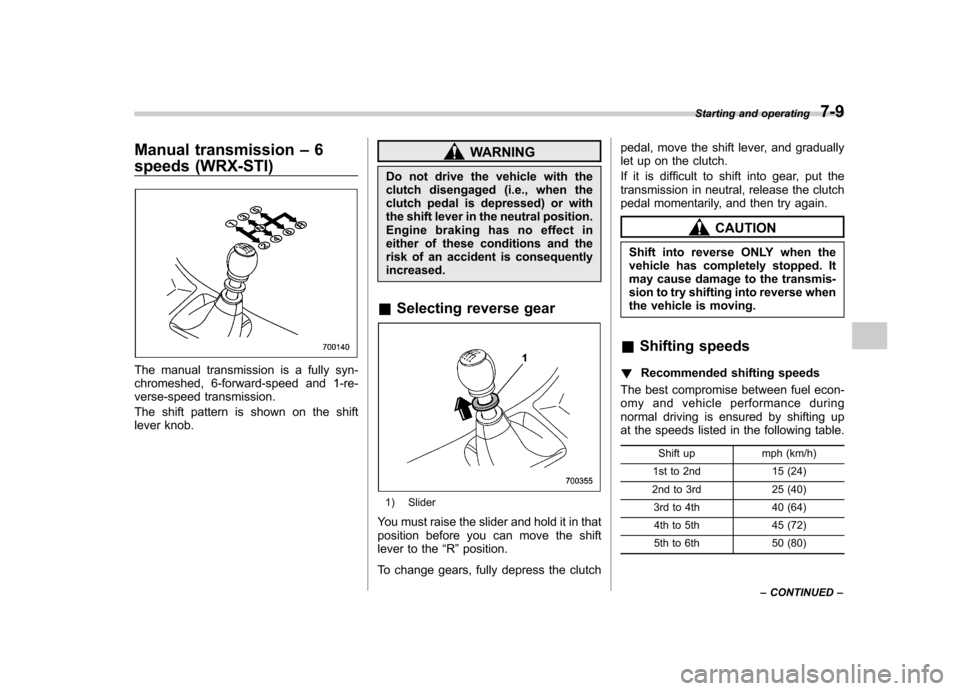
The shift pattern is shown on the shift
lever knob.
WARNING
Do not drive the vehicle with the
clutch disengaged (i.e., when the
clutch pedal is depressed) or with
the shift lever in the neutral position.
Engine braking has no effect in
either of these conditions and the
risk of an accident is consequentlyincreased.
& Selecting reverse gear
1) Slider
You must raise the slider and hold it in that
position before you can move the shift
lever to the “R ”position.
To change gears, fully depress the clutch pedal, move the shift lever, and gradually
let up on the clutch.
If it is difficult to shift into gear, put the
transmission in neutral, release the clutch
pedal momentarily, and then try again.
CAUTION
Shift into reverse ONLY when the
vehicle has completely stopped. It
may cause damage to the transmis-
sion to try shifting into reverse when
the vehicle is moving.
& Shifting speeds
! Recommended shifting speeds
The best compromise between fuel econ-
omy and vehicle performance during
normal driving is ensured by shifting up
at the speeds listed in the following table.
Shift up mph (km/h)
1st to 2nd 15 (24)
2nd to 3rd 25 (40) 3rd to 4th 40 (64)
4th to 5th 45 (72)
5th to 6th 50 (80) Starting and operating
7-9
– CONTINUED –
Page 207 of 364
7-10Starting and operating
!Maximum allowable speeds
The following table shows the maximum
speeds that are possible with each differ-
ent gear. The tachometer ’s needle will
enter the red area if these speeds areexceeded.
With the exception of cases where sudden
acceleration is required, the vehicle
should not be driven with the tachometer ’s
needle inside the red area. Failure to
observe this precaution can lead to
excessive engine wear and poor fuel
economy.
Gear mph (km/h)1st 33 (53)
2nd 53 (86) 3rd 78 (126)
4th 89 (169)
WARNING
When shifting down a gear, ensure
that the vehicle is not travelling at a
speed exceeding the Maximum Al-
lowable Speed for the gear which is
about to be selected. Failure to
observe this precaution can lead to
engine over-revving and this in turn
can result in engine damage. In addition, sudden application of
engine brakes when the vehicle is
travelling on a slippery surface can
lead to wheel locking; as a conse-
quence, control of the vehicle may
be lost and the risk of an accidentincreased.
NOTE
Never exceed posted speed limits. & Driving tips
Do not drive with your foot resting on the
clutch pedal and do not use the clutch to
hold your vehicle at a standstill on an
upgrade. Either of those actions may
cause clutch damage.
Do not drive with your hand resting on the
shift lever. This may cause wear on the
transmission components.
When it is necessary to reduce vehicle
speed due to slow traffic, turning corners,
or driving up steep hills, downshift to a
lower gear before the engine starts to
labor.
On steep downgrades, downshift the
transmission to 5th, 4th, 3rd or 2nd gear
as necessary; this helps to maintain a safe
speed and to extend brake pad life. In this way, the engine provides a braking
effect. Remember, if you
“ride ”(over use)
the brakes while descending a hill, they
may overheat and not work properly.
The engine may, on rare occasions, knock
when the vehicle rapidly accelerates or
rapidly pulls away from a standstill. This
phenomenon does not indicate a malfunc-tion.
Page 208 of 364
Manual transmission–5
speeds (except WRX-STI)
The manual transmission is a fully syn-
chromeshed, 5-forward-speed and 1-re-
verse-speed transmission.
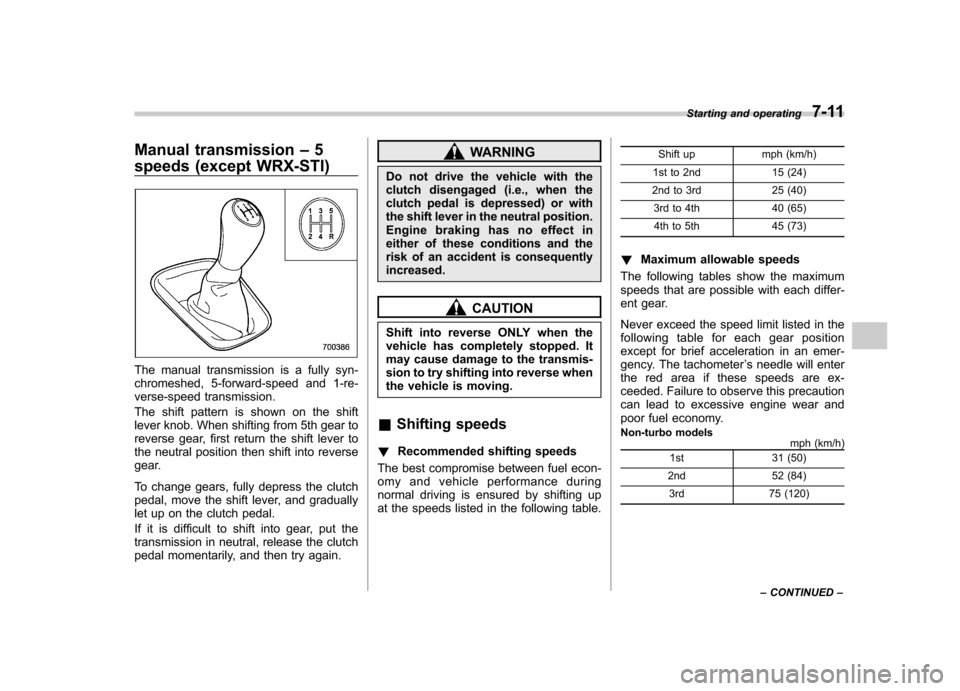
The shift pattern is shown on the shift
lever knob. When shifting from 5th gear to
reverse gear, first return the shift lever to
the neutral position then shift into reverse
gear.
To change gears, fully depress the clutch
pedal, move the shift lever, and gradually
let up on the clutch pedal.
If it is difficult to shift into gear, put the
transmission in neutral, release the clutch
pedal momentarily, and then try again.
WARNING
Do not drive the vehicle with the
clutch disengaged (i.e., when the
clutch pedal is depressed) or with
the shift lever in the neutral position.
Engine braking has no effect in
either of these conditions and the
risk of an accident is consequentlyincreased.
CAUTION
Shift into reverse ONLY when the
vehicle has completely stopped. It
may cause damage to the transmis-
sion to try shifting into reverse when
the vehicle is moving.
& Shifting speeds
! Recommended shifting speeds
The best compromise between fuel econ-
omy and vehicle performance during
normal driving is ensured by shifting up
at the speeds listed in the following table. Shift up mph (km/h)
1st to 2nd 15 (24)
2nd to 3rd 25 (40)
3rd to 4th 40 (65)4th to 5th 45 (73)
! Maximum allowable speeds
The following tables show the maximum
speeds that are possible with each differ-
ent gear.
Never exceed the speed limit listed in the
following table for each gear position
except for brief acceleration in an emer-
gency. The tachometer ’s needle will enter
the red area if these speeds are ex-
ceeded. Failure to observe this precaution
can lead to excessive engine wear and
poor fuel economy.
Non-turbo models mph (km/h)
1st 31 (50)
2nd 52 (84)
3rd 75 (120) Starting and operating
7-11
– CONTINUED –
Page 209 of 364
7-12Starting and operating
Turbo models
mph (km/h)
1st 34 (54)
2nd 59 (95) 3rd 85 (136)
WARNING
When shifting down a gear, ensure
that the vehicle is not travelling at a
speed exceeding the Maximum Al-
lowable Speed for the gear which is
about to be selected. Failure to
observe this precaution can lead to
engine over-revving and this in turn
can result in engine damage.
In addition, sudden application of
engine brakes when the vehicle is
travelling on a slippery surface can
lead to wheel locking; as a conse-
quence, control of the vehicle may
be lost and the risk of an accidentincreased.
& Driving tips
Do not drive with your foot resting on the
clutch pedal and do not use the clutch to
hold your vehicle at a standstill on an
upgrade. Either of those actions may
cause clutch damage. Do not drive with your hand resting on the
shift lever. This may cause wear on the
transmission components.
When it is necessary to reduce vehicle
speed due to slow traffic, turning corners,
or driving up steep hills, downshift to a
lower gear before the engine starts to
labor.
On steep downgrades, downshift the
transmission to 4th, 3rd or 2nd gear as
necessary; this helps to maintain a safe
speed and to extend brake pad life.
In this way, the engine provides a braking
effect. Remember, if you
“ride ”(over use)
the brakes while descending a hill, they
may overheat and not work properly.
The engine may, on rare occasions, knock
when the vehicle rapidly accelerates or
rapidly pulls away from a standstill. This
phenomenon is not an indication of a
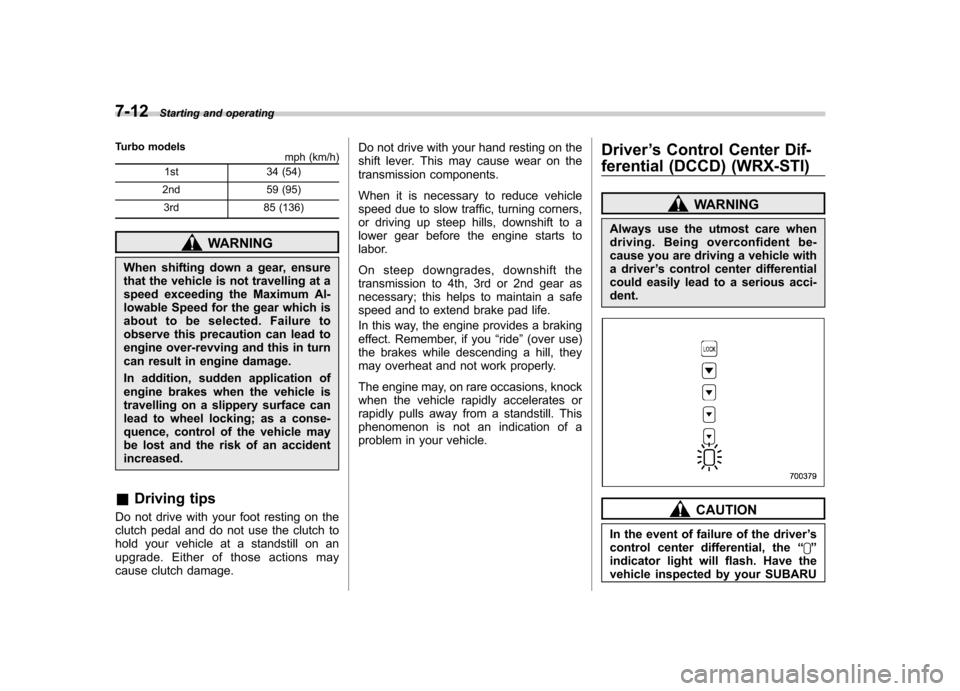
problem in your vehicle. Driver
’s Control Center Dif-
ferential (DCCD) (WRX-STI)
WARNING
Always use the utmost care when
driving. Being overconfident be-
cause you are driving a vehicle with
a driver ’s control center differential
could easily lead to a serious acci-dent.
CAUTION
In the event of failure of the driver ’s
control center differential, the “
”
indicator light will flash. Have the
vehicle inspected by your SUBARU
Page 212 of 364

.When a temporary spare tire is
installed
. When your vehicle is towed
. When the vehicle is stopped
with the manual mode se- lected
NOTE . A higher initial LSD torque setting
gives the vehicle greater traction when
driving straight ahead but makes cor-
nering more difficult. Remember this
when adjusting the initial LSD torque.
In general, higher initial LSD torque
settings assist driving on slippery
roads and lower settings for non-slip-
pery roads. If you become stuck in
snow or mud, turning the center differ-
ential control dial to the frontmost
position will help move the vehicle
out. (The “LOCK ”indicator will come
on at the frontmost position.). During cornering or when making
turns (especially when getting into the
garage), the rotational difference be-
tween the front and rear wheels may
cause a braking effect accompanied by
vibration and noise. This does not
indicate a problem. The phenomenon
will disappear when you turn the center
differential control dial to the rearmost position (minimum initial LSD torqueposition).
In the auto mode, it controls the initial
LSD torque automatically. While in the
auto mode, this phenomenon some-
times occurs depending on the driving
condition, however, it does not indicate
a problem..
Use the center differential indicator
light only as a rough indication of the
initial LSD torque.. If you operate the center differential
control dial while quickly accelerating
or turning a tight corner, you may feel
slight shocks. This is due to differential
action by the center differential and
does not indicate a problem.
& Temporary release
When the driver stops the vehicle and
pulls the parking brake lever after manu-
ally setting the initial LSD torque, the LSD
torque is temporarily minimized. However
the indicator in the combination meter
continues to show the driver ’s selected
initial LSD torque. When the driver re-
leases the parking brake lever, the initial
LSD torque set by the driver is restored. Automatic transmission
The automatic transmission is electroni-
cally controlled and provides 4 forward
speeds and 1 reverse speed. NOTE .
When the engine coolant tempera-
ture is still low, your vehicle ’s auto-
matic transmission will up-shift at high-
er engine speeds than when the cool-
ant temperature is sufficiently high in
order to shorten the warm-up time and
improve driveability. The gearshift tim-
ing will automatically shift to the nor-
mal timing after the engine has warmedup. . Immediately after ATF (automatic
transmission fluid) is replaced, you
may feel that the automatic transmis-
sion operation is somewhat unusual.
This results from invalidation of data
the on-board computer has collected
and stored in memory to allow the
transmission to shift at the most appro-
priate times for the current condition of
your vehicle. Optimized shifting will be
restored as the vehicle continues to be
driven for a while. Starting and operating
7-15
– CONTINUED –