2007 SUBARU IMPREZA clock
[x] Cancel search: clockPage 147 of 364
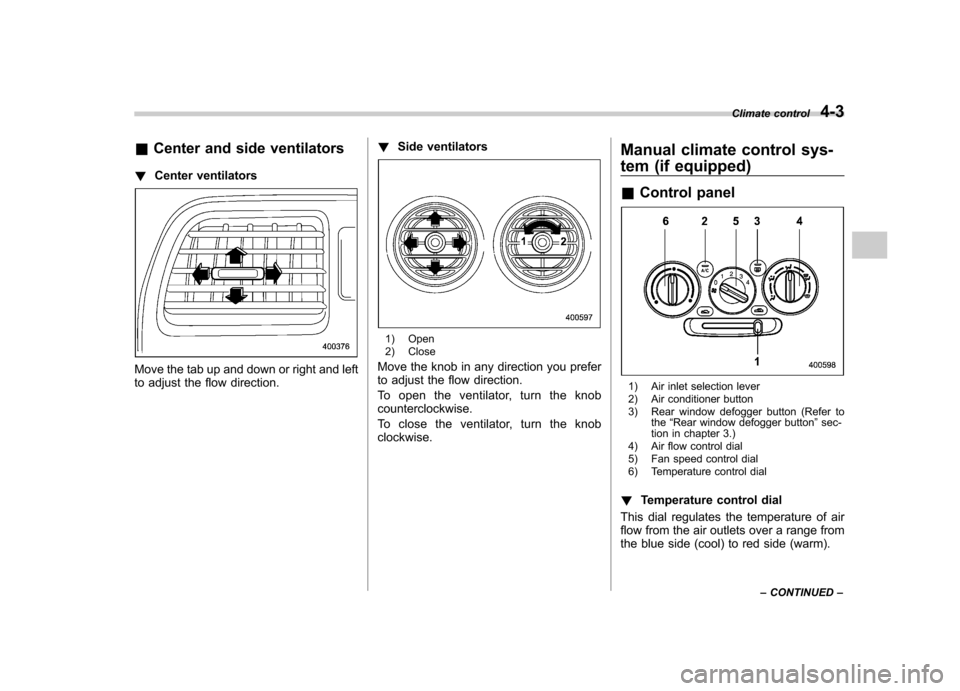
&Center and side ventilators
! Center ventilators
Move the tab up and down or right and left
to adjust the flow direction. !
Side ventilators
1) Open
2) Close
Move the knob in any direction you prefer
to adjust the flow direction.
To open the ventilator, turn the knob counterclockwise.
To close the ventilator, turn the knob clockwise. Manual climate control sys-
tem (if equipped) &
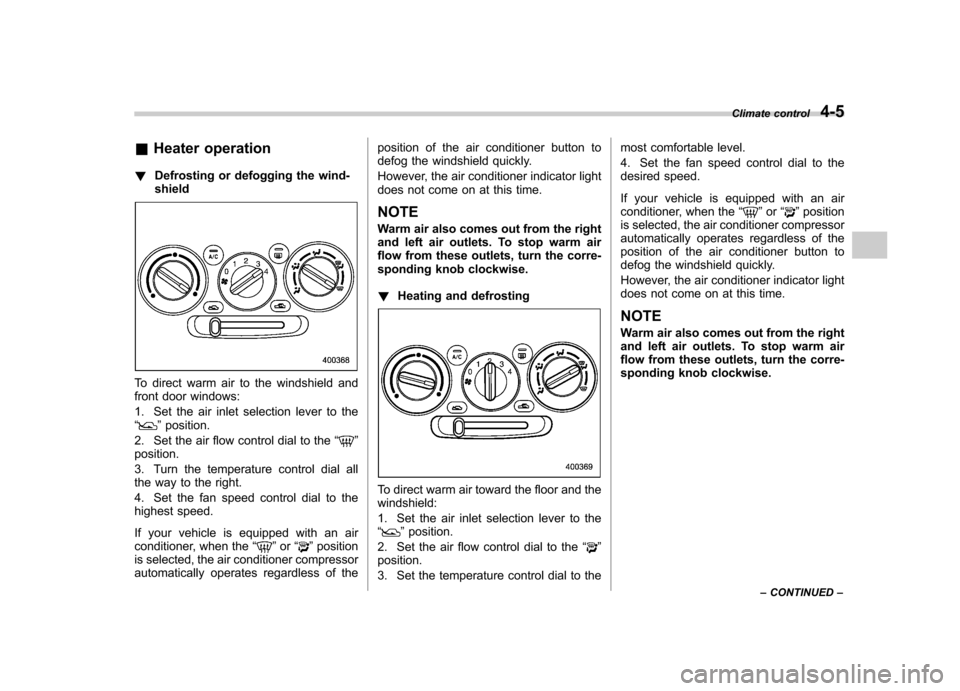
Control panel
1) Air inlet selection lever
2) Air conditioner button
3) Rear window defogger button (Refer to
the“Rear window defogger button ”sec-
tion in chapter 3.)
4) Air flow control dial
5) Fan speed control dial
6) Temperature control dial
! Temperature control dial
This dial regulates the temperature of air
flow from the air outlets over a range from
the blue side (cool) to red side (warm). Climate control
4-3
– CONTINUED –
Page 149 of 364
&Heater operation
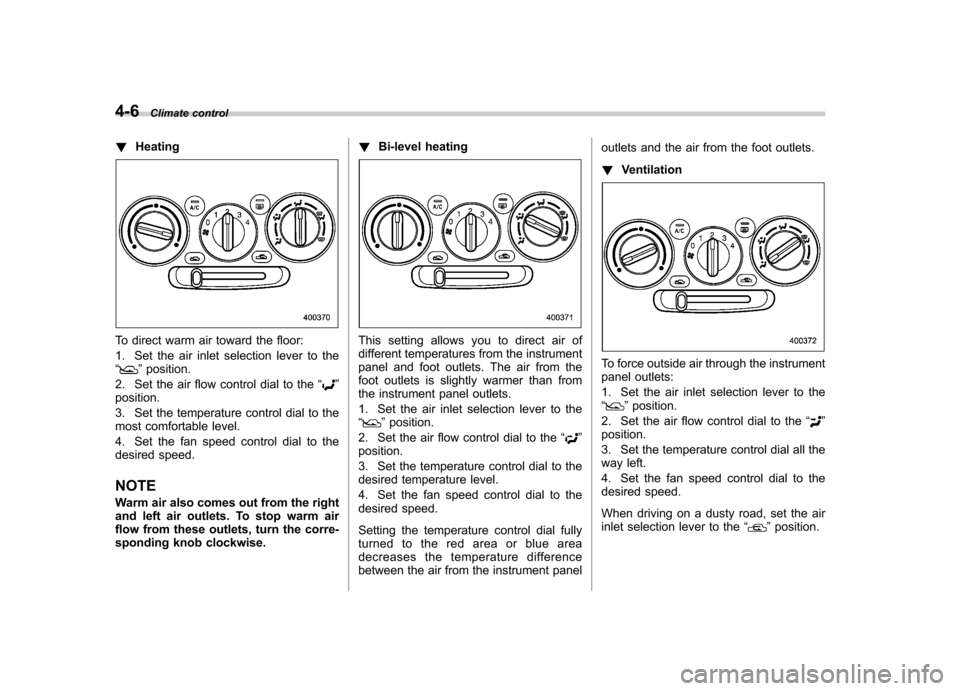
! Defrosting or defogging the wind- shield
To direct warm air to the windshield and
front door windows:
1. Set the air inlet selection lever to the “
”position.
2. Set the air flow control dial to the “
”
position.
3. Turn the temperature control dial all
the way to the right.
4. Set the fan speed control dial to the
highest speed.
If your vehicle is equipped with an air
conditioner, when the “
”or “”position
is selected, the air conditioner compressor
automatically operates regardless of the position of the air conditioner button to
defog the windshield quickly.
However, the air conditioner indicator light
does not come on at this time.
NOTE
Warm air also comes out from the right
and left air outlets. To stop warm air
flow from these outlets, turn the corre-
sponding knob clockwise. ! Heating and defrosting
To direct warm air toward the floor and the windshield:
1. Set the air inlet selection lever to the “
”position.
2. Set the air flow control dial to the “
”
position.
3. Set the temperature control dial to the most comfortable level.
4. Set the fan speed control dial to the
desired speed.
If your vehicle is equipped with an air
conditioner, when the
“
”or “”position
is selected, the air conditioner compressor
automatically operates regardless of the
position of the air conditioner button to
defog the windshield quickly.
However, the air conditioner indicator light
does not come on at this time.
NOTE
Warm air also comes out from the right
and left air outlets. To stop warm air
flow from these outlets, turn the corre-
sponding knob clockwise. Climate control
4-5
– CONTINUED –
Page 150 of 364
4-6Climate control
! Heating
To direct warm air toward the floor:
1. Set the air inlet selection lever to the “
”position.
2. Set the air flow control dial to the “
”
position.
3. Set the temperature control dial to the
most comfortable level.
4. Set the fan speed control dial to the
desired speed.
NOTE
Warm air also comes out from the right
and left air outlets. To stop warm air
flow from these outlets, turn the corre-
sponding knob clockwise. !
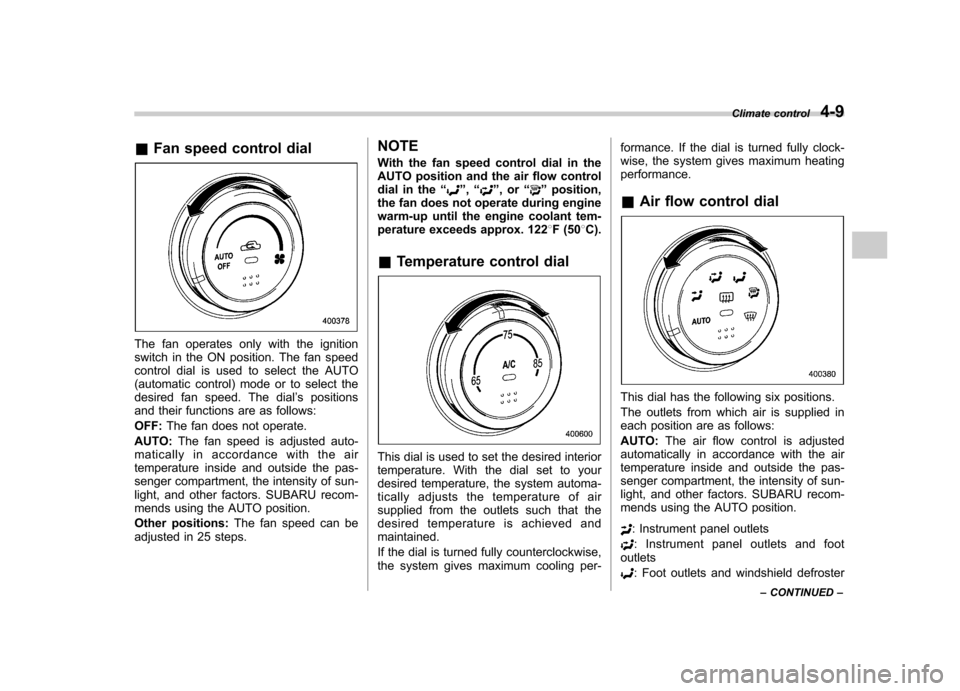
Bi-level heating
This setting allows you to direct air of
different temperatures from the instrument
panel and foot outlets. The air from the
foot outlets is slightly warmer than from
the instrument panel outlets.
1. Set the air inlet selection lever to the “
”position.
2. Set the air flow control dial to the “
”
position.
3. Set the temperature control dial to the
desired temperature level.
4. Set the fan speed control dial to the
desired speed.
Setting the temperature control dial fully
turned to the red area or blue area
decreases the temperature difference
between the air from the instrument panel outlets and the air from the foot outlets. !
Ventilation
To force outside air through the instrument
panel outlets:
1. Set the air inlet selection lever to the “
”position.
2. Set the air flow control dial to the “
”
position.
3. Set the temperature control dial all the
way left.
4. Set the fan speed control dial to the
desired speed.
When driving on a dusty road, set the air
inlet selection lever to the “
”position.
Page 153 of 364
&Fan speed control dial
The fan operates only with the ignition
switch in the ON position. The fan speed
control dial is used to select the AUTO
(automatic control) mode or to select the
desired fan speed. The dial ’s positions
and their functions are as follows: OFF: The fan does not operate.
AUTO: The fan speed is adjusted auto-
maticallyinaccordancewiththeair
temperature inside and outside the pas-
senger compartment, the intensity of sun-
light, and other factors. SUBARU recom-
mends using the AUTO position.
Other positions: The fan speed can be
adjusted in 25 steps. NOTE
With the fan speed control dial in the
AUTO position and the air flow control
dial in the
“
”, “”,or “”position,
the fan does not operate during engine
warm-up until the engine coolant tem-
perature exceeds approx. 122 8F (50 8C).
& Temperature control dial
This dial is used to set the desired interior
temperature. With the dial set to your
desired temperature, the system automa-
tically adjusts the temperature of air
supplied from the outlets such that the
desired temperature is achieved andmaintained.
If the dial is turned fully counterclockwise,
the system gives maximum cooling per- formance. If the dial is turned fully clock-
wise, the system gives maximum heatingperformance. &
Air flow control dial
This dial has the following six positions.
The outlets from which air is supplied in
each position are as follows: AUTO: The air flow control is adjusted
automatically in accordance with the air
temperature inside and outside the pas-
senger compartment, the intensity of sun-
light, and other factors. SUBARU recom-
mends using the AUTO position.
: Instrument panel outlets
: Instrument panel outlets and foot
outlets
: Foot outlets and windshield defroster Climate control
4-9
– CONTINUED –
Page 163 of 364

Display Control mode
Turn counterclockwise Turn clockwise
BAS Bass control For less bass sound For more bass sound
TRE Treble control For less treble sound For more treble sound
BAL Balance control To increase left speaker volume and de-
crease right speaker volume To increase right speaker volume and
decrease left speaker volume
FA D Fader control
To increase rear speaker volume and
decrease front speaker volume To increase front speaker volume and
decrease rear speaker volume
VOL Volume control For less volume For more volume
! FM/AM selection button (FM/AM)
Push the “FM/AM ”button (4) when the
radio is off to turn on the radio.
Push the “FM/AM ”button when the radio
is on to select FM1, FM2 or AM reception.
Each time this button is pressed, the band
will change in the following order:
The display indicates which one is cur-
rently selected. !
Stereo indicator
The stereo indicator “ST ”will come on
when an FM stereo broadcast is received. Audio
5-5
– CONTINUED –
Page 170 of 364
5-12Audio
Display Control mode
Turn counterclockwise Turn clockwise
BASS Bass control For less bass sound For more bass sound
MIDDLE Midrange control For less midrange sound For more midrange sound
TREBLE Treble control For less treble sound For more treble sound
FADER Fader control To increase rear speaker volume and
decrease front speaker volume To increase front speaker volume and
decrease rear speaker volume
BALANCE Balance control To increase left speaker volume and de-
crease right speaker volume To increase right speaker volume and
decrease left speaker volume
VOLUME Volume control For less volume For more volume
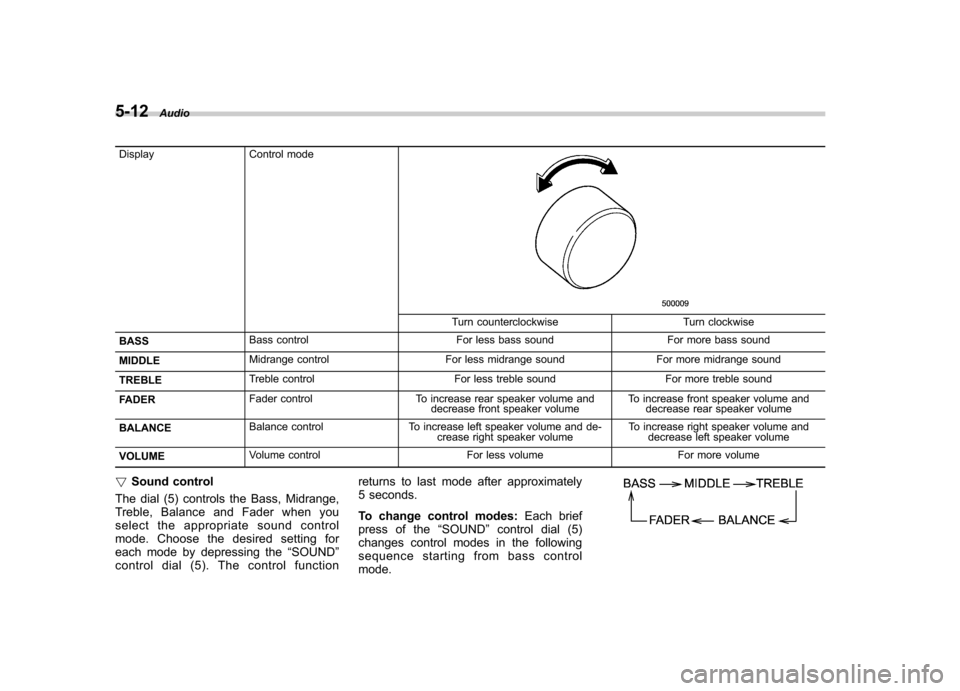
! Sound control
The dial (5) controls the Bass, Midrange,
Treble, Balance and Fader when you
select the appropriate sound control
mode. Choose the desired setting for
each mode by depressing the “SOUND ”
controldial(5).Thecontrolfunction returns to last mode after approximately
5 seconds.
To change control modes:
Each brief
press of the “SOUND ”control dial (5)
changes control modes in the following
sequence starting from bass controlmode.
Page 171 of 364
!Display illumination dimness cance-
lation (BRIGHT)
The brightness of the radio display dims
when the light switch is in the “
”or
“” position. If this makes the display
difficult to read, press the volume dial for
more than 2 seconds to return the display
to original brightness. Subsequently
pressing the volume dial again for more
than 2 seconds or if you can safely do so,
turning the light switch to the OFF position
and back to the “
”or “”position
makes the radio display dim again. ! FM/AM selection button (FM/AM)
Push the “FM/AM ”button (2) when the
radio is on to select FM1, FM2 or AM
reception. Each time this button is
pressed, the band will change in the
following order:
The display indicates which one is cur-
rently selected. ! Stereo indicator
The stereo indicator “ST ”will come on
when an FM stereo broadcast is received. !
Manual tuning (TUNE)
Turn the tuning dial (5) clockwise to
increase the tuning frequency and turn
the dial counterclockwise to decrease it.
Each click the dial is turned, the frequency
changes 10 kHz in the AM waveband and
0.2 MHz in the FM waveband. ! Seek tuning
When the “
”side of the “SEEK/TRACK/
CAT ”button (3) is depressed, the radio will
begin to automatically seek up for recei-
vable frequencies and will stop at the first
one found. For the “
”side, the radio will
begin to automatically seek down. This
function may not be available, however,
when radio signals are weak. In such a
situation, perform manual tuning to select
the desired station. ! Automatic tuning (SCAN)
Press the “SCAN ”button (4) to change the
radio to the SCAN mode. In this mode, the
radio scans through the radio band until a
station is found. The radio will stop at a
receivable station for 5 seconds while
displaying the frequency by blinking, after
which scanning will continue until the
entire band has been scanned from the
low end to the high end. Press the “SCAN ”
button again to cancel the SCAN mode
and to stop on any displayed frequency.
When the “SCAN ”button is pressed for automatic tuning, stations are scanned in
the direction of low frequencies to high
frequencies only. Automatic tuning may
not function properly if the station recep-
tion is weakened by distance from the
station or proximity to tall buildings andhills. !
Selecting preset stations
Presetting a station with a preset button
(6) allows you to select that station in a
single operation. Up to six AM, FM1 and
FM2 stations each may be preset. ! How to preset stations
1. Press the “FM/AM ”button (2) to select
AM, FM1 or FM2 reception.
2. Press the “SCAN ”button (4) or tune
the radio manually until the desired station
frequency is displayed.
3. Press one of the preset buttons (6) for
at least 2 seconds to store the frequency.
The frequency of the station will flash once
on the display at this time. NOTE . If the connection between the radio
and battery is broken for any reason
such as vehicle maintenance or radio
removal, all stations stored in the
preset buttons are cleared. If this
occurs, it is necessary to reset the Audio
5-13
– CONTINUED –
Page 180 of 364
5-22Audio
! Displaying Sirius ID of tuner
When you activate Sirius, you should
have your Sirius tuner ID ready because
each tuner is identified by its unique Sirius
tuner ID.
The Sirius ID will be needed when you
activate Sirius and receive Sirius custo-
mer support.
The Sirius ID can be found on the audio
display by tuning the channel to “0 ”.
Turn the “TUNE/FOLDER/CH ”dial (23) to
select the satellite radio channel. ! Channel selection
Turn the “TUNE/FOLDER/CH ”dial (23) to
select the radio channel. Turn the tuning
dial clockwise to change the channel
upward and turn the dial counterclockwise
to change the channel downward with
each click of the dial. ! Category selection
Press the “SEEK/TRACK/CAT ”button
(18) to select the category of radio
channel. Press the “
”side of the button
(18) to change the category upward and the “
”side of the button to downward
with each press of the button. ! Channel preset
Presetting a channel with a preset button
(22) allows you to select that station in a
single operation. Up to six SR1, SR2 and SR3 channels each may be preset.
Press one of the preset buttons for
at
least 2 seconds to store the channel. The
number of the channel will flash once on
the display, and the unit produces a beep
sound at this time. ! Channel scan
Press the “SCAN ”button (19) to change
the radio to the SCAN mode. In this mode,
the radio scans through the channel until a
station is found. The radio will stop at the
station for 5 seconds while displaying the
channel number, after which scanning will
continue until the entire channel has been
scanned from the low end to the high end.
Press the “SCAN ”button (19) again to
cancel the SCAN mode and to stop on any
displayed station.
When the “SCAN ”button is pressed for
automatic tuning, stations are only
scanned in an upward direction. ! Category mode
Press the “CAT ”button (21) for at least 2
seconds to turn the category mode on. In
this mode, the radio operations (channel
selection, channel scan) are performed
only in the selected category. To cancel
the category mode, press the “CAT ”button
(21) for at least 2 seconds again. !
Band selection
Push the “SAT ”button (20) when the radio
is on to select SR1, SR2 or SR3 reception.
Each time this button is pressed, the band
will change in the following order:
! AUX mode
Press the “CD/AUX ”button (17) to select
the “AUX mode ”(when the AUX unit is
connected to the AUX terminal).