2007 SKODA SUPERB audio
[x] Cancel search: audioPage 18 of 43

Audio17
Store station
– Select the desired range and the level using the button , or
–Set a station.
– Hold the station selection button pressed on the station which
should be stored, until the station is switched to mute.
Automatically store station
– Select the memory level (FM, TMC or AM), in which the stations
should automatically be stored.
– Hold the button pressed until the automatic storing begins and “ A-STORE ” is shown in the standard field - status range - of the
display. Additionally a progress display in percentage is shown in the
standard field - foreground - of the display.
– The stations with the strongest reception are stored automatically on level 2 (FM2, TC2 or. AM2) of the set range. The order of the stored
stations depends on their station code.
Note
•In the current range you can select up to six stations with the strongest recep-
tion using the button .
•An Autostore for TMC stations can take 10 minutes, as all receiveable stations
are checked for their TMC compatibility. At this time no radio mode is possible.
Retrieving the stored stations
– Select the desired range and the level using the button ,
or
– Briefly press the station selectio n button under which you have
stored the station.
You can also call up the stored st ations by pressing the button .
Note
•If a stored FM station is no longer receivable and the TA function is activated in
the “ SETUP AUDIO ”, “TP-SEEK ” is shown in the display after pressing the station
selection button , a finding is started and the radio play function is switched to
mute. If no TP station is receiv able, a signal tone sounds and “ NO TP” is shown in
the display In such a case th e function TA switches off ⇒page 13.
•If a stored TMC station is no longer receivable, “TMC-SEEK” is shown in the
display. If no TMC stations are receivable, “ NO TMC” is shown in the display. In such
a case select an FM station.
•If no TMC stations are received, a dy namic route guidance is not possible.
Replay recorded traffic information
After pressing the button , “TRACK” and the number of the last
recorded information is shown in the standard field - foreground - of the
display. In the standard field - status range - of the display the time of the
recording is shown next to the source display. If no information was
recorded, “ NO MESSAGE ” is shown in the standard field - foreground - of
the display.
Select recorded traffic information
– Press one of the buttons while replaying a recorded traffic infor- mation, in order to listen to the previous or the next one.
Fast station finding (audible)
– In order to play the information faster, press one of the buttons while replaying.
FMA2TMC
A5AMA6
A22
ASA20
ASA20
FMA2TMC
A5AMA6
A22
A14
A22
TIMA3
A1
A14
s2ck.7.book Page 17 Friday, April 20, 2007 12:38 PM
Page 19 of 43

Audio
18
Deleting traffic information
– Trafffic information is automaticall y deleted six seconds after end of
readiness.
Ending TIM function
– Press again the button to end the TIM function.
Note
•The TIM function is automatically en ded after replaying all information.
•If the TIM function was called up from the menu “ ROUTE GUIDANCE”, it can be
shown again by pressing the button .
CD mode
Internal CD drive
Your navigation system gives you the possibility to play audio CDs in the
internal drive. In addition a CD changer * can be connected.
Inserting the CD
– Slide the CD with the written side fa c in g u p in t o t h e C D c a s e. I n s e r t th e
CD as far as possible until it can be drawn in automatically by the navi-
gation system.
– After the CD was drawn in, the navigation system automatically
switches over to CD play function . The play function begins, system
oriented after a few seconds with the first track of the CD.
–“ TRACK ” and the current track number are shown in the standard field
- foreground - of the display. Starting CD mode
– If a CD has already been inserted, press the button . The play
function begins at the point where it was last interrupted. If the CD is
ready to play, the play function starts from the beginning.
Note
•The CD mode in the internal drive is possible if an audio CD for the navigation
CD was inserted. If no navigation CD has been inserted, only a “ NO MAP” route
guidance is possible ⇒page 31.
•Do not make an attempt to insert the CD with force.
•If a CD changer * is connected, this one is selected first by pressing the button
.
CD functions (internal drive)
Select track
– For selecting a track, press the right or left button upwards or downwards.
Fast station finding (audible)
– Press the right or left button for a fast station finding upwards or downards.
Playing all tracks on a CD (SCAN)
– Press the button . All tracks on a CD are briefly played in
ascending order (10 seconds). “ SCAN” is shown in the standard field -
background - of the display.
– Press once again the button to interrupt this function.
Listening to all tracks of a CD in the random sequence
– Press the button .
TIMA3
TIMA3
CDA10
CDA10
A1
A14
SCANA16
MIXA18
s2ck.7.book Page 18 Friday, April 20, 2007 12:38 PM
Page 20 of 43

Audio19
– Press the button once again to interrupt this function.
Taking out the CD
– Press the button , the CD is driv en to the initial position. Care-
fully remove the CD.
End CD mode
– Select the desired range or allow th e CD to eject with the button
, or
Information on how to use a CD
CD to jump
Uneven road surfaces and strong vibrations may cause the CD to jump. In such
cases wait with the CD mode until there is a better road surface to drive on.
Formation of condensation
When it is cold and after rain showers, moisture can deposit in the CD drive
(condensation). This can effect the CD ju mp or impair the play function. In such
cases wait until the moisture has dissipated.
Notes for the care of the CDs
If a CD is soiled, please never clean the CD in the direction of a circle but rather with
a soft fluffly cloth from inside to outside. In case of severe layers of dirt we recom-
mend to clean the CD with a commercially available CD cleaner. Also in this case do
not clean the CD in the direction of a circ le but rather from inside to outside and
then let it dry off.
Caution
•Never use liquids such as gasoline, paint thinner or disk cleaner, otherwise the
surface of the CD could get damaged.
•Never expose CDs to direct sun rays!
•Please never write or affix the CD!
Note
Di r t o r d amag e of a CD can le ad to d if ficulti es when “ reading” the information. The
difficulty in reading the error depends on th e dirt or on the severity of the mechan-
ical damage. Severe scratches cause reading errors which can make the CD jump or
“ get stuck ”. All CDs must be treated carefully and always be stored in a protective
case.
Audio settings
The treble and the bass as well as the volume distribution left/right
(balance) and front/rear (fader) can be set in the sound menu.
– Press the button , to call up the sound menu.
– You can select the menu points to be selected one after each other with the menu knob .
– Set and confirm the new values with the menu knob .
– The setting is reset by pressing the button .
– After all settings have been carried out, exit the sound menu by pressing the button or a an audio source button CD, FM, AM
or TMC.
Note
•The settings for treble and bass can be carried out and stored individually for
each audio source, the settings for balance and fader apply to all audio sources.
•The fader setting is only available if loudspeakers are installed in the vehicle
tailgate.
MIXA18
CDA10
FM
A2TMCA5AMA6
A24
A25
A25
A27
A27
s2ck.7.book Page 19 Friday, April 20, 2007 12:38 PM
Page 32 of 43

Navigation31
Route guidance
Begin guidance
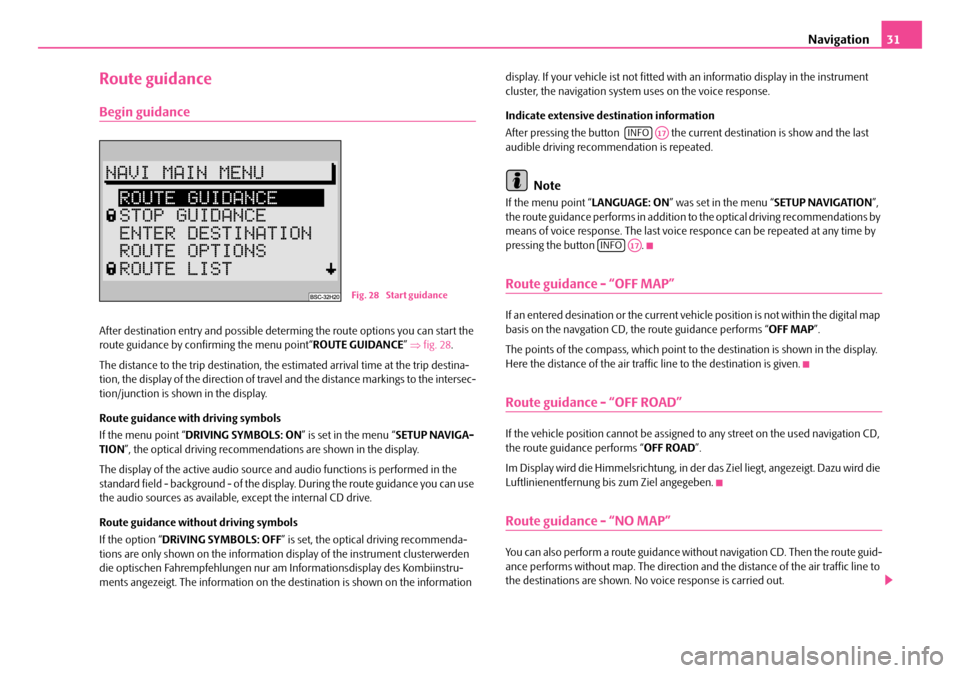
After destination entry and possible determing the route options you can start the
route guidance by confirming the menu point“ ROUTE GUIDANCE” ⇒ fig. 28 .
The distance to the trip destination, the estimated arrival time at the trip destina-
tion, the display of the direction of travel and the distance markings to the intersec-
tion/junction is shown in the display.
Route guidance with driving symbols
If the menu point “ DRIVING SYMBOLS: ON ” is set in the menu “SETUP NAVIGA-
TION ”, the optical driving recommendations are shown in the display.
The display of the active audio source and audio functions is performed in the
standard field - background - of the displa y. During the route guidance you can use
the audio sources as available, except the internal CD drive.
Route guidance without driving symbols
If the option “ DRiVING SYMBOLS: OFF” is set, the optical driving recommenda-
tions are only shown on the information display of the instrument clusterwerden
die optischen Fahrempfehl ungen nur am Informations display des Kombiinstru-
ments angezeigt. The information on the destination is shown on the information display. If your vehicle ist not fitted with an informatio display in the instrument
cluster, the navigation system uses on the voice response.
Indicate extensive destination information
After pressing the button the curr
ent destination is show and the last
audible driving recommendation is repeated.
Note
If the menu point “ LANGUAGE: ON” was set in the menu “ SETUP NAVIGATION”,
the route guidance performs in addition to the optical driving recommendations by
means of voice response. The last voice responce can be repeated at any time by
pressing the button .
Route guidance - “OFF MAP”
If an entered desination or the current vehicle position is not within the digital map
basis on the navgation CD, th e route guidance performs “OFF MAP”.
The points of the compass, which point to the destination is shown in the display.
Here the distance of the air traffi c line to the destination is given.
Route guidance - “OFF ROAD”
If the vehicle position cannot be assigned to any street on the used navigation CD,
the route guidance performs “ OFF ROAD”.
Im Display wird die Himmelsrichtung, in der das Ziel liegt, angezeigt. Dazu wird die
Luftlinienentfernung bis zum Ziel angegeben.
Route guidance - “NO MAP”
You can also perform a route guidance with out navigation CD. Then the route guid-
ance performs without map. The direction an d the distance of the air traffic line to
the destinations are shown. No voice response is carried out.
Fig. 28 Start guidance
INFOA17
INFOA17
s2ck.7.book Page 31 Friday, April 20, 2007 12:38 PM
Page 38 of 43

Glossary37
Glossary
Description
ABS
Antilock Brake System ⇒page 5
AF
Alternative frequency ⇒page 16
AM
Amplitude modulation, middle waveband, MW ⇒ page 4, ⇒page 16, ⇒page 17,
⇒ page 17, ⇒page 19, ⇒page 19
AS
Auto-Store - automatically stores the stat ions with the strongest reception in the
selected waveband ⇒page 17
BALANCE
Volume ratio of left/right loudspeaker is adjusted ⇒page 19
CD
Compact Disc ⇒page 4, ⇒page 6, ⇒page 7, ⇒page 8, ⇒page 9, ⇒page 12,
⇒ page 14, ⇒page 18, ⇒page 18, ⇒page 19, ⇒page 22
EON
Enhanced Other Networks; traf fic information of other stations can also be trans-
mitted by the navigation system duri ng play function of an audio source
EON is a RDS function, which ensures that all traffic information of a broadcasting
company is transmitted in the TP mode ⇒page 8.
FA D E R
Volume ratio of front/rear loudspeaker is adjusted ⇒page 19 FM
Frequency modulation, ultra short waveband, USW
⇒page 4, ⇒page 8,
⇒ page 9, ⇒page 11, ⇒page 16, ⇒page 17, ⇒page 17, ⇒page 19, ⇒page 19
GALA
Speed dependent volume adaptation - ⇒page 13
GPS
Global Positioning System - global satellite locating system ⇒page 5
MENU
Menu ⇒page 4, ⇒page 11
MUTE
Mute switch ⇒page 4, ⇒page 8, ⇒page 16
NO MESSAGE
No news ⇒page 17
NO TMC
No Traffic Message Channel - no tr affic message channel is available ⇒ page 17
NO TP
No Traffic Program - no station with traffic information is available ⇒page 17
RDS
Radio Data System - Radio station data system, coded data transfer of USW station
⇒ page 12, ⇒page 12
SAFE
Secured ⇒page 6
SCAN
Brief playing of all stations with the strongest reception in the selected waveband
or all tracks on a CD ⇒page 4, ⇒page 9, ⇒page 18.
s2ck.7.book Page 37 Friday, April 20, 2007 12:38 PM
Page 40 of 43

Index39
Index
A
Alarm . . . . . . . . . . . . . . . . . . . . . . . . . . . . . . . . . . . . . . . . 10
Audio . . . . . . . . . . . . . . . . . . . . . . . . . . . . . . . . . . . . . 12, 19
B
Buttons . . . . . . . . . . . . . . . . . . . . . . . . . . . . . . . . . . . . . . . . 4
C
Calibration . . . . . . . . . . . . . . . . . . . . . . . . . . . . . . . . . . . . . 7
CD
Navigation . . . . . . . . . . . . . . . . . . . . . . . . . . . . . . . . . . 7
Replay . . . . . . . . . . . . . . . . . . . . . . . . . . . . . . . . . . . 18
Switching on . . . . . . . . . . . . . . . . . . . . . . . . . . . . . . 18
CD Care . . . . . . . . . . . . . . . . . . . . . . . . . . . . . . . . . . . . . 19
Change short name . . . . . . . . . . . . . . . . . . . . . . . . . . . 33
Code . . . . . . . . . . . . . . . . . . . . . . . . . . . . . . . . . . . . . . 6, 15 Entry . . . . . . . . . . . . . . . . . . . . . . . . . . . . . . . . . . . . . 15
incorrect . . . . . . . . . . . . . . . . . . . . . . . . . . . . . . . . . 15
D
DestinationEnter destination . . . . . . . . . . . . . . . . . . . . . . . . . . 21
Intersection . . . . . . . . . . . . . . . . . . . . . . . . . . . . . . . 24
Memory . . . . . . . . . . . . . . . . . . . . . . . . . . . . . . . . . . 26
Selection . . . . . . . . . . . . . . . . . . . . . . . . . . . . . . . . . 27 sort . . . . . . . . . . . . . . . . . . . . . . . . . . . . . . . . . . . . . . 26
Street . . . . . . . . . . . . . . . . . . . . . . . . . . . . . . . . . . . . 23
Town . . . . . . . . . . . . . . . . . . . . . . . . . . . . . . . . . . . . 21
Town centre . . . . . . . . . . . . . . . . . . . . . . . . . . . . . . 24
Destination memory . . . . . . . . . . . . . . . . . . . . . . . 26, 32
Destinations . . . . . . . . . . . . . . . . . . . . . . . . . . . . . . . . . 32 delete . . . . . . . . . . . . . . . . . . . . . . . . . . . . . . . . . . . . 34
sort . . . . . . . . . . . . . . . . . . . . . . . . . . . . . . . . . . . . . . 33
Display . . . . . . . . . . . . . . . . . . . . . . . . . . . . . . . . . . . . . 7, 9
E
Explanations . . . . . . . . . . . . . . . . . . . . . . . . . . . . . . . . . . . 3
F
Factory settings . . . . . . . . . . . . . . . . . . . . . . . . . . . . . . 14
Flagged destination . . . . . . . . . . . . . . . . . . . . . . . . 27, 28
G
Guidance . . . . . . . . . . . . . . . . . . . . . . . . . . . . . . . . . . . . 31
I
Intersection . . . . . . . . . . . . . . . . . . . . . . . . . . . . . . . . . . 24
J
Jam . . . . . . . . . . . . . . . . . . . . . . . . . . . . . . . . . . . . . . 34, 35
L
Language . . . . . . . . . . . . . . . . . . . . . . . . . . . . . . . . . . . . 14
N
Navigation . . . . . . . . . . . . . . . . . . . . . . . . . . . . . . . . . 5, 11 Basic menu . . . . . . . . . . . . . . . . . . . . . . . . . . . . . . . 20
Navigation CD . . . . . . . . . . . . . . . . . . . . . . . . . . . . . . . . . 7
O
Operation . . . . . . . . . . . . . . . . . . . . . . . . . . . . . . . . . . . . . 6
R
Radio Retrieve station . . . . . . . . . . . . . . . . . . . . . . . . . . . 17
Store station . . . . . . . . . . . . . . . . . . . . . . . . . . . . . . 16
switch on . . . . . . . . . . . . . . . . . . . . . . . . . . . . . . . . . 16
Replacement service . . . . . . . . . . . . . . . . . . . . . . . . . . . . 6
Route . . . . . . . . . . . . . . . . . . . . . . . . . . . . . . . . . . . . . . . . 29 List . . . . . . . . . . . . . . . . . . . . . . . . . . . . . . . . . . . . . . 30
Possibilities . . . . . . . . . . . . . . . . . . . . . . . . . . . . . . . 29
Route guidance Cancel . . . . . . . . . . . . . . . . . . . . . . . . . . . . . . . . . . . 32
NO MAP . . . . . . . . . . . . . . . . . . . . . . . . . . . . . . . . . 31
OFF MAP . . . . . . . . . . . . . . . . . . . . . . . . . . . . . . . . . 31
OFF ROAD . . . . . . . . . . . . . . . . . . . . . . . . . . . . . . . 31
s2ck.7.book Page 39 Friday, April 20, 2007 12:38 PM