Page 1 of 14
Sh ift_capability2007
FRONTI E R
Q U I C K R E F E R E N C E G U I D E
Page 2 of 14
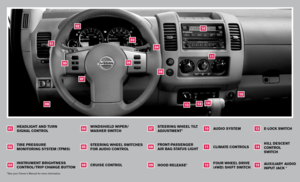
steering wheel switches for audio control
instru Ment Brightness
control /tri P change Button
tire
Pressure
M onitoring s Y ste M (tPM s)
0203
05
hood release* front -Passenger
air Bag status light
cruise control
06
0809
four wheel dri Ve
(4 wd ) shift switch
cli
Mate controls
1112
02
06
04
03
01
11
05
1410
08
13
07
windshield wi Per /
washer switch
headlight and turn signal control
01
04
steering wheel tilt
ad Just Ment *
07
e-loc K switch
audio
s Y ste M
10
13
09
*See your Owner’s Manual for more information.
12
15
auXiliar Y audio
in Put Jac K *
hill
descent
control switch
1415
Page 3 of 14

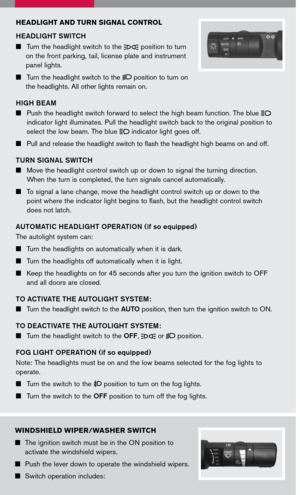
headlight and turn signal control
HEADLIGHT SWITCH
Turn the headlight switch to the position to turn
on the front parking, tail, license plate and instrument
panel lights.
Turn the headlight switch to the position to turn on
the headlights. All other lights remain on.
HIGH BEAM
Push the headlight switch forward to select the high beam function. The blue
indicator light illuminates. Pull the headlight switch back to the original position to
select the low beam. The blue
indicator light goes off.
Pull and release the headlight switch to flash the headlight high beams on and off.
TURN SIGNAL SWITCH
Move the headlight control switch up or down to signal the turning direction.
When the turn is completed, the turn signals cancel automatically.
To signal a lane change, move the headlight control switch up or down to the
point where the indicator light begins to flash, but the headlight control switch
does not latch.
AUTOMATIC HEADLIGHT OPERATION (if so equipped)
The autolight system can:
Turn the headlights on automatically when it is dark.
Turn the headlights off automatically when it is light.
Keep the headlights on for 45 seconds after you turn the ignition switch to OFF
and all doors are closed.
TO ACTIVATE THE AUTOLIGHT SYSTEM :
Turn the headlight switch to the AUTO position, then turn the ignition switch to ON.
TO DEACTIVATE THE AUTOLIGHT SYSTEM :
Turn the headlight switch to the OFF, or position.
FOG LIGHT OPERATION (if so equipped)
Note: The headlights must be on and the low beams selected for the fog lights to
operate.
Turn the switch to the position to turn on the fog lights.
Turn the switch to the OFF position to turn off the fog lights.
windshield wiPer /washer switch
The ignition switch must be in the ON position to
activate the windshield wipers.
Push the lever down to operate the windshield wipers.
Switch operation includes:
Page 4 of 14
 shift switch
(if so equipped)
This system provides three positions so the driver can
select the desired drive mode according to driving
conditions.
2WD – Dry,")
four-wheel driVe (4 wd) shift switch
(if so equipped)
This system provides three positions so the driver can
select the desired drive mode according to driving
conditions.
2WD – Dry, paved roads.
4H – Rocky, sandy or snow-covered roads. (Before placing 4WD shift switch in 4H
position from 2WD, ensure vehicle speed is less than 62.5 MPH [100 km/h]).
4LO – When maximum power and traction are required (steep grades, rocky, sandy or
muddy roads).
Intermittent – Wipers operate intermittently and can be adjusted by turning the
time control.
Low speed – Wipers operate at a continuous low speed.
High speed – Wipers operate at a continuous high speed.
Mist – Lift the lever up for one sweep operation of the wiper.
LCN0042
Wash – Pull the lever toward you. Wipers automatically wipe several times.
lo
hi
M ist
int
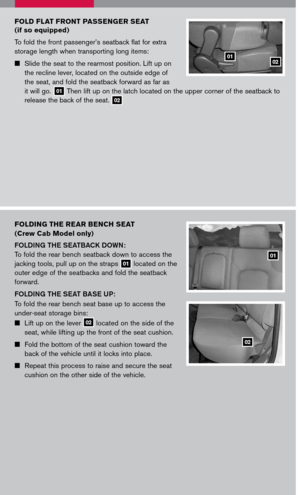
hill descent control switch
(if so equipped)
The hill descent control system is designed to reduce driver
workload when going down steep hills. The hill descent
control system helps to control vehicle speed so the driver can
concentrate on steering the vehicle.
To activate the hill descent control system:
The automatic transmission selector lever must be in
forward or reverse gear,
The 4WD switch must be in the 4L position and the vehicle speed must be under 15
MPH (25 km/h), or
The 4WD switch must be in the 4H position and the vehicle speed must be under 21
MPH (35 km/h), and
The hill descent control system switch must be on.
The hill descent control indicator light will come on when the system is activated.
Also, the stop/tail lights illuminate while the hill descent control system applies the
brakes to control vehicle speed. To turn off the hill descent control system, push the
switch to the off position. The hill descent control system is temporarily disabled when
the brake or accelerator pedal is depressed.
Refer to your Owner’s Manual for detailed information.
H ILL S TART A SSIST (HSA) (
if so equipped)
The hill start assist system automatically keeps the brakes applied to help prevent the
vehicle from rolling backwards in the time it takes the driver to release the brake pedal
and apply the accelerator when the vehicle is stopped on a hill.
Page 5 of 14

The Electronic Locking Rear Differential (E-Lock) system can
help provide added traction if the vehicle is stuck or becoming
stuck. This system is available on 2WD a")
e-loc K switch (if so equipped)
The Electronic Locking Rear Differential (E-Lock) system can
help provide added traction if the vehicle is stuck or becoming
stuck. This system is available on 2WD and 4WD vehicles.
To activate the system:
The 4WD switch must be in the 4LO position (4-wheel drive
vehicles),
The vehicle must be stopped or moving at 4 MPH (7 km/h)
or less, and
The E-Lock system switch must be turned on.
Once the vehicle is free, the system should be turned off.
cruise control (if so equipped)
To activate the cruise control, push the ON.OFF switch.
The indicator light in the instrument panel will illuminate.
To set cruising speed, accelerate the vehicle to the desired
speed, push the COAST/SET switch and release it. The
SET indicator light in the instrument panel will illuminate.
To reset at a faster cruising speed, push and hold the
ACCEL/RES switch. When the vehicle attains the speed you desire, release the
switch.
To reset at a slower cruising speed, push and hold the COAST/SET switch. Release
the switch when the vehicle slows to the desired speed.
To cancel cruise control, push the CANCEL switch or tap the brake pedal. The SET
indicator light in the instrument panel will go out.
To resume a preset speed, push and release the ACCEL/RES switch. The vehicle
returns to the last set cruising speed when the vehicle speed is over 25 MPH (40
km/h).
To turn off cruise control, push the ON.OFF switch. Both the CRUISE indicator light
and the SET indicator light in the instrument panel will go out.
HSA will operate automatically under the following conditions:
The selector lever is shifted to a forward or reverse gear.
The vehicle is stopped completely on a hill by applying the brake.
The maximum holding time is 2 seconds.
Page 6 of 14

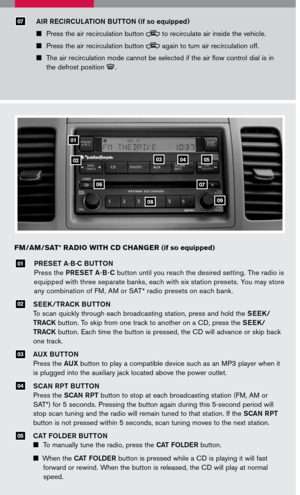
Press the POWER button to turn the audio system on or
off.
To choose preset radio stations A, B, C, CD and AUX
press MODE repea")
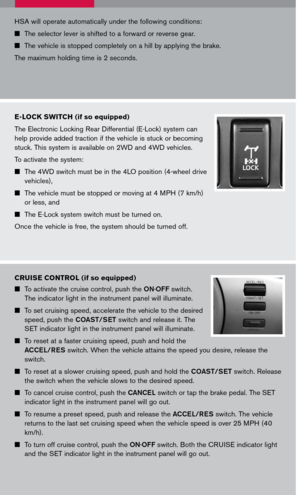
steering wheel switches for audio control
(if so equipped)
Press the POWER button to turn the audio system on or
off.
To choose preset radio stations A, B, C, CD and AUX
press MODE repeatedly.
The tuning up or down switch can be used to perform
the following:
• Push the
switch for less than 1.5 seconds to change to a preset station.
• Push and hold the
switch for more than 1.5 seconds to seek the next or previous
broadcasting radio station.
• Push the
switch while playing a CD (if so equipped) for less than 1.5 seconds to
change tracks on the CD.
• If the vehicle is equipped with a CD changer, push and hold the
switch for more
than 1.5 seconds to change between CDs.
utilit Y Bed with sPra Y-on B ed liner
and utili -trac K ™ sY ste M (if so equipped)
The Utili-track™ channel system allows you to move
tie-down clamps in the bed to the best location to
secure a load.
The tie-down cleats must be installed so the
clamp is properly seated in the notches in the
rail. If the tie-down cleat is not seated in the
notches, it will not be flush with the rail and
cannot be properly tightened. The bolt in the center of the cleat must be tightened
hand-tight (20 – 40 inch pounds).
Check the tightness of the tie-down cleat periodically during a trip to make sure the
center bolt has not become loose.
The channel end stoppers can be used to help prevent cargo from sliding or shifting
off the end of the truck bed. They must be installed so they are properly seated in the
detents in the channel.
Refer to your Owner’s Manual for loading limits and tie-down recommendations.
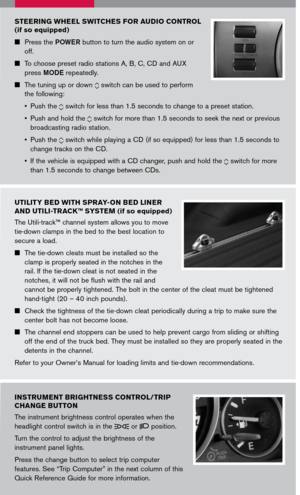
instru Ment B rightness control/tri P
change B utton
The instrument brightness control operates when the
headlight control switch is in the or position.
Turn the control to adjust the brightness of the
instrument panel lights.
Press the change button to select trip computer
features. See “Trip Computer” in the next column of this
Quick Reference Guide for more information.
Page 7 of 14

The ignition switch must be in the ON position to
operate the sunroof.
TILTING THE SUNROOF
To tilt the sunroof up, first close the sunroof by
pushing the switc")
sunroof controls (if so equipped)
The ignition switch must be in the ON position to
operate the sunroof.
TILTING THE SUNROOF
To tilt the sunroof up, first close the sunroof by
pushing the switch toward UP/CLOSE 01. Release
the switch, then push the UP/CLOSE switch again
to tilt the sunroof up.
To tilt the sunroof down, push the switch toward DOWN/OPEN 02.
SLIDING THE SUNROOF
To fully open the sunroof, push the switch toward DOWN/OPEN. To open the sunroof
part way, push the switch in any direction while the sunroof is sliding to stop it in the
desired position.
To fully close the sunroof, push the switch toward UP/CLOSE. To close the sunroof
part way, push the switch in any direction while the sunroof is sliding to stop it in the
desired position.
01
02
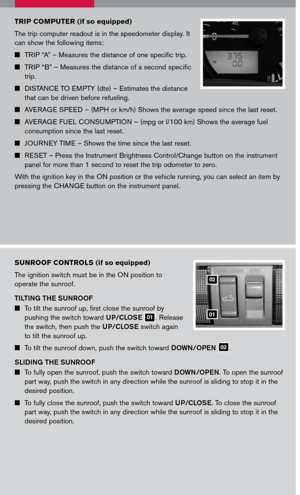
triP co MP uter (if so equipped)
The trip computer readout is in the speedometer display. It
can show the following items:
TRIP “A” – Measures the distance of one specific trip.
TRIP “B” – Measures the distance of a second specific
trip.
DISTANCE TO EMPTY (dte) – Estimates the distance
that can be driven before refueling.
AVERAGE SPEED – (MPH or km/h) Shows the average speed since the last reset.
AVERAGE FUEL CONSUMPTION – (mpg or l/100 km) Shows the average fuel
consumption since the last reset.
JOURNEY TIME – Shows the time since the last reset.
RESET – Press the Instrument Brightness Control/Change button on the instrument
panel for more than 1 second to reset the trip odometer to zero.
With the ignition key in the ON position or the vehicle running, you can select an item by
pressing the CHANGE button on the instrument panel.
Page 8 of 14
 or right (fast) to control fan
speed.
TEMPERATURE CONTROL DIAL
Turn the temperature control di")
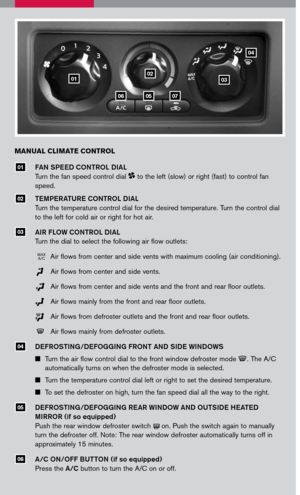
Manual cli Mate control
FAN SPEED CONTROL DIAL
Turn the fan speed control dial to the left (slow) or right (fast) to control fan
speed.
TEMPERATURE CONTROL DIAL
Turn the temperature control dial for the desired temperature. Turn the control dial
to the left for cold air or right for hot air.
AIR FLOW CONTROL DIAL
Turn the dial to select the following air flow outlets:
Air flows from center and side vents with maximum cooling (air conditioning).
Air flows from center and side vents.
Air flows from center and side vents and the front and rear floor outlets.
Air flows mainly from the front and rear floor outlets.
Air flows from defroster outlets and the front and rear floor outlets.
Air flows mainly from defroster outlets.
DEFROSTING/DEFOGGING FRONT AND SIDE WINDOWS
Turn the air flow control dial to the front window defroster mode . The A/C
automatically turns on when the defroster mode is selected.
Turn the temperature control dial left or right to set the desired temperature.
To set the defroster on high, turn the fan speed dial all the way to the right.
DEFROSTING/DEFOGGING REAR WINDOW AND OUTSIDE HEATED
MIRROR (if so equipped)
Push the rear window defroster switch on. Push the switch again to manually
turn the defroster off. Note: The rear window defroster automatically turns off in
approximately 15 minutes.
A/C ON/OFF BUTTON (if so equipped)
Press the A/C button to turn the A/C on or off.
06
05
04
02
01
030201
070506
04
MAXA/C
03


0203
05
hood release* front -Passenger
air Bag statu")