2007 NISSAN ARMADA instrument panel
[x] Cancel search: instrument panelPage 3 of 14

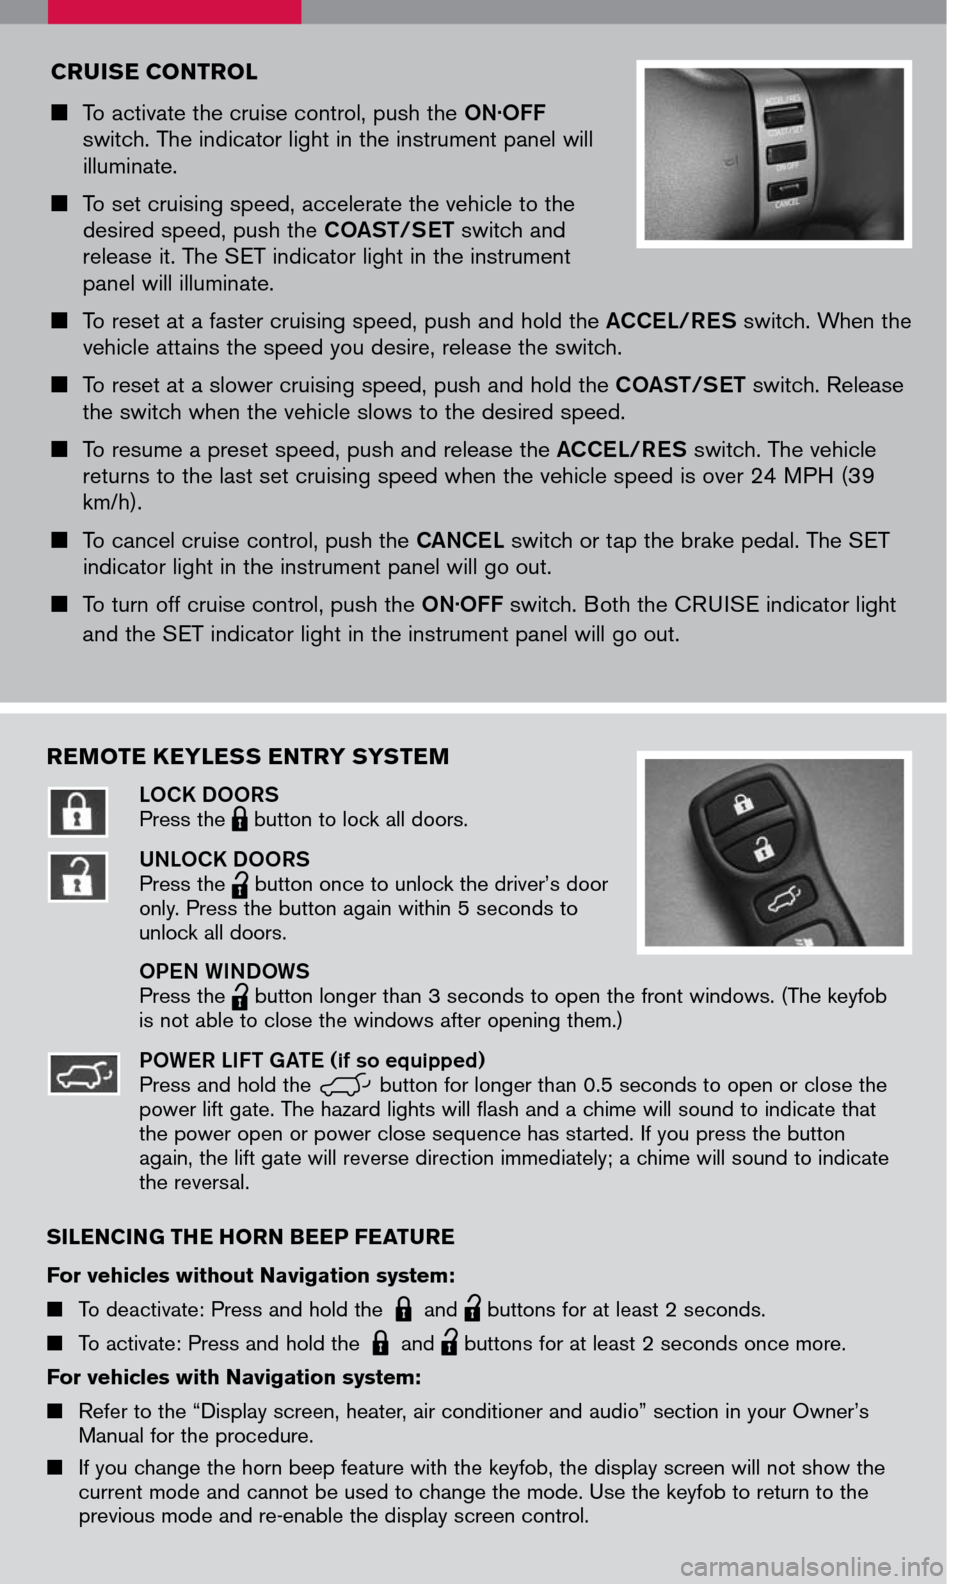
HEADLIGHT AND TURN SIGNAL CONTROL
HEADLIGHT SWITCH
Turn the headlight switch to the position to turn
on the front parking, tail, license plate and instrument
panel lights.
Turn the headlight switch to the position to turn on
the headlights. All other lights remain on.
HIGH BEAM
Push the headlight switch forward to select the high beam function. The blue
indicator light illuminates. Pull the headlight switch back to the original position to
select the low beam. The blue indicator light goes off.
Pull and release the headlight switch to flash the headlight high beams on and off.
TURN SIGNAL SWITCH
Move the headlight control switch up or down to signal the turning direction. When
the turn is completed, the turn signals cancel automatically.
To signal a lane change, move the headlight control switch up or down to the point
where the indicator light begins to flash, but the headlight control switch does not
latch.
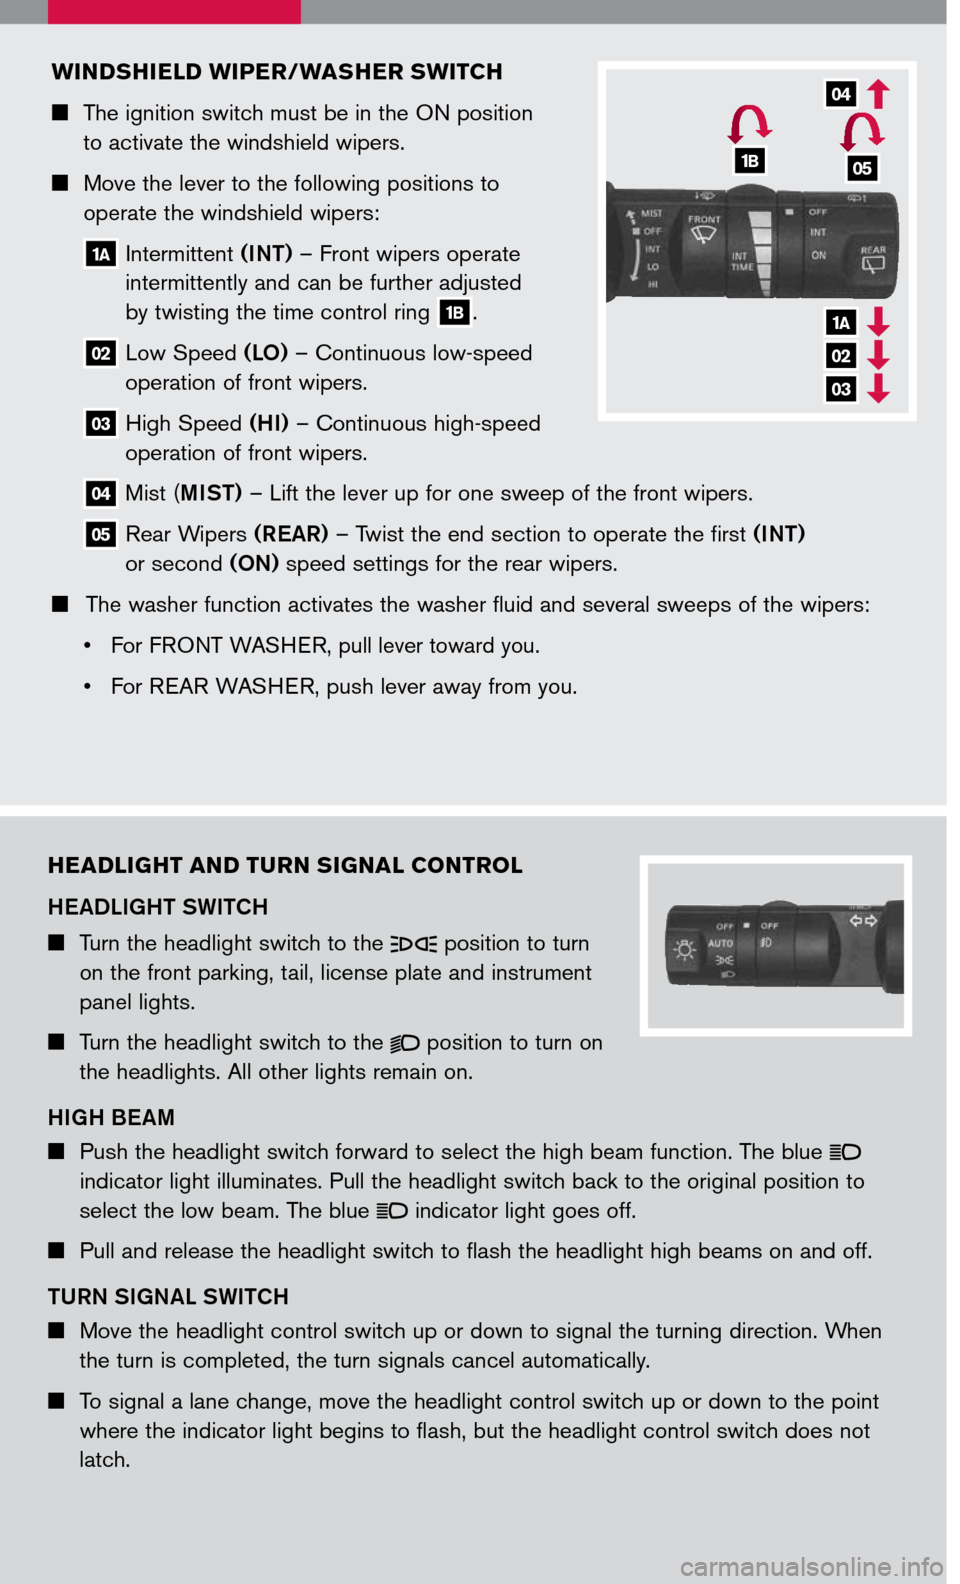
WINDSHIELD WIPER/WASHER SWITCH
The ignition switch must be in the ON position
to activate the windshield wipers.
Move the lever to the following positions to
operate the windshield wipers:
1A Intermittent (INT) – Front wipers operate
intermittently and can be further adjusted
by twisting the time control ring 1B.
02 Low Speed (LO) – Continuous low-speed
operation of front wipers.
03 High Speed (HI) – Continuous high-speed
operation of front wipers.
04 Mist (MIST) – Lift the lever up for one sweep of the front wipers.
05 Rear Wipers (REAR) – Twist the end section to operate the first (INT)
or second (ON) speed settings for the rear wipers.
The washer function activates the washer fluid and several sweeps of the wipers:
• For F
RONT WASHER, pull lever toward you.
• For REAR WASHER, push lever away from you.
1A
02
03
04
1B05
Page 6 of 14

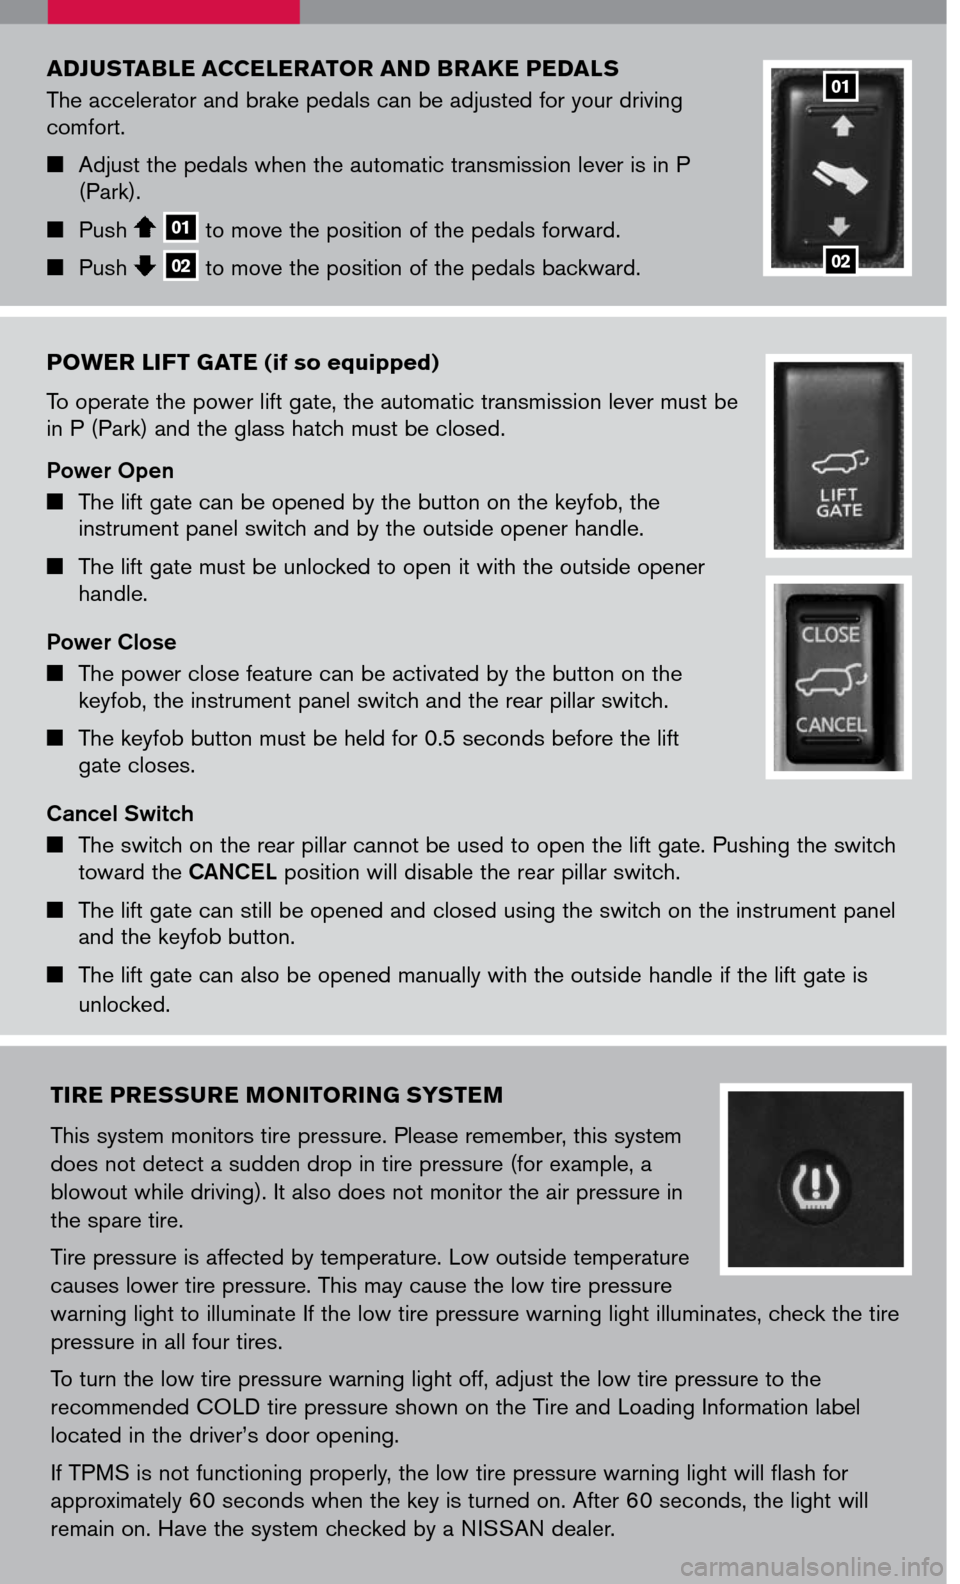
CRUISE CONTROL
To activate the cruise control, push the ON.OFF switch. The indicator light in the instrument panel will illuminate.
To set cruising speed, accelerate the vehicle to the desired speed, push the COAST/SET switch and release it. The SET indicator light in the instrument panel will illuminate.
To reset at a faster cruising speed, push and hold the ACCEL/RES switch. When the vehicle attains the speed you desire, release the switch.
To reset at a slower cruising speed, push and hold the COAST/SET switch. Release the switch when the vehicle slows to the desired speed.
To resume a preset speed, push and release the ACCEL/RES switch. The vehicle returns to the last set cruising speed when the vehicle speed is over 24 MPH (39 km/h).
To cancel cruise control, push the CANCEL switch or tap the brake pedal. The SET indicator light in the instrument panel will go out.
To turn off cruise control, push the ON.OFF switch. Both the CRUISE indicator light
and the SET indicator light in the instrument panel will go out.
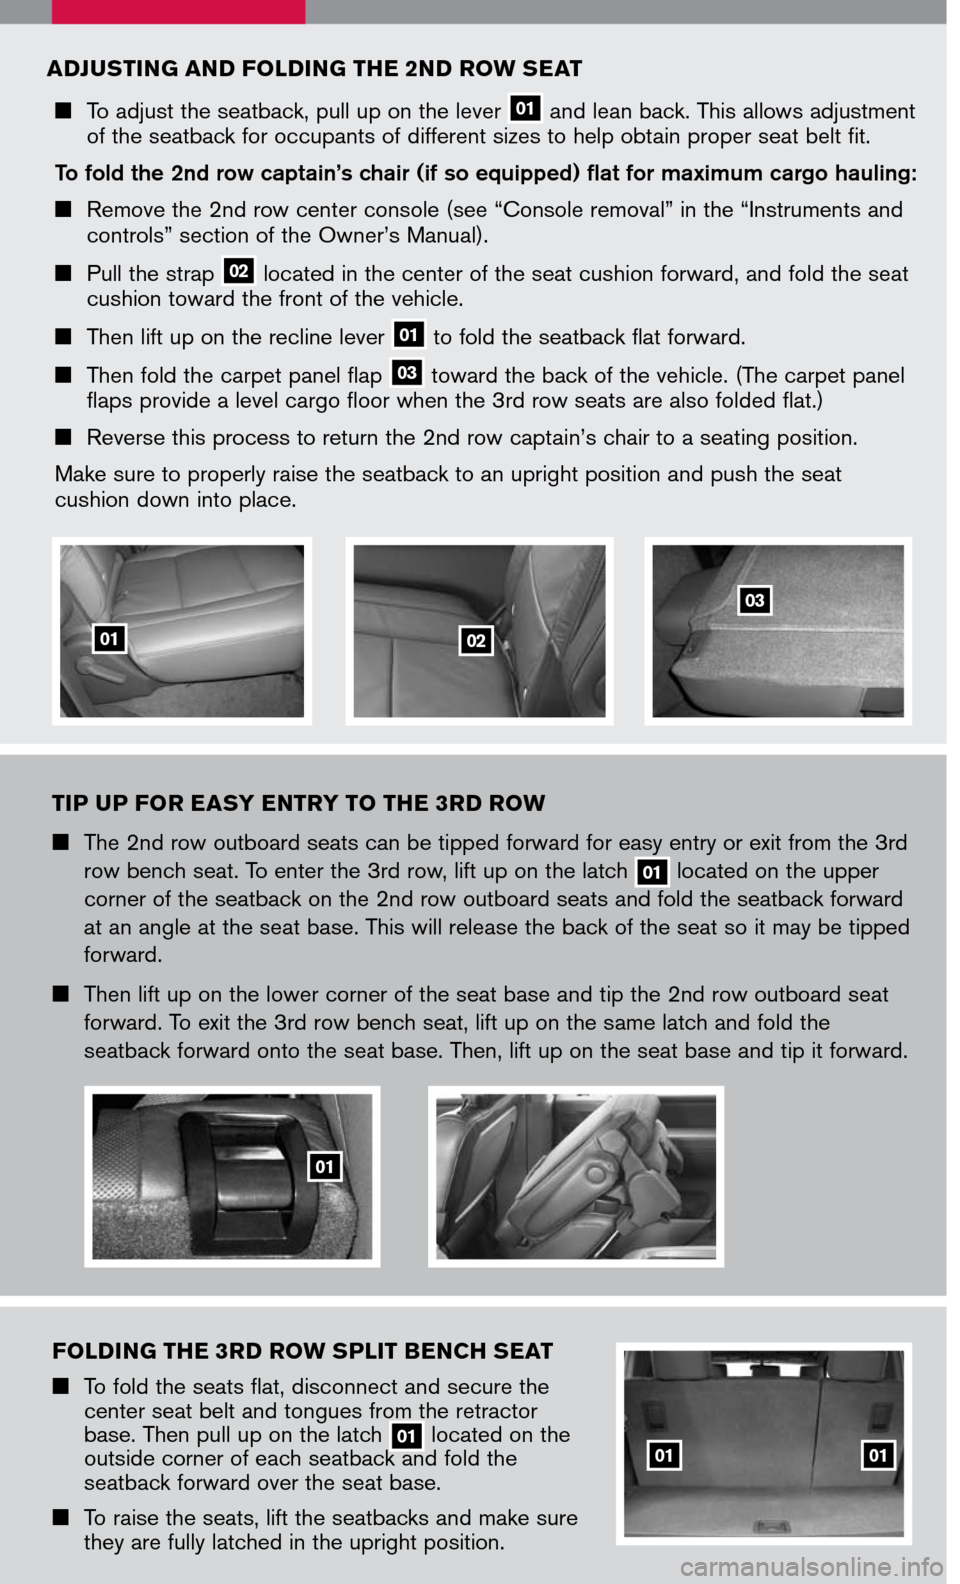
REMOTE KEYLESS ENTRY SYSTEM
LOCK DOORSPress the LPD0150 button to lock all doors.
UNLOCK DOORSPress the
lpd0151
button once to unlock the driver’s door only. Press the button again within 5 seconds to unlock all doors.
OPEN WINDOWS Press the
lpd0151
button longer than 3 seconds to open the front windows. (The keyfob is not able to close the windows after opening them.)
POWER LIFT GATE (if so equipped)Press and hold the
WPD0337
1A
button for longer than 0.5 seconds to open or close the power lift gate. The hazard lights will flash and a chime will sound to indicate that the power open or power close sequence has started. If you press the button again, the lift gate will reverse direction immediately; a chime will sound to indicate the reversal.
SILENCING THE HORN BEEP FEATURE
For vehicles without Navigation system:
To deactivate: Press and hold the LPD0150 and
lpd0151
buttons for at least 2 seconds.
To activate: Press and hold the LPD0150 and
lpd0151
buttons for at least 2 seconds once more.
For vehicles with Navigation system:
Refer to the “Display screen, heater, air conditioner and audio” section in your Owner’s Manual for the procedure.
If you change the horn beep feature with the keyfob, the display screen will not show the
current mode and cannot be used to change the mode. Use the keyfob to return to the
previous mode and re-enable the display screen control.
Page 10 of 14

POWER LIFT GATE (if so equipped)
To operate the power lift gate, the automatic transmission lever must be in P (Park) and the glass hatch must be closed.
Power Open
The lift gate can be opened by the button on the keyfob, the instrument panel switch and by the outside opener handle.
The lift gate must be unlocked to open it with the outside opener handle.
Power Close
The power close feature can be activated by the button on the keyfob, the instrument panel switch and the rear pillar switch.
The keyfob button must be held for 0.5 seconds before the lift gate closes.
Cancel Switch
The switch on the rear pillar cannot be used to open the lift gate. Pushing the switch toward the CANCEL position will disable the rear pillar switch.
The lift gate can still be opened and closed using the switch on the instrument panel and the keyfob button.
The lift gate can also be opened manually with the outside handle if the lift gate is
unlocked.
ADJUSTABLE ACCELERATOR AND BRAKE PEDALS
The accelerator and brake pedals can be adjusted for your driving comfort.
Adjust the pedals when the automatic transmission lever is in P (Park).
Push 01 to move the position of the pedals forward.
Push 02 to move the position of the pedals backward.
01
02
TIRE PRESSURE MONITORING SYSTEM
This system monitors tire pressure. Please remember, this system
does not detect a sudden drop in tire pressure (for example, a
blowout while driving). It also does not monitor the air pressure in
the spare tire.
Tire pressure is affected by temperature. Low outside temperature
causes lower tire pressure. This may cause the low tire pressure
warning light to illuminate If the low tire pressure warning light illuminates, check the tire
pressure in all four tires.
To turn the low tire pressure warning light off, adjust the low tire pressure to the
recommended COLD tire pressure shown on the Tire and Loading Information label
located in the driver’s door opening.
If TPMS is not functioning properly, the low tire pressure warning light will flash for
approximately 60 seconds when the key is turned on. After 60 seconds, the light will
remain on. Have the system checked by a NISSAN dealer.
Page 13 of 14

To adjust the seatback, pull up on the lever 01 and lean back. This allows adjustment of the seatback for occupants of different sizes to help obtain proper seat belt fit.
To fold the 2nd row captain’s chair (if so equipped) flat for maximum cargo hauling:
Remove the 2nd row center console (see “Console removal” in the “Instruments and controls” section of the Owner’s Manual).
Pull the strap 02 located in the center of the seat cushion forward, and fold the seat cushion toward the front of the vehicle.
Then lift up on the recline lever 01 to fold the seatback flat forward.
Then fold the carpet panel flap 03 toward the back of the vehicle. (The carpet panel flaps provide a level cargo floor when the 3rd row seats are also folded flat.)
Reverse this process to return the 2nd row captain’s chair to a seating position.
Make sure to properly raise the seatback to an upright position and push the seat cushion down into place.
ADJUSTING AND FOLDING THE 2ND ROW SEAT
TIP UP FOR EASY ENTRY TO THE 3RD ROW
The 2nd row outboard seats can be tipped forward for easy entry or exit from the 3rd
row bench seat. To enter the 3rd row, lift up on the latch 01 located on the upper
corner of the seatback on the 2nd row outboard seats and fold the seatback forward
at an angle at the seat base. This will release the back of the seat so it may be tipped
forward.
Then lift up on the lower corner of the seat base and tip the 2nd row outboard seat
forward. To exit the 3rd row bench seat, lift up on the same latch and fold the
seatback forward onto the seat base. Then, lift up on the seat base and tip it forward.
FOLDING THE 3RD ROW SPLIT BENCH SEAT
To fold the seats flat, disconnect and secure the center seat belt and tongues from the retractor base. Then pull up on the latch 01 located on the
outside corner of each seatback and fold the
seatback forward over the seat base.
To raise the seats, lift the seatbacks and make sure they are fully latched in the upright position.
0102
03
01
0101