Page 108 of 148

EM-108
CYLINDER BLOCK
Revision: 2006 November2007 350Z
DISASSEMBLY
1. Remove engine assembly from vehicle, and separate front suspension member and transmission from
engine. Refer to EM-101, "
ENGINE ASSEMBLY" .
2. Remove engine mounting brackets (RH and LH). Refer to EM-101, "
ENGINE ASSEMBLY" .
3. Remove the parts that may restrict installation of engine to widely use engine stand.
NOTE:
The procedure is described assuming that you use a widely use engine stand holding the surface, to
which transmission is installed.
�Remove clutch cover and clutch disk (M/T models). Refer to CL-16, "CLUTCH DISC, CLUTCH
COVER" .
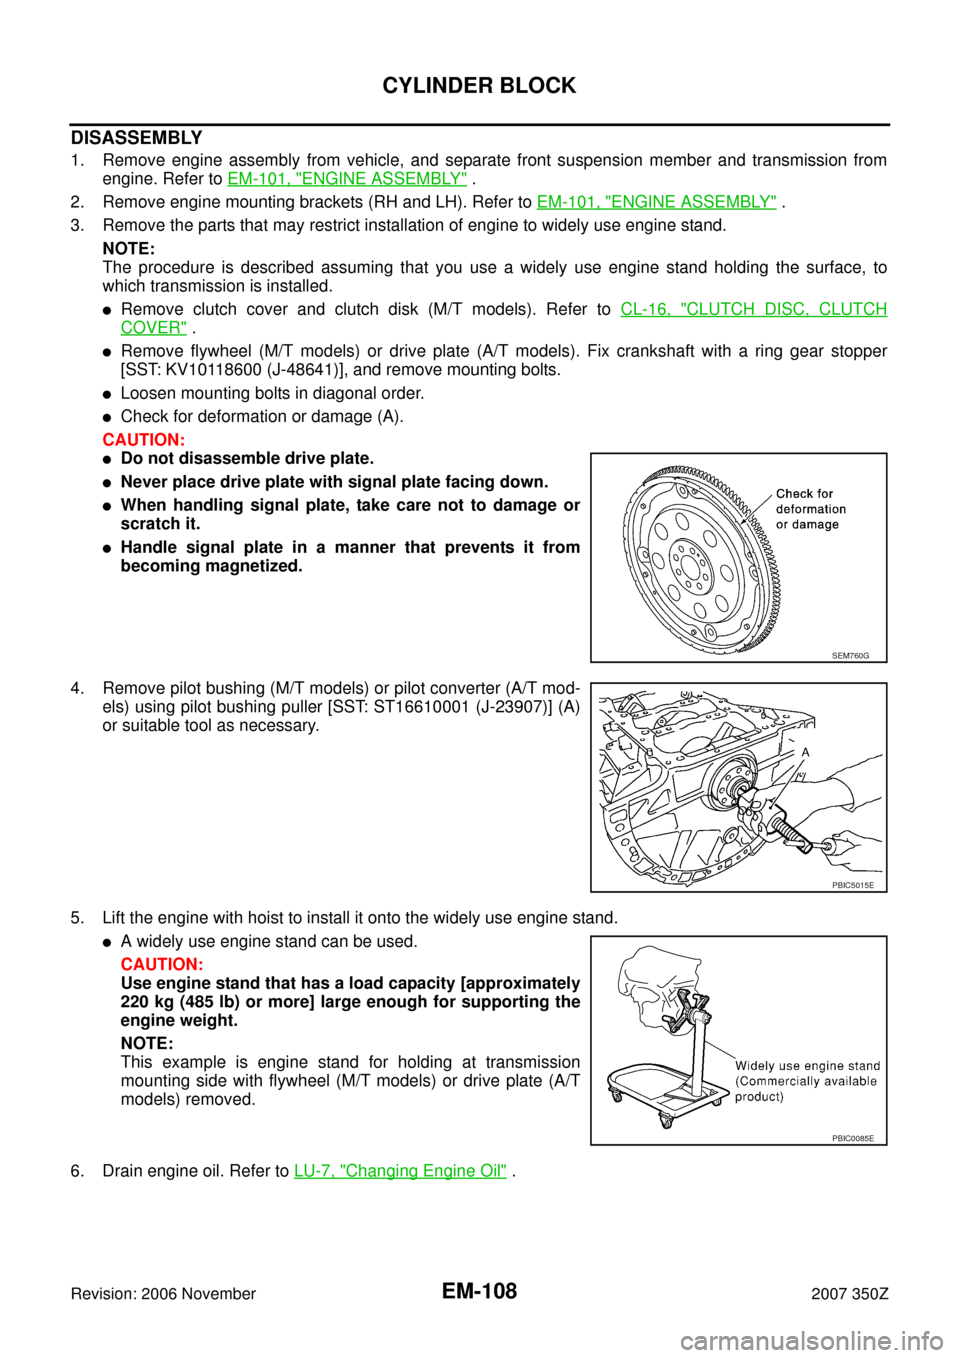
�Remove flywheel (M/T models) or drive plate (A/T models). Fix crankshaft with a ring gear stopper
[SST: KV10118600 (J-48641)], and remove mounting bolts.
�Loosen mounting bolts in diagonal order.
�Check for deformation or damage (A).
CAUTION:
�Do not disassemble drive plate.
�Never place drive plate with signal plate facing down.
�When handling signal plate, take care not to damage or
scratch it.
�Handle signal plate in a manner that prevents it from
becoming magnetized.
4. Remove pilot bushing (M/T models) or pilot converter (A/T mod-
els) using pilot bushing puller [SST: ST16610001 (J-23907)] (A)
or suitable tool as necessary.
5. Lift the engine with hoist to install it onto the widely use engine stand.
�A widely use engine stand can be used.
CAUTION:
Use engine stand that has a load capacity [approximately
220 kg (485 lb) or more] large enough for supporting the
engine weight.
NOTE:
This example is engine stand for holding at transmission
mounting side with flywheel (M/T models) or drive plate (A/T
models) removed.
6. Drain engine oil. Refer to LU-7, "
Changing Engine Oil" .
SEM760G
PBIC5015E
PBIC0085E
Page 118 of 148

EM-118
CYLINDER BLOCK
Revision: 2006 November2007 350Z
Flywheel (M/T models)
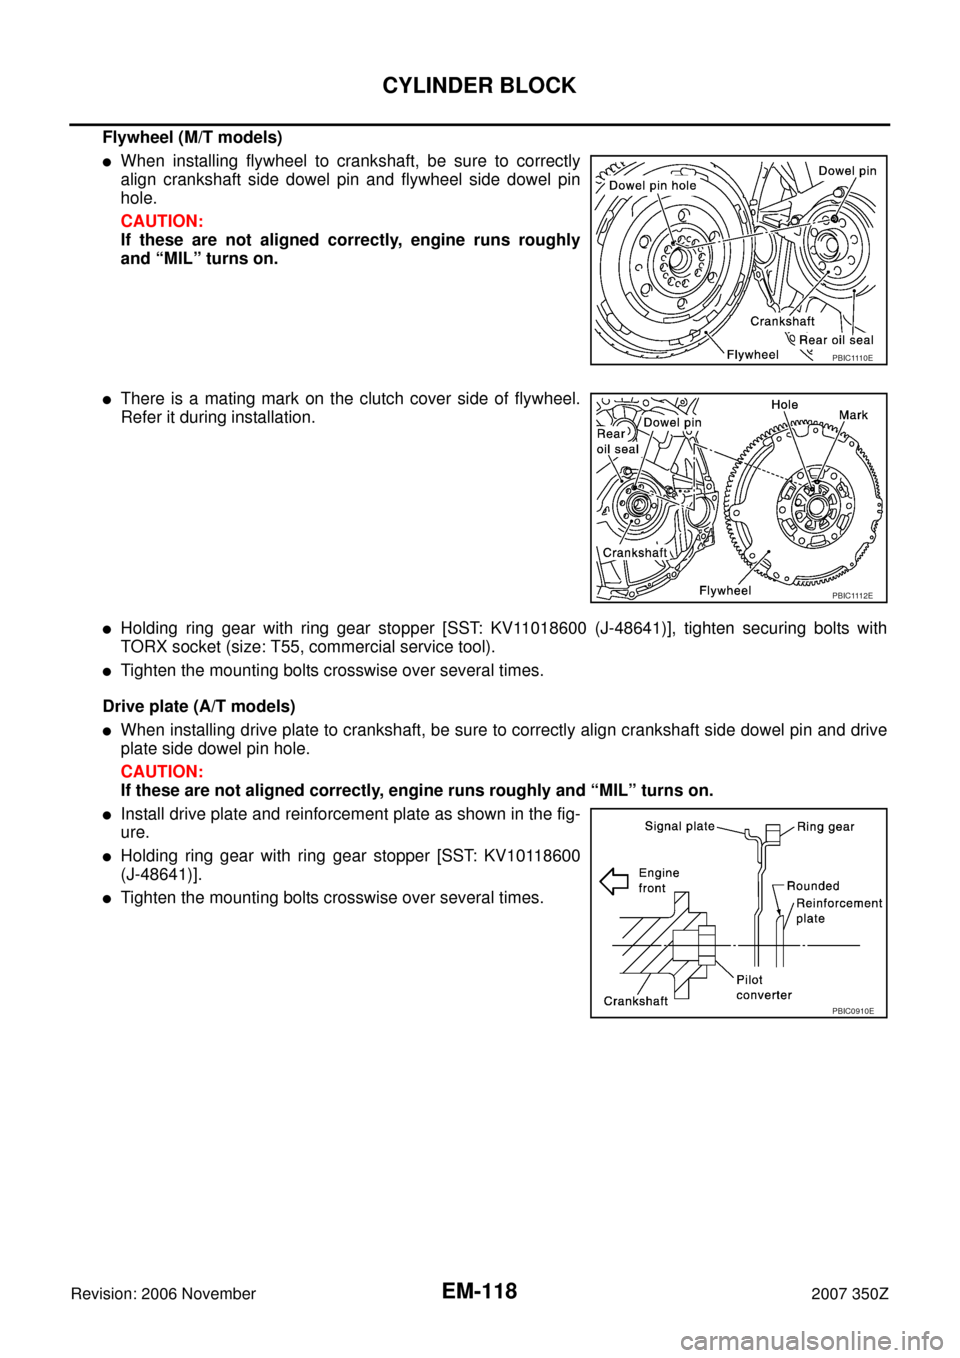
�When installing flywheel to crankshaft, be sure to correctly
align crankshaft side dowel pin and flywheel side dowel pin
hole.
CAUTION:
If these are not aligned correctly, engine runs roughly
and “MIL” turns on.
�There is a mating mark on the clutch cover side of flywheel.
Refer it during installation.
�Holding ring gear with ring gear stopper [SST: KV11018600 (J-48641)], tighten securing bolts with
TORX socket (size: T55, commercial service tool).
�Tighten the mounting bolts crosswise over several times.
Drive plate (A/T models)
�When installing drive plate to crankshaft, be sure to correctly align crankshaft side dowel pin and drive
plate side dowel pin hole.
CAUTION:
If these are not aligned correctly, engine runs roughly and “MIL” turns on.
�Install drive plate and reinforcement plate as shown in the fig-
ure.
�Holding ring gear with ring gear stopper [SST: KV10118600
(J-48641)].
�Tighten the mounting bolts crosswise over several times.
PBIC1110E
PBIC1112E
PBIC0910E
Page 134 of 148

EM-134
CYLINDER BLOCK
Revision: 2006 November2007 350Z
CONNECTING ROD BOLT OUTER DIAMETER
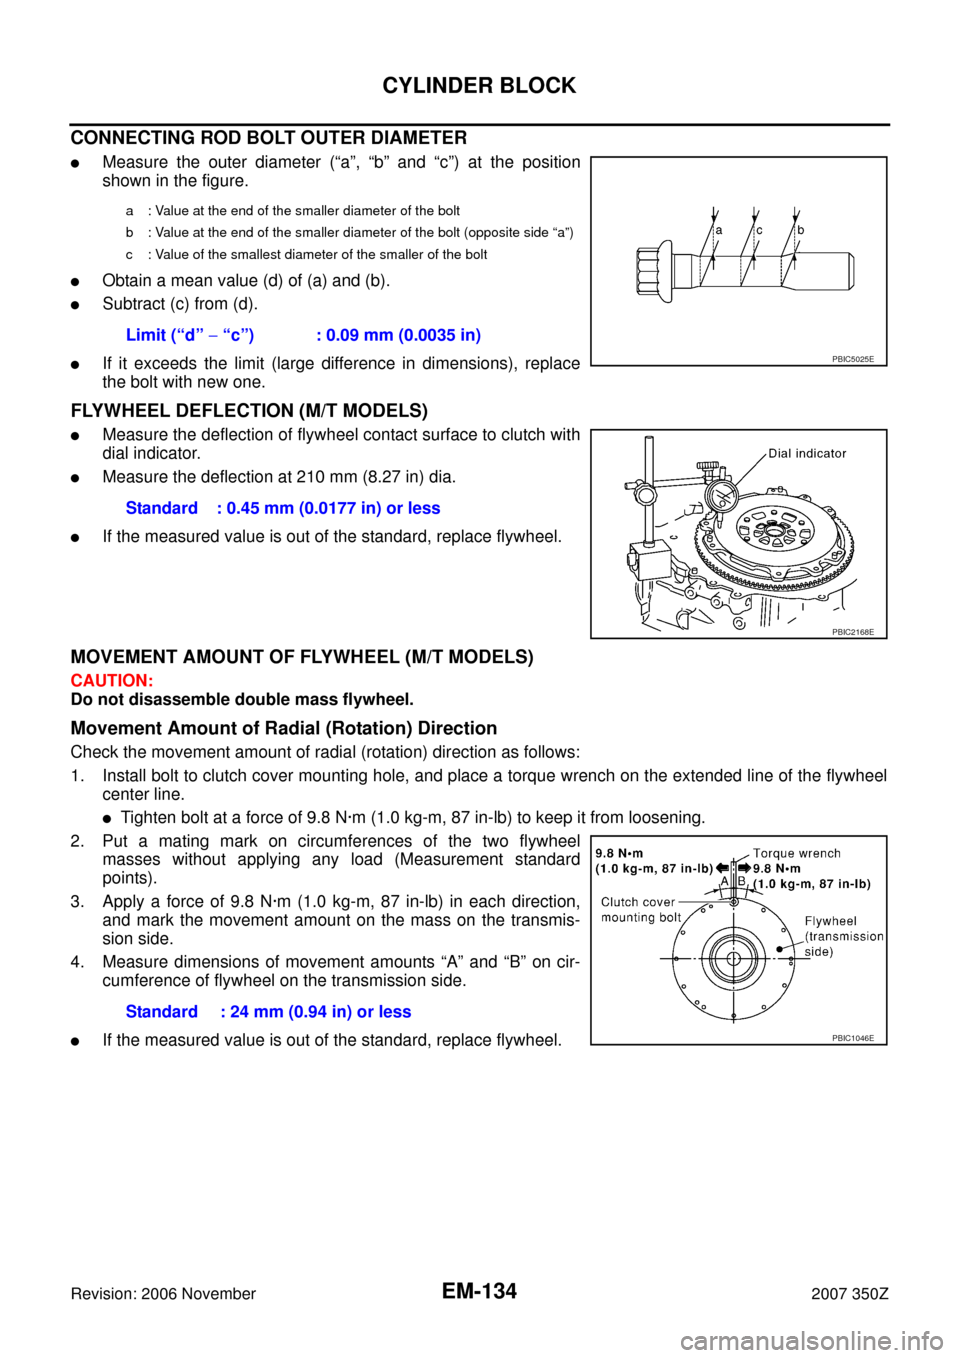
�Measure the outer diameter (“a”, “b” and “c”) at the position
shown in the figure.
�Obtain a mean value (d) of (a) and (b).
�Subtract (c) from (d).
�If it exceeds the limit (large difference in dimensions), replace
the bolt with new one.
FLYWHEEL DEFLECTION (M/T MODELS)
�Measure the deflection of flywheel contact surface to clutch with
dial indicator.
�Measure the deflection at 210 mm (8.27 in) dia.
�If the measured value is out of the standard, replace flywheel.
MOVEMENT AMOUNT OF FLYWHEEL (M/T MODELS)
CAUTION:
Do not disassemble double mass flywheel.
Movement Amount of Radial (Rotation) Direction
Check the movement amount of radial (rotation) direction as follows:
1. Install bolt to clutch cover mounting hole, and place a torque wrench on the extended line of the flywheel
center line.
�Tighten bolt at a force of 9.8 N·m (1.0 kg-m, 87 in-lb) to keep it from loosening.
2. Put a mating mark on circumferences of the two flywheel
masses without applying any load (Measurement standard
points).
3. Apply a force of 9.8 N·m (1.0 kg-m, 87 in-lb) in each direction,
and mark the movement amount on the mass on the transmis-
sion side.
4. Measure dimensions of movement amounts “A” and “B” on cir-
cumference of flywheel on the transmission side.
�If the measured value is out of the standard, replace flywheel.
a : Value at the end of the smaller diameter of the bolt
b : Value at the end of the smaller diameter of the bolt (opposite side “a”)
c : Value of the smallest diameter of the smaller of the bolt
Limit (“d” − “c”) : 0.09 mm (0.0035 in)
PBIC5025E
Standard : 0.45 mm (0.0177 in) or less
PBIC2168E
Standard : 24 mm (0.94 in) or less
PBIC1046E