Page 106 of 473
105 Controls in detail
Seats
AIRSCARF neck-level heating*
The AIRSCARF neck-level heating provides
the area surrounding the occupants’ necks
with a heated air stream flowing from
openings in the head restraints.
1AIRSCARF switch
2Indicator lampsRed indicator lamps2 on AIRSCARF
switch 1 show which heating level you
have selected:
�Switch on the ignition (�page 37).
Warning!G
When switching on the AIRSCARF neck-level
heating, the air streaming from the openings
may be very hot. When in close proximity to
the openings, you could be seriously
burned. To help avoid serious personal
injuries, switch the AIRSCARF to a lower
heating level.
Level
3Three indicator lamps on
(highest level).
2Two indicator lamps on.
1One indicator lamp on
(lowest level).
offNo indicator lamp on.
Page 108 of 473

107 Controls in detail
Memory function*
�Memory function*
Prior to operating the vehicle, the driver
should check and adjust the seat height,
seat position fore and aft, and seat back-
rest angle if necessary, to ensure adequate
control, reach and comfort. The head re-
straint should also be adjusted for proper
height. See also the section on air bags
(
�page 66) for proper seat positioning.
In addition, adjust the steering wheel to
ensure adequate control, reach, operation
and comfort. Both the interior and exterior
rear view mirrors should be adjusted for
adequate rear vision.
Fasten seat belts. Infants and small
children should be seated in an appropri-
ate infant or child restraint system which is
properly secured by a lap-shoulder belt
and that complies with U.S. Federal Motor
Vehicle Safety Standards 213 and 255
and Canadian Motor Vehicle Safety
Standards 213 and 210.2.With the memory function you can store up
to three different configurations.
Each store position on the driver’s side
includes the following settings:
�Seat position
�Steering wheel position
�Exterior rear view mirrors’ position
Each store position on the passenger side
includes the following setting:
�Seat positionThe memory button and memory position
switch are located on the outer side of
each seat.
1Memory buttonM
2Memory position switch
�Switch on the ignition (�page 37).
or
�Open the respective door.
Warning!G
Do not activate the memory function while
driving. Activating the memory function
while driving could cause the driver to lose
control of the vehicle.
Page 117 of 473

116 Controls in detail
Lighting
Switching on hazard warning flasher
�Press hazard warning flasher
switch1.
All turn signal lamps are flashing.
Switching off hazard warning flasher
�Press hazard warning flasher switch1
again.
Interior lighting
The controls are located in the overhead
control panel.
1Interior lighting on/off
2Automatic control on/off
3Right reading lamp on/off
4Left reading lamp on/offAutomatic control
Deactivating
�Press automatic control switch2 until
it engages at a deeper position than the
other switches.
The interior lighting remains switched
off in darkness, even when you
�unlock the vehicle
�remove the SmartKey from the
starter switch
�open a door
iWith the hazard warning flasher activated
and the combination switch set for either left or
right turn, only the respective turn signals will
operate when the ignition is switched on.
iIf the hazard warning flasher has been
activated automatically, press hazard warning
flasher switch1 once to switch it off.
!An interior lamp switched on manually does
not go out automatically.
Leaving an interior lamp switch in the ON posi-
tion for extended periods of time with the engine
turned off could result in a discharged battery.
iThe interior lighting is factory-set to
automatic mode.
iWhen you open the trunk, the trunk lighting
switches on automatically.
Page 119 of 473
.
1To brighten instrument cluster
illumination")
118 Controls in detail
Instrument cluster
A full view illustration of the instrument
cluster can be found in the “At a glance”
section (
�page 26).
1To brighten instrument cluster
illumination (knob+)
2To dim instrument cluster
illumination (knob-)
3Reset buttonJ
The instrument cluster is activated when
you
�open a door
�switch on the ignition (�page 37)
�press reset buttonJ
�switch on the exterior lampsFor information on changing the instru-
ment cluster settings, e.g. the language,
see “Instrument cluster submenu”
(
�page 139).Adjusting instrument cluster
illumination
Adjusting
Use knobs 1 or 2 to adjust the illumina-
tion brightness of the instrument cluster.
To brighten illumination
�Press knob1 briefly.
The instrument cluster illumination
brightens.
To dim illumination
�Press knob2 briefly.
The instrument cluster illumination
dims.
iOpening a door or pressing the reset
buttonJ without switching on the ignition or
the exterior lighting activates the multifunction
display illumination only for 30 seconds.
Warning!G
No messages will be displayed if either the
instrument cluster or the multifunction
display is inoperative.
As a result, you will not be able to see
information about your driving conditions,
such as speed or outside temperature,
warning/indicator lamps,
malfunction/warning messages or the
failure of any systems. Driving characteris-
tics may be impaired.
If you must continue to drive, do so with
added caution. Contact an authorized
Mercedes-Benz Center as soon as possible.
iThe instrument cluster illumination
automatically adjusts to the ambient light.
You can only adjust the brightness of the instru-
ment cluster illumination when it is dark outside.
iWith the exterior lighting switched on, the
brightness of the switches in the center console
will also be adjusted when using knob 1 or 2.
Page 131 of 473
130 Controls in detail
Control system
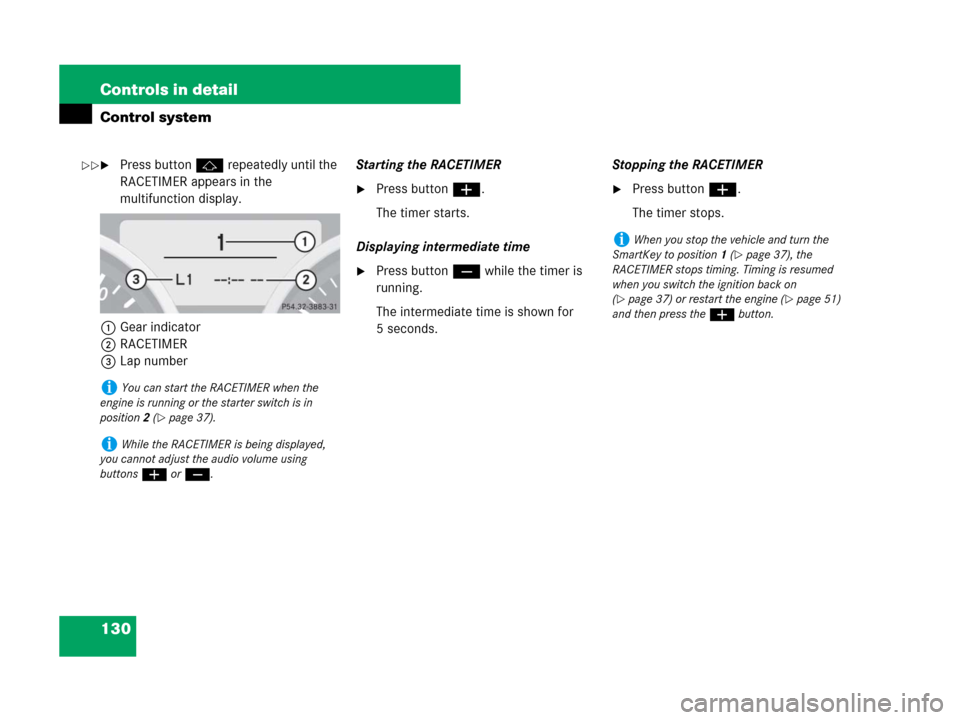
�Press button j repeatedly until the
RACETIMER appears in the
multifunction display.
1Gear indicator
2RACETIMER
3Lap numberStarting the RACETIMER
�Press button æ.
The timer starts.
Displaying intermediate time
�Press button ç while the timer is
running.
The intermediate time is shown for
5 seconds.Stopping the RACETIMER
�Press button æ.
The timer stops.
iYou can start the RACETIMER when the
engine is running or the starter switch is in
position2 (
�page 37).
iWhile the RACETIMER is being displayed,
you cannot adjust the audio volume using
buttonsæ or ç.
iWhen you stop the vehicle and turn the
SmartKey to position 1 (
�page 37), the
RACETIMER stops timing. Timing is resumed
when you switch the ignition back on
(
�page 37) or restart the engine (�page 51)
and then press the æbutton.
��
Page 169 of 473
168 Controls in detail
Good visibility
For information on the windshield wipers,
see “Windshield wipers” (
�page 56).
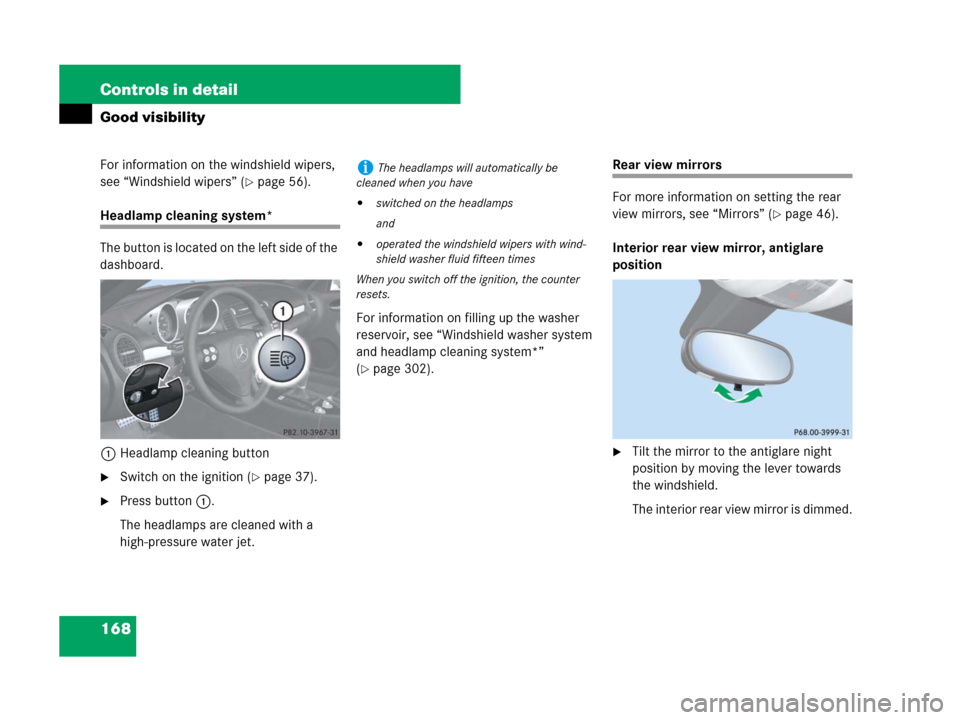
Headlamp cleaning system*
The button is located on the left side of the
dashboard.
1Headlamp cleaning button
�Switch on the ignition (�page 37).
�Press button1.
The headlamps are cleaned with a
high-pressure water jet.For information on filling up the washer
reservoir, see “Windshield washer system
and headlamp cleaning system*”
(
�page 302).
Rear view mirrors
For more information on setting the rear
view mirrors, see “Mirrors” (
�page 46).
Interior rear view mirror, antiglare
position
�Tilt the mirror to the antiglare night
position by moving the lever towards
the windshield.
The interior rear view mirror is dimmed.
iThe headlamps will automatically be
cleaned when you have
�switched on the headlamps
and
�operated the windshield wipers with wind-
shield washer fluid fifteen times
When you switch off the ignition, the counter
resets.
Page 170 of 473

169 Controls in detail
Good visibility
Auto-dimming rear view mirrors*
The reflection brightness of the exterior
rear view mirrors and the interior rear view
mirror will respond automatically to glare
when
�ignition is switched on
and
�incoming light from headlamps falls on
the sensor in the interior rear view
mirror
The rear view mirrors will not react if
�reverse gearR is engaged
�interior lighting is switched on
Warning!G
The auto-dimming function does not react if
incoming light is not aimed directly at sen-
sors in the interior rear view mirror.
The interior rear view mirror and the exterior
rear view mirror on the driver’s side do not
react, for example, if the wind screen* is
installed.
Light hitting the mirror(s) at certain angles
(incident light) could blind you. As a result,
you may not be able to observe traffic
conditions and could cause an accident.
Warning!G
Exercise care when using the passen-
ger-side exterior rear view mirror. The mirror
surface is convex (outwardly curved surface
for a wider field of view). Objects in mirror
are closer than they appear. Check your
interior rear view mirror or glance over your
shoulder before changing lanes.
Page 176 of 473

to position0.
Switching on
�Switch on the ignition (�page 37).
�Set")
175 Controls in detail
Climate control
Switching climate control system
on/off
Switching off
�Set air volume control2 (�page 174)
to position0.
Switching on
�Switch on the ignition (�page 37).
�Set air volume control2 to any speed
(
�page 174).
The previous settings are once again in
effect.
Setting the temperature
Use temperature controls1 and4
(
�page 174) to separately adjust the air
temperature on each side of the passenger
compartment. You should raise or lower
the temperature setting in small incre-
ments, preferably starting at 72°F (22°C).
The climate control will adjust to the set
temperature as fast as possible.
Increasing
�Turn temperature control 1
and/or4 (
�page 174) slightly
clockwise.
The climate control system will corre-
spondingly adjust the interior air tem-
perature.
iSevere conditions (e.g. strong air pollution)
may require replacement of the filter before its
scheduled interval. A clogged filter will reduce
the air volume to the interior.
If the vehicle interior is hot, ventilate the interior
before driving off. The climate control will then
adjust the interior temperature to the set value
much faster.
Keep the air intake grille in front of the wind-
shield free of snow and debris.
When the retractable hardtop is closed, do not
obstruct air flow by placing objects on the air
flow-through exhaust slots below the rear
window.
Warning!G
When the climate control is switched off, the
outside air supply and circulation are also
switched off. Only choose this setting for a
short time. Otherwise the windows could
fog up, impairing visibility and endangering
you and others.