Page 152 of 242
150 Navigation*
Important notes
If your vehicle has been transported (e.g.
by a car, train or ferry) the system may
make navigation announcements which do
not correspond to the vehicle’s position.
The system needs to redetermine its
position.
Determining the location after the
vehicle has been transported
The system will need some time to
determine its location after the car has
been transported. The time required for
the system to do so varies from case to
case.
�Switch the COMAND on.
�Activate the Navigation main menu
(
�page 152).
The navigation DVD needs to be in the
DVD NAVIGATION slot (
�page 210).
�Drive and press c.
Drive until the position or the road
indicated correspond to the real
circumstances. The system is now
correctly adjusted.
Route guidance after the vehicle has
been transported
Page 181 of 242
179 Navigation*
Route guidance
Route guidance in these areas
When you are
�entering a partially digitized area
or
�starting route guidance within such an
area,
the navigation system will inform you that
turn by turn guidance cannot be provided
with corresponding navigation displays
and voice announcements.Map display
Within these areas the display shows a
split screen with the map on the left-hand
side and a direction arrow on the right side
pointing to the destination instead of the
symbol for the next driving maneuver
(�page 180).
Route presentation
Usually the map highlights the active route
on verified roads with a blue line.
After route calculation, the route may
contain unverified road sections. Here, the
exact route guidance is suppressed and
these route sections will appear as blue
dotted lines. This type of line e.g. connects
two verified road sections, which are
displayed as blue lines or connects the end
of a verified road with a stopover or
destination located on an unverified road.
i
Displayed or audible distance to the
beginning of such an area is an
estimation. The actual distance may
differ.
WarningG
If the origin and destination are located very
close to each other, the system may not pro-
vide the shortest path to the destination
when you are travelling in an unverified area.
In most cases you will be directed to a veri-
fied road closest to the destination. This
may appear to be a long and unconvenient
route but it is safer. At your own risk, you
may choose to drive on the unverified roads
to the destination.
Page 184 of 242
182 Navigation*
Route guidance
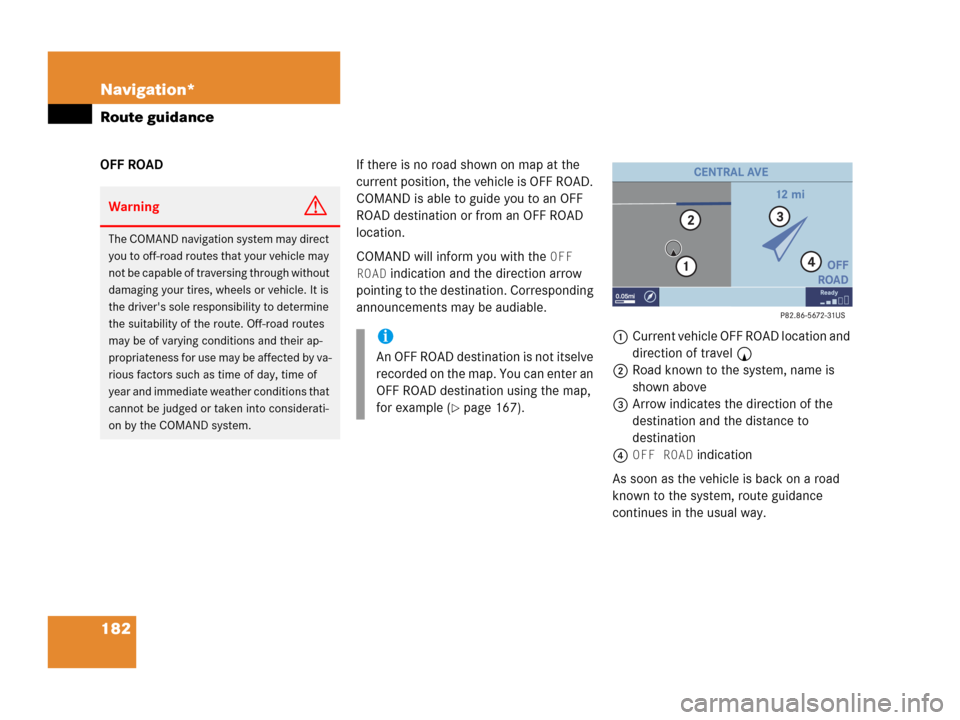
OFF ROADIf there is no road shown on map at the
current position, the vehicle is OFF ROAD.
COMAND is able to guide you to an OFF
ROAD destination or from an OFF ROAD
location.
COMAND will inform you with the
OFF
ROAD
indication and the direction arrow
pointing to the destination. Corresponding
announcements may be audiable.
1Current vehicle OFF ROAD location and
direction of travel y
2Road known to the system, name is
shown above
3Arrow indicates the direction of the
destination and the distance to
destination
4
OFF ROAD indication
As soon as the vehicle is back on a road
known to the system, route guidance
continues in the usual way.
WarningG
The COMAND navigation system may direct
you to off-road routes that your vehicle may
not be capable of traversing through without
damaging your tires, wheels or vehicle. It is
the driver's sole responsibility to determine
the suitability of the route. Off-road routes
may be of varying conditions and their ap-
propriateness for use may be affected by va-
rious factors such as time of day, time of
year and immediate weather conditions that
cannot be judged or taken into considerati-
on by the COMAND system.
i
An OFF ROAD destination is not itselve
recorded on the map. You can enter an
OFF ROAD destination using the map,
for example (
�page 167).
Page 190 of 242
188 Navigation*
During route guidance
This function allows you to select an
intermediate destination while route
guidance is active. A stopover destination
may be a gas station or a restaurant or any
other place. When the route to the
stopover destination is calculated, the
system calculates the route from the
stopover destination to the main
destination.
Entering a stopover destination
�Activate the soft key display
(
�page 184).
�Press the Stopovr soft key.
The map is displayed in full view.
or
The Stopover still active menu will
appear (
�page 190) if a stopover
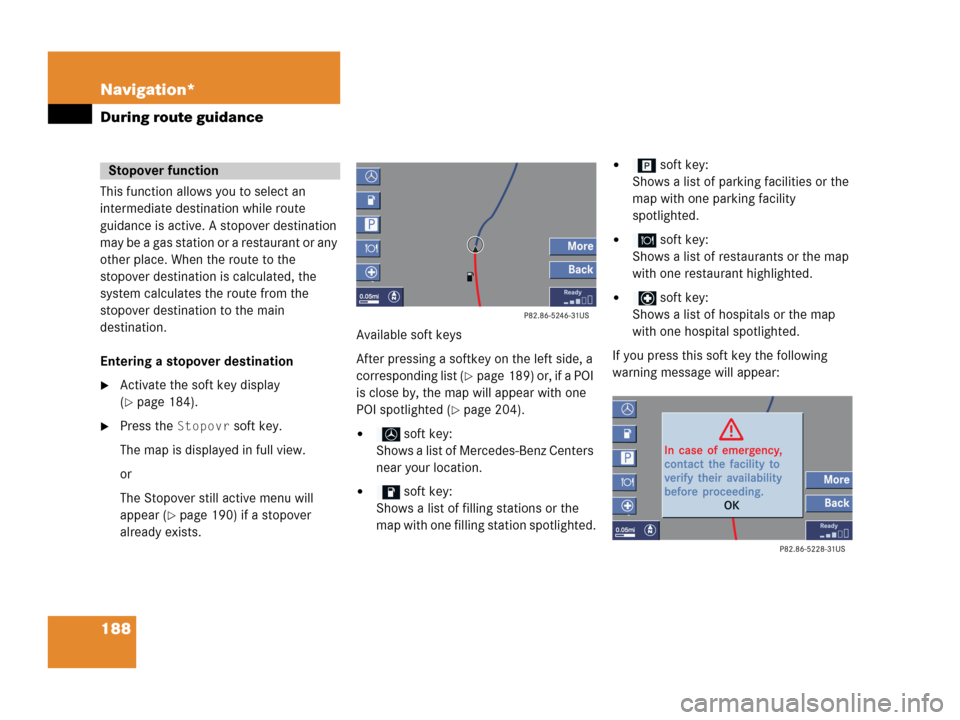
already exists.Available soft keys
After pressing a softkey on the left side, a
corresponding list (
�page 189) or, if a POI
is close by, the map will appear with one
POI spotlighted (
�page 204).
� soft key:
Shows a list of Mercedes-Benz Centers
near your location.
� soft key:
Shows a list of filling stations or the
map with one filling station spotlighted.
� soft key:
Shows a list of parking facilities or the
map with one parking facility
spotlighted.
� soft key:
Shows a list of restaurants or the map
with one restaurant highlighted.
� soft key:
Shows a list of hospitals or the map
with one hospital spotlighted.
If you press this soft key the following
warning message will appear:
Stopover function
Page 196 of 242

194 Navigation*
During route guidance
Display in Map
�In the Settings menu (�page 191),
press the
Map soft key.
The available options are displayed.
The symbol _ indicates the present
setting.You can select the following map
information:�Time of Arrival/Dist. to
Dest.
The status bar displays the estimated
time of arrival and the distance to
destination. If a stopover destination is
active, the corresponding stopover
time and distance information are
displayed.
�GPS coordinates
The status bar displays the following
data:
�your current position in the form of
coordinates
�the number of satellites currently
received
�the height above sea level
�No display
The status bar displays the road you
are currently driving on.
�Use the joystick to g or G to select
the option with the symbol -.
�Press button E.
The selected option is activated.
�Press the Back s o f t k e y t o c o n f i rm a nd
return to the map.
i
If the split screen is active the road
name will appear on the status bar.
Page 205 of 242

203 Navigation*
POIs (Points of Interest)
�Push the joystick to G or g to
select the desired POI.
�Press E.
The Start route guidance menu will
appear (
�page 173).
Entering a city
�In the Find menu, push the joystick to
G to select menu item
Within a
city
.
�Press E.
The Enter city menu will appear
(
�page 163).
�Enter the city and press E to confirm.
A list showing the available POIs within
the entered city will appear.
�Select the desired POI from the list and
press E to confirm.
The Start route guidance menu will
appear (
�page 173).Entering a POI by name
�In the Select POI category menu, press
the
Name softkey.
or
�In the Find menu, push the joystick to
G to select menu item
By name.
The Enter POI menu will appear.
Enter POI menu
�Enter the POI name and press E to
confirm.
A list showing the entered POI name
will appear.
�Press E.
The Start route guidance menu will
appear (
�page 173).
i
If menu item By name is chosen, the
corresponding category symbol will
appear in first line.
Page 209 of 242
207 Navigation*
Today’s plan
� Today’s plan
The today’s plan memory can be used to
save destinations for which routes can be
calculated one after the other.
The memory can save a maximum of 18
destinations.
You can add a destination to today’s plan
�from the Route guidance menu
�from the Last destinations memory and
�from the Destination memory.
�Press the Plan soft key in the
corresponding menu.
The message
The
has
been added to today’s plan.
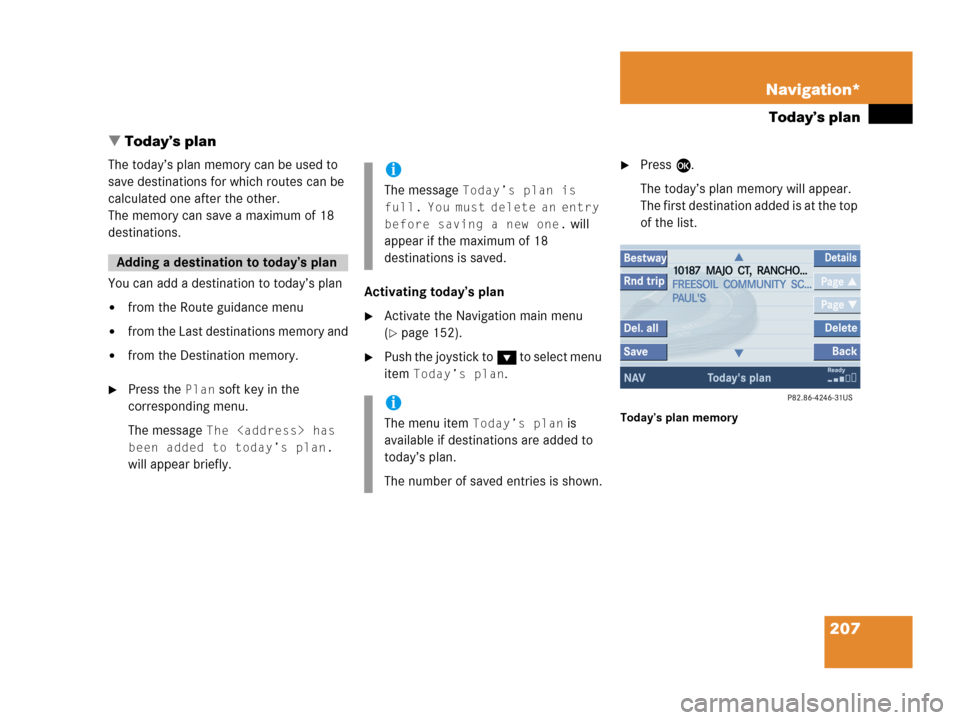
will appear briefly.Activating today’s plan
�Activate the Navigation main menu
(
�page 152).
�Push the joystick to G to select menu
item
Today’s plan.
�Press E.
The today’s plan memory will appear.
The first destination added is at the top
of the list.
Today’s plan memory
Adding a destination to today’s plan
i
The message Today’s plan is
full. You must delete an entry
before saving a new one.
will
appear if the maximum of 18
destinations is saved.
i
The menu item Today’s plan is
available if destinations are added to
today’s plan.
The number of saved entries is shown.
Page 219 of 242
217 Service
Tele Aid*
� Tele Aid*
Tele Aid* incorporates the following
functions:
�Emergency call system
�Roadside Assistance
�Information
For certain emergency situations, the
system automatically triggers an
emergency call. An emergency call can
also be triggered manually by pressing the
corresponding button. Refer to your
vehicle Operator’s Manual for additional
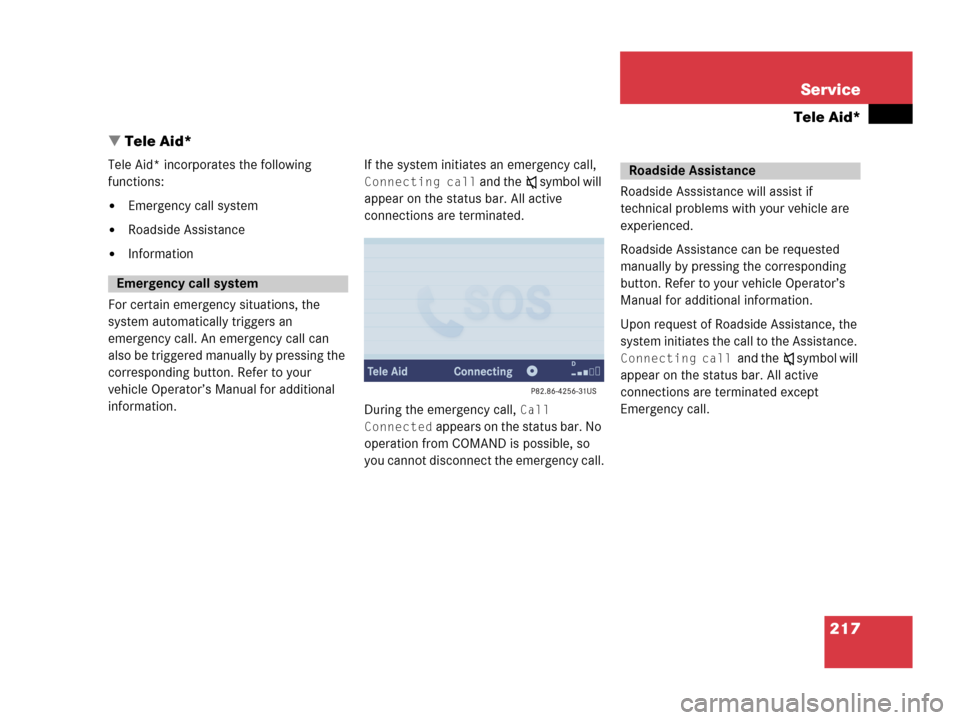
information.If the system initiates an emergency call,
Connecting call and theß symbol will
appear on the status bar. All active
connections are terminated.
During the emergency call,
Call
Connected appears on the status bar. No
operation from COMAND is possible, so
you cannot disconnect the emergency call.Roadside Asssistance will assist if
technical problems with your vehicle are
experienced.
Roadside Assistance can be requested
manually by pressing the corresponding
button. Refer to your vehicle Operator’s
Manual for additional information.
Upon request of Roadside Assistance, the
system initiates the call to the Assistance.
Connecting call and theß symbol will
appear on the status bar. All active
connections are terminated except
Emergency call.
Emergency call system
Roadside Assistance