Page 318 of 522

317 Operation
Driving instructions
For more information, see “Winter driving”
(�page 364).
Standing water
Passenger compartmentDriving abroad
Abroad, there is an extensive
Mercedes-Benz service network at your
disposal. If you plan to drive into areas
which are not listed in the index of your
Mercedes-Benz Center directory, you
should request pertinent information from
your authorized Mercedes-Benz Center.
Warning!
G
If the vehicle becomes stuck in snow, make
sure that snow is kept clear of the exhaust
pipe and from around the vehicle with the
engine running. Otherwise, deadly carbon
monoxide (CO) gases may enter vehicle in-
terior resulting in unconsciousness and
death.
To assure sufficient fresh air ventilation,
open a window slightly on the side of the ve-
hicle not facing the wind.Warning!
G
The outside temperature indicator is not de-
signed to serve as an ice-warning device and
is therefore unsuitable for that purpose. In-
dicated temperatures just above the freez-
ing point do not guarantee that the road
surface is free of ice.
!
Do not drive through flooded areas or water
of unknown depth. Before driving through water,
determine its depth. Never accelerate before
driving into water. The bow wave could force wa-
ter into the engine and auxiliary equipment, thus
damaging them.
If you must drive through standing water, drive
slowly to prevent water from entering the pas-
senger compartment or the engine compart-
ment. Water in these areas could cause damage
to electrical components or wiring of the engine
or transmission, or could result in water being in-
gested by the engine through the air intake caus-
ing severe internal engine damage. Any such
damage is not covered by the Mercedes-Benz
Limited Warranty.
Warning!
G
Always fasten items being carried as secure-
ly as possible.
In an accident, during hard braking or sud-
den maneuvers, loose items will be thrown
around inside the vehicle, and cause injury
to vehicle occupants unless the items are
securely fastened in the vehicle.
The trunk is the preferred place to carry ob-
jects.
Page 332 of 522

331 Operation
Engine compartment
Battery
Your vehicle’s battery is located on the
right hand side of the trunk (
�page 460).
The battery should always be sufficiently
charged in order to achieve its rated ser-
vice life. Refer to Maintenance Booklet for
battery maintenance intervals.
If you use your vehicle mostly for short-dis-
tance trips, you will need to have the bat-
tery charge checked more frequently.
When replacing the battery, always use
batteries approved by Mercedes-Benz.
If you do not intend to operate your vehicle
for an extended period of time, consult an
authorized Mercedes-Benz Center about
steps you need to observe.Batteries contain materials that can harm
the environment if disposed of improperly.
Recycling of batteries is the preferred
method of disposal. Many states require
sellers of batteries to accept old batteries
for recycling.
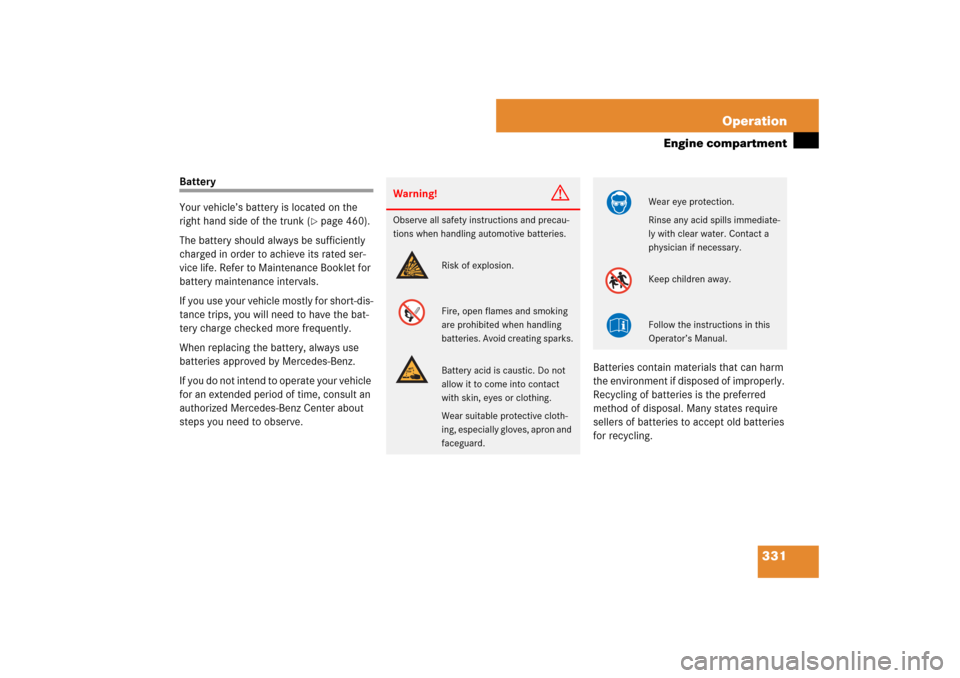
Warning!
G
Observe all safety instructions and precau-
tions when handling automotive batteries.
Risk of explosion.
Fire, open flames and smoking
are prohibited when handling
batteries. Avoid creating sparks.
Battery acid is caustic. Do not
allow it to come into contact
with skin, eyes or clothing.
Wear suitable protective cloth-
ing, especially gloves, apron and
faceguard.
Wear eye protection.
Rinse any acid spills immediate-
ly with clear water. Contact a
physician if necessary.
Keep children away.
Follow the instructions in this
Operator’s Manual.
Page 431 of 522
430 Practical hintsWhat to do if …Display symbol
Display message
Possible cause/consequence
Possible solution
t
Function
unavailable
This display appears if button t or
s on the multifunction steering wheel
is pressed and the vehicle is not equipped
with a telephone.
W
Top up
washer fluid
The fluid level has dropped to about
1/3 of
total reservoir capacity.
�
Add washer fluid (
�page 332).
Ê
The trunk is open.
�
Close the trunk.
Y
You are driving with the hood open.
�
Stop the vehicle in a safe location as
soon as it is safe to do so.
�
Close the hood (
�page 327).
There is otherwise danger of an accident.
V
You are driving with one or more doors
open.
The display symbol shows you which
doors are open.
�
Close the doors.
@
Vehicle rising
Your vehicle is adjusting to your level se-
lection.
Page 433 of 522

432 Practical hintsWhere will I find ...?First aid kit
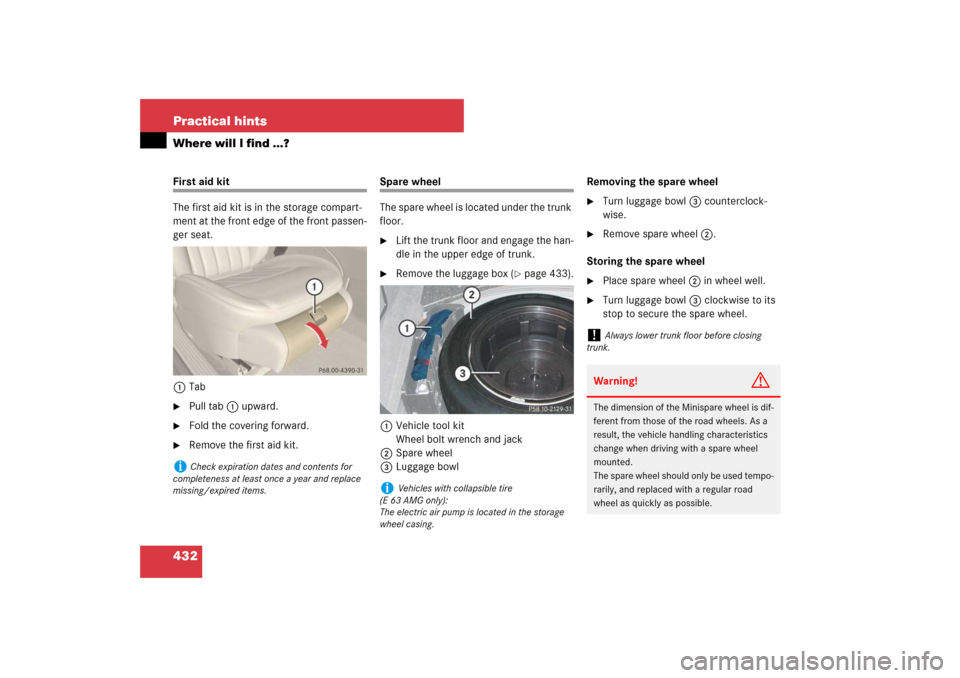
The first aid kit is in the storage compart-
ment at the front edge of the front passen-
ger seat.
1Tab�
Pull tab1 upward.
�
Fold the covering forward.
�
Remove the first aid kit.
Spare wheel
The spare wheel is located under the trunk
floor.�
Lift the trunk floor and engage the han-
dle in the upper edge of trunk.
�
Remove the luggage box (
�page 433).
1Vehicle tool kit
Wheel bolt wrench and jack
2Spare wheel
3Luggage bowlRemoving the spare wheel
�
Turn luggage bowl3 counterclock-
wise.
�
Remove spare wheel2.
Storing the spare wheel
�
Place spare wheel2 in wheel well.
�
Turn luggage bowl3 clockwise to its
stop to secure the spare wheel.
i
Check expiration dates and contents for
completeness at least once a year and replace
missing/expired items.
i
Vehicles with collapsible tire
(E 63 AMG only):
The electric air pump is located in the storage
wheel casing.
!
Always lower trunk floor before closing
trunk.
Warning!
G
The dimension of the Minispare wheel is dif-
ferent from those of the road wheels. As a
result, the vehicle handling characteristics
change when driving with a spare wheel
mounted.
The spare wheel should only be used tempo-
rarily, and replaced with a regular road
wheel as quickly as possible.
Page 434 of 522
433 Practical hints
Where will I find ...?
In case of a flat tire, you may temporarily
use the spare wheel when observing the
following restrictions:�
Do not exceed a vehicle speed of
50 mph (80 km / h).
�
Drive to the nearest tire repair facility
to have the flat tire repaired or re-
placed as appropriate.
�
Do not operate vehicle with more than
one spare wheel mounted.
For more information, see “Spare wheel”
(
�page 487).
Luggage box
Remove luggage box
1Fastening clip
2Luggage box�
Turn fastening clips1 to the left up-
wards from fastening bolts.
�
Lift luggage box in the area of the fas-
tening bolts and remove it from trunk.Install luggage box
�
Insert luggage box into trunk so that
fastening clips are in line with fastening
bolts.
�
Push front edge of luggage box in direc-
tion of arrow under cover of trunk sill.
�
Press fastening clips onto fastening
bolts until they lock into place.
Page 435 of 522

434 Practical hintsWhere will I find ...?Vehicle tool kit
The vehicle tool kit is stored in the com-
partment underneath the trunk floor
(�page 432).
The vehicle tool kit includes:
�
One pair of universal pliers
�
One towing eye bolt
�
One wheel wrench
�
One alignment bolt
�
One fuse extractor
�
Spare fuses
�
Collapsible wheel chock
�
A pair of gloves
Setting up the collapsible wheel chock
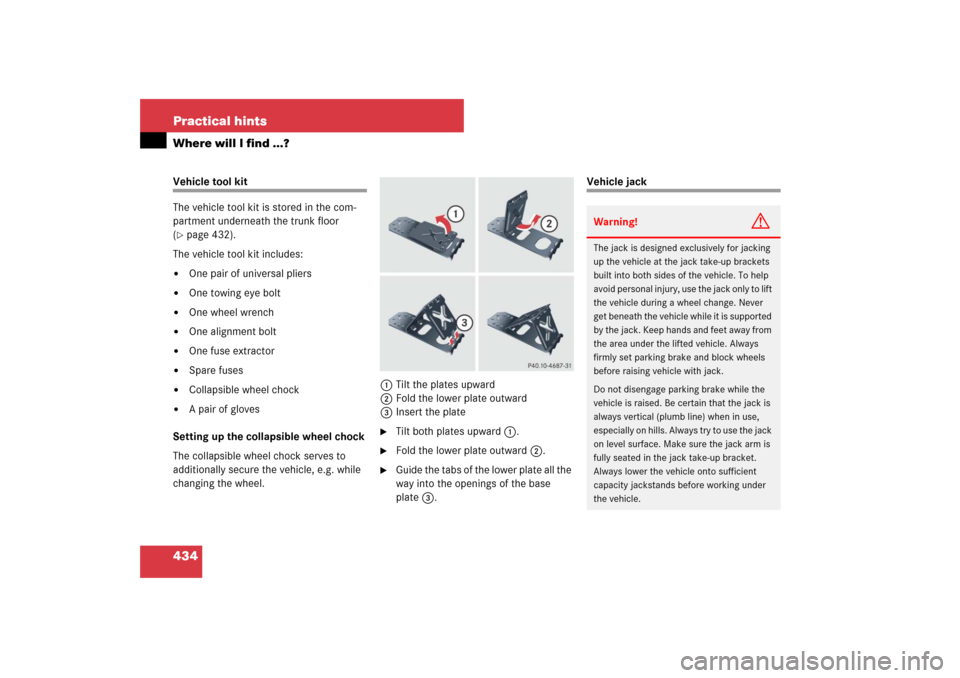
The collapsible wheel chock serves to
additionally secure the vehicle, e.g. while
changing the wheel.1Tilt the plates upward
2Fold the lower plate outward
3Insert the plate
�
Tilt both plates upward1.
�
Fold the lower plate outward2.
�
Guide the tabs of the lower plate all the
way into the openings of the base
plate3.
Vehicle jackWarning!
G
The jack is designed exclusively for jacking
up the vehicle at the jack take-up brackets
built into both sides of the vehicle. To help
avoid personal injury, use the jack only to lift
the vehicle during a wheel change. Never
get beneath the vehicle while it is supported
by the jack. Keep hands and feet away from
the area under the lifted vehicle. Always
firmly set parking brake and block wheels
before raising vehicle with jack.
Do not disengage parking brake while the
vehicle is raised. Be certain that the jack is
always vertical (plumb line) when in use,
especially on hills. Always try to use the jack
on level surface. Make sure the jack arm is
fully seated in the jack take-up bracket.
Always lower the vehicle onto sufficient
capacity jackstands before working under
the vehicle.
Page 436 of 522
435 Practical hints
Where will I find ...?
The vehicle jack is located in the storage
compartment underneath the trunk floor
(�page 432).
Storage position�
Remove vehicle jack from its
compartment.
�
Turn crank handle in direction of arrow
as far as it will go.
Operational position�
Turn crank handle clockwise.
Before storing the vehicle jack in its
compartment:
�
It should be fully collapsed.
�
The handle must be folded in (storage
position).
Page 437 of 522
436 Practical hintsUnlocking/locking in an emergencyUnlocking the vehicle
If you cannot unlock the vehicle with the
SmartKey or SmartKey with
KEYLESS-GO*, open the driver’s door and
the trunk using the mechanical key.
Removing the mechanical key
1Mechanical key locking tab
2Mechanical key
�
Move locking tab1 in direction of ar-
row.
�
Slide mechanical key2 out of the
housing.
Unlocking the driver’s door
�
Insert mechanical key2 into the
driver’s door lock until it stops.
�
Turn mechanical key2 counterclock-
wise to position1 until the locking
knobs move up.
The driver’s door is unlocked.
�
Pull door handle to open the driver’s
door.
i
Unlocking your vehicle with the mechanical
key and opening the driver’s door or the trunk
will trigger the anti-theft alarm system.
To cancel the alarm, Insert the SmartKey or
SmartKey with KEYLESS-GO* in the starter
switch.
1
Unlocking
2
Mechanical key