Page 2041 of 6020

ENGINE MECHANICAL (C24SE) 6A-27
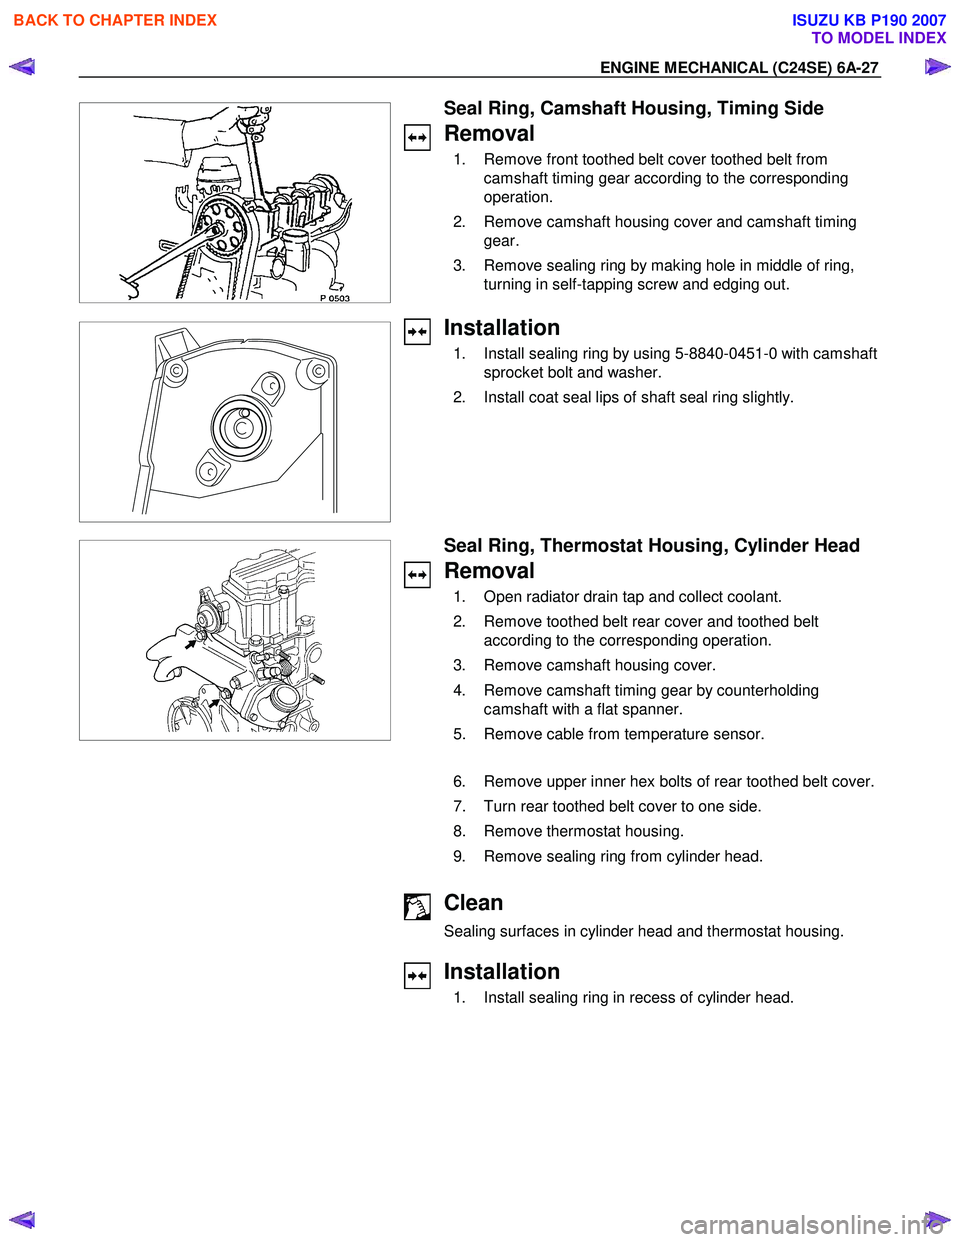
Seal Ring, Camshaft Housing, Timing Side
Removal
1. Remove front toothed belt cover toothed belt from camshaft timing gear according to the corresponding
operation.
2. Remove camshaft housing cover and camshaft timing gear.
3. Remove sealing ring by making hole in middle of ring, turning in self-tapping screw and edging out.
Installation
1. Install sealing ring by using 5-8840-0451-0 with camshaft sprocket bolt and washer.
2. Install coat seal lips of shaft seal ring slightly.
Seal Ring, Thermostat Housing, Cylinder Head
Removal
1. Open radiator drain tap and collect coolant.
2. Remove toothed belt rear cover and toothed belt according to the corresponding operation.
3. Remove camshaft housing cover.
4. Remove camshaft timing gear by counterholding camshaft with a flat spanner.
5. Remove cable from temperature sensor.
6. Remove upper inner hex bolts of rear toothed belt cover.
7. Turn rear toothed belt cover to one side.
8. Remove thermostat housing.
9. Remove sealing ring from cylinder head.
Clean
Sealing surfaces in cylinder head and thermostat housing.
Installation
1. Install sealing ring in recess of cylinder head.
BACK TO CHAPTER INDEX
TO MODEL INDEX
ISUZU KB P190 2007
Page 2042 of 6020
6A-28 ENGINE MECHANICAL (C24SE)
2. Install cable to temperature sensor.
3. Install upper bolts of rear toothed belt rear cover.
4. Install camshaft timing gear then check timing according to the corresponding operation.
5. Install camshaft housing cover.
6. Install toothed belt and front cover.
7. Fill up and bleed cooling system according to the corresponding operation.
Tighten (Torque)
Thermostat housing to cylinder head - 15 N ⋅m/1.5 kgf ⋅m.
Seal Ring - Front Camshaft Housing, Replace
Removal
Mark running direction of toothed belt.
Remove toothed belt-see operation “Toothed Belt, Replace”.
Camshaft housing cover, camshaft pulley-counterhold on hex
of camshaft.
Removal
Screw self-tapping screw into seal ring.
Edge out seal ring.
Installation
Lightly coat sealing lip of seal ring with protective grease.
Install seal ring with 5-8840-0451-0 into camshaft housing-use
screw and washer of camshaft pulley.
BACK TO CHAPTER INDEX
TO MODEL INDEX
ISUZU KB P190 2007
Page 2069 of 6020

ENGINE MECHANICAL (C24SE) 6A-55
OPERATIONS ON REMOVED ENGINE
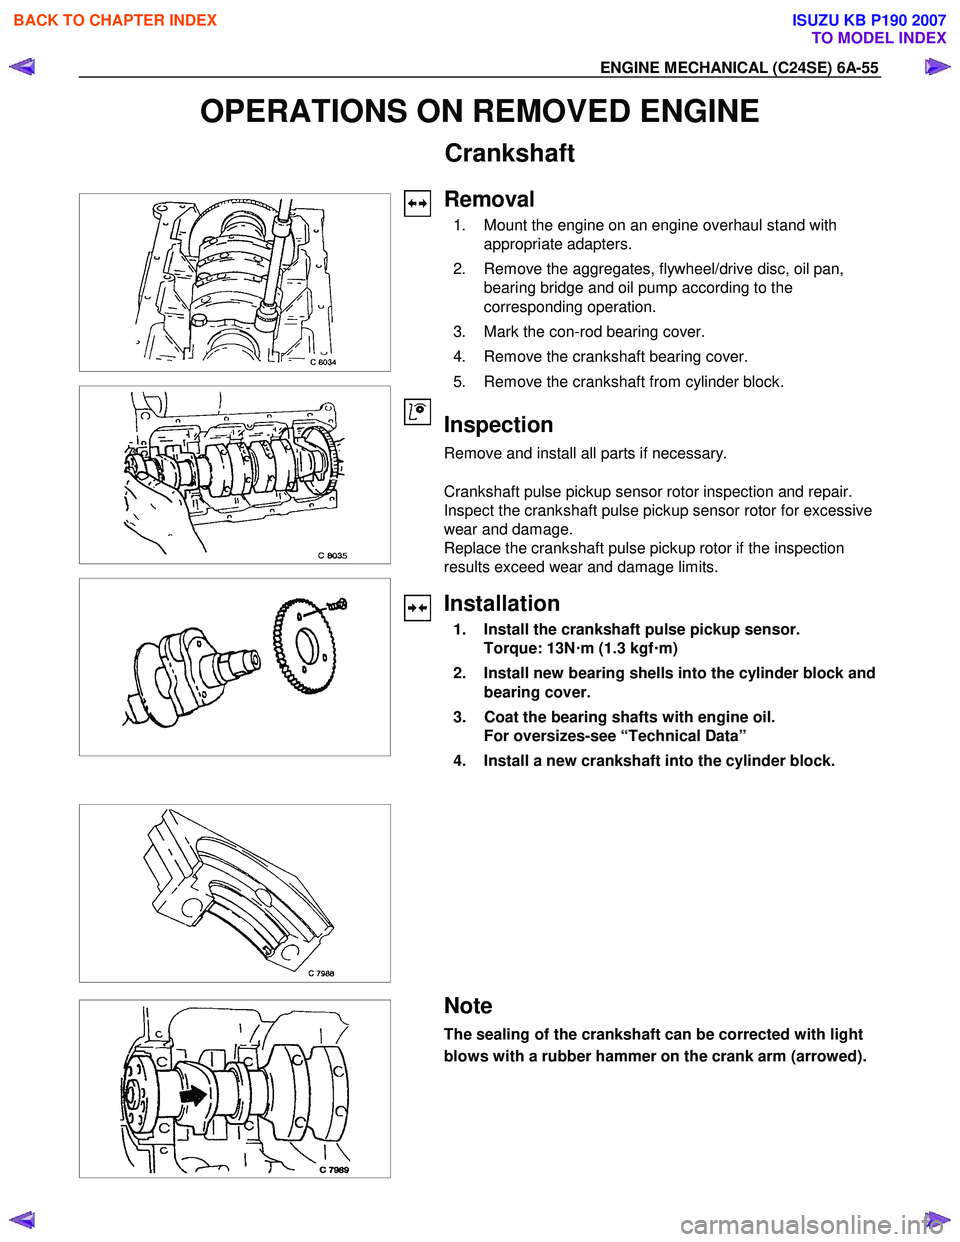
Crankshaft
Removal
1. Mount the engine on an engine overhaul stand with appropriate adapters.
2. Remove the aggregates, flywheel/drive disc, oil pan, bearing bridge and oil pump according to the
corresponding operation.
3. Mark the con-rod bearing cover.
4. Remove the crankshaft bearing cover.
5. Remove the crankshaft from cylinder block.
Inspection
Remove and install all parts if necessary.
Crankshaft pulse pickup sensor rotor inspection and repair.
Inspect the crankshaft pulse pickup sensor rotor for excessive
wear and damage.
Replace the crankshaft pulse pickup rotor if the inspection
results exceed wear and damage limits.
Installation
1. Install the crankshaft pulse pickup sensor. Torque: 13N !
!!
!
m (1.3 kgf !
!!
!
m)
2. Install new bearing shells into the cylinder block and bearing cover.
3. Coat the bearing shafts with engine oil. For oversizes-see “Technical Data”
4. Install a new crankshaft into the cylinder block.
Note
The sealing of the crankshaft can be corrected with light
blows with a rubber hammer on the crank arm (arrowed).
BACK TO CHAPTER INDEX
TO MODEL INDEX
ISUZU KB P190 2007
Page 2084 of 6020
6A-70 ENGINE MECHANICAL (C24SE)
FUEL INJECTION SYSTEM
MAP SENSOR
Removal
1. Disconnect the battery cable.
2. Disconnect the electrical connector from the sensor.
3. Remove the mounting bolts securing the sensor to the manifold.
4. Remove the sensor from the intake manifold.
Installation
1. Push MAP sensor into the manifold.
2. Install the mounting bolts and tighten them.
3. Connect electrical connector.
4. Connect the battery cable.
Pressure Regulator
Removal
1. Remove vacuum hose.
2. Remove fuel hoses.
3. Remove pressure regulator.
Installation
1. Install pressure regulator.
2. Install fuel hoses.
3. Install vacuum hoses.
ECM (Engine Control Module)
Removal
(2.4L)
1. Disconnect the ECM connector.
2. Remove the four hex bolts and nuts.
3. Remove the ECM from the ECM bracket on engine.
BACK TO CHAPTER INDEX
TO MODEL INDEX
ISUZU KB P190 2007
Page 2085 of 6020
ENGINE MECHANICAL (C24SE) 6A-71
Installation
(2.4L)
1. Install the ECM to the ECM bracket on engine.
2. Tighten the four screws to the bracket.
3. Connect the connector.
ECT
Removal
1. Remove wiring harness plug and coolant temperature sensor.
Tighten (Torque)
Temperature sensor to intake pipe - 10 N ⋅m (1.0 kgf ⋅m)
W iring harness plug to temperature sensor
Inspection
Coolant level
Idle Air Control (IAC) Valve
Removal
1. Remove wiring harness plug, hose clamps and idle speed adjuster.
Installation
1. Install idle speed adjuster, hose clamps and wiring harness plug.
Ignition Coil
Removal
1. Remove 2 bolts, plug and ignition coil.
Installation
1. Install ignition coil, plug and bolts.
BACK TO CHAPTER INDEX
TO MODEL INDEX
ISUZU KB P190 2007
Page 2086 of 6020
6A-72 ENGINE MECHANICAL (C24SE)
Crank Position Sensor
Removal
1. Remove crank position sensor.
Installation
1. Install crank position sensor.
BACK TO CHAPTER INDEX
TO MODEL INDEX
ISUZU KB P190 2007
Page 2087 of 6020

ENGINE MECHANICAL (C24SE) 6A-73
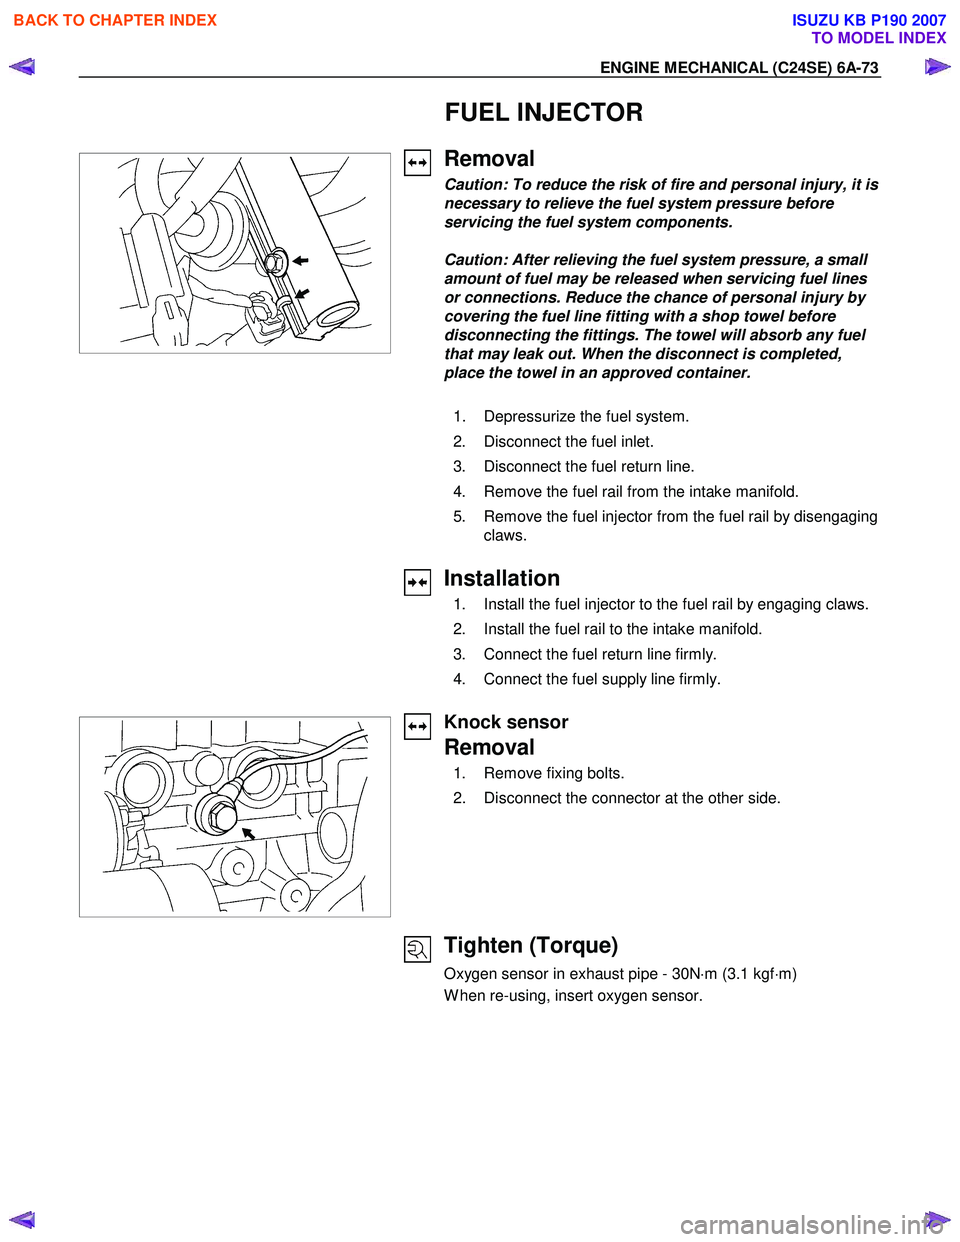
FUEL INJECTOR
Removal
Caution: To reduce the risk of fire and personal injury, it is
necessary to relieve the fuel system pressure before
servicing the fuel system components.
Caution: After relieving the fuel system pressure, a small
amount of fuel may be released when servicing fuel lines
or connections. Reduce the chance of personal injury by
covering the fuel line fitting with a shop towel before
disconnecting the fittings. The towel will absorb any fuel
that may leak out. When the disconnect is completed,
place the towel in an approved container.
1. Depressurize the fuel system.
2. Disconnect the fuel inlet.
3. Disconnect the fuel return line.
4. Remove the fuel rail from the intake manifold.
5. Remove the fuel injector from the fuel rail by disengaging claws.
Installation
1. Install the fuel injector to the fuel rail by engaging claws.
2. Install the fuel rail to the intake manifold.
3. Connect the fuel return line firmly.
4. Connect the fuel supply line firmly.
Knock sensor
Removal
1. Remove fixing bolts.
2. Disconnect the connector at the other side.
Tighten (Torque)
Oxygen sensor in exhaust pipe - 30N ⋅m (3.1 kgf ⋅m)
W hen re-using, insert oxygen sensor.
BACK TO CHAPTER INDEX
TO MODEL INDEX
ISUZU KB P190 2007
Page 2088 of 6020
6A-74 ENGINE MECHANICAL (C24SE)
Oxygen Sensor (If applicable)
Removal
1. Remove wiring harness plug.
2. Remove oxygen sensor from the front exhaust pipe.
Tighten (Torque)
Oxygen sensor in exhaust pipe - 30 N ⋅m (3.1 kgf ⋅m)
Throttle Valve Position Sensor
Removal
1. Remove wiring harness connector.
2. Remove throttle valve position sensor.
Installation
1. Install throttle valve position sensor.
2. Install wiring harness connector.
Accelerator Pedal and Cable
Removal
1. Remove pad stopper from pedal stop bolt.
Installation
1. Install pad stopper.
Inspection
Ensure that accelerator pedal is fully in idle position and
accelerator level at engine is in closed position.
Pull outer sleeve of accelerator cable towards pedal and check
that clip on sleeve is in slot nearest to grommet.
Reposition clip if necessary, and check that full throttle and idle
positions are obtained at engine lever.
BACK TO CHAPTER INDEX
TO MODEL INDEX
ISUZU KB P190 2007