Page 2124 of 3061
IP-12
< SERVICE INFORMATION >
INSTRUMENT PANEL ASSEMBLY
CLUSTER LID C
CAUTION:
When removing and installing, place shop cloths onto surrounding parts to protect A/T finisher and
center console from damage.
Removal
1. Disconnect battery negative terminal.
2. Remove A/T finisher.
3. Remove center console. Refer to IP-10
.
4. Pull to disconnect cluster lid C clips.
5. Disconnect cluster lid C electrical connectors.
Installation
Installation is in the reverse order of removal.
CLUSTER LID D
CAUTION:
When removing and installing, place shop cloths onto surrounding parts to protect A/T finisher and
center console from damage.
Removal
1. Remove cluster lid C. Refer to IP-10.
2. Remove instrument lower cover LH. Refer to IP-10
.
3. Remove glove box. Refer to IP-10
.
4. Pull to disconnect cluster lid D clips.
5. Disconnect cluster lid electrical connectors.
Installation
Installation is in the reverse order of removal.
AWJIA0326ZZ
AWJIA0327ZZ
Page 2125 of 3061

INSTRUMENT PANEL ASSEMBLY
IP-13
< SERVICE INFORMATION >
C
D
E
F
G
H
J
K
L
MA
B
IP
N
O
P
INSTRUMENT LOWER COVER LH
Removal
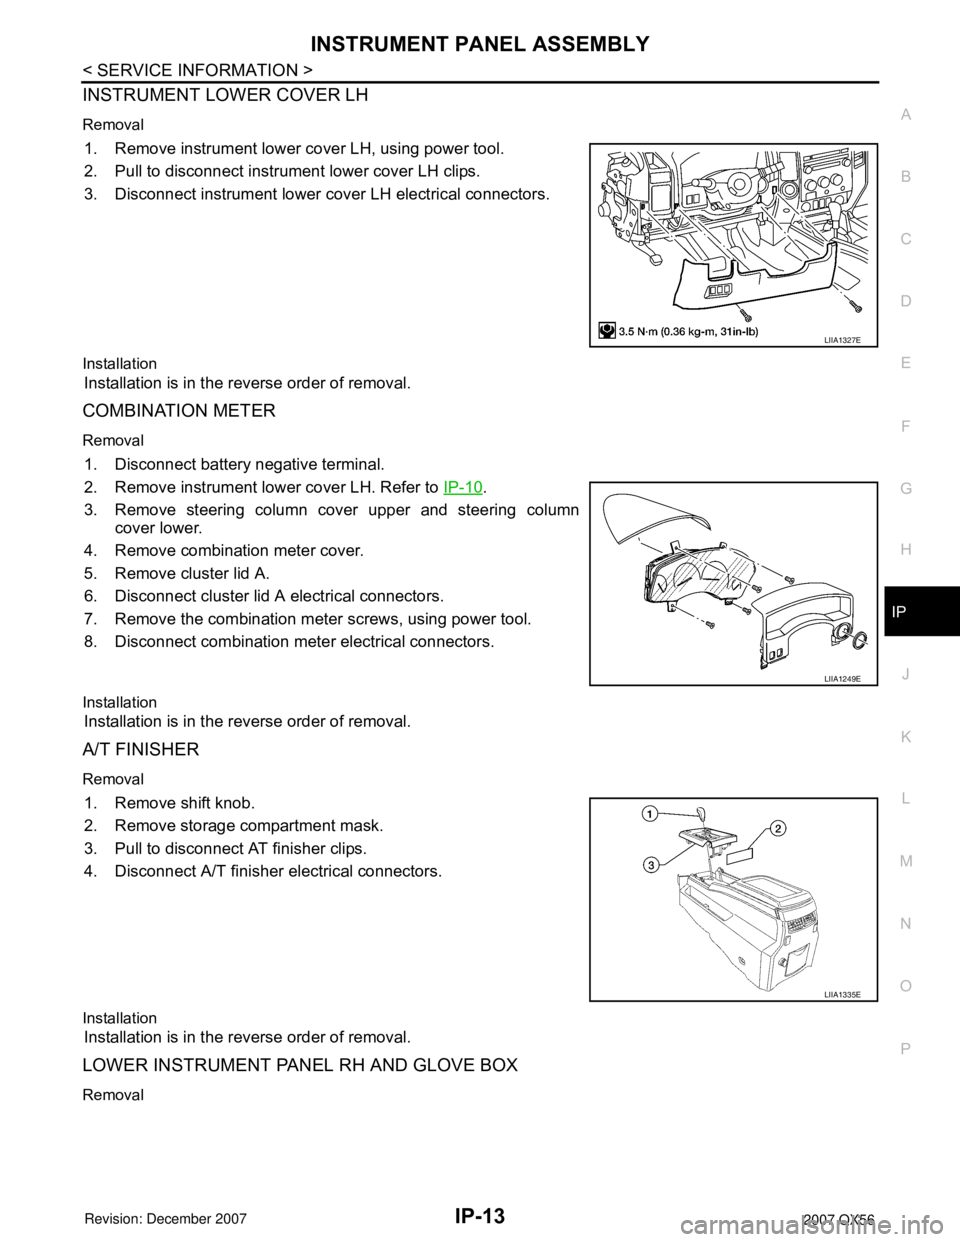
1. Remove instrument lower cover LH, using power tool.
2. Pull to disconnect instrument lower cover LH clips.
3. Disconnect instrument lower cover LH electrical connectors.
Installation
Installation is in the reverse order of removal.
COMBINATION METER
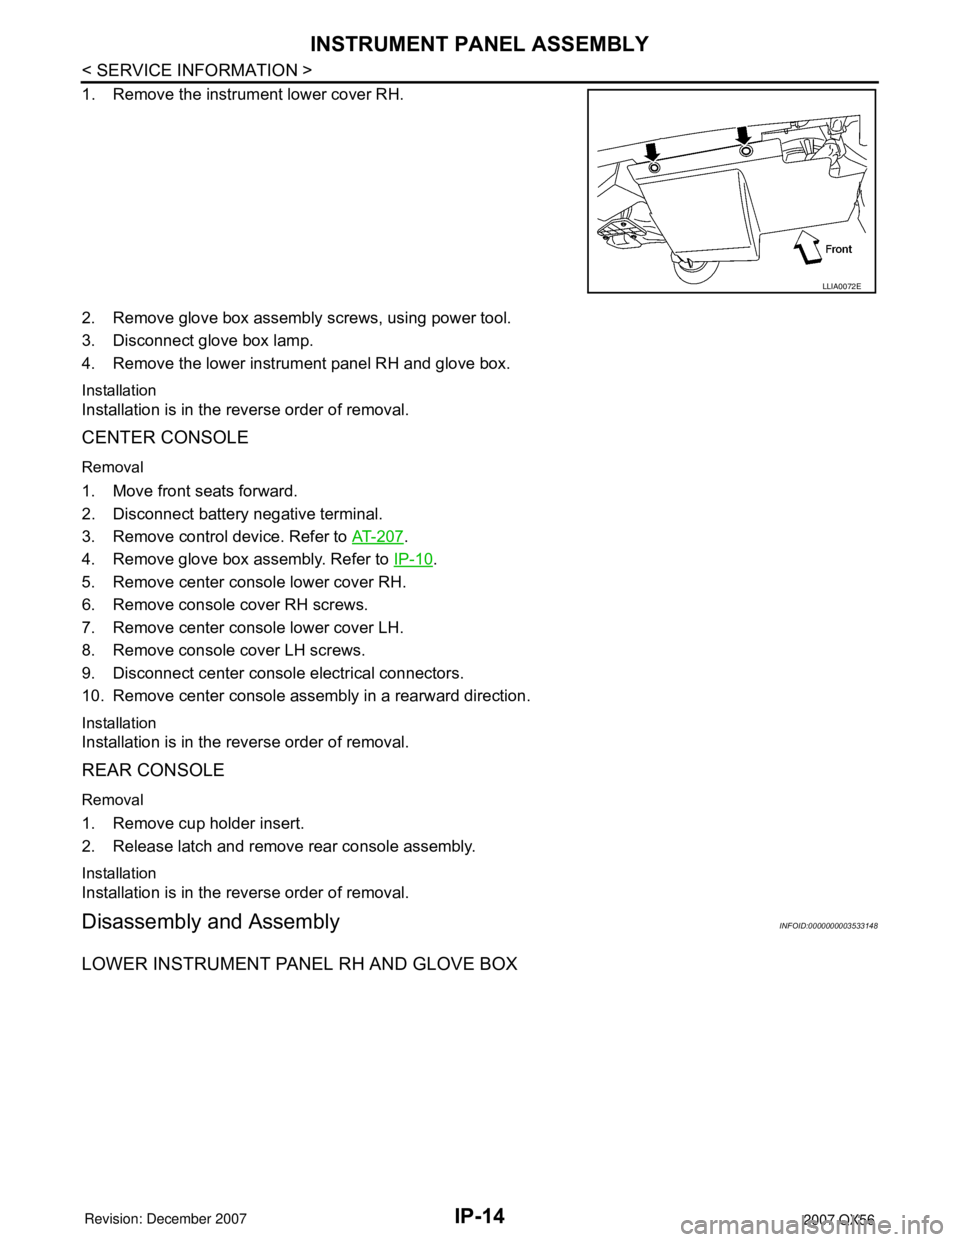
Removal
1. Disconnect battery negative terminal.
2. Remove instrument lower cover LH. Refer to IP-10
.
3. Remove steering column cover upper and steering column
cover lower.
4. Remove combination meter cover.
5. Remove cluster lid A.
6. Disconnect cluster lid A electrical connectors.
7. Remove the combination meter screws, using power tool.
8. Disconnect combination meter electrical connectors.
Installation
Installation is in the reverse order of removal.
A/T FINISHER
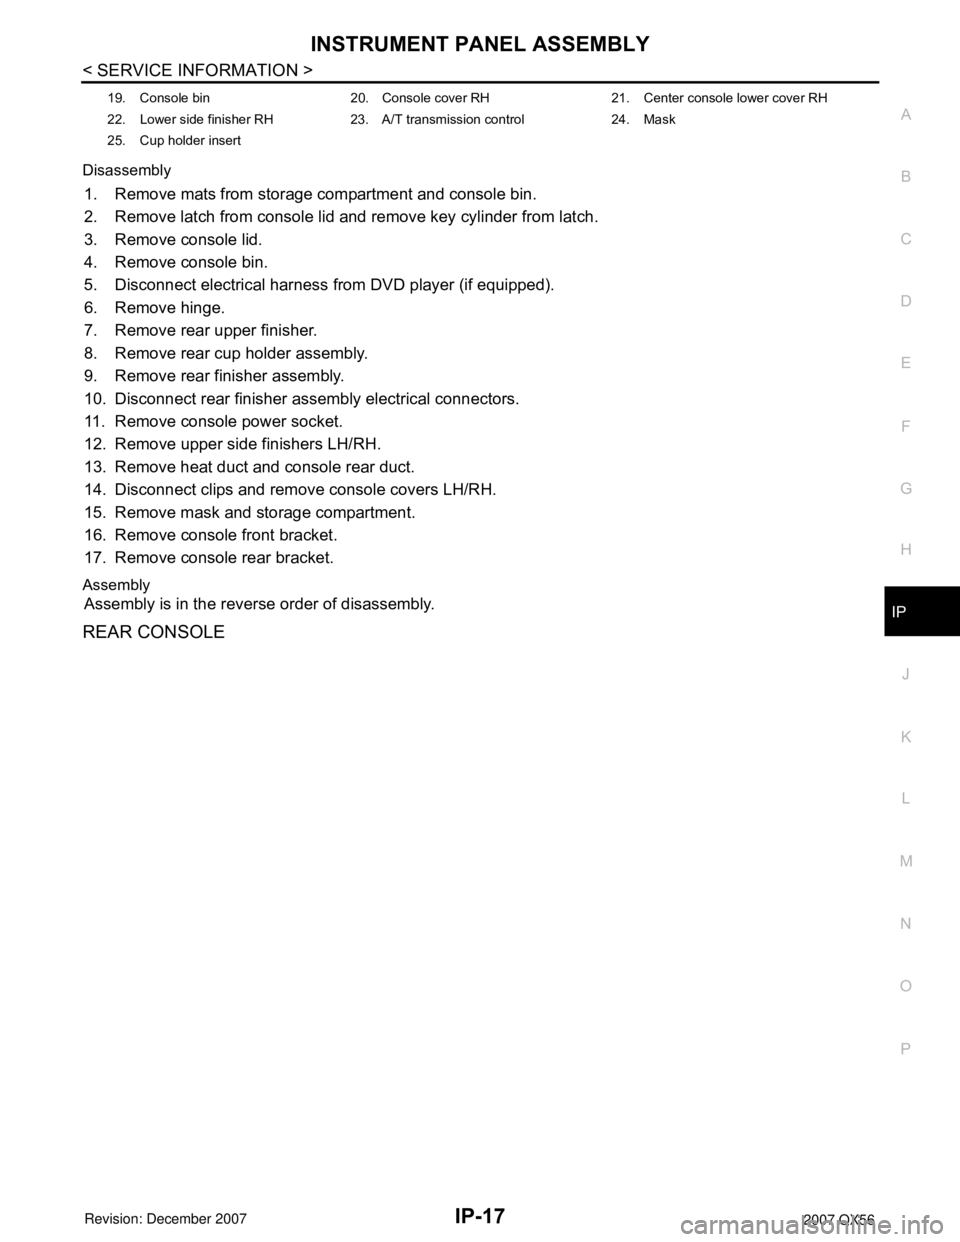
Removal
1. Remove shift knob.
2. Remove storage compartment mask.
3. Pull to disconnect AT finisher clips.
4. Disconnect A/T finisher electrical connectors.
Installation
Installation is in the reverse order of removal.
LOWER INSTRUMENT PANEL RH AND GLOVE BOX
Removal
LIIA1327E
LIIA1249E
LIIA1335E
Page 2126 of 3061

IP-14
< SERVICE INFORMATION >
INSTRUMENT PANEL ASSEMBLY
1. Remove the instrument lower cover RH.
2. Remove glove box assembly screws, using power tool.
3. Disconnect glove box lamp.
4. Remove the lower instrument panel RH and glove box.
Installation
Installation is in the reverse order of removal.
CENTER CONSOLE
Removal
1. Move front seats forward.
2. Disconnect battery negative terminal.
3. Remove control device. Refer to AT-207
.
4. Remove glove box assembly. Refer to IP-10
.
5. Remove center console lower cover RH.
6. Remove console cover RH screws.
7. Remove center console lower cover LH.
8. Remove console cover LH screws.
9. Disconnect center console electrical connectors.
10. Remove center console assembly in a rearward direction.
Installation
Installation is in the reverse order of removal.
REAR CONSOLE
Removal
1. Remove cup holder insert.
2. Release latch and remove rear console assembly.
Installation
Installation is in the reverse order of removal.
Disassembly and AssemblyINFOID:0000000003533148
LOWER INSTRUMENT PANEL RH AND GLOVE BOX
LLIA0072E
Page 2127 of 3061
INSTRUMENT PANEL ASSEMBLY
IP-15
< SERVICE INFORMATION >
C
D
E
F
G
H
J
K
L
MA
B
IP
N
O
P Disassembly
1. Remove damper clip from glove box.
2. Remove glove box pins and glove box.
3. Remove glove box striker screws, using power tool and remove glove box striker.
4. Remove fuse block cover.
5. Remove glove box damper screws and remove glove box damper.
Assembly
Assembly is in the reverse order of disassembly.
CENTER CONSOLE
1. Glove box damper 2. Lower instrument panel RH 3. Clips
4. Rubber stoppers 5. Glove box pins 6. Glove box
7. Glove box striker 8. Fuse block cover 9. Glove box assembly
WIIA0301E
Page 2128 of 3061
IP-16
< SERVICE INFORMATION >
INSTRUMENT PANEL ASSEMBLY
1. Console lid assembly 2. A/T finisher 3. Tray
4. Storage compartment 5. Storage compartment mask 6. Console reinforcement assembly
7. Center console lower cover LH 8. Console front bracket 9. Lower side finisher LH
10. Console cover LH 11. Rear console duct 12. Power socket assembly
13. Rear cup holder assembly 14. Rear finisher assembly 15. Console rear bracket
16. Heat duct 17. Rear upper finisher 18. Console bin mat
WIIA0923E
Page 2129 of 3061

INSTRUMENT PANEL ASSEMBLY
IP-17
< SERVICE INFORMATION >
C
D
E
F
G
H
J
K
L
MA
B
IP
N
O
P Disassembly
1. Remove mats from storage compartment and console bin.
2. Remove latch from console lid and remove key cylinder from latch.
3. Remove console lid.
4. Remove console bin.
5. Disconnect electrical harness from DVD player (if equipped).
6. Remove hinge.
7. Remove rear upper finisher.
8. Remove rear cup holder assembly.
9. Remove rear finisher assembly.
10. Disconnect rear finisher assembly electrical connectors.
11. Remove console power socket.
12. Remove upper side finishers LH/RH.
13. Remove heat duct and console rear duct.
14. Disconnect clips and remove console covers LH/RH.
15. Remove mask and storage compartment.
16. Remove console front bracket.
17. Remove console rear bracket.
Assembly
Assembly is in the reverse order of disassembly.
REAR CONSOLE
19. Console bin 20. Console cover RH 21. Center console lower cover RH
22. Lower side finisher RH 23. A/T transmission control 24. Mask
25. Cup holder insert
Page 2130 of 3061
IP-18
< SERVICE INFORMATION >
INSTRUMENT PANEL ASSEMBLY
Disassembly
1. Remove hinge cover.
2. Remove screws and remove lid assembly.
3. Remove screw and remove latch from lid assembly
1. Lid assembly 2. Lid latch 3. Console bin
4. Cup holder insert 5. Rear upper console assembly 6. Rubber bumper
7. Floor latch 8. Rear console floor bracket 9. Rear console floor base
10. Hinge cover 11. Hinge 12. Base hook
13. Rear lower console assembly 14. Console bin mat
AWJIA0329ZZ
Page 2131 of 3061
INSTRUMENT PANEL ASSEMBLY
IP-19
< SERVICE INFORMATION >
C
D
E
F
G
H
J
K
L
MA
B
IP
N
O
P
4. Remove screws and remove hinge.
5. Remove screws and separate rear upper console assembly and rear lower console assembly.
6. Remove floor latch from rear upper console assembly.
7. Remove screws and remove console bin from rear upper console assembly.
8. Remove screws and remove rear console floor base.
9. Remove bolts and remove rear console floor bracket.
Assembly
Assembly is in the reverse order of disassembly.